The Anatomy of the Bounty - AL-

Here you go, Daniel. You will start with the base. Technically, in this particular case, the size doesn't matter. ;) However, what really matters, is all sides are even and are perfectly square (this is imperative)! Mark\devide all sides in half and scraped them, frankly, scraping is unnecessary and the pencil line would suffice, however scraping makes a line thinner.
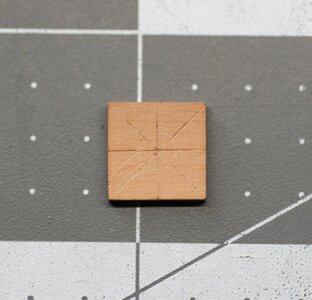
600_2980.jpg

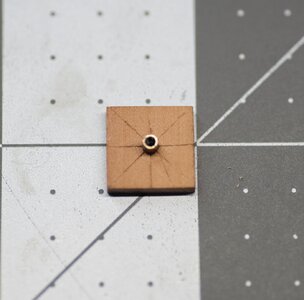
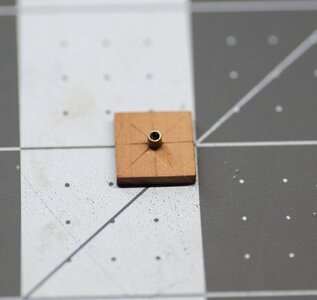
Time to drill a center hole. Recall when you made your trucks, the hole was the size of your mandrel bolt. Now..., your axletree might have a larger diameter so you will have to drill the tracks first. In this case, the center hole should be the rod representing the diameter of your axletree. I didn't find a suitable diameter rod, so I use tubing instead. The track doesn't have to fit snug on the rod, but it doesn't have to be too loose either. It has to be easily rotated with your fingers.
600_2982.jpg 600_2983.jpg

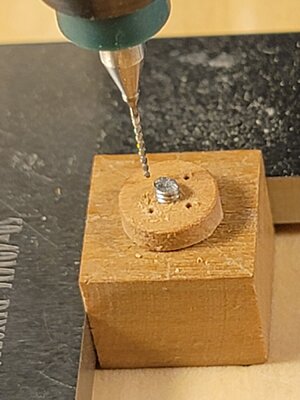
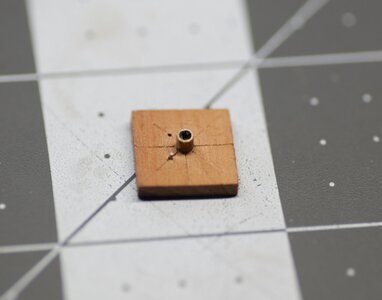
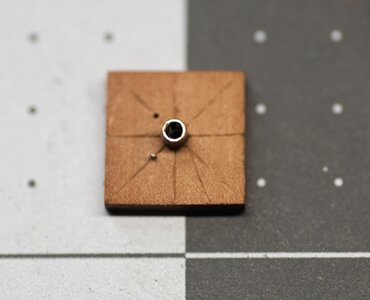
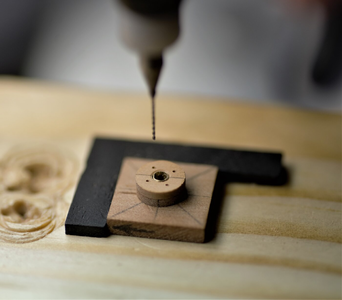
Time to drill the first hole for the bolts. Position your track into the jig, and adjust the correct distance accordingly, This can be precisely done with the X\Y coordinate table. Drill the first hole for the bolts, and adjust as necessary until fully satisfied. The drill bit should be the diameter of the wire you will use for bolts. In this example, I am using a 3.90mm drill bit, and the wire is 4.00mm. Next, remove the truck from the jig and rotate the jig to the next side, This is where an absolute square comes into play. Drill another hole thru the jig, without the truck on. This hole will be used for the guidance pin. The pin should be made out of a broken drill bit (the same diameter you are using to drill the holes). DON't attached the pin yet!!!
600_2987.jpg 600_2986.jpg

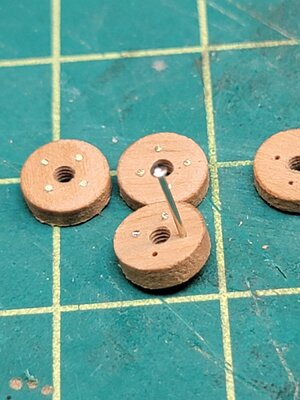
Before attaching the pin to the jig, drill the initial hole in all your trucks. Once completed, attach the guidance pin, only a few mm should suffice, see the above images. And now the fun time. Get the truck and position the hole on the pin, drill the hole. Lift the truck and position just drilled hole on the pin... you got it, drill another hole! lift and turn the truck until all the holes are drilled. That should be it! Once all the trucks are drilled, make the bolts by simply inserting the wire into the holes and cutting flush. Sand a bit to make it even and smooth.
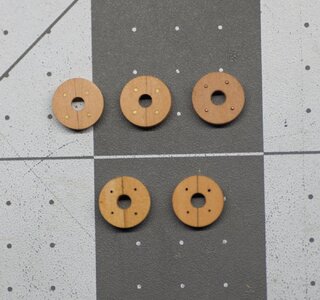
1653439523374.png

600_2991.jpg

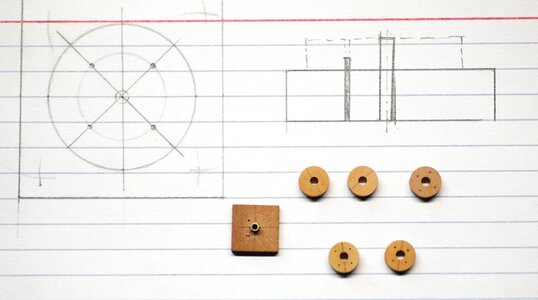
The right wheel (truck) is made with copper wire and rounded bolts, all other bolts imitate using brass wire. Below is the sketch I made (no scale), hope it will kick your 'Aha' moment. But please feel to ask if you need help.
600_2990.jpg

Happy bolting!!
 
Here you go, Daniel. You will start with the base. Technically, in this particular case, the size doesn't matter. ;) However, what really matters, is all sides are even and are perfectly square (this is imperative)! Mark\devide all sides in half and scraped them, frankly, scraping is unnecessary and the pencil line would suffice, however scraping makes a line thinner.

View attachment 310200

Time to drill a center hole. Recall when you made your trucks, the hole was the size of your mandrel bolt. Now..., your axletree might have a larger diameter so you will have to drill the tracks first. In this case, the center hole should be the rod representing the diameter of your axletree. I didn't find a suitable diameter rod, so I use tubing instead. The track doesn't have to fit snug on the rod, but it doesn't have to be too loose either. It has to be easily rotated with your fingers.

View attachment 310201 View attachment 310204

Time to drill the first hole for the bolts. Position your track into the jig, and adjust the correct distance accordingly, This can be precisely done with the X\Y coordinate table. Drill the first hole for the bolts, and adjust as necessary until fully satisfied. The drill bit should be the diameter of the wire you will use for bolts. In this example, I am using a 3.90mm drill bit, and the wire is 4.00mm. Next, remove the truck from the jig and rotate the jig to the next side, This is where an absolute square comes into play. Drill another hole thru the jig, without the truck on. This hole will be used for the guidance pin. The pin should be made out of a broken drill bit (the same diameter you are using to drill the holes). DON't attached the pin yet!!!

View attachment 310205 View attachment 310206

Before attaching the pin to the jig, drill the initial hole in all your trucks. Once completed, attach the guidance pin, only a few mm should suffice, see the above images. And now the fun time. Get the truck and position the hole on the pin, drill the hole. Lift the truck and position just drilled hole on the pin... you got it, drill another hole! lift and turn the truck until all the holes are drilled. That should be it! Once all the trucks are drilled, make the bolts by simply inserting the wire into the holes and cutting flush. Sand a bit to make it even and smooth.

View attachment 310209

View attachment 310207

The right wheel (truck) is made with copper wire and rounded bolts, all other bolts imitate using brass wire. Below is the sketch I made (no scale), hope it will kick your 'Aha' moment. But please feel to ask if you need help.

View attachment 310208

Happy bolting!!
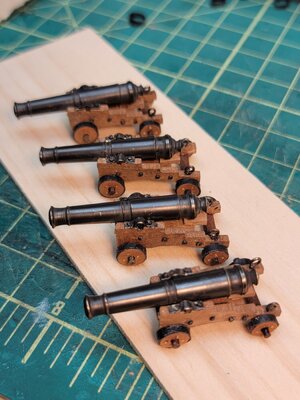

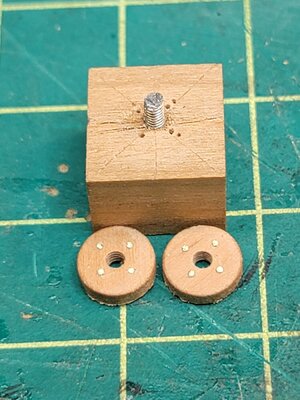
Ok Jimsky , I did a small modification to your jig. As I decided that I will leave the trucks axel hole of the same size, I did this:

20220525_173602.jpg

I cut the mandrel head and the trucks are screwed. All well centered. When I decided where I will do the first hole, then I just turned the jig. Done :-) :-)

20220525_174748.jpg

I didn't have wire for the bolts, so I decided to do them on this way:

20220525_180152.jpg

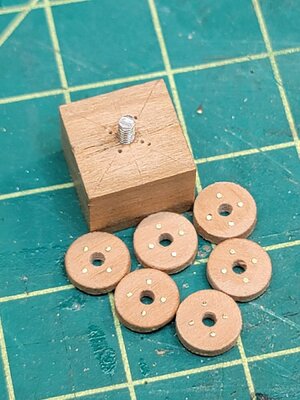
Now the front trucks for 3 cannons are ready. I need to do 2 more from scratch. Then I will follow with the smaller posterior trucks.

20220525_181526.jpg

Thank you for all the tips jimsky !!!!!

And to keep my "Sanity" I will not do anything else to these trucks ... HAHAHA :-) :-)

Cheers
Daniel
 
Just on place for the picture. I don't think will anyone notice the bolts. But I will take care that they see them by pointing their heads with my hands saying DO YOU SEE THEM NOW ????

HAHAHA HAHAHA HAHAHA

20220525_183721.jpg
 
Last edited:
Ok Jimsky , I did a small modification to your jig. As I decided that I will leave the trucks axel hole of the same size, I did this:

View attachment 310319

I cut the mandrel head and the trucks are screwed. All well centered. When I decided where I will do the first hole, then I just turned the jig. Done :) :)

View attachment 310320

I didn't have wire for the bolts, so I decided to do them on this way:

View attachment 310321

Now the front trucks for 3 cannons are ready. I need to do 2 more from scratch. Then I will follow with the smaller posterior trucks.

View attachment 310322

Thank you for all the tips jimsky !!!!!

And to keep my "Sanity" I will not do anything else to these trucks ... HAHAHA :) :)

Cheers
Daniel
Very good! Seem it is not hard as long as you will not give up. I am really happy to see the results
 
Ok Jimsky , I did a small modification to your jig. As I decided that I will leave the trucks axel hole of the same size, I did this:

View attachment 310319

I cut the mandrel head and the trucks are screwed. All well centered. When I decided where I will do the first hole, then I just turned the jig. Done :) :)

View attachment 310320

I didn't have wire for the bolts, so I decided to do them on this way:

View attachment 310321

Now the front trucks for 3 cannons are ready. I need to do 2 more from scratch. Then I will follow with the smaller posterior trucks.

View attachment 310322

Thank you for all the tips jimsky !!!!!

And to keep my "Sanity" I will not do anything else to these trucks ... HAHAHA :) :)

Cheers
Daniel
Good morning Daniel- Sanity prevails. Excellent work. Cheers Grant
 
Those gun carriages really look excellent Daniel! Well done! Thumbsup

Thank you Heinrich, but it is just standard job. I tried to do them better. But that was the best I could, without redoing them 100 % from scratch. Nevertheless, I tried thing I have never done before thanks to @Jimsky. @Frank48 also send me a lot of info on cannons that I will apply on my future builds.

Definitely they are better than what they will look if I used all the kit material.

Thank you Heinrich !!!

Cheers
Daniel
 
Nevertheless, I tried thing I have never done before thanks to @Jimsky. @Frank48 also send me a lot of info on cannons that I will apply on my future builds.
We all learn, one way or another, every day. There is always something to find out about. One way learning things is when someone shares his\hers knowledge... ;)
 
Very good looking cannons a lot better than any kit offering.
I have built mine but they don't look half as good as yours so looks like a rebuild for the cannons for me.
Had bit of a hiatus on my build and just getting back into it. Your is progressing very well and look forward to seeing the finished build

Hi Robert. Thank you for stopping to take a look and for the compliments.

After all these nice comments, you all will convince me they look fine.

I visited your built and one of your last postings was also about the cannons. I used the kit cannon carriage (I hope that's the name) and the cannons. I added the trucks, axels and small iron details. The kit has small brass trucks and no axels at all.

You can do the same for yours.

Now I need to do the cannon blocks and ropes.

Cheers and Thank you !!!
Daniel
 
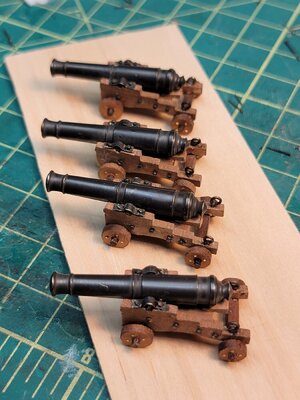
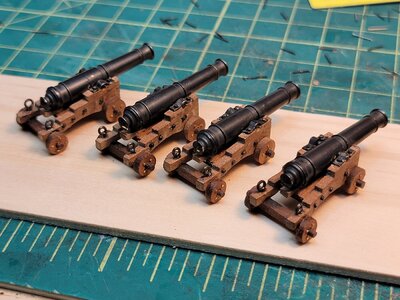
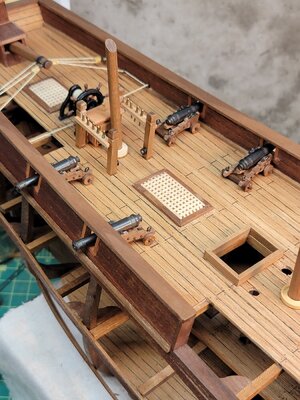
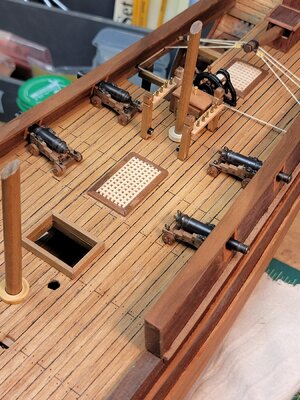
Well... after all the good reviews about my cannons I tried to dress them more.

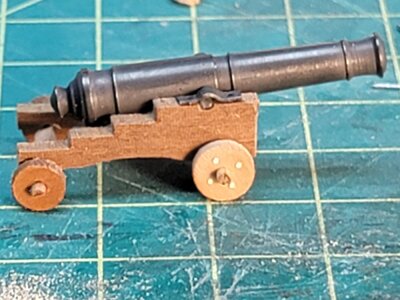
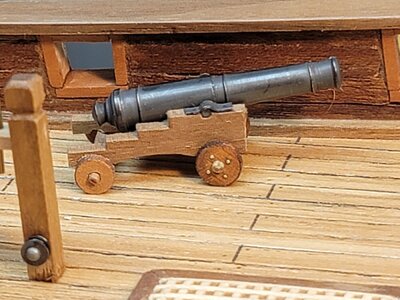
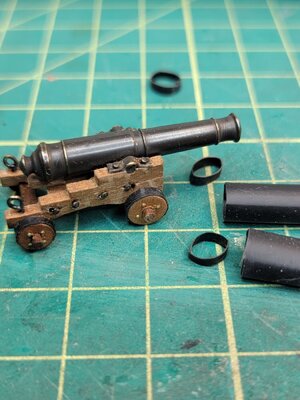
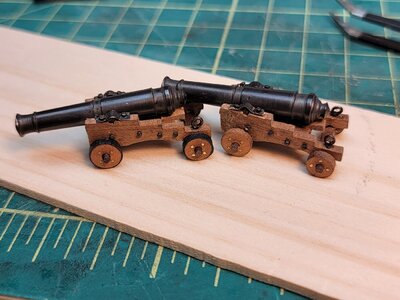
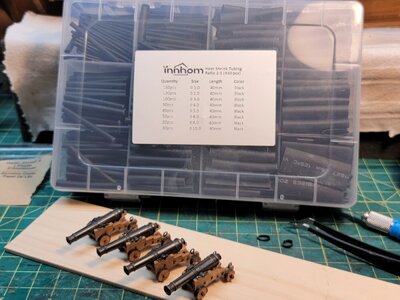
Added the iron bands around the trucks.

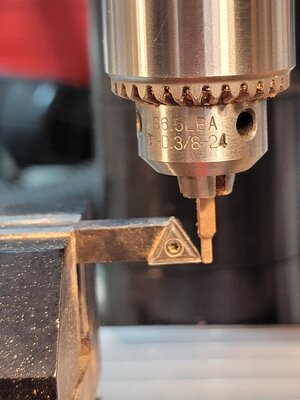
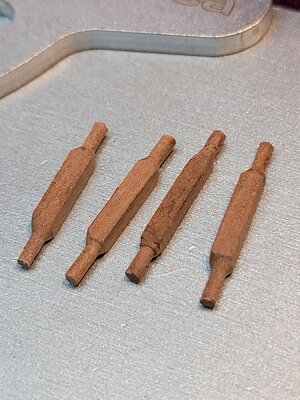
I was going to paint them. But then I decided to use Heat Shrink Tubing. You use one that is a hair smaller than the truck diameter. With the help of pliers, you place it around. Finally you give them a soft touch of heat to Shrink it a little and.... you are done. I used my soldering tip to Shrink the rubber.

Looks better than paint as it provides "volume" , like being really iron around the truck.

What do you think ?

20220705_131902.jpg20220705_135200.jpg20220705_140605.jpg20220705_140707.jpg

Cheers
Daniel

PS: New Modelers, be aware that iron rings around the cannon wheels were not used on ships (see next postings).
 
Last edited:
Back
Top