The Anatomy of the Bounty - AL-

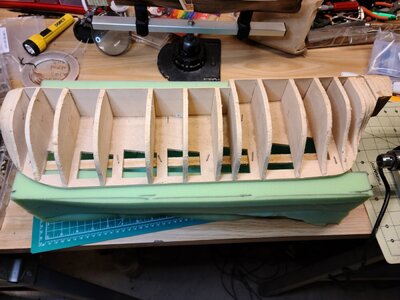
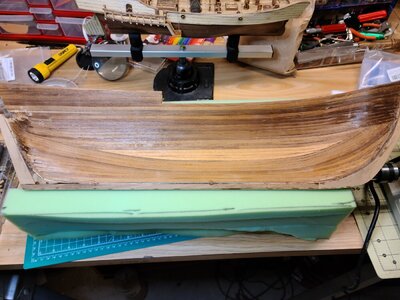
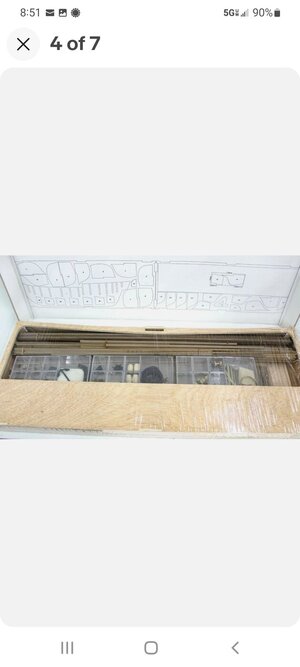
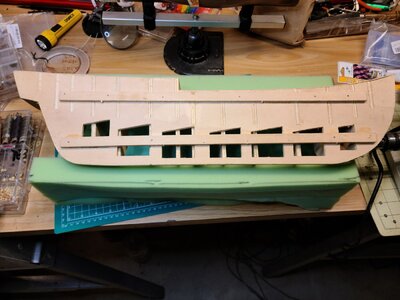
Those pictures refreshed my memory that the parts used as a mold to built the hull were, by itself, the "wooden box" of the kit. And the parts where detailed on the lid, as seen on this screenshot. :-) Ahhh Old memories about this kit.

20200813_175450.jpg20200813_175438.jpg20200813_175342.jpgScreenshot_20220509-085112_eBay.jpg

I did a trip to Madrid, Spain. Around 1998. Went in my luggage to Buenos Aires, Argentina. Later in 2000 I took it with me when we relocated to Belgium. 2001 I built the hull. In 2002 we relocated to USA. And last year, after all those travels and time, I started its built again.

Seeing this kit on my working bench brings me LOT of memories about my trips, with my family, from country to country.

Cheers
Daniel
 
Hi Guys

I am going very slowly on my built. Many things on my plate to do in preparation of my retirement. Nevertheless this built keeps me on the hobby.

This week I decided to try to built the cannons. All was fine until I arrived to the wheels (trucks). I didn't like the brass ones provided by the kit. So I decided to try Jimsky's method .

Thread 'Making the cannon trucks (wheels) using Proxxon MF70' https://shipsofscale.com/sosforums/threads/making-the-cannon-trucks-wheels-using-proxxon-mf70.9819/

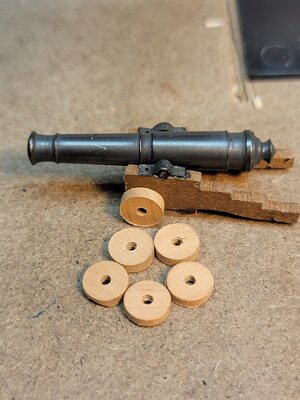
My first round wasn't good. Jimsky provided me some guidance by PM to fine tune my job. And here are the results.

20220522_184747.jpg20220522_185143.jpg20220522_185348.jpg20220522_185502.jpg20220522_193347.jpg

So far so good.

Still I have to do 2 more front trucks and all the back trucks.

Thank you Jimsky !!!!!

Cheers
Daniel
 
You hit the nail on the head, Daniel! Good job. Now, you might go a bit creative and add...bolts. How about that? Well, it is not necessary but it will give the tracks a fancy look ;)
 
You hit the nail on the head, Daniel! Good job. Now, you might go a bit creative and add...bolts. How about that? Well, it is not necessary but it will give the tracks a fancy look ;)

HAHAHA... I will try for sure. Let's see if I succeed.

Yet I need to finish the trucks and see how I do the trucks axes. Any tip here ?

Cheers !!
Daniel
 
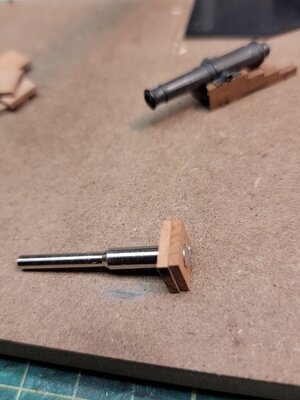
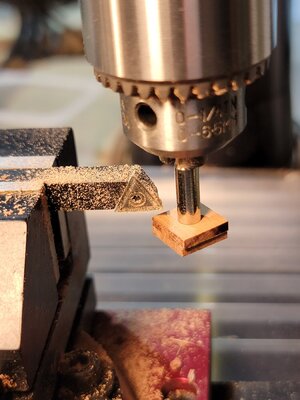
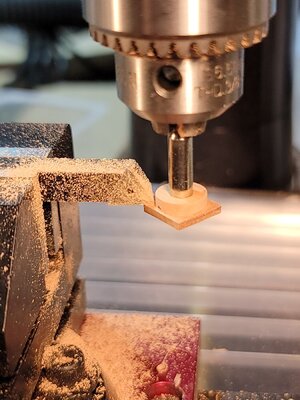
I am planning to use the mill as a lathe, using your idea, to turn round the tips of a square pice of wood.
 
Last edited:
HAHAHA... I will try for sure. Let's see if I succeed.

Yet I need to finish the trucks and see how I do the trucks axes. Any tip here ?

Cheers !!
Daniel
Greetings Daniel, we have another tutorial for making trucks, there you can find the answer and suggestions on how to imitate bolts on the tracks.

1653269120578.png


good luck!
 
Greetings Daniel, we have another tutorial for making trucks, there you can find the answer and suggestions on how to imitate bolts on the tracks.

View attachment 309790


good luck!

I will try this method for the bolts. What is the tool you used to round the tip of the iron wire on the video ?

Can you post a picture here, please.

Then, you pushed the "bolts" with the same tool or you used one of those "nails pushers" ?

Cheers
Daniel
 
Hi Guys

I am going very slowly on my built. Many things on my plate to do in preparation of my retirement. Nevertheless this built keeps me on the hobby.

This week I decided to try to built the cannons. All was fine until I arrived to the wheels (trucks). I didn't like the brass ones provided by the kit. So I decided to try Jimsky's method .

Thread 'Making the cannon trucks (wheels) using Proxxon MF70' https://shipsofscale.com/sosforums/threads/making-the-cannon-trucks-wheels-using-proxxon-mf70.9819/

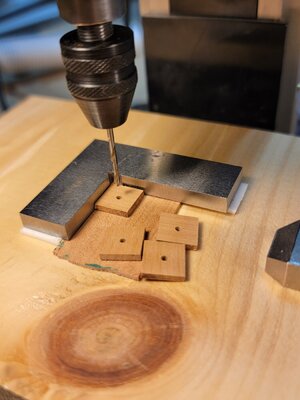
My first round wasn't good. Jimsky provided me some guidance by PM to fine tune my job. And here are the results.

View attachment 309778View attachment 309779View attachment 309780View attachment 309781View attachment 309782

So far so good.

Still I have to do 2 more front trucks and all the back trucks.

Thank you Jimsky !!!!!

Cheers
Daniel
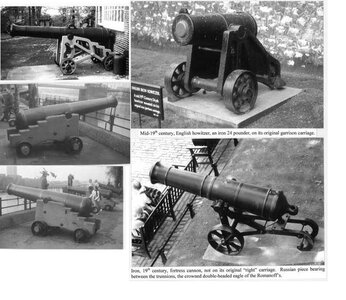
Good afternoon, let me show you these photos, the conformity of the wheels of the time

cann.jpg
 
I will try this method for the bolts. What is the tool you used to round the tip of the iron wire on the video ?

Can you post a picture here, please.

Then, you pushed the "bolts" with the same tool or you used one of those "nails pushers" ?

Cheers
Daniel
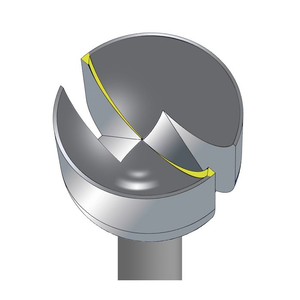
The time passed by and the tool I have been using is an outdated tool (still can be used), I found a much better solution. It is a twin-cut concave bur. With such a bur, it requires much less effort to make bolts head.

1653320023949.png

The bur comes as the set of one for the most common sizes used, or an individual for the same sizes. I use the smallest size available. It works great on soft steel or brass wire. Once the bolt head is set, you can push it with a scrap of wood. Here are the sizes available in the set.
  • B118.450 0.80mm
  • B118.451 0.90mm
  • B118.452 1.00mm
  • B118.453 1.10mm
  • B118.454 1.20mm
  • B118.455 1.30mm
  • B118.456 1.40mm
  • B118.457 1.50mm
  • B118.458 1.60mm
  • B118.459 1.70mm
  • B118.460 1.80mm
  • B118.462 2.00mm
Happy bolting;)
 
The time passed by and the tool I have been using is an outdated tool (still can be used), I found a much better solution. It is a twin-cut concave bur. With such a bur, it requires much less effort to make bolts head.

View attachment 309960

The bur comes as the set of one for the most common sizes used, or an individual for the same sizes. I use the smallest size available. It works great on soft steel or brass wire. Once the bolt head is set, you can push it with a scrap of wood. Here are the sizes available in the set.
  • B118.450 0.80mm
  • B118.451 0.90mm
  • B118.452 1.00mm
  • B118.453 1.10mm
  • B118.454 1.20mm
  • B118.455 1.30mm
  • B118.456 1.40mm
  • B118.457 1.50mm
  • B118.458 1.60mm
  • B118.459 1.70mm
  • B118.460 1.80mm
  • B118.462 2.00mm
Happy bolting;)
Where did you order these from Jim?
 
Where did you order these from Jim?
Thanks, Paul. Those can be ordered from jewelry stores. I bought mine here, but cannot guarantee the cheapest price available. They are Swiss made by Busch company. You can find them on eBay as well. Just check the price\shipping to get a bargain price. Most likely you will never use larger burs, therefore buying individual sizes make more sense. Even individual burs come in pack of six-count.

 
Thanks, Paul. Those can be ordered from jewelry stores. I bought mine here, but cannot guarantee the cheapest price available. They are Swiss made by Busch company. You can find them on eBay as well. Just check the price\shipping to get a bargain price. Most likely you will never use larger burs, therefore buying individual sizes make more sense. Even individual burs come in pack of six-count.


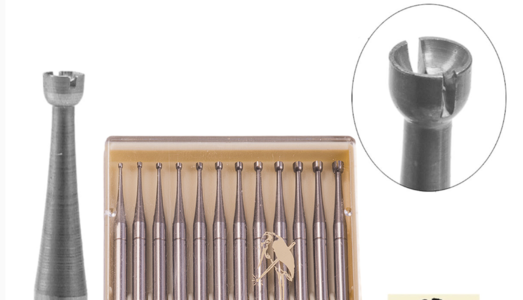
What about these ones Jimsky. They are just "cup burs" , not "twin cup burs"

12 Piece Round Cup Burs Set https://www.amazon.com/dp/B000RB60JC/ref=cm_sw_r_apan_i_54BK6M5Q7NQD6D1VBK94
 
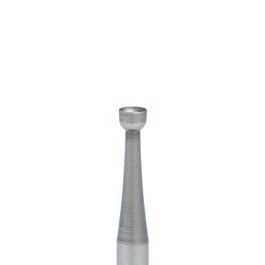
Correct, Daniel. Those are just regular cup burs. You can still use them, but they are not designed to cut, but more designed to smooth the surface. The cutting edge is not the same as for the twincut. Also, the twincut burs are 3 in one: they cut, shape, and smooth. here is how the twincut bur look.

1653347703740.png
 
Correct, Daniel. Those are just regular cup burs. You can still use them, but they are not designed to cut, but more designed to smooth the surface. The cutting edge is not the same as for the twincut. Also, the twincut burs are 3 in one: they cut, shape, and smooth.

Then Twin Cups bur will have to be !!!

Thank you !!!
Daniel
 
Thank you Jimsky for your help on doing the trucks. Concerning adding bolts to them isn't for me. Afyer trying to replicate your device of the picture and running a few trucks I gave away to the idea.

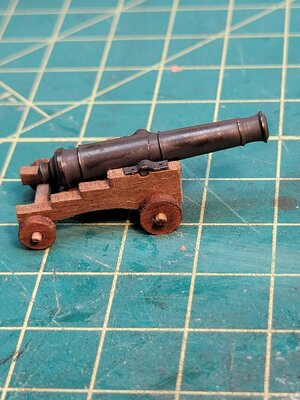
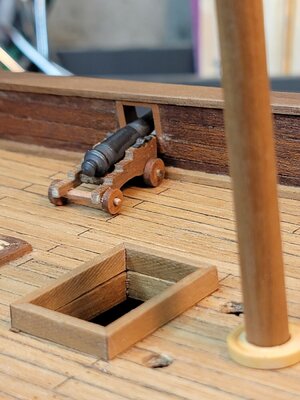
I moved on, did the axels (not included with the kit) and the picture shows how it ended the trucks Chapter.

Now I will do the other 3 cannons axels. Then I will try to dress the cannon carriage with bolts, etc. And finally the ropes. Let's see how much I am able to do.

20220523_225352.jpg20220523_230212.jpg

Cheers
Daniel
 
Good progress on the carriages Daniel. Also good advice from @Jimsky.

Thank you Heinrich!!!

Jimsky excellent advices were also given by PM. It all started when I asked him what could be the trucks size in 1:48 and what trucks size he used for his Alert that is also 1:48
----------------
Jimsky answer:
......Greetings Daniel, Technically speaking the size of the tracks and the carriages depend on the caliber of the guns. The caliber is measured by the Lb (pound) of the round\shot. 18 pounder gun means the shot weight 18 pounds.
On Alert, they use 6-pounders, while on Bounty they use 4-pounders, I can conclude they use the exact size of the carriages.
for the 1:48 scale, I use 7.50mm for the front track, and 6.30mm for the rear. Also, I looked in the book, and they are pretty much alike (made from two halves), except on Bounty they use 6 bolts per track, on Alert only 4. ;)

good luck, let me know how it goes... and if you need help, you know what to do...
___________

Nice to know that data for anyone who read this thread. I tried to make them thinner to glue 2 halves. But things didn't came out as expected. Jimsky pointed me the potential places of errors. I corrected them and decided to do just the full truck instead of gluing 2 halves.

Then yesterday I tried to do the bolts holes. But after failing and redoing a few trucks i stopped. And I called it a success considering my skills levels.

Now let see if I can dress a little that carriage.
 
Then yesterday I tried to do the bolts holes. But after failing and redoing a few trucks i stopped. And I called it a success considering my skills levels.
...you know where you fail, Daniel? Yes, you guessed it right, you stopped trying... ;) Obviously, you don't have to struggle, you should have fun while you build, but... only perseverance can lead to success.

What seems to be a problem? What are you struggling with? You can simplify bolts and use just a wire (without the head), it will also be counted. :) Once you grasp the technique, you can advance with different types of bolts.

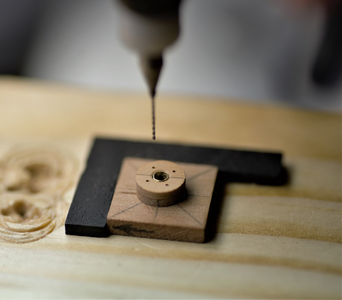
Jimsky, I was not able to build this jig with enought precision to keep the wheel centered and have the holes exactly at the same distance. Like you on the below picture.

1653269120578.png

Agree, I need to persevere. I will give it another try to built that jig. Axels and wheels are not glued yet on my pictured cannon.

Cheers
Daniel
 
Jimsky, I was not able to build this jig with enought precision to keep the wheel centered and have the holes exactly at the same distance. Like you on the below picture.

View attachment 310153

Agree, I need to persevere. I will give it another try to built that jig. Axels and wheels are not glued yet on my pictured cannon.

Cheers
Daniel
I will try to elaborate on the jig this evening as I am busy at work now.
 
Back
Top