The "Chinese" Harvey

The obviously synthetic tread which came with the Harvey kit does NOT tie on easily. Simple overhand knots will not hold tight enough to glue. And so I've been using bowlines which work, but also give a lot more bulk to the knot.
Wait a second... you SERIOUSLY considered using the fibrous, kit provided thread? it's absolutely HORRIBLE! :oops:
 
Wait a second... you SERIOUSLY considered using the fibrous, kit provided thread? it's absolutely HORRIBLE! :oops:
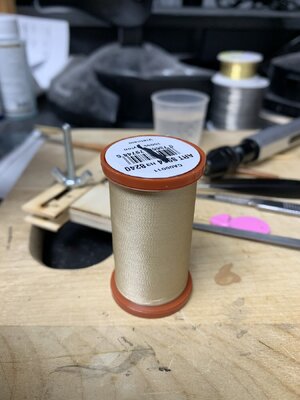
Considered and used somewhat successfully, so far, my friend! ("successfully" might need some 'splaining...) Though after painting the breeches at least two times each to get some contrast... As for the lighter colored "running ropes" in the kit, the black is pretty heavy and what I am still so far going with. But I ordered this which I have not tried yet for the runners:

IMG_0400.jpeg
 
Last edited:
It was a very frustrating weekend. First attempts at rigging went to hell. I kinda even tossed down the model a bit too hard when finally giving up (snapping the bowsprit and loosening several cannon off the deck). And I expressed that frustration to my wife as my loss of eyesight due to getting older.

But then I thought about it and ordered these:


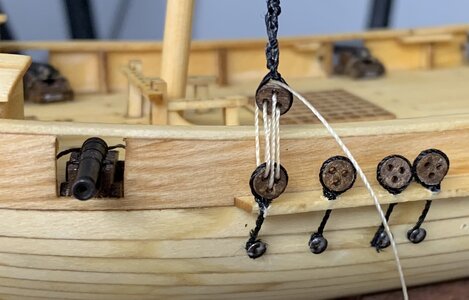
This evening, I was able to get the needle threader through the deadeye holes that were my failure point over the weekend. And I also repaired a couple of things that broke during my fit. So I am looking forward to getting my rigging on.

So much better to work on this by sight and not feel!

BTW, working with a headset on is tricky! Eye hand coordination needs to adjust! I now know I need to train my hands to the new magnified eye settings before everything will be copesetic. So, slow and easy on the way forward.

IMG_0401.jpeg
 
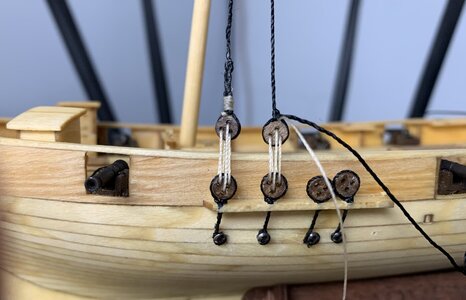
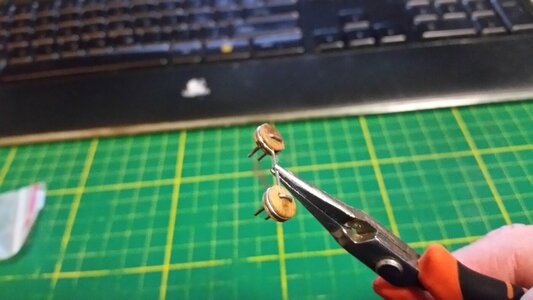
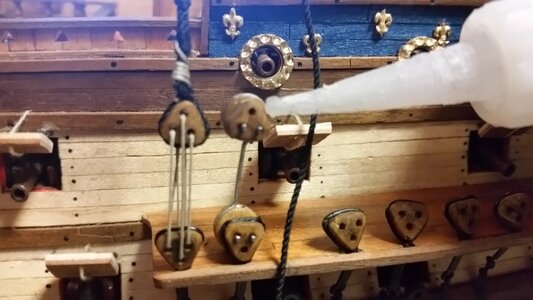
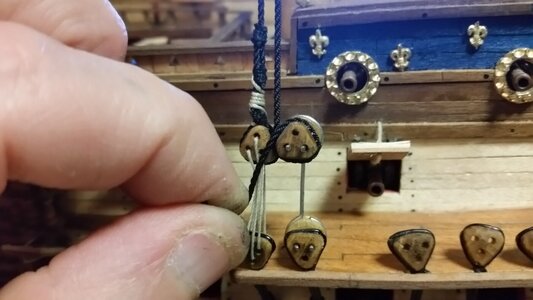
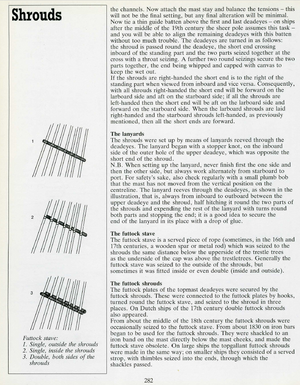
Look at my build log for an easier method. Connect the shroud at the top first, at the masthead. Apply some PVA glue to the edge of the upper deadeye. Loop the bottom end of the shroud around the upper deadeye, adjusting its position such that it is at the correct height above the lower deadeye, while at the same time having some tension on the shroud line, stretching the line just beyond being taut. Make sure the holes in the upper deadeye are at the correct rotational position while doing this. Once the glue is tacky enough to hold the deadeye to the shroud, seize the bitter end to the standing part and trim as you normally would. Then lash the upper and lower deadeyes with the lanyard, adjusting the distance between the deadeyes. If you did the previous steps correctly, the shroud tension should be just right. No slack, and a slight stretch of the shroud to hold the tension.
 
Right. And I plan to try that! As soon as I finally tie off this one. Each wrap of the rope takes time to dry and all. And usually, I get distracted while waiting and start or do something else and then eventually realize I have not completed one single deadeye in two weeks!
 
So how do you manage the height of the upper eyes to be all inline? I guess I can loosen or tighten the stays. But is there a better way?

View attachment 437250
If you placed the upper deadeye near to the desired height or about 1/8" higher, you can tighten the lanuard between the deadeyes to adjust the location of the upper deadeye, making them even with the other upper deadeyes. Each shroud has some stretch in it, allowing for you to adjust the deadeye spacing.The difference in tension between the shrouds will be negligible. To make the upper deadeye positions consistent, make and use the tool below. You can check the tension on each shroud with your fingers. All you have to do is check to make sure that the tension of the port shrouds and starboard shrouds are about even so the mast isn't pulled to one side or the other. Doing all this is a skill you get by rigging shrouds. You have no choice but to improve. Rigging shrouds gets fast after a couple models, but ratlining still seems to take forever. :)

665 Deadeye Tool.jpg

Add a small bit of CA glue to edge of upper deadeye.
689 Apply Glue to Side of Deadeye Where Shroud End Goes.jpg

Wrap shroud under some light tension around the deadeye and hold until the glue grabs it.
690 Wrap and Glue Bitter end of Shround to Deadeye.jpg
 
Last edited:
If you placed the upper deadeye near to the desired height or about 1/8" higher, you can tighten the lanuard between the deadeyes to adjust the location of the upper deadeye, making them even with the other upper deadeyes. Each shroud has some stretch in it, allowing for you to adjust the deadeye spacing.The difference in tension between the shrouds will be negligible. To make the upper deadeye positions consistent, make and use the tool below. You can check the tension on each shroud with your fingers. All you have to do is check to make sure that the tension of the port shrouds and starboard shrouds are about even so the mast isn't pulled to one side or the other. Doing all this is a skill you get by rigging shrouds. You have no choice but to improve. Rigging shrouds gets fast after a couple models, but ratlining still seems to take forever. :)

View attachment 437288

Add a small bit of CA glue to edge of upper deadeye.
View attachment 437289

Wrap shroud under some light tension around the deadeye and hold until the glue grabs it.
View attachment 437290
Should it play a high E note when you pluck it? ROTF
 
Should it play a high E note when you pluck it? ROTF
Ahh... you jest, however:

Tension on lines has actually been described in a treatise by Hero of Alexandria as the "musical method" for the cordage used to power torsion artillery engines (torsion catapults powered by tensioned and twisted cord bundles). Determining the proper pretensioning of the cord spring bundles was determined by 1) plucking the cord (musical method) or 2) by measuring the diameter reduction as the cord was tensioned. Typically, the powering cord in a catapult was considered properly tensioned when the cord was reduced to 2/3 of of it normal diameter.

So, actually observing the sound of a cord under tension is an ancient and well documented technique for determining line tension, and has far more uses than musical instruments. It can also be used to help raze entire cities.

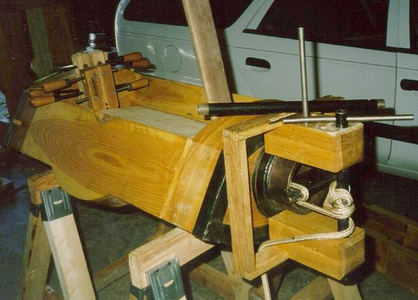
Picture of a ballista half spring having its cord wrapped and pretensioned using a portable windlass during assembly of the ballista.
1711403984861.png

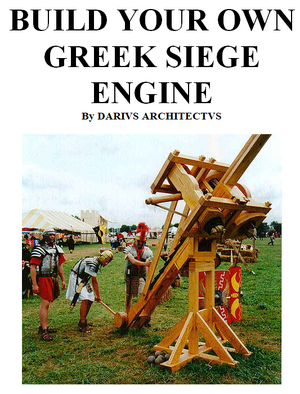
Completed ballista, with both cord bundles pretensioned and twisted to equal strength, being operated by myself and the crew of Legio XXIV Valeria Victrix in 2005 and shown on my unpublished book cover.
1711404280108.png

...and you thought all you'd learn here is how to make better toy boats! :D
 
Kurt,

That is AWESOME! Thanks for sharing all of that! I am more humbled to be in your presence than ever before (no pressure).

But seriously... I STILL have not finished one set of deadeyes. BUT I have an excuse! I was on podium teaching a class for the last three days. Sooo much fun! But stressful as F***. Totally wears me down after three days being on my feet for 8 hours and doing "performance art." I'm glad this is a holiday weekend.

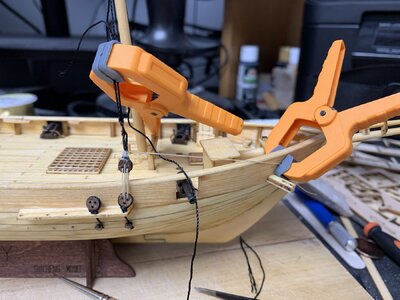
But I did reset the distance between the pair on the second deadeye. And hope to set the tension in the stays once the wraps are completed.

Thanks again for all the advice and super interesting extracurricular info! You can hijack my thread anytime :).

IMG_0406.jpeg

Cheers.

M.
 
Kurt,

That is AWESOME! Thanks for sharing all of that! I am more humbled to be in your presence than ever before (no pressure).

But seriously... I STILL have not finished one set of deadeyes. BUT I have an excuse! I was on podium teaching a class for the last three days. Sooo much fun! But stressful as F***. Totally wears me down after three days being on my feet for 8 hours and doing "performance art." I'm glad this is a holiday weekend.

But I did reset the distance between the pair on the second deadeye. And hope to set the tension in the stays once the wraps are completed.

Thanks again for all the advice and super interesting extracurricular info! You can hijack my thread anytime :).

View attachment 438084

Cheers.

M.
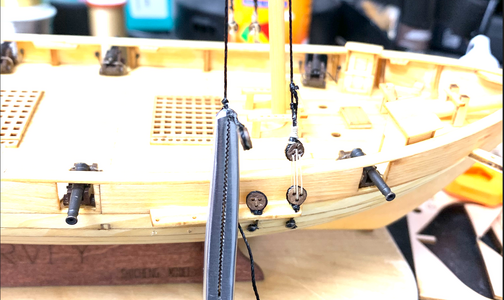
Why do these two shrouds and their lashings appear slack? Oh, and you want to rig shroud in pairs, one on port side, the other on starboard side, or you will bend your mast to one side. Get a pair of shrouds rigged on the starboard side to balance these two out. Never tension newly installed shrouds on one side of the ship only. Move in port/stbd pairs from fore to aft. Fix these things now or later it will get quite ugly. If you tighten the lashings and the upper and lower deadeyes end up too close to each other, you may need to re-tie the shrouds at the top and shorten them just a tiny bit. That's a bit dicey. I am hoping that when you put two shrouds on the other side of the ship, the mast will lean to starboard enough to tighten these port shrouds, without leaning too far and end up not being vertical relative to the hull.

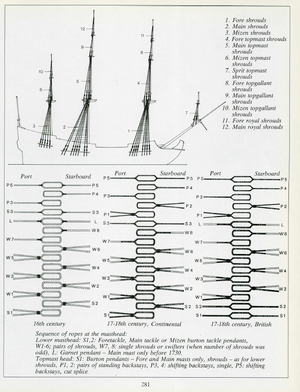
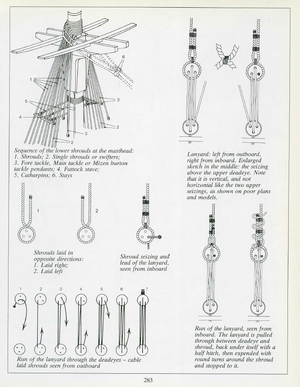
Here is the order for rigging the shrouds, From Wolfram zu Mondfeld. Note, this is for large, square riggers. On your schooner each loop of shroud line around the masthead yields two shroud lines on one side of the vessel. At the masthead, the loops at the top are layered as shown below in the top-view diagrams, with bottom of the diagram being forward, and the top of the diagram being aft. Note, on my schooner model, I omitted the pendants used for cargo loading tackles (indicated below as fore, main, and burten pendants). The model was too small to cram the cargo tackles in beneath the shrouds/ratlines so I left them out and just rigged the shrouds.

1711705855584.png

1711705989901.png

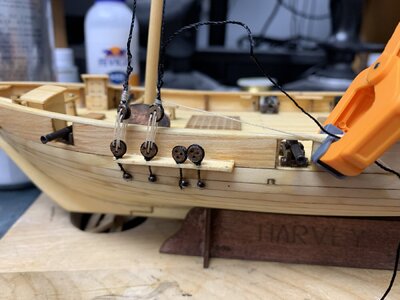
You cans see in the picture directly below how the shroud pairs are looped around the masthead and stack up in one of the patterns above.
1711705955582.png
 
Last edited:
Why do these two shrouds and their lashings appear slack? Oh, and you want to rig shroud in pairs, one on port side, the other on starboard side, or you will bend your mast to one side. Get a pair of shrouds rigged on the starboard side to balance these two out. Never tension newly installed shrouds on one side of the ship only. Move in port/stbd pairs from fore to aft. Fix these things now or later it will get quite ugly. If you tighten the lashings and the upper and lower deadeyes end up too close to each other, you may need to re-tie the shrouds at the top and shorten them just a tiny bit. That's a bit dicey. I am hoping that when you put two shrouds on the other side of the ship, the mast will lean to starboard enough to tighten these port shrouds, without leaning too far and end up not being vertical relative to the hull.

Here is the order for rigging the shrouds, From Wolfram zu Mondfeld. Note, this is for large, square riggers. On your schooner each loop of shroud line around the masthead yields two shroud lines on one side of the vessel. At the masthead, the loops at the top are layered as shown below in the top-view diagrams, with bottom of the diagram being forward, and the top of the diagram being aft. Note, on my schooner model, I omitted the pendants used for cargo loading tackles (indicated below as fore, main, and burten pendants). The model was too small to cram the cargo tackles in beneath the shrouds/ratlines so I left them out and just rigged the shrouds.

View attachment 438142

View attachment 438144

You cans see in the picture directly below how the shroud pairs are looped around the masthead and stack up in one of the patterns above.
View attachment 438143
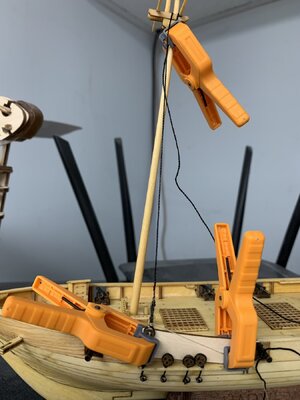
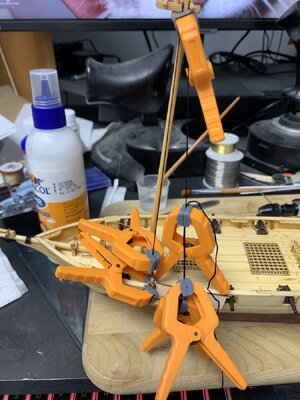
The front one appears slack because it has been made to be so! The two are on the same stay line that is simply looped around the mast. I thought that was how it was done. I have it clamped tight up at the masthead to lean the mast to spring tension the second deadeye a bit while lashing that one to the stay. So that slacks the foremost one as you see in the pic. I was hoping that everything would be taught enough once the clamp is released, and a seizing is in place. I thought you went two on one side, two on the other, and then the third went to both sides. But if it is always port to starboard in pairs I will do that on the main.

Thanks for all the great reference material and advice!

M.
You have it correct, M. I'm hoping that the first pair on the port side tighten up after the pair on the starboard side are tensioned. Usually the first pair of shrouds appear a built more taut, but things will probably turn out okay as you go.
 
I had a bit of a diversion. The Washing Machine drain pump stopped working and that took a bit of research and logistics. The dryer is stacked on top of the washer so the factory instructions to start by taking the top off the washer were not an option. Short story: it is fixed. Took a couple weeks (and probably more off my life). But back to boats!

IMG_0409.jpeg
 
I think I've finally dialed in a method to finish the Stays/dead eyes. It was at the cost of three dead eyes though. At only 2mm dia they are impossible for me to find if launched from the build site while I am attempting to rope them! And losing a dead eye SUCKS! I mean it take several days to cut them out, sand them smooth, paint them, file in the rope grove, and then LOSE them!


pic.png
 
Back
Top