The Druid Build

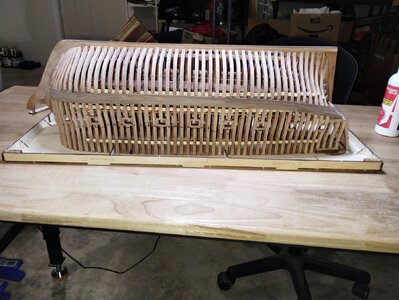
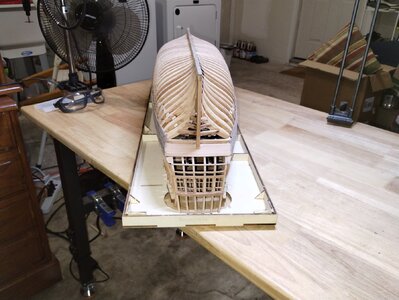
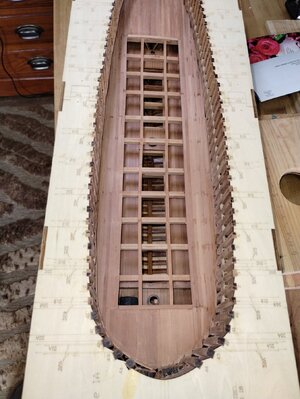
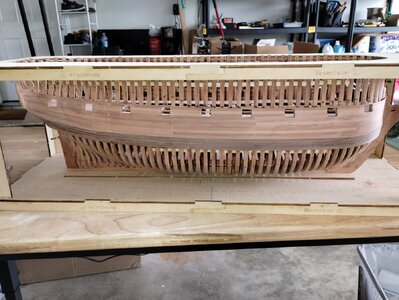
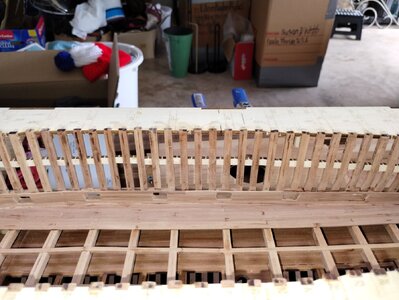
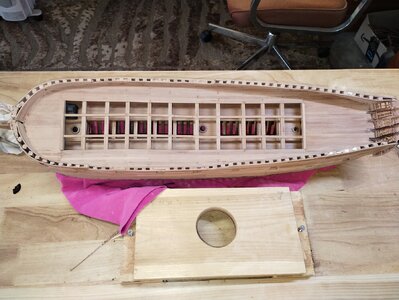
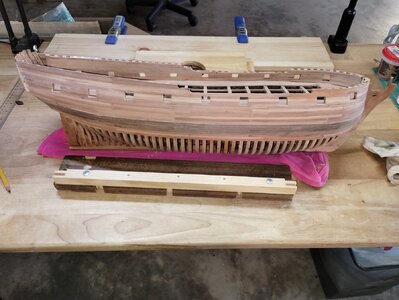
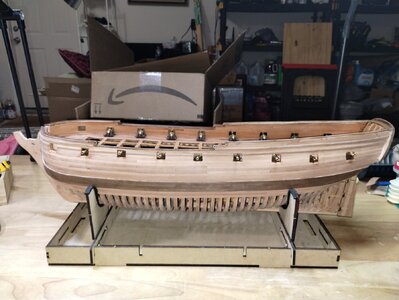
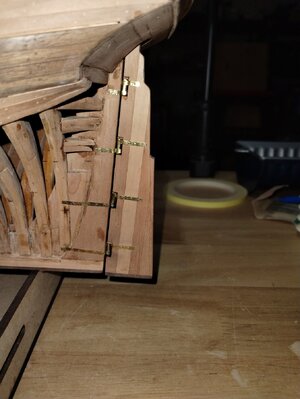
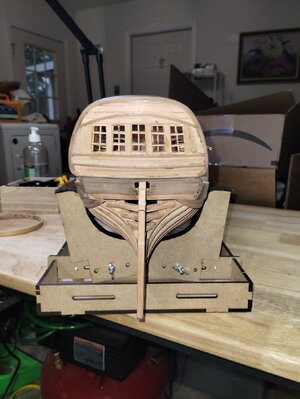
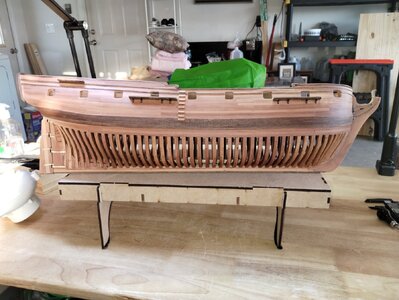
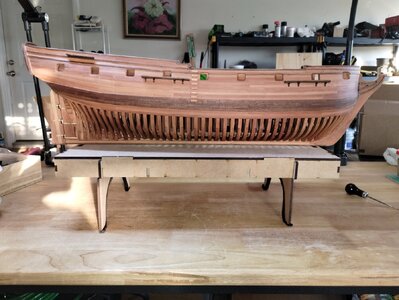
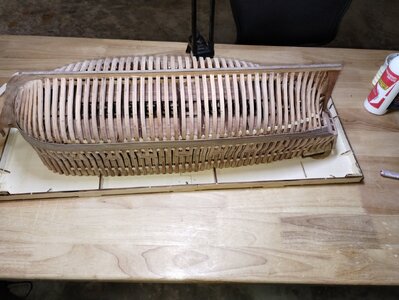
Finished the first layer of planking for the Wales! and started on the stern planks for the lower Poop It's a little rough in places right now but will straighten it out later. I released the bottom of the hull from the jig, it started getting in the way! now it is much easier to work on!! I am going to start to fair the upper portion of the hull above the Wales as I want to make sure the planking sits very flush as There is only one layer of planking!! not very forgiving. as the double plank hull gives you!!IMG_20231229_175608672.jpgIMG_20231229_175618052.jpgIMG_20231229_175626587.jpg I messed up one of the windows on the stern and will need to straighten it up.
 
Last edited:
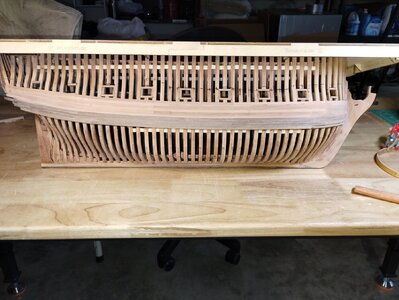
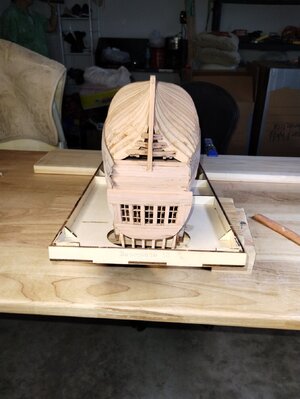
Roughed in the planking on the poop deck and working on the hull planking. finished the double plank Wales and working on the upper planks! Prior to purchasing this POF kit I thought it would be easier to plank with all the ribs to guide you but as far as I am concerned it is much harder for two reasons 1 too many contact points to fair on the hull over 40 on this kit!! to add to the difficulty I do believe the MFG did make some numbering mistakes on the rib progression which I did not catch during construction. My fault! The other Issue I have is the instructions and pictorial guides, are not much assistance and in some cases do not make sense! The one good thing is It does make you think about what to do and how to do it!! I think when I finish this kit I will go back to the old POB kits as I like the look of a full planked hull and the more forgiving double planking!! well enough complaining, time to go back to planking the hIMG_20240106_172344443.jpgIMG_20240106_172424119.jpgull.
 
I must apologies for all my negative remarks yesterday, concerning this kit!! Actually, the quality of the materials supplied in the kit are very good so far! I get a little frustrated sometimes as I am used to instructions for the kits, I have built in the past leading me through step by step, this kit requires my previous building experience, it requires my full attention and patience and has slowed me down requiring me to think through the sequence of steps needed to construct this build. sometimes good step by step instructions can make you lazy.
 
I must apologies for all my negative remarks yesterday, concerning this kit!! Actually, the quality of the materials supplied in the kit are very good so far! I get a little frustrated sometimes as I am used to instructions for the kits, I have built in the past leading me through step by step, this kit requires my previous building experience, it requires my full attention and patience and has slowed me down requiring me to think through the sequence of steps needed to construct this build. sometimes good step by step instructions can make you lazy.
I often spend as much time thinking about what I'm doing as I do actually doing what I'm doing... ROTF.
 
I must apologies for all my negative remarks yesterday, concerning this kit!! Actually, the quality of the materials supplied in the kit are very good so far! I get a little frustrated sometimes as I am used to instructions for the kits, I have built in the past leading me through step by step, this kit requires my previous building experience, it requires my full attention and patience and has slowed me down requiring me to think through the sequence of steps needed to construct this build. sometimes good step by step instructions can make you lazy.
seems, that you are thinking enough - very good result
You are on a very good way
 
I often spend as much time thinking about what I'm doing as I do actually doing what I'm doing... ROTF.
Yes, that is true for me also!! Just simple things like how to clap this, what glue to use on this, Should I make a jig to do this, what is the length of that and on and on!! in some cases, I just overthink things to the point that I just go for itThumbsup
 
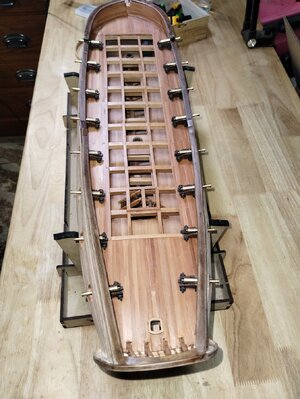
working on the exterior planking up to the top of the gun ports! roughed in the 1st deck/ gun deck and planked one side of the inside hull planks again up to the top of the gun ports! not happy with the results of the inside planks! To me, it looks like I put the wrong frames in sequence in some places, but I followed the sequence provided by the plans. that I am sure of! On the one side, I completed the planks they are a little wavy in spots, I noticed when I was installing the frames that some looked out of place! but I did not want to start switching them based on what I thought was correct, that early in the build! so I just installed them per plans and part numbers?? too late to change now I will just continue on,


IMG_20240124_124728578.jpgIMG_20240124_124740166.jpgIMG_20240124_124803232.jpg
 
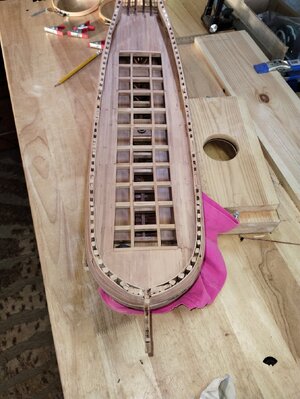
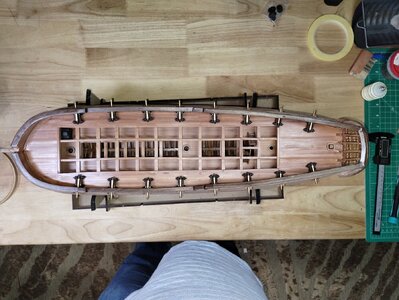
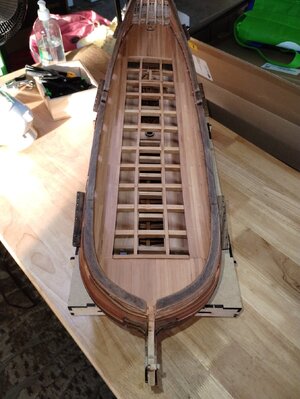
finished the rough-in of the exterior and interior planking! started fitting the parts for the, as I call them handrails and parts, this has turned out to be a job as the handrails are pre-cut so you have no leeway when installing! everything must be the correct length this is difficult as the bow section, the midsection, and the stern section are 3 different lengths. and 3 different parts?? In other ships I have built the railings were made from regular planks you just cut to fit! Put a lot of hours in to finish the planking, I am glad it is done, now I can sand and detail what I have completed so far and go on to other things. looking at the overhead bow shot picture you can see where some of the ribs just don't seem to fit correctly. I don't know?? too late now! the railing will cover most of that from the side it's hard to see, but I see it, I know it is there:(IMG_20240130_172004734.jpgIMG_20240130_172019045.jpgIMG_20240130_172056961.jpg
 
The above is an older message that I failed to Press "reply" on. None the less, my opinion stands, as does my high opinion of your work thus far. We are, after all, usually our own most stringent critics.
When you finish and you start getting well deserved compliments, remember, only you will see the flaws. Thumbsup ;)
 
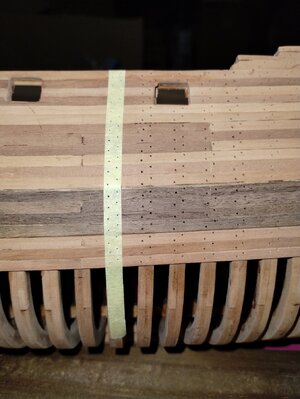
Working on the exterior plank nailing pattern! I took me a while to figure out how to ensure the nailing pattern is fairly vertically and horizontally consistent. well decided to use 6mm masking tape the same width as the frames and used a pinprick to place the pattern and then drilled the holes with a small dia. drill, worked great!! I am still deciding whether I am going to use tree nails to fill the holes. It looks good just to leave them drilled. IMG_20240131_181834478.jpg
 
a good way to keep the holes in line - good result
Based on my personla taste, I would fill the holes to imitate the treenails, but it a question of taste - if you do not make the bigger work with toothpicks or similar (I am making in moment on my Granado) you could also fill the holes withh a wood-filler or paste -> much faster and also a goo result.

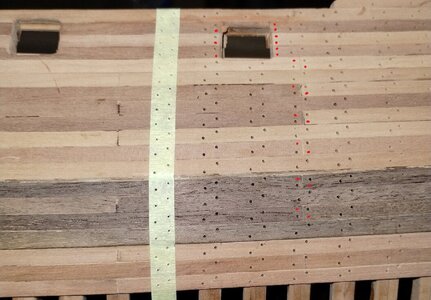
One small comment on the pattern to make it absolutely perfect. on butt joints of the planking would be two treenails on each end of a plank, the same close to a gunport - see my red dotts
IMG_20240131_181834478.jpg
 
a good way to keep the holes in line - good result
Based on my personla taste, I would fill the holes to imitate the treenails, but it a question of taste - if you do not make the bigger work with toothpicks or similar (I am making in moment on my Granado) you could also fill the holes withh a wood-filler or paste -> much faster and also a goo result.

One small comment on the pattern to make it absolutely perfect. on butt joints of the planking would be two treenails on each end of a plank, the same close to a gunport - see my red dotts
View attachment 424921
yes wood filler will be my way didn't think of that yes and singles on the sides of the gun ports. thanks for the tip! I have seen the tree nail material for sale online in different diameters, but it seems expensive to me! wood filler will work
 
yes wood filler will be my way didn't think of that yes and singles on the sides of the gun ports. thanks for the tip! I have seen the tree nail material for sale online in different diameters, but it seems expensive to me! wood filler will work
or toothpicks - maybe not for this model, but the next will come
take a look at my actual work
 
so that's how they do that! using a draw plate? looks like it works great! you can make any diameter tree nail. thanks for the tip. but for this kit I am going to bypass the tree nails, The Druid build is a warm-up and indoctrination on full rib kits, my sights are set on the full rib Le Requin, from ZHL your tip on tree nails I will use on that kit.
 
been putting a couple of hours a day into the ship, mostly on the cannon assembly! thank God I don't have 60 guns like the Le Soleil kit I am working on in the Philippines, hope to be back there next January, and finish that fine ship, just have the running rigs to do!! I am waiting for some Matt Varnish to arrive and then will put the first coat on. I put quite a bit of thought into the color scheme for the kit and have decided to mostly leave it natural. I purchased some black walnut and cherry dye to enhance the natural wood colors and will as I mentioned above use a Super Matt varnish. I like the look of natural wood, not a lot of bling and color on this ship as with my Le Soleil project! I still have a lot of cleanups to do on the hull area before I varnish but all the main assembly is complete! sorry my stomach  got in the way on that overhead shot comes with age:) IMG_20240217_170437313.jpgIMG_20240217_170424802.jpgIMG_20240217_170409379.jpgIMG_20240217_170328015.jpgIMG_20240217_170454112.jpg
 
installed the support plates for the shrouds on the sides of the hull I ordered some black jewelry wire .768mm to make the chains for the deadeyes This part I am not looking forward to as I have difficulty making them!! Looked at buying some already made but the sizes I needed in all the shops were out of stock! I guess I am not the only one who has issues with making chainplates:oops: I read an article on Sos about soldering the wire at the joints. might try that or just use the wire bend and twist around the deadeye bend a hook and attach the chain and plate. I am also not happy with the plates that came with the kits as I think they are too big. So, I have some decisions to make in that area before I start. installed the stem feet and Hawseholes plates. and have started tapering the masts, again another area I that is not at the top of my list of happy time:( Tapering by hand is tedious, but purchasing a mini lathe is expensive. I also tried a drill, but it wobbles too much. So, I will taper by hand. I decided to apply a coat of matt finish varnish on the hull decks and ribs. to seal and protect from accidents!! The wood color looks good! Wiil sand down with 0000 steel wool, before I apply the final topcoat. IMG_20240220_172459793.jpgIMG_20240220_172547030.jpgIMG_20240220_172521752.jpg
 
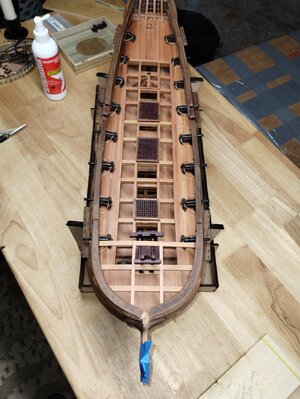
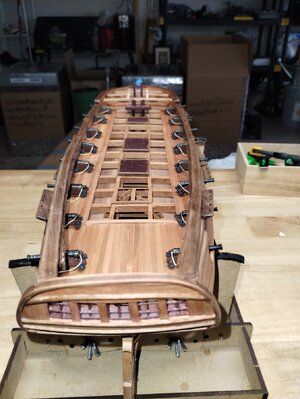
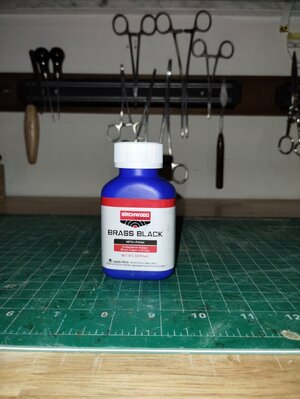
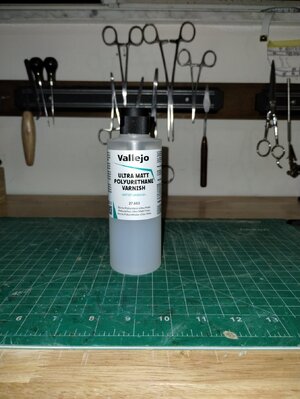
finished up on the assembly of the cannons and carriages and have them installed and rigged, I used Birchwood Brass Black and the cannons and Tamiya hull red for the carriages, I have decided to use the Hull red for some of the parts to give the ship just a touch of color! the Brass black worked great. also used it on all the brass wire and firttings! Things are going along fairly well have run into a few issues but have been able to overcome most that is whats nice about working with wood. It is forgiving:) The ships Instructions just creates issues for me due to the lack of understandable measurment info, limited explaination written and photoed / english . It does make you think! I also decided to use Ulta Matt Varnish by Vallego for the finish. I do not care for the shinny look matt works good for me. the blue tape has helped me stop breaking that front piece I am a little slow took mke 3 times:rolleyes:IMG_20240301_164227936.jpgIMG_20240301_164425219.jpgIMG_20240301_185920555 (1).jpgIMG_20240301_190127318.jpg
 
finished up on the assembly of the cannons and carriages and have them installed and rigged, I used Birchwood Brass Black and the cannons and Tamiya hull red for the carriages, I have decided to use the Hull red for some of the parts to give the ship just a touch of color! the Brass black worked great. also used it on all the brass wire and firttings! Things are going along fairly well have run into a few issues but have been able to overcome most that is whats nice about working with wood. It is forgiving:) The ships Instructions just creates issues for me due to the lack of understandable measurment info, limited explaination written and photoed / english . It does make you think! I also decided to use Ulta Matt Varnish by Vallego for the finish. I do not care for the shinny look matt works good for me. the blue tape has helped me stop breaking that front piece I am a little slow took mke 3 times:rolleyes:View attachment 431815View attachment 431816View attachment 431817View attachment 431818
Beautiful!
 
Back
Top