The pirated Black Pearl

Joined
Jan 10, 2020
Messages
40
Points
78

I thought I'd keep a log of my experiences in; being cheap, buying third rate goods, being too lazy to ask for a refund and just trying to fix up what might simply be a floating lemon.

(I'm about 2 weeks in, so the tenses may change in a few posts time.)

Straight to the point -> I asked my wife to buy me a Black Pearl kit from a dodgy drop shipping company, she did, and when it arrived it was junk in a box. It was a "copy" of the ZHL full senario, but seeing as how they copy other companies I continued on the premise that two wrongs don't make a right but so what, it's most likely some poor factory worker raiding the bins.

It arrived.
IMG-20200102-WA0002.jpeg
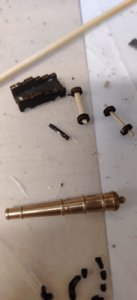
Burnt out, stinking, ripped up and half there.

Challenge accepted!
 
First up, it's a pile of crap so whatever I do to it is going to be an improvement.. important to reduce the stress when taking on a first time modelling project.

Out with the spray can, Matt Black.
(BTW I'm a Design Tech teacher so I've got the gear..)
IMG_20200115_170558.jpg
IMG_20200115_170609.jpg

And I sprayed it all over! Back and front, I didn't even know if it supposed to be black I just sprayed, not think and certainly not even. I wanted this to be as they say in interior design shows "disssstressssed".

Next up, build the dry dock. Pine, MDF and PVA.

IMG_20200115_172950.jpg
 
The build begins.
Now the instructions were obviously not included so I spent a few days searching online. I found a collection of word docs that I believe was made by someone on this forum. The funny thing was that I didn't get them from him, I got them from another supplier who linked them from yet another supplier!! What is going on over there?

IMG_20200201_102416.jpg

And no, my camera is 4K! These instructions are actually like this, all pixelated, hardly visible and painful to read.. Through out the 63 poorly rendered pages there was a reference to another ship name..
IMG_20200201_094643.jpg
it wasn't spooky back then, but it's pretty god damn spooky now! The Black Pearls instructions were originally for the SPIRIT OF WUHAN! Obviously at the time I had never heard of the city containing 11 million people, a statement to my lack of detailing to come..

Ah yes the build.
IMG_20200116_102445.jpg
Using Gorilla Wood Glue, because of the mess free lid design, I started to slot the parts into place, the thicknesses were inaccurate and didn't match up to the widths of the slot (or vise versa)
IMG_20200116_102514.jpg
This led me to having to cut balsa wedges, jam them in the gaps and re orientate the parts so as to render them straight and at 90 degs.
IMG_20200116_103155.jpg
It was coming along nicely (or so I thought at the time.. I have now come to the understanding that are two support struts missing from the bottom, I know this because I am currently looking at them on my desk! (Yes I know the blade is dangerously extended, I had an itchy nostril)
IMG_20200116_112924.jpg
Anyway, I left it to glue used tape to gently secure it parallel. Burnt ply wood warps and bows.
 
Last edited:
Scrub the deck! The lower one after it's been glued.
Once the PVA had dried, (once I got bored of waiting) it was time to fix the lower deck in place, this had been previously sprayed back and I had gone about it with a craft knife and piece of coarse glass paper. (to dizztress it).
IMG_20200116_155129.jpg
The deck actually fitted pretty well, I had to slice 2mm from one of the slots but it was pretty close from the off.
IMG_20200116_161517__01.jpg
Spring clamps for everyone! Well no because I've taken them all.
IMG_20200116_161807.jpg
The Next Day - Now I did need to leave this to properly dry.
IMG_20200117_115312.jpgIMG_20200117_144831.jpgIMG_20200117_160323.jpg
Time to put the "Keel?" in place (I honestly haven't got a clue what the parts of the ship are, and those instructions weren't going to change that any time soon) This was very straight forward and once done it would allow me to effectively use the "Dry Dock" I made earlier.
 
Lock 'im in da Brig!
Next to come was the cages and doors for the prison situated on the lower deck, no Muster Stations here!
Ok so no metal cages were included in the 'kit' now were there any door handles, locks, hinges.. you get the gist.
I took Copper G18 wire (about 1mm) and using a pair of needle nose pliers bent the copper into a circle with a short bit sticking out at 90deg to the perpendicular. Stuck the copper through the hole in the door with UHU modelling glue and touched it a few times with a black permanent marker.
IMG_20200121_125848.jpg
The strange thing here is that because the Laser Cutter was either poorly ventilated/ had a dirty lens/ was out of focus, the burnt MDF for the cage grill had given it 'corroded' feel on one side.
A beauty image
There were no real issues with this section aside from the copper rings, but that's all part of it.
IMG_20200122_115147.jpg
I tried to paint rust on the cages but I failed, now it looks like blood, so all good.
IMG_20200122_115305.jpg
 
Let there be light.. No! Actually let there be light, because even though the supplier claimed that the LEDs were included, they obviously weren't.

The first thing here was to find Orange LEDs, nothing fancy but they needed to be small. Managed to find a bag of 50 3mm Orange LEDs online. (After initially getting a bag of red ones..) I needed a dim glow NOT a sexy one!

Went about designing the lamps with what I had to hand, Copper wire 1mm, 0.8mm Hoop Ply and a laser cutter.
IMG_20200123_100917.jpg
4 discs:
3.5mm DIA- 2 hole for the LED legs
5mm DIA- 4 hole for the Copper wire (rods) and a 3mm hole for the LED base
5mm DIA- 4 hole for the Copper wire (rods) and a 2mm hole for the LED top
5mm DIA- 4 hole for the Copper wire rods

Assembled:
IMG_20200122_124328.jpgIMG_20200123_101256.jpg
Tested:
IMG_20200123_101439.jpgIMG_20200123_101811.jpg
As soon as I saw the orange glow I knew I had to finish this build!
IMG_20200123_163011.jpg
The LEDs were bent at 90 deg, soldered, insulated and glued into place using UHU modelling glue.
Now time for some beauty shots.
IMG_20200123_163748__01.jpgIMG_20200123_163827__01.jpgIMG_20200123_164025.jpg
 
Time for an update - The Orlop Deck

Sprayed black like the rest of the parts, the Orlop deck was then set upon with a craft knife to emphasise the boards and sanded in areas that may have had heavy crew flow.
IMG_20200124_084432.jpgIMG_20200124_084450.jpg
using multiple spring clamps, the idea was to glue the deck to the beam and allow the wood to follow the curvature of the ship. After this the beams to support the upper deck were glued, these would be the supports for the 'lanterns'
I had decided that the original wiring was too thick so split open an Ethernet cable, the wires here were thinner but way too rigid (I realised after the fact)
IMG_20200126_174256.jpgIMG_20200131_093150.jpg
It was time to secure the lights to the Orlop beams, UHU glue as before but after the first few I started using the 4 wires from old USB cables, these were thin and flexible, important when gluing into place. And there was a lot of gluing into place!
IMG_20200129_233625.jpgIMG_20200129_233644.jpgIMG_20200130_202321.jpgIMG_20200131_093632.jpg
The end result is here:
IMG_20200131_225715.jpg
 
Soft furnishings, Hinges and Barrels!
Finding an old pillow case lying and a bit of cotton string around I decided to make a few hammocks;
IMG_20200131_143032.jpg
These were then chucked in toilet bleach for 30 mins (which did bugger all!) and then left to sit in a strong cup of black tea and coffee for about 2 hours.
IMG_20200201_092126.jpg
Using Modelling glue once more, they were fixed across the Orlop deck, I had also made a few extra bits to cover up some of the wires in, what I thought would be, visible places.
IMG_20200201_094511.jpgIMG_20200201_094542.jpg
Now the 'kit' came with no brass parts and I knew I was going to need hinges for some of the doors, the brig was a bit bare but luckily it was darks down there.. this deck had a lot more light.
Using Brass split pins for paper, I cut them length ways in half (Tin Snips) then centre punched dents, scratched up, inked up and wire wooled.
IMG_20200203_092507.jpgIMG_20200205_090311.jpg
Fixed them to the doors and got the sort of look I was after.
IMG_20200205_120611.jpg
Now the 'Kit' did come with Barrels, these I coloured in with a permanent black pen, scratched up and wrapped in a little copper wire.
IMG_20200205_134819.jpg
Wire wool, saw dust and cotton were added to a couple and then glued into place.
IMG_20200205_143129.jpg
It was starting to look busy.
 
Walls and Skin
Using a Dremmel I sett upon the bow, removing the edge so that I would be about to wrap the Ply wood around the ship, the grain was wrong (obviously) so I knew it was be a dick to bend and set in place.
IMG_20200205_145831.jpgIMG_20200205_152150.jpg
There was no room for delicacy on this, the most resistant spring clamps used, I knew that once it was glued up I'd always be able to fix the beams etc if they snaped in the process.
IMG_20200205_162742.jpgIMG_20200206_112039.jpg
With a day's waiting whilst it set, it seemed to work and it was time to thicken the enveloped with the 2 pieces of 3-4mm Plywood Panelling they had provided.
IMG_20200206_145624.jpgIMG_20200206_145609.jpg
As you can see, the panels don't align with the external wall, I'm thinking of filling them or covering the gaps later..
The interior needs to be covered with planks of wood, I was only provided the exterior, unless you include the absolutely FUBARed charcoaled MDF crap strips they provided.
I dug into the Veneer cabinet... everyone should have one!
IMG_20200207_091034.jpgIMG_20200207_091041.jpg
I was still going to blacken it up so decided against some nice cherry, instead I went for Figured Ash, white, absorbent and textured.. A bit like the toilet rolls no longer on the shelves here.
IMG_20200207_091919.jpgIMG_20200207_092543.jpg
I got to staining it, not too black only a think single coat, I want the blackness but also the grain.
IMG_20200207_093617.jpgIMG_20200207_093627.jpgIMG_20200207_094324.jpg
Popped it into the Laser cutter and sliced away at 4mm. Not a char in site (Easy when you give a sh1t!)
IMG_20200207_121114.jpgIMG_20200207_121800.jpgIMG_20200207_152156.jpg
Glued in place, the most therapeutic and expensive part of the ship and build.
 
The slow section.
Dear Father, it's been 1 month since my last 'entry'.....
What have you been doing my son?
Well, I've spent most of my time blasting my cannon and thinking about balls....

The kit came with quite a few brass cannons, CNC turned and highly polished, the chassis of the cannons were a simple saddle design with 'wheels' but no axles.
IMG_20200214_152917.jpg
IMG_20200214_153034.jpg
IMG_20200219_091029.jpg
The first job was to get those axles, kebab sticks cut into 1/4s would suffice, the second job was to stress those bright shiny guns. Welcome to The Blaster!
IMG_20200219_091035.jpgIMG_20200217_120535.jpgIMG_20200217_120548.jpgIMG_20200217_120936.jpgIMG_20200219_093108.jpg
A few fiddly minutes of Sand Blasting and the guns were roughed up enough for what I wanted. The issue was, I had originally painted one black, after distressing it with emery and wire wool the bright shiny brass ruined the effect completely.
IMG_20200214_153309.jpg
This time I made sure it didn't. The first 2 images show the effect with permanent black ink, it's quite a dusty finish which I liked but it tended to wear, the ink didn't seem to take. The last 2 images, 3 and 4 show the effect with Matt Black spray paint, this was a lot more hard wearing and allowed me to distress it in key areas.
IMG_20200217_121107.jpgIMG_20200217_121534.jpgIMG_20200219_134509.jpgIMG_20200220_105136.jpg
It was now time to sort the balls out.. until I actually took one of the 4 out of the bag!
LOOK AT THE SIZE OF THAT, I mean what do they think they're actually doing, why even bother? I would have been fine with another charred piece of crap wood roughly shaped like a circle, at least I could have laughed it off. This was them taking the p155, I can hear them laughing and jeering, "Let's give the prick 4 massive balls... hahahaha!"
IMG_20200228_083343.jpg
So I spent a few weeks investigating balls, whilst I started on the rammers and wads. Spinning the cotton around whittled kebab sticks and dipping the wad into coffee dregs from the machine.
IMG_20200228_113828.jpgIMG_20200304_082514.jpg
Ok, back to my balls..
I got 2mm BBs: too small, I got Polymorph and moulded it: too much time.
IMG_20200306_085013.jpg
In the end I ripped the plug from the bath tub and used the chain, this worked, perfectly..
IMG_20200306_090857.jpgIMG_20200306_091655.jpg
 

Attachments

  • IMG_20200214_152917.jpg
    IMG_20200214_152917.jpg
    69.5 KB · Views: 16
  • IMG_20200214_153034.jpg
    IMG_20200214_153034.jpg
    63.9 KB · Views: 12
ShiZazzle the deck.
Ladders, Mops and Portals.

Let us start with a little Hessian, or as they say in the Hot Dang U S and A 'burlap', some trusted KAYbab stick, a tinkle of Copper wire and a sprinkle of love.
IMG_20200211_110752.jpgIMG_20200211_112254.jpg
And there you have it, a miniature witches broom, or swill mop. Done!
TBH I was looking to decorate the deck, it's well empty and I needed a little filler.
Now for the boring bit, the internal cladding had left the portals covered, I knew I was going to need to sort that out and I had been leaving it until the last moment.
First, dig out the Dremel, well the Chinese copy which screams like a banshee and tries to vibrate itself out of your hands, up your arm and towards your neck.IMG_20200211_151451.jpgIMG_20200211_151849.jpg
Then back to basics with a little rough wet and dry glued to a needle file.
IMG_20200212_144028.jpg
Beauty shot!
IMG_20200221_083105.jpg
Check he mop leaning itself top left.. Filthy!
Time for the ladder/ stairs. Blackened balsa, cut and angled
IMG_20200302_095247.jpgIMG_20200302_095259.jpg
Glue the steps in place and file a notch for the top to hook onto the deck above... (Because they're too pissing big for the hole they were supposed to go into... obviously)
IMG_20200304_083539.jpgIMG_20200304_084935.jpg
Cut some legs off a couple of resistors because the kit didn't come with any modelling wire, twist them around and glue them to the balsa planks.
IMG_20200304_091548.jpg
Add some Copper hand rails and lean the ladder against the Cu roll.
IMG_20200304_143345.jpg
The secure in place and get some close ups, knowing that absolutely no one is ever going to see it because it'll be covered by the deck above!
IMG_20200304_143517.jpgIMG_20200304_143532.jpg
But it'll be my dirty little secret.. The ladder to the 'dungeon'.
 
So they brought Easter Holidays forward, which would have been great had I been able to get to work via a non (potentially) contaminated form of transport. So, like the rest of global production, the ship building has ground to an almost standstill. To make it worse I've just had to add the upper deck which has now covered all my lovely guns and hammocks.
Anyway...
Adding the Upper deck, after a little sanding her and there, and the odd snapping of 'ribs' I managed to glue down the sprayed back deck. As you can see, this looked sh1te and needed something doing to it.
IMG_20200306_142855.jpgIMG_20200306_143737.jpg
The back end, Aft? and floor to the Captains Cabin also needed a good wedging in. Naturally the deck needed a couple of clamps to keep it down and pressed against the beams of the deck below.
IMG_20200306_144501.jpgIMG_20200306_144525.jpgIMG_20200306_145324.jpg
I had a load of stained Ash left over, so after a little rub and tickle (sanding down of the deck pieces.. and yes I'm spelling deck!) it was time to get the wood nice and sticky. FFS! I'll stop now.
IMG_20200306_151326.jpgIMG_20200311_144513.jpg
Because you'll be able to see this decking from above, I decided to lay it as individual planks, as you would have done in the early 2000's whilst upgrading your house with the then very fashionable Pergo Flooring. Ahhh the times I had, house maid's knee, Formica splinters while the young first time buyers looked on impressed with their floors, ignoring my language.
IMG_20200309_084409.jpg
It was all going so very well, and then I realised that I'd binned or rather, hadn't been given the sides 'or walls?'
IMG_20200312_113451.jpg
So out with the balsa and let the cutting begin.
Introducing, possibly the worst 3D printing in the world. So I need to start working on the Captain's Quarters, I need a Captain's Table and above that I want a chandelier, nothing fancy but enough to set it apart from the gas lamp lower down.
IMG_20200318_072815.jpg
The design is simple, three 3mm LEDs at 120 degs apart, clear PLA coloured black in the centre.
What came out was just beyond the pail.
IMG_20200318_091150.jpg
But... it's going in a room with (now about to be tarnished) windows and the LEDs will cast shadows.
IMG_20200318_092018.jpg
Only the best for the Captain's Table!
Now the wiring, the plan is to have all the wires from all the LEDs run through the deck on the port side into the bilge. Then have two copper 'rods' run along the keel to the rudder, add the correct resistor for a 5V USB supply to Parallel LEDs 2.4V 10mA. A 3V coin cell seems to be doing a good job on the individuals but I've just fried one with 5V straight. (260 ohm needed, 1W)
IMG_20200320_123756.jpgIMG_20200320_133826.jpgIMG_20200324_091821.jpg
Huh.. just realised I hadn't added wires for the 3 big stern lamps. Let's hope I don't forget again.
 
Well Well Well... what a MESS!!
Works opened and thus the build can and shall continue!

Getting back to a model build after a long break was always going to be tough... but getting back to a model build that was poorly supplied and had the instructions from hell has been a crazy challenge.

The first job was to sort out the electrics, I had a couple of dozen LEDs all rigged in parallel throughout a closed ship. If these blew I'd be in the sh1t.
I'm planning on using a USB supply to power the lights, so 5v, well actually 5.2v if it peaked.
The forward voltage for the 3mm LED (Orange) between 1.9v - 2.1v
The amps needed for the LED is 20mA
The supply, we'll take as 5.2v to be safe
So the resistor value, on the conservative side, is going to be close to 160Ω
IMG_20200819_125715.jpg
I went for a 180Ω again to be on the conservative side, better to be dim than dead. (Is what my mother used to say after reading my school report)
IMG_20200819_130532.jpgScreenshot 2020-08-20 at 3.14.17 PM.png
All soldered into place, I chose a micro USB female adaptor for the power input, this would allow me to unplug. The little port was about 1USD from the good BangGood store and as you can see from the last landscape beauty shot, it fits and works.
IMG_20200819_130834.jpgIMG_20200819_131337.jpg
 
What a great build log!! I too have a cheap nock off of a nock off Black Pearl, without the interior and a super sweet, can you believe it 2d figurehead that is made of 2 peices of crapboard thats supposed to be glued together. Yeah, real junk. I'll definately be following along and Id love to get my mitts on a copy of the plans you procured to assist in my ash ache when I get to it. Bravo!!
 
Back
Top