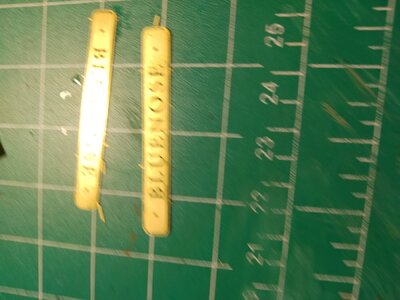
Hi Peter, be sure to post this to Dom's build, I know he will appreciate it.A Happy Birthday / Un joyeux anniversaire, Dominique. Enjoy the day!
Regards, Peter
-

Win a Free Custom Engraved Brass Coin!!!
As a way to introduce our brass coins to the community, we will raffle off a free coin during the month of August. Follow link ABOVE for instructions for entering.
-

PRE-ORDER SHIPS IN SCALE TODAY!
The beloved Ships in Scale Magazine is back and charting a new course for 2026!
Discover new skills, new techniques, and new inspirations in every issue.
NOTE THAT OUR FIRST ISSUE WILL BE JAN/FEB 2026
- Home
- Forums
- Ships of Scale Group Builds and Projects
- Bluenose PoF Group Build
- Bluenose Group Build Logs
You are using an out of date browser. It may not display this or other websites correctly.
You should upgrade or use an alternative browser.
You should upgrade or use an alternative browser.
The Schooner Bluenose 1921, POF Yuanqing Models 1:72 [COMPLETED BUILD]
Aai aai aai ….. I searched for his last posts and saw some……. Will do!Hi Peter, be sure to post this to Dom's build, I know he will appreciate it.
(And made a addition in the post …..)
My apologies ……
- Joined
- Oct 1, 2023
- Messages
- 2,017
- Points
- 488

Its Saturday! Good morning, everyone.
I have a nice little update starting with the dories. This set of photos shows my construction technique and several shots of various angles and distances.
The paint theme ties into the theme I used on the main ship.
View attachment 390353View attachment 390354View attachment 390355View attachment 390356
Next are the various angles and I did a little photo editing with some of the shots using a flash to highligt the gray interior of the dories, the gray looks much darker without flash in the photos than it does in person.
View attachment 390357View attachment 390358View attachment 390359View attachment 390360View attachment 390361View attachment 390362
Last up today I have the redo on the anchors correcting the direction of the stocks and applying Peters @Peter Voogt excellent suggestion to hone the stock in a more realistic shape. Check it out.
View attachment 390363View attachment 390364
Have a great weekend and thanks for checking in.
Hello Daniel,Its Saturday! Good morning, everyone.
I have a nice little update starting with the dories. This set of photos shows my construction technique and several shots of various angles and distances.
The paint theme ties into the theme I used on the main ship.
View attachment 390353View attachment 390354View attachment 390355View attachment 390356
Next are the various angles and I did a little photo editing with some of the shots using a flash to highligt the gray interior of the dories, the gray looks much darker without flash in the photos than it does in person.
View attachment 390357View attachment 390358View attachment 390359View attachment 390360View attachment 390361View attachment 390362
Last up today I have the redo on the anchors correcting the direction of the stocks and applying Peters @Peter Voogt excellent suggestion to hone the stock in a more realistic shape. Check it out.
View attachment 390363View attachment 390364
Have a great weekend and thanks for checking in.
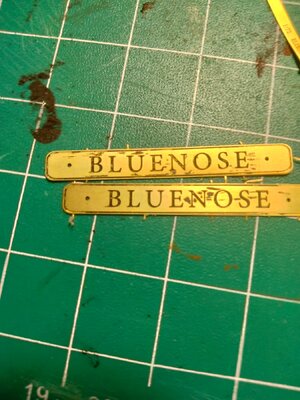
What was your technique for painting the Bluenose nameplate at the bow?
I was thinking to paint it black and then sanding but am afraid of sanding marks.
Thank you,
Ted
Hi Ted, For the nameplate I just painted the whole thing then after a fer seconds I wiped the plate down gently and the paint just stayed in the lower lying letters and boarder. It was actually much easier than I thought at first.What was your technique for painting the Bluenose nameplate at the bow?
- Joined
- Oct 1, 2023
- Messages
- 2,017
- Points
- 488

- Joined
- Oct 1, 2023
- Messages
- 2,017
- Points
- 488

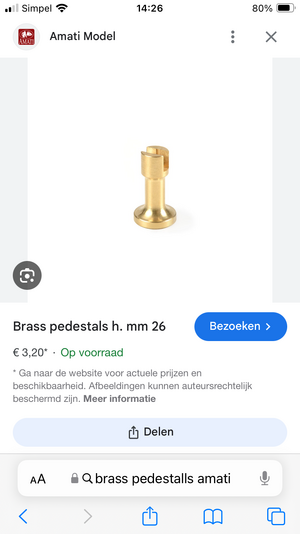
Did you get the brass pedestal at Amazon. What size are they pleaseWell good evening all, I have a late evening post this time. I decided to fashion my version of the Bluenose's stand and am quite satisfied with the outcome. I started by cutting some walnut strips to overlay the kit supplied base (which had a less than desirable looking finish). Then sanding in to match the side bevels. Using the same paint scheme as on the BN itself painted the sloped edges midnight blue. Take a look.
View attachment 386187View attachment 386188
A year or so ago I had purchased some brass pedestals for my Vasa but never used them. So now the perfect opportunity is here and with a little woodwork and polishing here they are.
View attachment 386190View attachment 386191
With 2 coats of clear matte poly on top I couldn't be happier. Here she is sitting on her perch.
View attachment 386192
And lastly, I did one improvement to the BN brass name plate at the bow by filling in the lettering and attachment bolts.
Hope you enjoy.
View attachment 386193
Have a great evening!
Best regards
Ted
Hi Ted, just for grins try Googling "Brass pedestals for model ships". You can always measure the wood pedestals that come in your kit for a size reference.Did you get the brass pedestal at Amazon. What size are they please
Best regards
- Joined
- Oct 28, 2018
- Messages
- 760
- Points
- 403

- Joined
- Oct 1, 2023
- Messages
- 2,017
- Points
- 488

Hello Dean,Well good evening all, I have a late evening post this time. I decided to fashion my version of the Bluenose's stand and am quite satisfied with the outcome. I started by cutting some walnut strips to overlay the kit supplied base (which had a less than desirable looking finish). Then sanding in to match the side bevels. Using the same paint scheme as on the BN itself painted the sloped edges midnight blue. Take a look.
View attachment 386187View attachment 386188
A year or so ago I had purchased some brass pedestals for my Vasa but never used them. So now the perfect opportunity is here and with a little woodwork and polishing here they are.
View attachment 386190View attachment 386191
With 2 coats of clear matte poly on top I couldn't be happier. Here she is sitting on her perch.
View attachment 386192
And lastly, I did one improvement to the BN brass name plate at the bow by filling in the lettering and attachment bolts.
Hope you enjoy.
View attachment 386193
Have a great evening!
I have found some brass pedestals on Amazon that look very similar to these.
Did you get your from Amazon.
Beautiful work.
Look studying your build log to make deadeyes and chain plates.
Best regards
Ted
g
- Joined
- Oct 1, 2023
- Messages
- 2,017
- Points
- 488

Good afternoon, everyone, in preparation of constructing the ships mast I have completed the mast hoops of which I have three sizes 8mm for the main and fore mast upper sections and 9.5 and 10.5mm for the main and foremast lower sections. The lower sections have a combination of two sizes. I used 100# white mixed media paper and cut strips as close to 1.0 to1.5mm wide as I could get. Not sure but I think the fore and main topmast are too big at scale 1:72. I say this because the correct hoop scale for the topmast (based on Jenson's book) would be 4.5 to 5.5mm dia. and I had to use 8mm hoops that would slide up and with relative ease. I made a roughly 80/20 mix of paint and water to coat the hoops by dipping and swishing around. Check it out.
View attachment 392311View attachment 392312View attachment 392313
Next, I began experimenting with homemade turnbuckles for the bow sprit rigging. The last photo will be what I use, it most closely resembles the look I am after.
More than likely they are a touch too large for scale, I will know better when I get one mounted up.
View attachment 392316View attachment 392317View attachment 392318
Thanks for looking in and as always happy
- Joined
- Oct 1, 2023
- Messages
- 2,017
- Points
- 488

- Joined
- Oct 1, 2023
- Messages
- 2,017
- Points
- 488

Thank you, look try to find them here.
Best regards
Ted
Best regards
Ted
Hi Ted, this is Dan not Dean. I believe I purchased those pedestals from the Modelexpo people@ https://modelexpo-online.com/Hello Dean,
I have found some brass pedestals on Amazon that look very similar to these.
Did you get your from Amazon.
Beautiful work.
Look studying your build log to make deadeyes and chain plates.
Best regards
Ted
g
- Joined
- Oct 1, 2023
- Messages
- 2,017
- Points
- 488

I apologize for that Dan. I'll check model expoHi Ted, this is Dan not Dean. I believe I purchased those pedestals from the Modelexpo people@ https://modelexpo-online.com/
Absolutely beautiful Daniel! I love it!Good morning, everyone, after 12 months and 13 days I have a finished Bluenose Schooner I am proud to present for your review. Unfortunately, you will not see any rope hanks, I made up a dozen of them, but they all look really bad, for some reason I have never been able to produce decent ones. For the cable holding down the barrels I did add hold down hooks and the last item I installed was the ships wheel. For those of you currently working on this model, the wheel is very brittle so be cautious when handling it. So here it is.
View attachment 431668View attachment 431669View attachment 431670View attachment 431671View attachment 431672View attachment 431673View attachment 431674View attachment 431675View attachment 431676View attachment 431677
I thank everyone who joined me in building this ship, it would have been difficult beyond reason if not for your help. A special thanks to Johan @RDN1954 for sending me the sail templates which without I probably would have invented some never before heard curse words. And to Peter @Peter Voogt who I was able to gather so much wonderful technical data regarding all the pulleys and hardware needed to properly set the sails on. None of this type of information is available on the kit plans as they make no provisions for sails. Also, a special thank you to Heinrich @Heinrich who made this kit available to us and who moderates this branch of the forum, he makes this build possible through his connections with Yuanqing Models. I will submit these photos to Donnie through a PM and see if he will post it in the forum's gallery.
Until next time and as always Happy Modeling!
View attachment 431678
View attachment 431679
- Joined
- Oct 1, 2023
- Messages
- 2,017
- Points
- 488

Thats great news Ted.Yeah, rigging time has arrived.
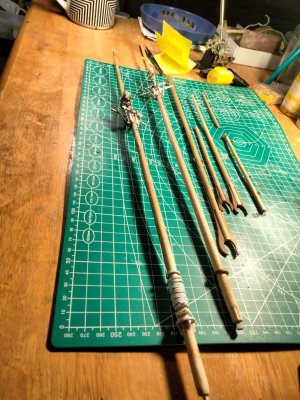
I was a bit confused, new masts, booms and gaffs on a already completed build of a BN. But then I saw it are those of Ted’s build.Masts and spars two coated with Minwax oil based Golden Pecan.
Yeah, rigging time has arrived.
Happy modeling
Ted View attachment 484592
A nice completion of all the rounded wood parts, Ted. You show them also in your own log?
Regards, Peter
- Joined
- Sep 3, 2021
- Messages
- 5,198
- Points
- 738

That's a build log hijacked...I was a bit confused, new masts, booms and gaffs on a already completed build of a BN. But then I saw it are those of Ted’s build.
A nice completion of all the rounded wood parts, Ted. You show them also in your own log?
Regards, Peter


