The Schooner Bluenose 1921, POF Yuanqing Models 1:72 [COMPLETED BUILD]

Good afternoon, I just received my YQ Bluenose and am excited to share my first look at its contents. Of course, it came very well packaged and upon opening there is no apparent damage to any of the contents. I like the way most all the fiddley pieces have been shrink wrapped to a cardboard base. While there are what looks to be ample instructions, I downloaded a set in English since I don't read or speak Chinese. So, let's have a look.

View attachment 357678View attachment 357679View attachment 357680View attachment 357681

Here is one item the 'ships wheel' that I am really glad to see. This was not the original version, quite a few 3d printed versions were made and put in this kit and I'm just glad they still had some for mine.

View attachment 357682

Next are just a few more shots.

View attachment 357683View attachment 357684View attachment 357685View attachment 357686View attachment 357687

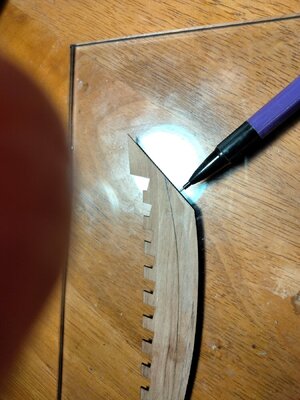
In this last photo I am experimenting with tree nails since I'll be using them in this build. I drilled 3 different hole sizes then used a light wood filler dark wood filler and brass nails and brass wire to see the effects. I used walnut as a test source however I will try some pear wood out as well. After a light sanding and wax seal coat I am pleased with it so far. More than likely, I'll go with darker wood filler. 

View attachment 357688

It will be several days before I get started as I'm still in a research phase. I did buy a fine reference book on the Bluenose II by LB Jenson but not to worry I won't get the two confused in my "Bluenose" build. There will be many similarities that will transfer from BN II to the original Bluenose.

I hope you enjoy. Happy modeling.
Congratulations Daniel,
What a beautiful kit. I'm sure you're going to spend many pleasant hours on this one.
Ted
 
Quelles belles photos d'un bien joli bateau: une réussite votre goelette !
Votre construction est un des exemples à suivre et je m'en inspire beaucoup....bien plus réel que les plans fournis !
Tout simplement Bravo !
Bien à Vous, Dom
Hello Dom, thank you for your kind words.
 
Good morning, everyone, after 12 months and 13 days I have a finished Bluenose Schooner I am proud to present for your review. Unfortunately, you will not see any rope hanks, I made up a dozen of them, but they all look really bad, for some reason I have never been able to produce decent ones. For the cable holding down the barrels I did add hold down hooks and the last item I installed was the ships wheel. For those of you currently working on this model, the wheel is very brittle so be cautious when handling it. So here it is.

View attachment 431668View attachment 431669View attachment 431670View attachment 431671View attachment 431672View attachment 431673View attachment 431674View attachment 431675View attachment 431676View attachment 431677

I thank everyone who joined me in building this ship, it would have been difficult beyond reason if not for your help. A special thanks to Johan @RDN1954 for sending me the sail templates which without I probably would have invented some never before heard curse words. And to Peter @Peter Voogt who I was able to gather so much wonderful technical data regarding all the pulleys and hardware needed to properly set the sails on. None of this type of information is available on the kit plans as they make no provisions for sails. Also, a special thank you to Heinrich @Heinrich who made this kit available to us and who moderates this branch of the forum, he makes this build possible through his connections with Yuanqing Models. I will submit these photos to Donnie through a PM and see if he will post it in the forum's gallery.

Until next time and as always Happy Modeling!

View attachment 431678

View attachment 431679
Absolutely stunning!
 
Daniel, an absolute masterpiece! It has been an interesting and rewarding experience to follow you on your BN modelling journey, and now the outcome is there for us all to enjoy. I predict that you will find excuses to walk past your completed model several times a day and bask in the glory of your handiwork. Well done indeed! Thumbsup
 
Daniel, an absolute masterpiece! It has been an interesting and rewarding experience to follow you on your BN modelling journey, and now the outcome is there for us all to enjoy. I predict that you will find excuses to walk past your completed model several times a day and bask in the glory of your handiwork. Well done indeed! Thumbsup
Thank you, Mark, somehow, I never realized you have a BN II completed. I just spent time looking her over and she is indeed a beauty. I also bookmarked you rope coil jig. Thanks.
 
Good morning fellow modelers, I have a short weekend update. Below you can see the first 14 ribs plus one towards the stern for setting up intermittent dry fits. These ribs are ready for their final sanding with 320 grit paper. This is sort of an assembly line process where I'll get another 15 or so ready and bring them to this stage as well.

View attachment 359624

Here is a close up showing my solution to placing the faux treenails holding rib sections together. I drilled a 0.8mm hole through with my Dremel drill press then filled the holes with a neutral wood filler. I do like the way most everyone else uses toothpicks, however this method works best for me.

View attachment 359625

Next up is a test piece looking at different surface finishes. So far just regular linseed oil is my favorite. I am looking to preserve the contrast between the tree nails and the frames.

View attachment 359626

Not being any sort of paint or staining expert, I am open to suggestions. There may be some other topcoats to add??

Thanks for checking in and am looking forward to any feedback you may have. As always happy modeling.
I don't have a drill press for my Dremel (actually Wen). Am I correct in thinking doing treenails but hand would be impractical.
Ted
 
I don't have a drill press for my Dremel (actually Wen). Am I correct in thinking doing treenails but hand would be impractical.
Ted
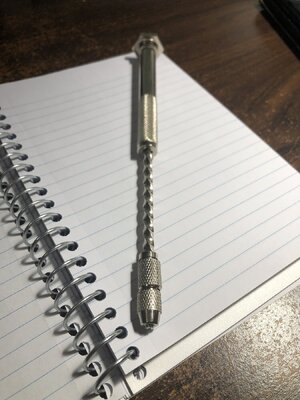
Not at all Ted. In fact, I would say the vast majority of treenail installation is done by hand with a handheld Dremel type tool. Others I know of use a handheld twist drill too, you know where you push down on the drill handle, and it makes itself spin. I chose the drill press because the ribs being held in my hand lent themselves to being done in the drill press.

IMG_3309.jpg
 
Last edited:
Back
Top