Yup, I agree. It's actually kind of surprising a kit of this sophistication would have that type of part included. We go through all the process of putting the frames together then the deck beams, so why not individual strips of decking which is a relatively simple part of the build??To me, printed parts take away from realism.
-

Win a Free Custom Engraved Brass Coin!!!
As a way to introduce our brass coins to the community, we will raffle off a free coin during the month of August. Follow link ABOVE for instructions for entering.
-

PRE-ORDER SHIPS IN SCALE TODAY!
The beloved Ships in Scale Magazine is back and charting a new course for 2026!
Discover new skills, new techniques, and new inspirations in every issue.
NOTE THAT OUR FIRST ISSUE WILL BE JAN/FEB 2026
- Home
- Forums
- Ships of Scale Group Builds and Projects
- Bluenose PoF Group Build
- Bluenose Group Build Logs
You are using an out of date browser. It may not display this or other websites correctly.
You should upgrade or use an alternative browser.
You should upgrade or use an alternative browser.
The Schooner Bluenose 1921, POF Yuanqing Models 1:72 [COMPLETED BUILD]
I did find that an odd mix myself. I can only guess that perhaps it was to cut cost and to simplify assembly. They also dumbed down all of the rigging fittings to use eyes everywhere. Which is why I totally abandoned the kit instructions at the mast stage of the build. If you look at what Peter did, he took it to the next level, and you really are on your own at that point. So it is a matter of what type build you want to achieve, a close representation or a highly detailed representation. Or in Peters @Peter Voogt case, an exact representation, down to all the detail you can achieve at scale!Yup, I agree. It's actually kind of surprising a kit of this sophistication would have that type of part included. We go through all the process of putting the frames together then the deck beams, so why not individual strips of decking which is a relatively simple part of the build??
I (mostly) agree with Dean. (And not just because he mentioned me in his post.I did find that an odd mix myself. I can only guess that perhaps it was to cut cost and to simplify assembly. They also dumbed down all of the rigging fittings to use eyes everywhere. Which is why I totally abandoned the kit instructions at the mast stage of the build. If you look at what Peter did, he took it to the next level, and you really are on your own at that point. So it is a matter of what type build you want to achieve, a close representation or a highly detailed representation. Or in Peters @Peter Voogt case, an exact representation, down to all the detail you can achieve at scale!
A kit is developed with a certain philosophy and for a certain target group. And other considerations such as cost etc.
But a kit does not oblige you to use it only in accordance with the manual. You can use or not use the materials according to the plans or to your own insight and skills.
Unlike with a car, you don't have to get a driver's license, there are no (speed) limits, stop for traffic lights, wearing safety belts etc etc.
And you can see from the reactions whether it is appreciated what you do with with your build.

What do we have a nice hobby in that regard.
Regard, Peter
Hello Peter, well of course a kit doesn't oblige you or require you to use it only in accordance with the manual. What I see as this kit's oddity (sheet decking) in no way diminishes my enthusiasm during its build, or dampens my appreation for Yuanqing for producing in fact it presents a challenge which I happen to embrace. Indeed, we do have a nice hobby in that regard.But a kit does not oblige you to use it only in accordance with the manual.
Good afternoon, to all,
Here is a short update in preparation of the decking phase. First you see the glue down of notched perimeter boards. I had to carefully remove the port side boards from the deck sheet. This will be the fourth model deck I have worked on and the first one with notched perimeter boards which I really like the looks of.
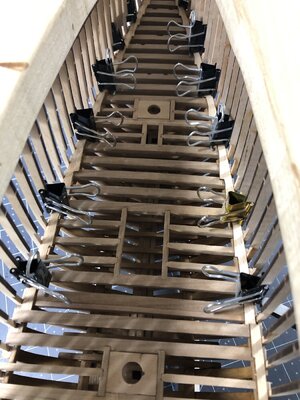
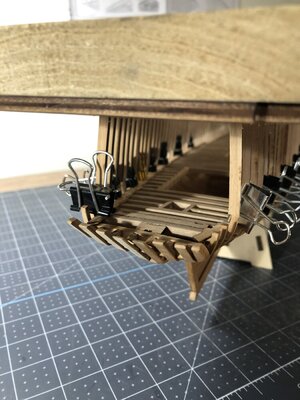
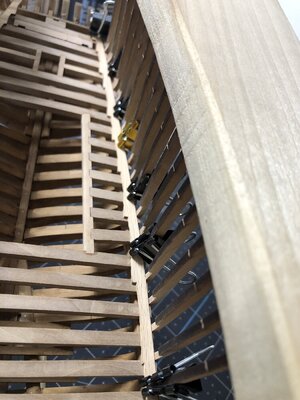
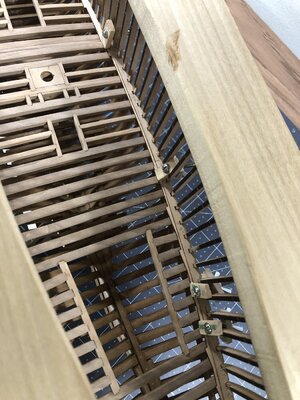
Next you see the dry fit of the waterway boards which I will end up painting white. The notches require a little sanding here and there for a good fit. I am having to do some minor modifications at the stern pieces to make everything fit. I am sure this is due to a non-perfect substructure install but nothing I can't overcome. I had a miscue or two on the transom assembly so I had to dry fit both sides so I can see just how this all goes together.
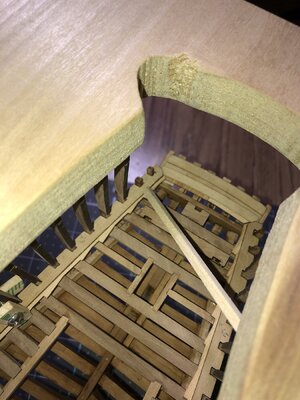
No telling when my new deck boards will arrive so thankfully there is no shortage of other areas to work on.
Thanks for checking in and hope you all have a great Memorial weekend in remembrance of our nations fallen soldiers.
Here is a short update in preparation of the decking phase. First you see the glue down of notched perimeter boards. I had to carefully remove the port side boards from the deck sheet. This will be the fourth model deck I have worked on and the first one with notched perimeter boards which I really like the looks of.


Next you see the dry fit of the waterway boards which I will end up painting white. The notches require a little sanding here and there for a good fit. I am having to do some minor modifications at the stern pieces to make everything fit. I am sure this is due to a non-perfect substructure install but nothing I can't overcome. I had a miscue or two on the transom assembly so I had to dry fit both sides so I can see just how this all goes together.


No telling when my new deck boards will arrive so thankfully there is no shortage of other areas to work on.
Thanks for checking in and hope you all have a great Memorial weekend in remembrance of our nations fallen soldiers.
Pretty impressive the waterway notches fit the frames (even with a bit of tweaking). Not much tolerance in the placement of the frames!
Thanks Paul, I had them in place temporarily during the glue up of the longitudinal stiffener's which helped keep them properly spaced.Pretty impressive the waterway notches fit the frames (even with a bit of tweaking). Not much tolerance in the placement of the frames!
Smarter than the average bear, Daniel!Thanks Paul, I had them in place temporarily during the glue up of the longitudinal stiffener's which helped keep them properly spaced.
Thanks Paul, I must admit there is such a wealth of information from my predecessors on this build which I rely heavily on. To all my friends in the BLUENOSE group, a big thank you!Smarter than the average bear, Daniel!
Good morning Daniel. All looking spot on. The “minor adjustments must be so small as all appears symmetrical and snug fitting. The deck notches on the BN look stunning when done correctly but the margin of error is small between stunning and “Eish”. I know you will pull this off so enjoy. Cheers GrantGood afternoon, to all,
Here is a short update in preparation of the decking phase. First you see the glue down of notched perimeter boards. I had to carefully remove the port side boards from the deck sheet. This will be the fourth model deck I have worked on and the first one with notched perimeter boards which I really like the looks of.
View attachment 376380View attachment 376381View attachment 376382
Next you see the dry fit of the waterway boards which I will end up painting white. The notches require a little sanding here and there for a good fit. I am having to do some minor modifications at the stern pieces to make everything fit. I am sure this is due to a non-perfect substructure install but nothing I can't overcome. I had a miscue or two on the transom assembly so I had to dry fit both sides so I can see just how this all goes together.
View attachment 376383View attachment 376384
No telling when my new deck boards will arrive so thankfully there is no shortage of other areas to work on.
Thanks for checking in and hope you all have a great Memorial weekend in remembrance of our nations fallen soldiers.
Thanks Grant. Now that I have applied the first coat of white paint (off ship), I'll have to lightly hit each side of each notch with a file remove the paint buildup so the boards will fit.Good morning Daniel. All looking spot on. The “minor adjustments must be so small as all appears symmetrical and snug fitting. The deck notches on the BN look stunning when done correctly but the margin of error is small between stunning and “Eish”. I know you will pull this off so enjoy. Cheers Grant
I actually painted mine on the ship because the bulwarks and railing are both white. if you paint the waterway board a dark grey, then painting becomes much more difficult because you have to edge around each notch where the frames are. Also you can use a little filler or glue for any gaps, and then do touch up painting.Thanks Grant. Now that I have applied the first coat of white paint (off ship), I'll have to lightly hit each side of each notch with a file remove the paint buildup so the boards will fit.
Hi Dean. That same thought occurred to me. The only reason my first coat is off ship is because of the thin 1mm edge. I didn't want to try and paint that after I had glued it down and keep it off the natural wood deck. I will be painting all the bulwarks white so any second coats or touch ups shouldn't be a problem.I actually painted mine on the ship because the bulwarks and railing are both white. if you paint the waterway board a dark grey, then painting becomes much more difficult because you have to edge around each notch where the frames are. Also you can use a little filler or glue for any gaps, and then do touch up painting.
Makes sense…work smart, not hard!Hi Dean. That same thought occurred to me. The only reason my first coat is off ship is because of the thin 1mm edge. I didn't want to try and paint that after I had glued it down and keep it off the natural wood deck. I will be painting all the bulwarks white so any second coats or touch ups shouldn't be a problem.
Apologies for the “tardy” question. I just purchased the same kit and was wondering, would it make sense bevel the parts before assembling? It seems that doing so would make it easier to get sharp, crisp, edges for the rabbet.Hi Johan, that explains the really tight fit in the dry fit of the frames onto the keel. Your right, I've already had to do some light sanding in all the frames keel notch. So far, I've had luck on the long bevel at piece 18. The wall behind my worktable (with the hanging plans I don't look at enough) catches most of my bad words.
The Bevel
View attachment 359097
Hello maguro and welcome aboard. As far as the frames go, I would say it's easier to do the beveling after each frame is glued together. you have something more substantial to hold onto. I used a rotary hand grinder to get close then finished by hand. As for piece #18, I had glued it to the other keel pieces then used a rotary hand tool to carefully grid it close then finished it by hand sanding.
While waiting on my deck boards delivery I permanently placed the water boards. I will have some patch and repair in a few locations, but I will wait till I cut the ship out of its framing jig first.
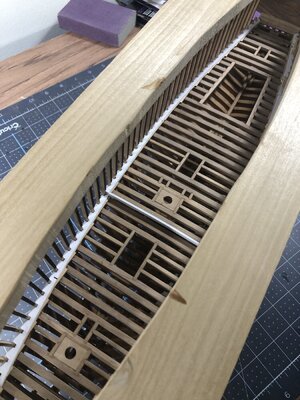
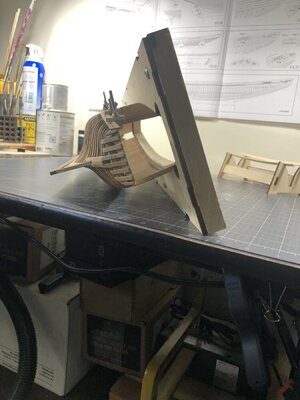
I decided to begin application of the bulwarks while still in the jig as it provides a good stable base on its side.
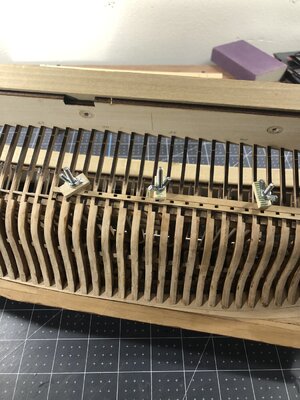
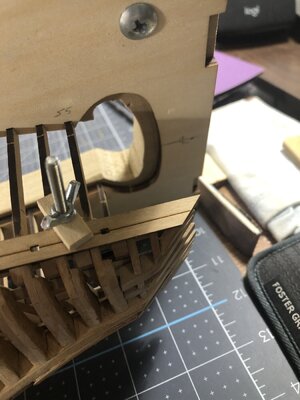
Perfect position for bulwark installs. By the way aligning the bottom of the drain scuppers with the top of the water boards give the corect elevation placement. From there you just have to endo with (in my case) the best average location as close to the plans as possible.
Hope you all enjoy. Happy modeling!

I decided to begin application of the bulwarks while still in the jig as it provides a good stable base on its side.


Perfect position for bulwark installs. By the way aligning the bottom of the drain scuppers with the top of the water boards give the corect elevation placement. From there you just have to endo with (in my case) the best average location as close to the plans as possible.

Hope you all enjoy. Happy modeling!
Thanks Mark, what's interesting to me is I have yet to use any CA glue, it's all PVA at this point and it gives me time to apply and spread it then position it and clamp.Looking good Daniel. Great idea to see what else you can get done (bulwarks in this case) while you have the hull in such a stable position, and those wing-nut clamps you have seem ideal for the job
Looking good Daniel. You can free it from the jig now. 


