It is a Pontos. I will contact the administration to change the title. Very good catch. I don't knoEw why I labeled incorrectly with "Eduard"
-

Win a Free Custom Engraved Brass Coin!!!
As a way to introduce our brass coins to the community, we will raffle off a free coin during the month of August. Follow link ABOVE for instructions for entering.
-

PRE-ORDER SHIPS IN SCALE TODAY!
The beloved Ships in Scale Magazine is back and charting a new course for 2026!
Discover new skills, new techniques, and new inspirations in every issue.
NOTE THAT OUR FIRST ISSUE WILL BE JAN/FEB 2026
You are using an out of date browser. It may not display this or other websites correctly.
You should upgrade or use an alternative browser.
You should upgrade or use an alternative browser.
USS Oliver Hazard Perry FFG 7 by Academy with Pontos 1:350
- Thread starter Will @ Trilogy
- Start date
- Watchers 21
Already modified...It is a Pontos. I will contact the administration to change the title. Very good catch. I don't knoEw why I labeled incorrectly with "Eduard"
Thanks Jim
Alright guys thanks for all the information and with that said let the building begin.
Hull sides dry fit together without any mishaps
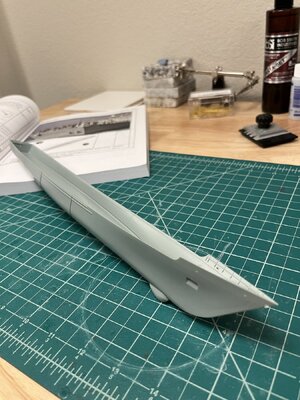
Hull sides glued together revealing a gap along the center. Once the hull has set overnight I'll sand to remove the sharp break at the joint and then fill the gaps with plastic putty.
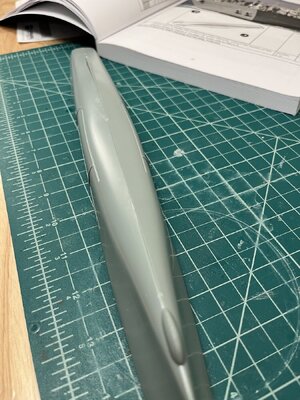
After working on the Hasegawa Akagi the Perry is tiny and the hull sides are slim.
Hull sides dry fit together without any mishaps

Hull sides glued together revealing a gap along the center. Once the hull has set overnight I'll sand to remove the sharp break at the joint and then fill the gaps with plastic putty.

After working on the Hasegawa Akagi the Perry is tiny and the hull sides are slim.
is this book the manual? wow - maybe 200 pages - double-wow
Have fun with the project
Have fun with the project
I placed putty along the hull seams and fill three holes on each side for plastic railings we will be using Pontos pe railings.
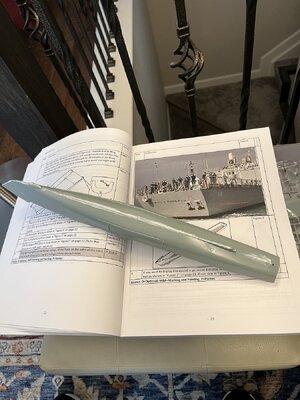
When dry the excess putty will be scraped off and then sanded smooth. Earlier I forgot to photograph the Pontos photo etch so here is a photo.
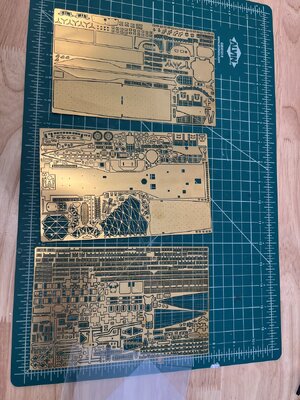
Some of pe appears to be very fragile so much care must be taken.

When dry the excess putty will be scraped off and then sanded smooth. Earlier I forgot to photograph the Pontos photo etch so here is a photo.

Some of pe appears to be very fragile so much care must be taken.
Hallo @Will @ TrilogyUSS Oliver Hazard Perry (FFG-7) was the lead ship of the Oliver Hazard Perry class of guided-missile frigates. The class was originally intended as austere "low" category guided missile frigates (compared with the high capability Spruance class) for General Purpose and Anti-Air convoy escort. In June 2000, the United States delivered one of two surplus Oliver Hazard Perry-class guided missile frigates to the Polish navy; the frigate is the first navy vessel to be fully compatible with NATO. (The above sentences are excerpts from wikipedia and used for introduction to the ship)
With research into the ship I discovered two references that I've found exceptional informative. The first is "FFG-7 Model by Glenn Hoover" a step by step of how he built the Academy model.
View attachment 413592
Next is a sample page from the book
View attachment 413598
I plan to follow this book as described in the above photo. The book is 145 pages so I anticipate the difficulty of not to jump ahead but just follow the steps.
The other reference I found is of a Polish Navy ship. The ORP Kosciuszko F-273 is the former USS Wadsworth FFG-9 and one of two Perry class NATO ships in the Polish Navy.
View attachment 413603
The booklet is 18 pages of photos and drawings. Below is a sample of a booklet page.
View attachment 413604
View attachment 413612
Now the kit. Academy model of the frigate with the addition of Eduard photo etch and packaged and sold by Eduard #38019F1 Advanced.
View attachment 413607
The basic kit seems fairly simple after the IJN Akagi by Hasegawa
View attachment 413605
That being said it is now on to the photo etch with 3 sheets of etch and a sheet of dry rub another of decals
View attachment 413608View attachment 413609View attachment 413610
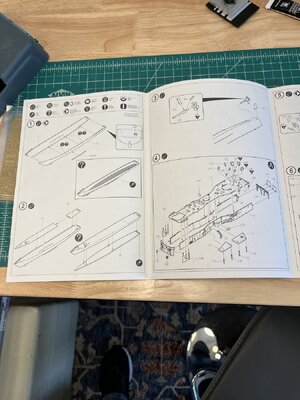
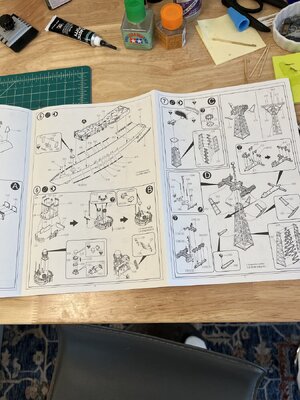
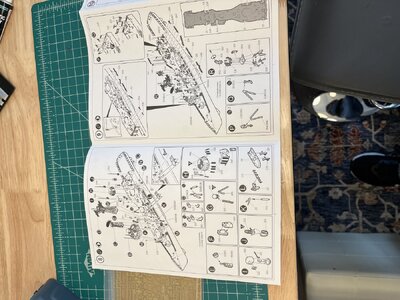
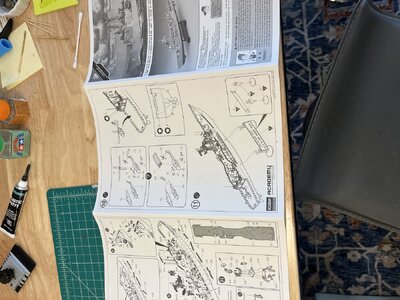
I built the Academy USS Indianapolis and didn't know why Academy vague instructions would be any better with this kit and with the Eduard PE it is even more vague.View attachment 413613View attachment 413614
A few closeups of the instructions showing the detail of the photo etch. What appeared to be a rather simple kit has now what looks to be a challenging model.
View attachment 413615View attachment 413616
Not sure of the timing to start this project with the holidays fast approaching but maybe I can squeak in some time.
we wish you all the BEST and a HAPPY BIRTHDAY

Happy Birthday, Will! 

Very best wishes on your birthday Will. Late in the day here but I hope your day was thoroughly enjoyable.
Thank you for the wishes Jim, Roger, Uwe and all the others it is great to be in this wonderful family of modelers.
With hull seam sealed and sanded it's ready for primer and paint. I learned a method of multicolor hull painting from a youtube video building the USS Indianapolis. The first step is painting the black in the area where the boot topping will be located. On the Academy kit there were two faint lines indicating the boot topping. There faint parallel lines were 3mm wide so using a 3mm making tape the area was taped off. The second step was to tape the area to be grey.
I forgot to take a picture of the boot topping taping but here is grey taped
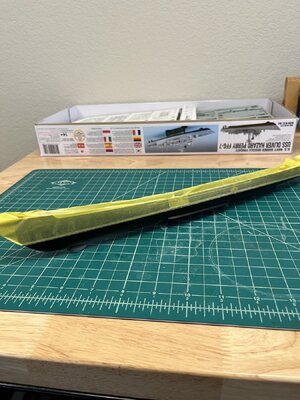
As you can see I painted the black much larger than required insuring the boot topping area painted.
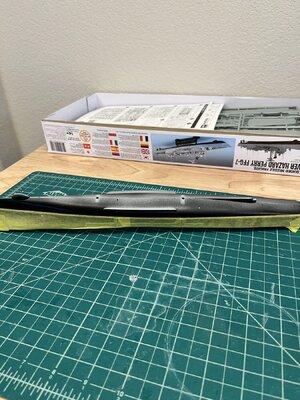
Paint the red for the hull bottom
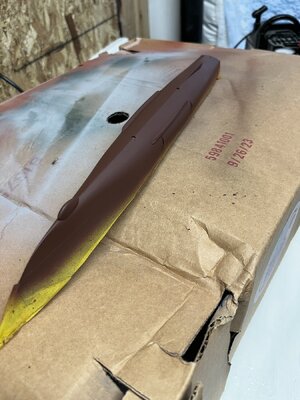
Next remove the tape and then tape the tape exposing the grey area and then tape the red. You'll notice that I've left the boot topping taped and placeing tape on top. This method ensures that the boot topping stays intact.
Grey are painted
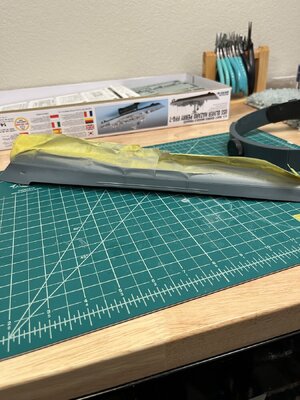
When dry remove the tape exposing the hull colors.
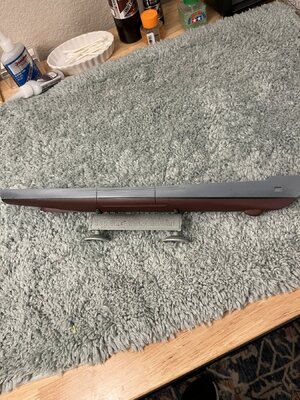
The hull is now ready for a clear gloss covering preparing for decal placement.
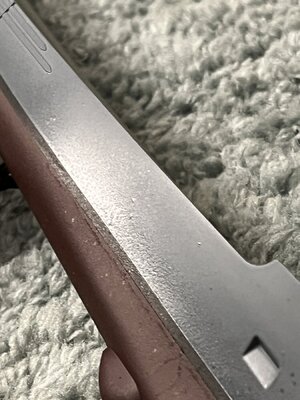
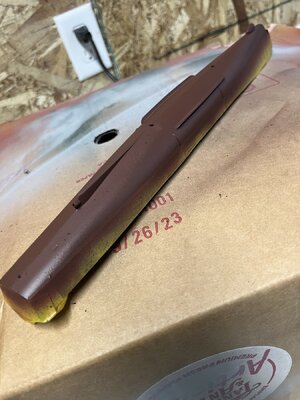
I forgot to take a picture of the boot topping taping but here is grey taped

As you can see I painted the black much larger than required insuring the boot topping area painted.

Paint the red for the hull bottom

Next remove the tape and then tape the tape exposing the grey area and then tape the red. You'll notice that I've left the boot topping taped and placeing tape on top. This method ensures that the boot topping stays intact.
Grey are painted

When dry remove the tape exposing the hull colors.

The hull is now ready for a clear gloss covering preparing for decal placement.


The last two photos were too be in this post where I explained my oops in the painting. After the paint dried I sanded the blemished area and taped and repainted with better results.
Best of luck with the PE. Looks extremely intricate and eye dazzling.USS Oliver Hazard Perry (FFG-7) was the lead ship of the Oliver Hazard Perry class of guided-missile frigates. The class was originally intended as austere "low" category guided missile frigates (compared with the high capability Spruance class) for General Purpose and Anti-Air convoy escort. In June 2000, the United States delivered one of two surplus Oliver Hazard Perry-class guided missile frigates to the Polish navy; the frigate is the first navy vessel to be fully compatible with NATO. (The above sentences are excerpts from wikipedia and used for introduction to the ship)
With research into the ship I discovered two references that I've found exceptional informative. The first is "FFG-7 Model by Glenn Hoover" a step by step of how he built the Academy model.
View attachment 413592
Next is a sample page from the book
View attachment 413598
I plan to follow this book as described in the above photo. The book is 145 pages so I anticipate the difficulty of not to jump ahead but just follow the steps.
The other reference I found is of a Polish Navy ship. The ORP Kosciuszko F-273 is the former USS Wadsworth FFG-9 and one of two Perry class NATO ships in the Polish Navy.
View attachment 413603
The booklet is 18 pages of photos and drawings. Below is a sample of a booklet page.
View attachment 413604
View attachment 413612
Now the kit. Academy model of the frigate with the addition of Eduard photo etch and packaged and sold by Eduard #38019F1 Advanced.
View attachment 413607
The basic kit seems fairly simple after the IJN Akagi by Hasegawa
View attachment 413605
That being said it is now on to the photo etch with 3 sheets of etch and a sheet of dry rub another of decals
View attachment 413608View attachment 413609View attachment 413610
I built the Academy USS Indianapolis and didn't know why Academy vague instructions would be any better with this kit and with the Eduard PE it is even more vague.View attachment 413613View attachment 413614
A few closeups of the instructions showing the detail of the photo etch. What appeared to be a rather simple kit has now what looks to be a challenging model.
View attachment 413615View attachment 413616
Not sure of the timing to start this project with the holidays fast approaching but maybe I can squeak in some time.
Thanks for the reminder David. The model has an offset hole for the rudder and 24" in 1/350 makes the rudder location appear as if you misplaced the rudder. And again thanks and good to hear from you.
Yes the photo etch is going to be challenging. Thanks for your comments
Nice methodology with the hull painting Will. Appears to have worked a charm.The last two photos were too be in this post where I explained my oops in the painting. After the paint dried I sanded the blemished area and taped and repainted with better results.
With the hull painting complete and drying it's time to start with the photo etch decking per the book. First this is to wash the PE removing the residual grease and containments. Borrowing the wife's dessert tray and filling with dish detergent and warm water letting the PE soak for an hour.
Soaking in a floral fiberglass tray

Rinse completely and set aside to dry.
Another great idea came from the book. How many of you have damaged or lost decal slide images? I have and particularly on the Akagi deck and looking closely you can see several pieces aligned. In some cases not so good. So the fix to this is simple. Take the sheet of decal and scan them onto a memory stick so when you loose or damage just print on a decal sheet for a new image. I found decal image sheets made to be used on a inkjet printer.
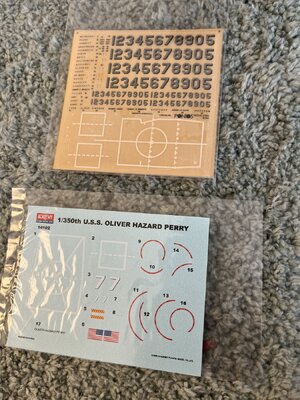
With this done I fell safer handling all the small long pieces.
The deck had holes for plastic railing and since I using PE railings the holes had to be filled.
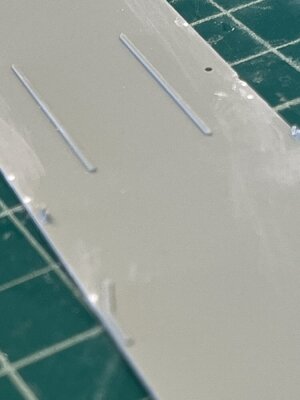
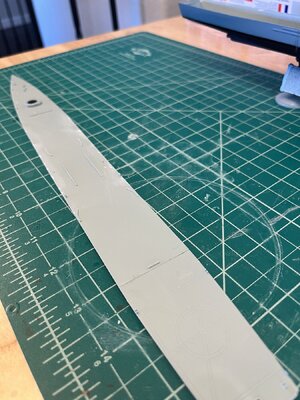
Next is putting the deck pieces together which was a simple matter of sufficient glue and proper alignment.
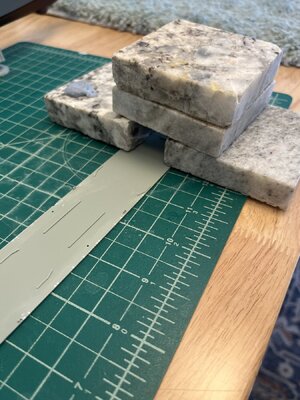
Once glued I used the 3" square granite samples for weight to hold the deck flat.
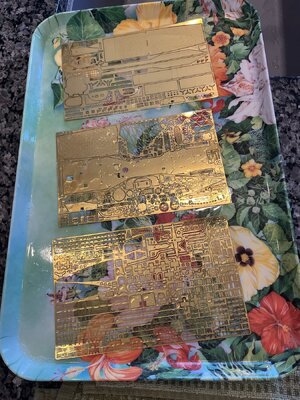
Soaking in a floral fiberglass tray

Rinse completely and set aside to dry.
Another great idea came from the book. How many of you have damaged or lost decal slide images? I have and particularly on the Akagi deck and looking closely you can see several pieces aligned. In some cases not so good. So the fix to this is simple. Take the sheet of decal and scan them onto a memory stick so when you loose or damage just print on a decal sheet for a new image. I found decal image sheets made to be used on a inkjet printer.

With this done I fell safer handling all the small long pieces.
The deck had holes for plastic railing and since I using PE railings the holes had to be filled.

Next is putting the deck pieces together which was a simple matter of sufficient glue and proper alignment.

Once glued I used the 3" square granite samples for weight to hold the deck flat.


