USS Oliver Hazard Perry FFG 7 by Academy with Pontos 1:350

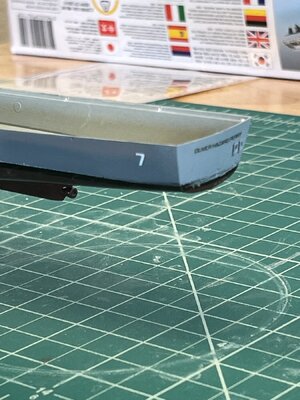
A short report as progress is slowing due to waiting for paint to dry. Hull is painted and per the instructions a clear gloss coat was applied prior to placing the decals. I've never used a gloss clear coat on models but it really does bring the colors into a vibrant shade. A few decals applied and then when dry another clear gloss coat for protection.
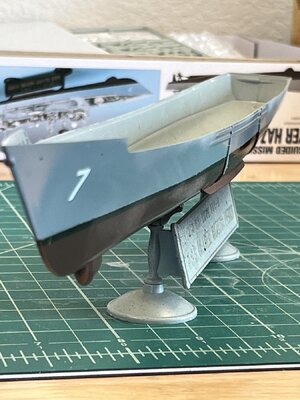
IMG_1468.jpegIMG_1467.jpeg
Next some touchup after the decals dry and before the next clear coat.
 
so that the prop shaft once the prop is removed can be removed/replaced without removing the rudder.
 
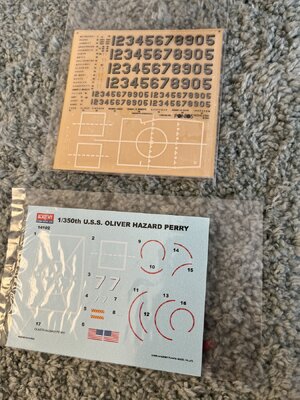
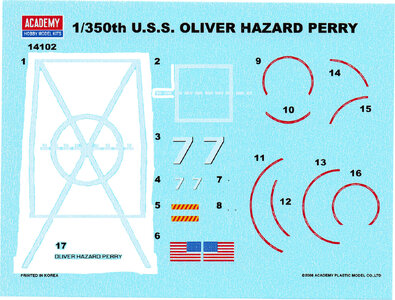
As I said in an earlier post that it was suggested to scan the decal sheet for future use. Well while adding the helipad landing lines the decal was broken. The long legs were separate from the body and became very unmanageable. So I now had to learn how to make a decal from a scanned image. While learning I felt I could take time to start the PE on the foredeck.
Clean the PE fret with lacquer thinner
Apply a thin coat of Mr Surface 1200 actually two thin coats
Spray two thin coats of Tamiya sky grey paint
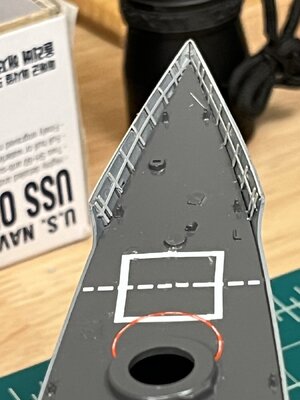
The forward rail consisted on three pieces one on each side for the stiffening ribs and the third no top of the rail. The top was in the shape of a "V".
Here's the finished ribs and topping photo
IMG_1475.jpeg
The book said to paint the insides of the foredeck the same grey as the hull top and as you can see the sky grey is lighter than the hull grey. I will has to carefully paint the inside to to match the PE sky grey. I'll paint the PE and a small scratch before going forward.
 
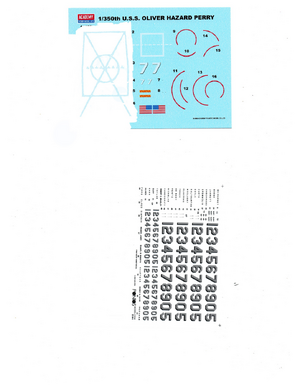
Now on to making a decal for the helipad. When I scanned the decal sheet it copied the blue back sheet underneath the clear decal.
IMG_1466.jpeg
Now the problem is how to make the blue clear. My daughter is getting married on Nov 2 and trying to decide on a wedding dress. While she was here I saw her combining photos of dresses and vails, but what was important to me was the app she was using on her iPad. After she went back to Phoenix I asked her twin what app was she using. Procreate. Down loaded the app and immediately was lost. In comes the twin I'll help you Dad. How wonderful to have this resource for me to draw upon. Together we downloaded the scanned image and started. Using the eraser function we started removing the blue. I didn't mention how tedious this was but not long into it she left saying let me know if you need help. The beauty of the app is the eraser can be from a dot to a large dot so using the small do drawing the line edges and the erase last function and two days I think I've got it.
Image.png
Now to cut it out and have a go at it. But wait make another copy just in case.
 
i use the eraser in the Adobe Elements 2 to cleanup over 140 sets of Booklet of General Plans of US ships i have saved on my computer. basically removing the background so that it is white leaving the ship object alone & easier to see. i work between 100 & 400 percent resolution so the object lines are cleaner.
 
Thanks for the info. I wonder how successful it was.

The paint is nice and clean. You did well with the scanning and cleaning. A trick that sometimes works, say to scan newsprint which usually bleeds the other side text through, is to cover the back with black. Another thing (isn't great to get advice after you've done all the hard work?) is to scan in both color and black and white (not grayscale but pure black or white) and combine the parts you absolutely need in color. There's still clean up, but it can save you. But you did it!
 
can you scan the unedited drawing so it would be megabytes in size not kilobytes so i edit that drawing for you. don't blame for not happy with yours once i saw it.
 
I have the original scan in b&w and color the file size is 3.9mb. Are you volunteering to try making it better and if so please send me a pm with you email I would love to have your assistance.
 
what colors are the supposed white lines? already sent my email address in the pm you started yesterday. here is what i have done yesterday.

ffg7 heli-pad decal.jpg
 
what colors are the supposed white lines? already sent my email address in the pm you started yesterday. here is what i have done yesterday.

View attachment 429420
Your cleanup looks much better than my attempt. Great Job
The lines are white when I slide the decal off the blue backing paper. I've already placed the name and the square pattern on the foredeck. So now the problem of blue lines which were bled through the white decal lines is how to get back to white lines. When I changed the blue lines to white they became invisible against the white background of the erased area. Hope this explains what the problem is as I know it is confusing.
 
Looking good. And excellent you scanned big, it's always easy to get rid of size r detail, impossible to get it back! Looks like you have great help.
 
Back
Top