WOW! Looks Great! It also looks like a lot of work and money, those Pronto kits are close to $300, ouch!
-

Win a Free Custom Engraved Brass Coin!!!
As a way to introduce our brass coins to the community, we will raffle off a free coin during the month of August. Follow link ABOVE for instructions for entering.
-

PRE-ORDER SHIPS IN SCALE TODAY!
The beloved Ships in Scale Magazine is back and charting a new course for 2026!
Discover new skills, new techniques, and new inspirations in every issue.
NOTE THAT OUR FIRST ISSUE WILL BE JAN/FEB 2026
You are using an out of date browser. It may not display this or other websites correctly.
You should upgrade or use an alternative browser.
You should upgrade or use an alternative browser.
USS Oliver Hazard Perry FFG 7 by Academy with Pontos 1:350
- Thread starter Will @ Trilogy
- Start date
- Watchers 21
Thanks Shane. I got my Academy/Prontos on eBay. I just bid and waited for the results and saved some $$$
Very nice!
Big improvement with small additions. Superstructure was glued to the main deck and as the book pointed out there was a small gap between the superstructure and main deck. I used the plastic cement to attach the parts but prior to glueing a small bead of thick ca glue was laid on the inside corner and pressed to fill gap when placed. Let the boat sit over night. Placed the decals after gym and lunch completing this step.
A few photos of decals
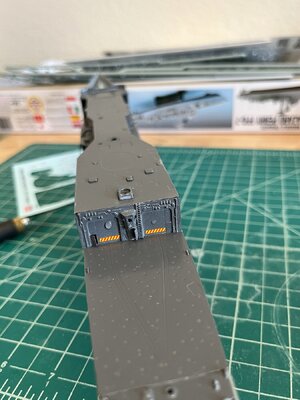
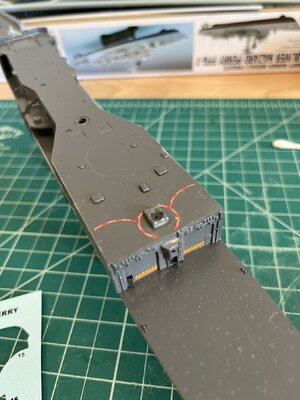
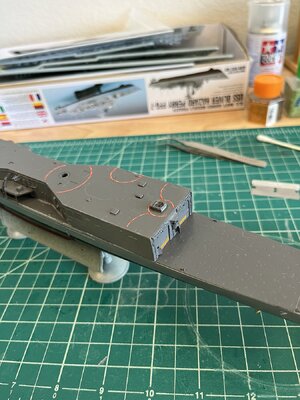
Next is adding a few small model parts and then on to more PE
A few photos of decals


Next is adding a few small model parts and then on to more PE
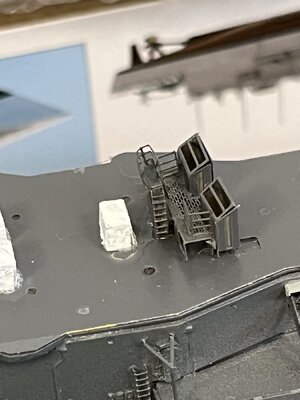
While still on the sprue I primed the small pieces and then painted the with multi coats of thinned flat white paint. The white is glaring on the dark deck but actual photos of a Perry class ship these pieces were white.
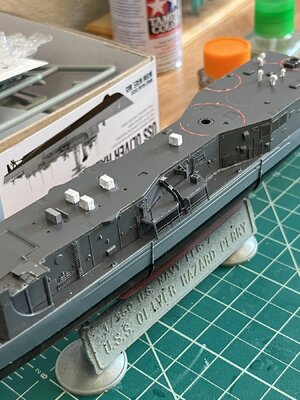
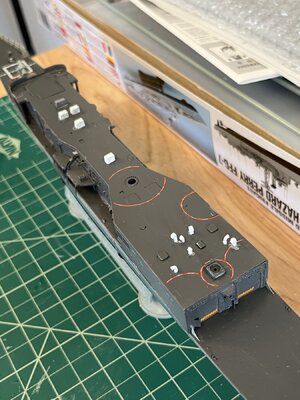
I should have sprayed a light coat of clear flat to stop the glue from dissolving the paint, oh well I can touch up the deck around the pieces.


I should have sprayed a light coat of clear flat to stop the glue from dissolving the paint, oh well I can touch up the deck around the pieces.
I finished the first PE and thought I'd post. It is the signal flag platform and boxes that will sit under the mast. There are 8 pieces of PE to make the assembly. Working with small intricate pieces was very time consuming but not its just painting and glueing to the deck.
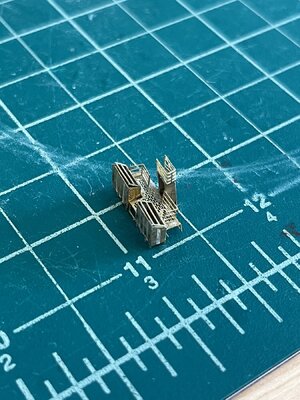
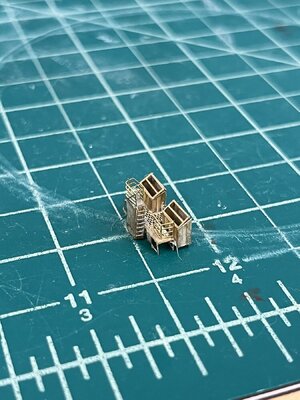

Not sure what the tail is in the photo just lint I think. I quickly and carefully wash before primer and paint.


Not sure what the tail is in the photo just lint I think. I quickly and carefully wash before primer and paint.
- Joined
- Aug 14, 2018
- Messages
- 825
- Points
- 403

Looks right to me. JJ..Will, there appears to be a somewhat major problem with your model as that is the long hull stern & possibly flight you glued on, the Perry was a short hull version not long hull.
I believe that I've built the kit as Oliver Hazard Perry. I'm not sure what you're referring too.
- Joined
- Jan 21, 2023
- Messages
- 372
- Points
- 138

i have to bring my kit box of that model down to my office on the ground floor from my bedroom on the 3rd floor so can do a comparison. the decal is in the mail at 10:15am today. it is inside a folded envolope inside the mail envolope. give it a week or so to get to you.
Thanks David for the decal. My flight deck (helipad) is one piece I believe what your seeing is the PE helipad which appears to be two pieces of deck.
- Joined
- Jan 21, 2023
- Messages
- 372
- Points
- 138

are you doing the long hull or short hull as you mention doing long hull in this link? https://shipsofscale.com/sosforums/...y-academy-with-pontos-1-350.13145/post-347267
Good catch!!! Must have been a brain fart. To end confusion I am building the short version. (i.e. Oliver Hazard Perry)
- Joined
- Jan 21, 2023
- Messages
- 372
- Points
- 138

what are you going to do about the kit's helicopters as they are wrong for the Perry as they are Sikorsky SH-60/MH-60 Seahawk when they should be Kaman SH-2 Seasprite?
Helicopter: 1 - SH-2 LAMPS Helicopter http://www.navsource.org/archives/07/0707.htm
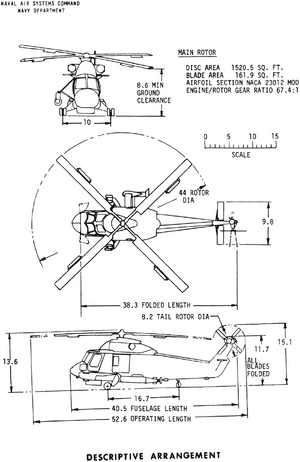
Helicopter: 1 - SH-2 LAMPS Helicopter http://www.navsource.org/archives/07/0707.htm

I have so much todo that I haven't given the helicopter a thought. Thanks for your insight.
Started the main deck railings with the port and starboard side completed up to the helipad deck. I'm waiting for the decal before these railing as they are a little more completed and the decal is very fragile so a clear deck is a must. Completed the superstructure deck furniture along with touching the paint smears.
Not very exciting photos but here are the railing upper deck photos
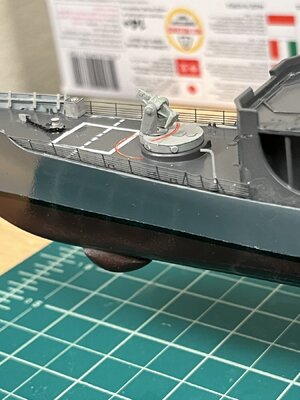
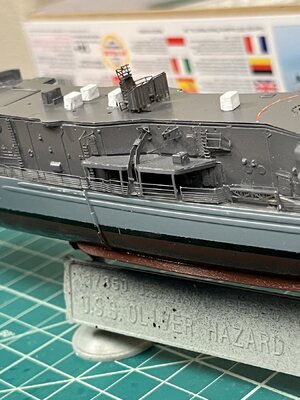
Not very exciting photos but here are the railing upper deck photos


Completed the bridge structure along with ALL the PE. This was a complicated assembly and very tedious.
Modifying the sides of the bridge by removing almost half making room for the PE.
Remove all the raised moulded parts of the base and sanding smooth
Then glueing the sides and aft pieces to the base.
While drying fold up the forward PE with windows
Glue the windows to the base and sides
Fold up the whip antenna structure, a ladder, and two boxes
Fold the octogonal base turn over and fold and glue the octagonal railing
mount the octogonal structure on top of where the round plastic had been
glue the boxes alongside the octogon structures
fold up the CAS tower, add the tip, fold railing and glue the CAS dome
fold and add the bridge to railing
Glue it all together and whoopie
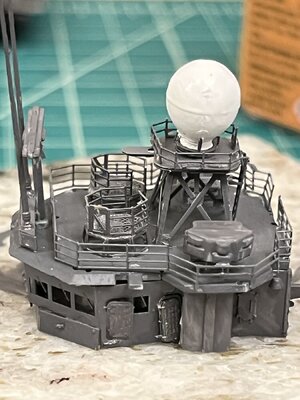
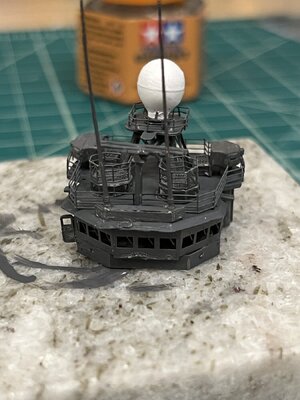
Now a couple sitting on the deck to be glued at a latter step
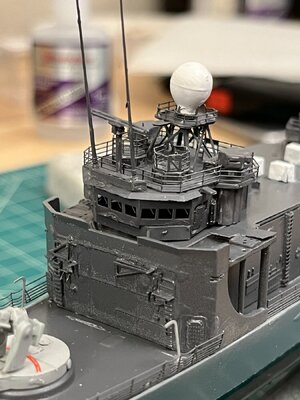
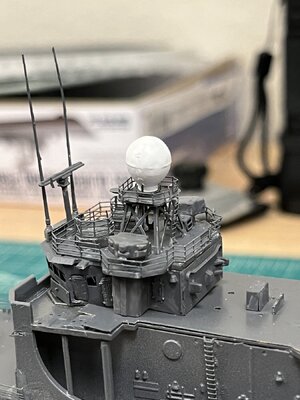
Modifying the sides of the bridge by removing almost half making room for the PE.
Remove all the raised moulded parts of the base and sanding smooth
Then glueing the sides and aft pieces to the base.
While drying fold up the forward PE with windows
Glue the windows to the base and sides
Fold up the whip antenna structure, a ladder, and two boxes
Fold the octogonal base turn over and fold and glue the octagonal railing
mount the octogonal structure on top of where the round plastic had been
glue the boxes alongside the octogon structures
fold up the CAS tower, add the tip, fold railing and glue the CAS dome
fold and add the bridge to railing
Glue it all together and whoopie


Now a couple sitting on the deck to be glued at a latter step


