-

Win a Free Custom Engraved Brass Coin!!!
As a way to introduce our brass coins to the community, we will raffle off a free coin during the month of August. Follow link ABOVE for instructions for entering.
-

PRE-ORDER SHIPS IN SCALE TODAY!
The beloved Ships in Scale Magazine is back and charting a new course for 2026!
Discover new skills, new techniques, and new inspirations in every issue.
NOTE THAT OUR FIRST ISSUE WILL BE JAN/FEB 2026
You are using an out of date browser. It may not display this or other websites correctly.
You should upgrade or use an alternative browser.
You should upgrade or use an alternative browser.
Vasa - 1:65 DeAgostini [COMPLETED BUILD]
- Thread starter dockattner
- Start date
- Watchers 148
True story. We spend more on coffee each day at the cafe down on the beach…and have nothing to show for itThat’s a very nice case Paul. Expensive, yes, but well worth the money.
Now, if you spread the cost over the time to build your superb Vasa:
$500US over 26 months $19.23 a month or roughly $4.72 a week or 67c a day - feel better now?.
Good morning Paul. A high quality Vasa needs a high quality case. Money well spent. Under pressure now- don’t mess this up- no redo’s here.Indeed. The cost was breathtaking (north of $500 US) for 1/4" (the case is roughly 20" by 48"). I think 3/8" would have been a better choice but that was a special order for the glass shop with unknown delivery date and additional cost (I didn't ask because when they told me the cost of the 1/4" I was no longer able to speak coherently).
I also have a piece of edge-glued oak forming the base (also oddly expensive). I cut a rabbet into the edge of that wood panel to receive the plexi. I think a routed slot would have been better but I doubted my ability to work at such precise tolerances. I gave myself about 1/8" slop in the rabbet and that worked out very well.
My goal is to make the side of the plexiglass box removable (as it sits on the table it would not be possible to lift the box over the top of the ship without running into the overhead beams). To that end I will be adding trim pieces around the edges/corners of the case - and perhaps also along the bottom. I have an idea in my head - just not sure if it can be realized. Stay tuned...
 . Cheers Grant
C'mon Grant! Redo's are essential in scratch building! They allow you to make something better the second time. Bashing is 100% redo's.Good morning Paul. A high quality Vasa needs a high quality case. Money well spent. Under pressure now- don’t mess this up- no redo’s here.. Cheers Grant
All kidding aside, redo's, despite destroying our mood, wrecking out confidence, and costing so much time and money to correct, also have a silver lining: they give us experience. And that, ladies and gentlemen, is the silver lining that makes us better modelers. (BUT IT REALLY SUCKS TO HEAR THAT SICKENING *CRUNCH* SOUND! ARRRRrrrr!!!  )
)
- Joined
- Sep 3, 2021
- Messages
- 5,199
- Points
- 738

I had a colleague once, who, with the same reasoning, justified the purchase of his Audi A6...That’s a very nice case Paul. Expensive, yes, but well worth the money.
Now, if you spread the cost over the time to build your superb Vasa:
$500US over 26 months $19.23 a month or roughly $4.72 a week or 67c a day - feel better now?.
(Slightly different numbers though.)
When you have expensive hobbies with a small budget, you HAVE to be able to do those mental gymnastics to avoid the fact that you set the priority of the hobby above most other costs demanding your attention. But hen again, if you CAN afford it, (here's another excuse), you only live once...I had a colleague once, who, with the same reasoning, justified the purchase of his Audi A6...
(Slightly different numbers though.)
- Joined
- Sep 3, 2021
- Messages
- 5,199
- Points
- 738

True statement, plus it takes my attention away a bit from the all-day "news" being dumped on us.you only live once...
- Joined
- Oct 17, 2020
- Messages
- 1,691
- Points
- 488

Hello, I've always done everything I thought I could with the ifs and nevers of my hobby, I have a good amount of equipment and a wealth of books and projectsTrue statement, plus it takes my attention away a bit from the all-day "news" being dumped on us.
- Joined
- Jan 9, 2020
- Messages
- 10,566
- Points
- 938

What a beautiful display case, Paul. My honest opinion is that the cost of the showcase is irrelevant. When it is going to house a model that you have poured your heart and soul into, and which is for all practical purposes a work of art, then it deserves the best!
Nice display Paul, only a pitty to put such a nice ship in a display case.
As I recall you prefer to leave your ships open to the air with some intermittent cleaning...Nice display Paul, only a pitty to put such a nice ship in a display case.
In my case I have grandchildren over at my house with curious eyes (and hands) to consider.
I fully understand.As I recall you prefer to leave your ships open to the air with some intermittent cleaning...
In my case I have grandchildren over at my house with curious eyes (and hands) to consider.
Of course I'm impressed with the ship, and the case, but the house! I may walk over there, after all.Trying her future quarters on for size...
View attachment 342848
View attachment 342847
View attachment 342849
What a strange and wonderful direction this new hobby has taken me...
I think I picked up along the way that you are a skilled woodworker - is that right Marc? You have mentioned making things (tables/furniture) in the past: avocation or vocation?Of course I'm impressed with the ship, and the case, but the house! I may walk over there, after all.
Anyway, my house is a true timber frame built by a company out your way: Bensen Woodworking Co (Bensenwood) of Walpole, NH. Remember Norm Abram from This Old House? They built his family room addition. My house used to be on their website, but I just looked and it's been taken down so I can't show you... Come on over. I'll have a pinot open, and you can teach me how to read plans for making a ship model...
Last edited:
Hi Paul, wonderful work and experiments your doing I'm learning quite a bit and hopefully will remember it all or at least some of it. You mention 'Mod Podge", is that the "Mod Podge Photo transfer" version?? - cheers.So, I had to pump the brakes on completing my Vasa.
First, I've ordered a few bits and baubles that I might add to my ship (or not), and several of these are being held hostage by US customs.
Next, I decided that I'd have a go at fabricating my own case. Of course, this entails some woodworking along with ordering panels of plexiglass from our local glass supply shop. Well, after several weeks waiting for my (shockingly expensive) plexiglass, one of the pieces was cut wrong... I just picked up the replacement panel this morning after another delay.
Finally, I've spent (translation: wasted) hours and hours researching how to make flags, ordering stuff I might need, and then experimenting/testing various materials and techniques.
At first, I thought I had struck gold. I located 1:72 Vasa flags on the secondary market - close enough to my scale to use. They were reported to be printed on silk - PERFECT! Well, they are printed on some sort of polyester (plastic) based textile that cannot be shaped. Plus, the color (the blue) wasn't a very accurate representation of the Swedish flag:
View attachment 342140
I then decided to make my own. First, taking a tip from @Maarten I used a product called Mod Podge to transfer an image of a flag onto the fabric I used for my sails. It's fairly simple. You print out your flag onto paper using a laser printer (not an inkjet printer) - coat the image with Mod Podge - press into your fabric (smoothing it out carefully) and allowing it to dry for 24 hours. You then soak down the paper with water and rub it off - the image remains on the fabric. I ran into two issues. First, I couldn't get all the paper residue off the image (maybe I just needed to try harder), but I also realized that I would need to do the transfer on the other side of the fabric as well. Things started to get a bit thick...
View attachment 342143
Not a total fail, but not quite what I was looking for.
Next, I order Silkspan. Turns out Silkspan comes in several thickness options (light, medium, heavy). I have been experimenting with both light and medium. Here is the technique. You use your printer to print the flag onto the Silkspan. Of course, the Silkspan is too flimsy to run through your printer on its own, so you need to tape it to a piece of paper first. This works remarkably well with both inkjet and laser printers.
Here is a trial using an inkjet printer:
View attachment 342141
Not bad. The image even bleeds through to the other side of the Silkspan - but it doesn't come out as clear as the front side. Here is the back of the two flags above (one is light, and one is medium Silkspan):
View attachment 342142
Here is the same thing using a laser printer (I have now color-corrected the blue).
View attachment 342144
I neglected to take a picture of the back of these - but they are essentially the same as the inkjet versions...
After a bit more research I came across a spray used to 'fix' chalk art when drawn on paper. I'm not exactly sure how it works, but this spray doesn't only sit on the surface - it causes the chalk to meld with the paper in some manner. Well, when I sprayed it on the BACK of these flags it caused the image (ink) to meld deeper into the Silkspan.
Front again:
View attachment 342146
Back:
View attachment 342147
Much better. These are inkjet versions, but it works just as well with laser images.
I printed up a full page of flags on my laser printer. Generously sprayed the back and allowed everything to dry. When I went to retrieve my new flags, I discovered I had 'glued' the Silkspan to the cardboard I was using as a backer. I uttered a mild profanity and gave up for the day. I'll just wait until I work again and print more flags (the laser printer is at my office...).
Here's the spray I used:
View attachment 342148
Stay tuned...
Yes. I used the Mod Podge Photo Transfer version but I'm not certain that was the best choice. The photo version creates a white opaque background so that photos can be transferred onto things (shirts, for example) that are colored. Without the white background the image wouldn't look good. Since I was transferring onto white cloth, I didn't need that white background, and I'm wondering if that added to the thickness issue I ran into. I was going to try regular Mod Podge (@Maarten - what do you use?) but I still would have had to transfer the flag art to both the front and the back of the cloth and I was worried about that...so I ended up with printing onto Silkspan...Hi Paul, wonderful work and experiments your doing I'm learning quite a bit and hopefully will remember it all or at least some of it. You mention 'Mod Podge", is that the "Mod Podge Photo transfer" version?? - cheers.
I really like this image transfer idea. Maarten used it to transfer graphics (scrollwork) and words (ship's name) onto wood and I think that's where the strength of this technique lies. Having a white background would make transferring onto wood look lousy so Maarten must be using the regular Mod Podge (?).
Hi Kirill,Good day,
Paul, Your model looks fantastic! I like it very much!
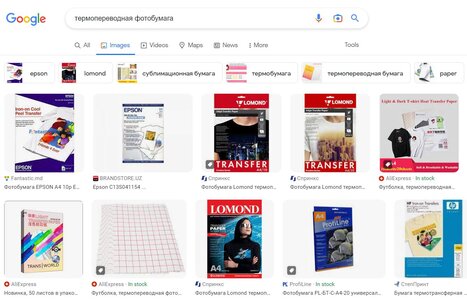
About flags - is this "Mod Podge" same stuff as thermo- transferring photo paper? I used this paper for making my flags.. it could be with white or transparent background...depend on what you need
View attachment 343277
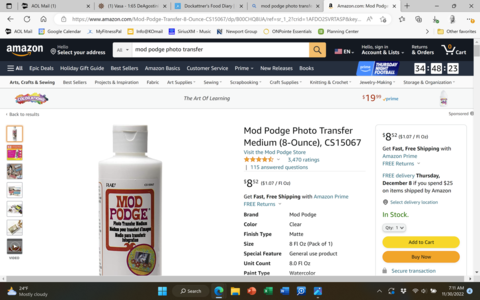
Thank you for your kind review. I used this (creates a white background):

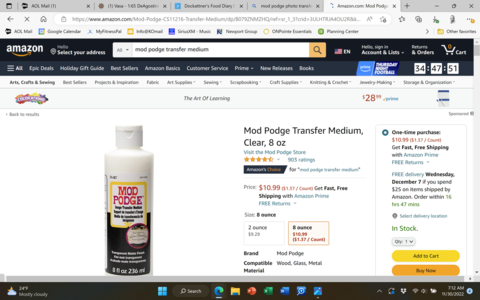
But I think this might also work (without the white background):

Someone else posted about the photo transfer paper and I think that's a great idea as well. I wish I had known about it earlier and I could have included it in my trials!


