Geez I’m blown away. That looks fantastic.Thank you Charlie, Michiel and Bluebeard! I am encouraged to keep pressing on by your kind review of my work.
Cool side by side Kurt!
Also
 to the little guy.
Jan
 |
As a way to introduce our brass coins to the community, we will raffle off a free coin during the month of August. Follow link ABOVE for instructions for entering. |
 |
 |
The beloved Ships in Scale Magazine is back and charting a new course for 2026! Discover new skills, new techniques, and new inspirations in every issue. NOTE THAT OUR FIRST ISSUE WILL BE JAN/FEB 2026 |
 |
Geez I’m blown away. That looks fantastic.Thank you Charlie, Michiel and Bluebeard! I am encouraged to keep pressing on by your kind review of my work.
Cool side by side Kurt!
 to the little guy.
Hi Paul, just perfect.It's been several weeks since I posted a progress report. It's not that I haven't been busy - but what I've been working on is pretty ordinary and I didn't think you would be interested in a blow by blow storyboard.
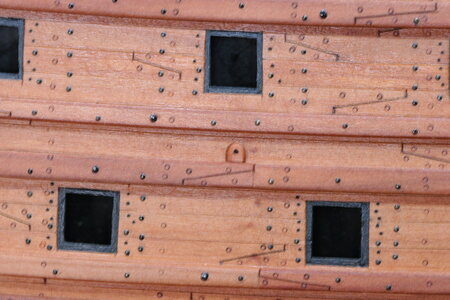
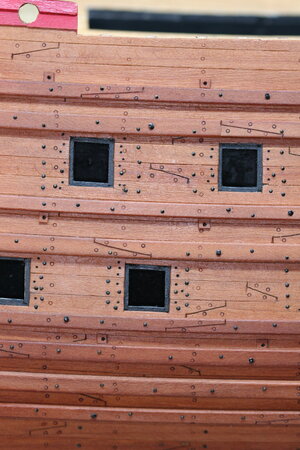
Anyway, once the wales were successfully installed I added faux scarf joints along their run. This was actually harder to do well than cutting real scarf joints like I used on the hull planking. I would still do it the way I did it for the reasons I offered previously - I'm just making a passing observation.
Once the wales were oiled I then set about detailing the hull.
First, I completed treenailing the scarf joints (previously I had only completed the lower portion of the hull - no point in treenailing under the wales or the galleries was my thinking back then...).
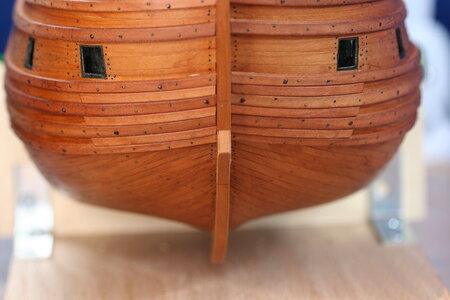
And for the past 10 days (as time allowed) I have been adding tiny nails to represent bolts in the following locations: four at each gun port for the cannon rigging, at the knees of the upper and lower gundecks, at the futtock riders (second riders?) in the region of the orlop deck, and then various bolts along the run of the wales. In total I installed around 1500 tiny nails (give or take a hundred).
But enough chit-chat...I submit the following for your critical review:
View attachment 221824
View attachment 221818
View attachment 221819
View attachment 221820
View attachment 221822
View attachment 221821
These macro images make me cringe - but it is what it is.
More detailing remains: fillers strips between the wales near the bow (I have only seen this on the Vasa but that may simply be a reflection of my naiveté), the mail/package port discussed previously, scuppers, and whatever else I come up with after reviewing more pictures from the Vasa museum.
Oh, I almost forgot the highlight of my week: my grandson turned one! He was born the week COVID was shutting down America in 2020...
View attachment 221823
Thanks for visiting!
Don't know how I missed that - excellent indeed!!!Paul,
Congrats on your grandson's Name Day (I was a big GÖT fan - and read all the books - lol)
PS: I may have missed it - how did you replicate the look of treenails along the hull? - Scarf joints came out
I thought you had a job!A small update...
I placed some 'filler' boards between the wales at the bow of the ship. I'm uncertain what these are for (surf break? splash control?) but they appear on the mother-ship so I returned the favor. I'll add some trenails the next time I have that set up in my shop, as well as some bolts (but I need to blacken more nails first)...
View attachment 222950
I also added some scuppers. On the Wasa these are solid hunks of wood with a channel 'drilled' through the center (sorry about the lousy focus):
View attachment 222940
View attachment 222941
Next up: hatch covers. The ones issued with the kit were unsuitable. At scale they would have been almost 13 inches tall and the holes between the boards would have been nearly 6 inches across - certain to end up snapping the ankle of a barefoot sailor. I found an after-market kit that I hoped would work and made a prototype to see...
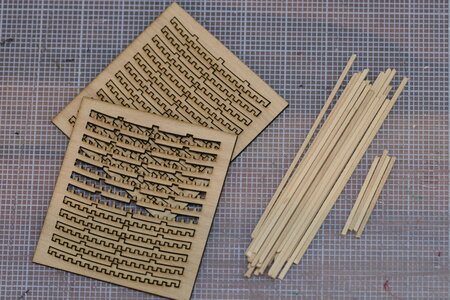
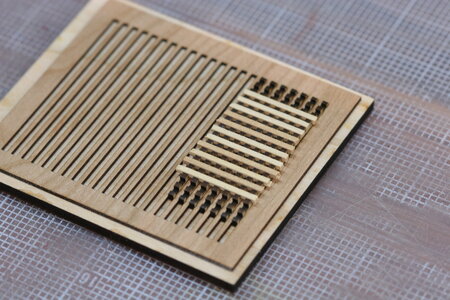
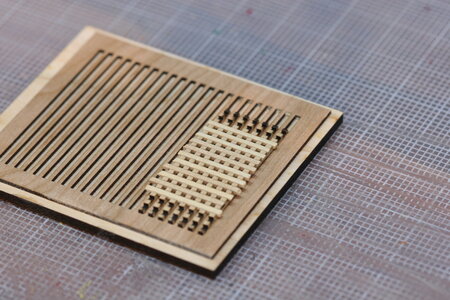
The kit comes with a clever little jig, a laser-etched template, and battens cut to fit snugly into the notches on the template:
View attachment 222942
View attachment 222943
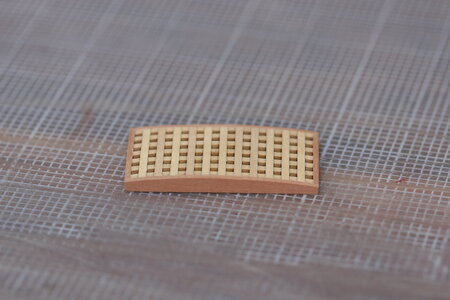
I then carefully sanded the battens down to the camber of the template and removed the laser char...
View attachment 222944
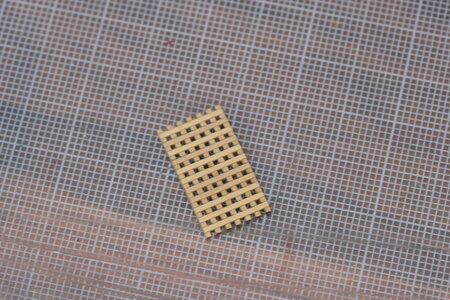
From other build logs I learned about using watered down white glue to get the pieces to bond together - and then trimmed the ends:
View attachment 222945
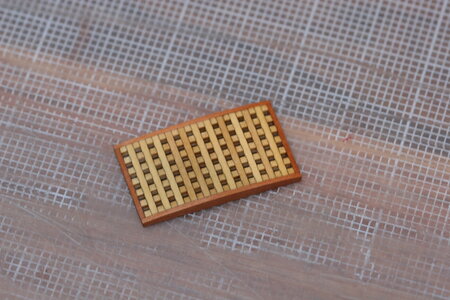
Next, I fabricated a frame for the hatch cover using my precious stock of dimensional pear:
View attachment 222946
View attachment 222947
And a splash of oil to make it pretty:
View attachment 222948
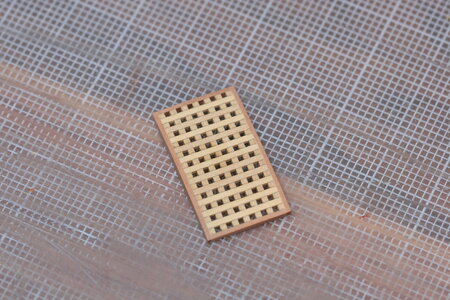
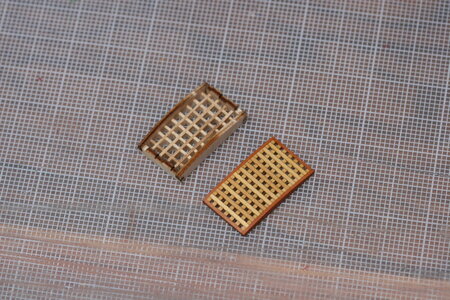
I couldn't be happier with my prototype (now presented next to the kit grating):
View attachment 222949
The downside of liking my prototype is now I have to make a bunch of these little guys so I may be gone for a while!
I continue to be inspired by the work you are all doing on your ships. I enjoy learning from all of you, and appreciate the vicarious fellowship created on the SOS forum.
ONWARD!
He's going to retire and build modelsI thought you had a job!

A small update...
I placed some 'filler' boards between the wales at the bow of the ship. I'm uncertain what these are for (surf break? splash control?) but they appear on the mother-ship so I returned the favor. I'll add some trenails the next time I have that set up in my shop, as well as some bolts (but I need to blacken more nails first)...
View attachment 222950
I also added some scuppers. On the Wasa these are solid hunks of wood with a channel 'drilled' through the center (sorry about the lousy focus):
View attachment 222940
View attachment 222941
Next up: hatch covers. The ones issued with the kit were unsuitable. At scale they would have been almost 13 inches tall and the holes between the boards would have been nearly 6 inches across - certain to end up snapping the ankle of a barefoot sailor. I found an after-market kit that I hoped would work and made a prototype to see...
The kit comes with a clever little jig, a laser-etched template, and battens cut to fit snugly into the notches on the template:
View attachment 222942
View attachment 222943
I then carefully sanded the battens down to the camber of the template and removed the laser char...
View attachment 222944
From other build logs I learned about using watered down white glue to get the pieces to bond together - and then trimmed the ends:
View attachment 222945
Next, I fabricated a frame for the hatch cover using my precious stock of dimensional pear:
View attachment 222946
View attachment 222947
And a splash of oil to make it pretty:
View attachment 222948
I couldn't be happier with my prototype (now presented next to the kit grating):
View attachment 222949
The downside of liking my prototype is now I have to make a bunch of these little guys so I may be gone for a while!
I continue to be inspired by the work you are all doing on your ships. I enjoy learning from all of you, and appreciate the vicarious fellowship created on the SOS forum.
ONWARD!

Hi Bilal, I appreciate your thoughtful comments. I have had my share of failure during this build - but I have also been kindly helped by many members of this forum. Indeed, on several occasions I was pretty much dead in the water and someone spoke up and saved the day. I get in trouble when my knowledge base fails me, but I don't realize it until too late (that is, I don't know what I don't know...). I've developed a keener sense for this over time, and I am spending more time researching things than I did at the beginning of the build (these hatch covers are an example of that). Most important of all, I have learned that the kit instructions have a different target in mind than my goals for this ship so I have largely jettisoned them.Hi Paul
I believe proper planning and knowledge (know-how) is important in scale ship modelling and saves our time.
Somehow I often use try and fail method while building my models. (And I know this is a little bit contradictory)
I try and fail and keep trying and failing only when I'm in a position where I have not acquired the knowledge to complete a process.
That's why I like the way of your obtaining know-how and building your model so organised and neat.
Your Vasa is a piece of beauty. Congrats.
BTW Happy birthday to your lovely grandson.
Bilal
 .
.I'll message you Bill...Hey Paul. I might look at that hatch cover kit for a future build of the Vasa. Could you please let me know where you got it. Thanks Bill
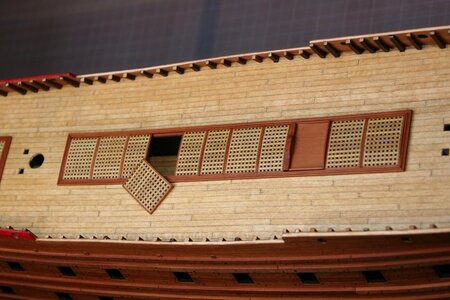
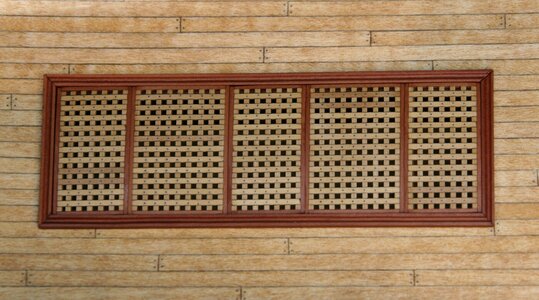
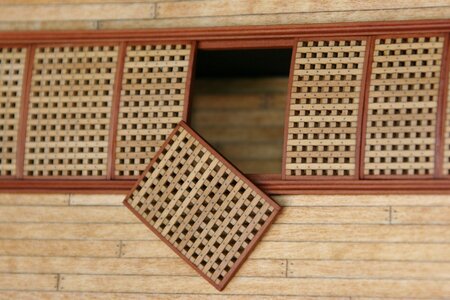
Great work Paul! You continue to surprise me.I thought you were all my friends...but several days ago I was abducted by the owner of a hatch cover/grating factory and not a single one of you came looking for me.
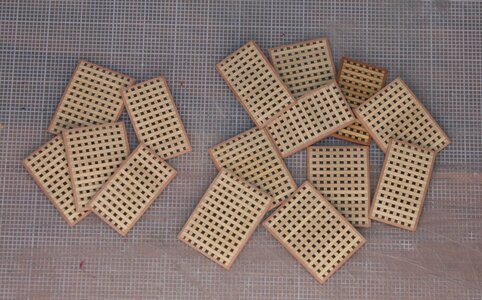
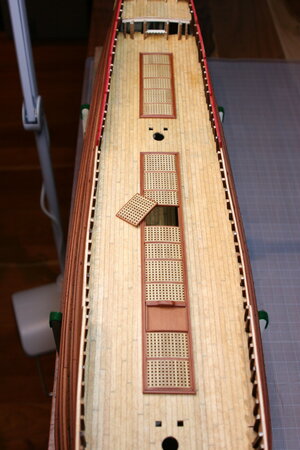
I made the most of my time away by (surprise!) making hatch covers:
View attachment 224026
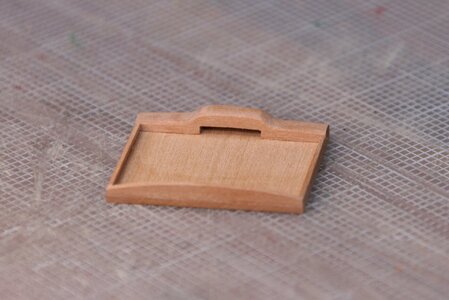
I also made this little platform that will one day host the capstan:
View attachment 224028
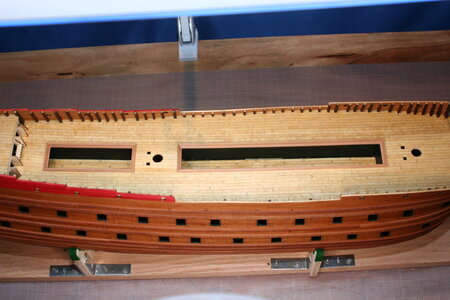
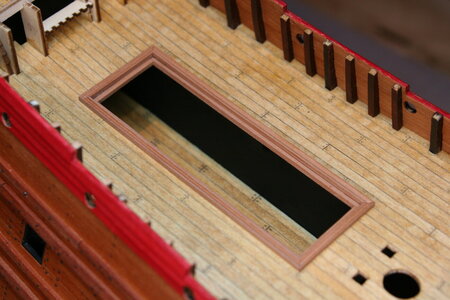
Back on the ship I added a 'shelf' on the inside of the deck openings along with a 'frame' on the deck surface:
View attachment 224029
Here's a closer look. I used a scraping tool to create the frame profile...
View attachment 224030
I then treated the hatch covers, the shelves, and the frames with linseed oil.
View attachment 224031
View attachment 224032
This was a fun little project and I am pleased with the scale and detailing.
View attachment 224033
View attachment 224034
Looking ahead, I'm beginning to realize that without power tools I am going to face some production obstacles. Then again, even if I buy some tools, I frankly lack the knowledge/experience that would make those purchases wise or helpful. Hmm...
As always, thanks for stopping by to see what I have been up to!
...and those hatch covers look fantastically awesome (not a surprise) at least for me! And I recognize the Pear under the Linseed oil, truly magic appearance. The nails are just marks or actual treenails? Looks really realistic!I made the most of my time away by (surprise!) making hatch covers:

Yup. That's my pear all the way from Russia... The nails are just 0.5 lead pencil. They should be paired on a diagonal but on a test piece that was just too much visually at this scale....and those hatch covers look fantastically awesome (not a surprise) at least for me! And I recognize the Pear under the Linseed oil, truly magic appearance. The nails are just marks or actual treenails? Looks really realistic!
