Yes I have seen a lot of discussion on this topic through out some of the forum posts and I am glad that God has granted me an opportunity to have one of the better representations of the Vasa with out too much alteration being needed.You are very right Grant. I think the decision as to which kit to choose is a particularly important one when it comes to ships like the VASA, Victory, SR and ST.
-

Win a Free Custom Engraved Brass Coin!!!
As a way to introduce our brass coins to the community, we will raffle off a free coin during the month of August. Follow link ABOVE for instructions for entering.
-

PRE-ORDER SHIPS IN SCALE TODAY!
The beloved Ships in Scale Magazine is back and charting a new course for 2026!
Discover new skills, new techniques, and new inspirations in every issue.
NOTE THAT OUR FIRST ISSUE WILL BE JAN/FEB 2026
You are using an out of date browser. It may not display this or other websites correctly.
You should upgrade or use an alternative browser.
You should upgrade or use an alternative browser.
Vasa 1:75 - Billing Boats by Robp1025
- Thread starter Robp1025
- Start date
- Watchers 8
-
- Tags
- billing boats vasa
A scale of 1:75 means a 'reduction' from full or real-life dimensions 75 times. So, say a belay pin was 18" long in real life (I actually do not know how long they really are) then you would divide 18 by 75 to get 0.24 inches or a quarter inch long. A 6' tall man would be about 1" tall on your model. There are some items a modeler wishes to show such as nail heads or deck joint sealer which would be so small if you scaled it that you would not really see it so instead, they are made just big enough to see which puts them out of scale but represented still.
Thank you Daniel I appreciate this answer because I can utilize this for most of my other builds as well! Plus who knows maybe I'll put some little men on my ship since I'm going to be doing some micro painting lol.A scale of 1:75 means a 'reduction' from full or real-life dimensions 75 times. So, say a belay pin was 18" long in real life (I actually do not know how long they really are) then you would divide 18 by 75 to get 0.24 inches or a quarter inch long. A 6' tall man would be about 1" tall on your model. There are some items a modeler wishes to show such as nail heads or deck joint sealer which would be so small if you scaled it that you would not really see it so instead, they are made just big enough to see which puts them out of scale but represented still.
Daniel gave the best answer because it is broadly applicable.
Fidelity to scale has been a thing for me so I have spent a lot of time on this subject. Generally speaking - at the scale we are working - most everything we do is at risk for being too large (and to be sure - the accessories that came with your kit are generally too large). The problem then becomes...as we approach an accurate size the items get so small as to be unworkable. For example, the blocks associated with the cannon carriages should probably be 2mm in size. Well, it can be done but good luck. You will need very steady hands and magnification. To that end it is common to simplify the rigging leaving out certain elements like hooks - or just use a breaching rope - or just using larger blocks.
So, now attempting to answer your specific question... You can find wooden belay pins and age-appropriate triangular deadeyes from Crafty Sailor. Look under the 'fittings' tab. I chose to use 8mm belay pins but there are other sizes you might like better. For the deadeyes I used several different sizes as that reflects what was done on the 1:10 museum model. I used 5mm deadeyes at the channel for the fore and main masts, 4mm deadeyes at the channel for the mizzen and the lower tops (fore and main masts). Finally, I used 3mm deadeyes at the bowsprit and upper tops (fore and main). I'll warn you though - these small deadeyes are not easy to work with and might be money wasted. Honestly, I haven't generally seen others changing the sizes of the deadeyes, so I suspect what I did is unnecessary bordering on foolish.
You will find better blocks at DryDock (and actually better deadeyes too, but Zoly doesn't have triangular deadeyes).
I'll add one more bit. Calculating the size of these items can be done and is a good way to be precise - but I'll put in an advertisement for just using what looks right. I use the 1:10 model extensively as a guide to help me visualize the relative size of things. Here is a link to some high-resolution images: https://www.modelships.de/Museums_and_replicas/Vasa-Museet-Stockholm/Photos-Vasa-model.htm. Clicking on the images allows you to zoom.
Hope this helps a bit.
Hello all!! So I have been at work here and painting and doing things I should not be wasting time on but yea so here goes from where we picked up
So first off I did not like how my paint was laying on the wood. Even sanding it down with 400 grit and using gesso I was not getting the flat clean surface I see everyone getting. First goal for today was figure out how the heck you guys do this lol.
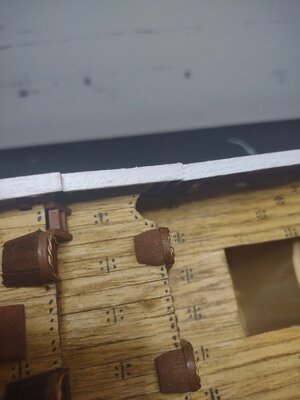
This picture is an example, so I took myself to www.howtheheckiseveryonesomuchbetterthan.com and found nothing there but I did find some info on prepping wood for painting. So doing a 50/50 pva and water mix and some sanding then testing both thinned and not thinned arcylic I have found out how to make a super smooth surface.
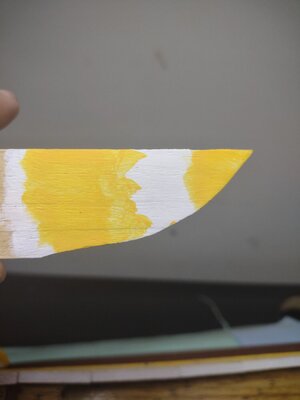
Now that this is out the way onto my fixes for the day. I learned through study and re study of all the wonderful builds that the planking was not finished on this ship....sigh..... So now I started the process of doing the layered planking with 5mm planks and a 1mm overlay to make the staggered effect.
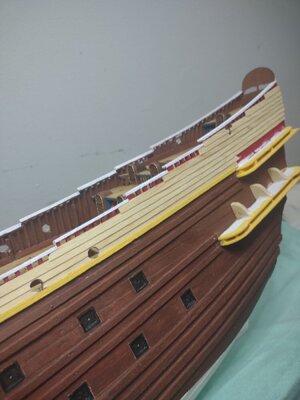
Then I studied pictures again and said something is not right.....so I have come to find out the Billings first flaw is that they do not do a part that I saw on doc's build and also the build of the 1:10 model...there is a piece(idk if you would consider it a wale or a strake or what so it's called a piece for me) that is under the pegs that hold up the first layer of rails. So decided to try and make this. And it came out not bad tbh. So I'm going to be working on painting tomorrow because it's a process to prep the wood before I even get to painting.
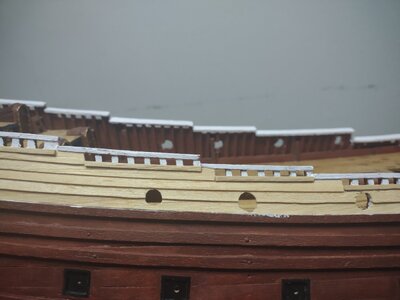
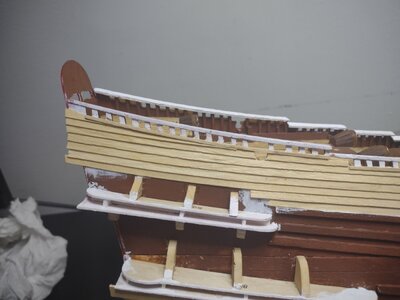
Let me know if you guys have any suggestions and as always have a wonderful night!!
So first off I did not like how my paint was laying on the wood. Even sanding it down with 400 grit and using gesso I was not getting the flat clean surface I see everyone getting. First goal for today was figure out how the heck you guys do this lol.

This picture is an example, so I took myself to www.howtheheckiseveryonesomuchbetterthan.com and found nothing there but I did find some info on prepping wood for painting. So doing a 50/50 pva and water mix and some sanding then testing both thinned and not thinned arcylic I have found out how to make a super smooth surface.

Now that this is out the way onto my fixes for the day. I learned through study and re study of all the wonderful builds that the planking was not finished on this ship....sigh..... So now I started the process of doing the layered planking with 5mm planks and a 1mm overlay to make the staggered effect.

Then I studied pictures again and said something is not right.....so I have come to find out the Billings first flaw is that they do not do a part that I saw on doc's build and also the build of the 1:10 model...there is a piece(idk if you would consider it a wale or a strake or what so it's called a piece for me) that is under the pegs that hold up the first layer of rails. So decided to try and make this. And it came out not bad tbh. So I'm going to be working on painting tomorrow because it's a process to prep the wood before I even get to painting.


Let me know if you guys have any suggestions and as always have a wonderful night!!
When I paint wood on a ship model, I still want it to look like wood, so I use water based paints and thin them so they don’t fill in the wood grain. It takes about 3 coats. You can lightly sand after the first coat as the water in the paint will raise the grain some. By the second coat you should not need to sand anymore. On dense woods, you can usually get away without any sanding between layers of paint.
If you want a smooth surface without wood grain showing, then you want to add a sealer or clear coat first. Then lightly sand and the paint will go on very smooth! Make sure to brush the paint on thinned, and do multiple coats. Thick coats end up with brush marks every time!
Hope that helps!
If you want a smooth surface without wood grain showing, then you want to add a sealer or clear coat first. Then lightly sand and the paint will go on very smooth! Make sure to brush the paint on thinned, and do multiple coats. Thick coats end up with brush marks every time!
Hope that helps!
That's a good idea too even after the sanding and all. Thank you Daniel! What do you use to thin your paints?When I paint wood on a ship model, I still want it to look like wood, so I use water based paints and thin them so they don’t fill in the wood grain. It takes about 3 coats. You can lightly sand after the first coat as the water in the paint will raise the grain some. By the second coat you should not need to sand anymore. On dense woods, you can usually get away without any sanding between layers of paint.
If you want a smooth surface without wood grain showing, then you want to add a sealer or clear coat first. Then lightly sand and the paint will go on very smooth! Make sure to brush the paint on thinned, and do multiple coats. Thick coats end up with brush marks every time!
Hope that helps!
I use water based paints, so I add water and stir. For oil based paints, you need to add thinner. I stopped using oil based paints, stains and clear coats due to fumes!That's a good idea too even after the sanding and all. Thank you Daniel! What do you use to thin your paints?
I use all water based products now, that are thinned and cleaned with water.
I'm right there with you so that's good to see I'm on the right trackI use water based paints, so I add water and stir. For oil based paints, you need to add thinner. I stopped using oil based paints, stains and clear coats due to fumes!
I use all water based products now, that are thinned and cleaned with water.
So this is kind of my thing but everyone likes to show the finished product but I like showing process so my pictures look rough in my updates because your always in process until your on to the next project. As for where I am in my current endeavor is the fact that I started painting and getting things in order with that but missed the GLARING fact that the galleys have not been full assembled.
Soooo yea we in process and I'll show off when it's done but this was interesting building it all from scratch and not cast pieces. And I think if I get cast pieces for a galley I might do it myself like this atleast for larger ones.
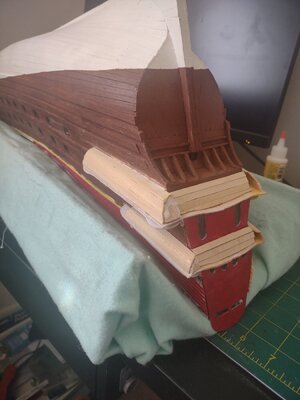
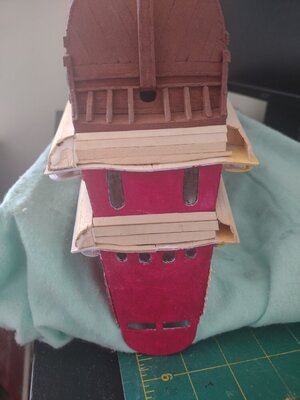
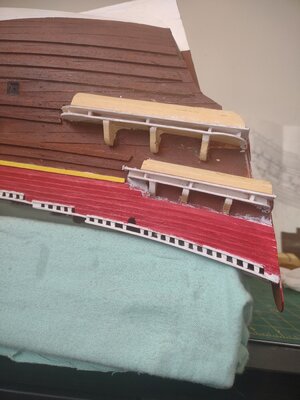
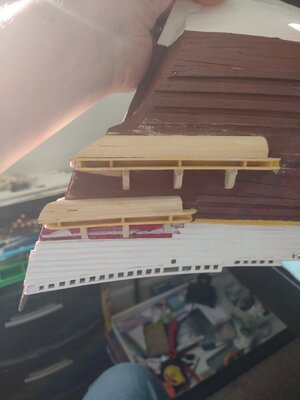
Thank you so much for checking in and let me know what you guys think if forum pictures should be the finished product or the process??
Soooo yea we in process and I'll show off when it's done but this was interesting building it all from scratch and not cast pieces. And I think if I get cast pieces for a galley I might do it myself like this atleast for larger ones.


Thank you so much for checking in and let me know what you guys think if forum pictures should be the finished product or the process??
I like where you are headed here Rob. The Billings guys will be more helpful than I can be with regard to advice. I do know that the 'beehives' will be particularly difficult.
Yep it should be interesting but I think I have a good plan of attack so we will see how it goes. Thank you for your reply!I like where you are headed here Rob. The Billings guys will be more helpful than I can be with regard to advice. I do know that the 'beehives' will be particularly difficult.
Hi Rob, I would definitely like to see periodic updates as you go along. In particular I would like to see progress photos of the galleries and what I call the 'inverted hornets' nest'. They were a real challenge for me. Your gallery planking looks very good at this point.
Ok sounds good for me I know I'm not a professional like @dockattner @Heinrich and all but I will try to do my best for all of youHi Rob, I would definitely like to see periodic updates as you go along. In particular I would like to see progress photos of the galleries and what I call the 'inverted hornets' nest'. They were a real challenge for me. Your gallery planking looks very good at this point.
I round my weekend off with some more done then I thought I was going to be able to do!! I dedicated to shaping the underbelly of the gallies and the back part and it came out pretty well. Had to do wood filler to make sure it was clean but now I'm working on the painting and will be tackling the "bell towers" I'm going to call them that cause yea lol. Here is some progress pics of where I am
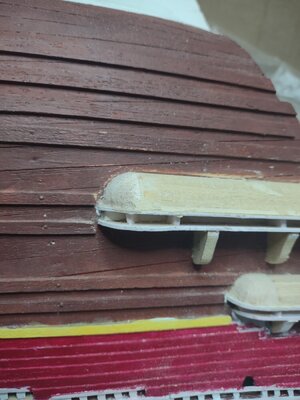
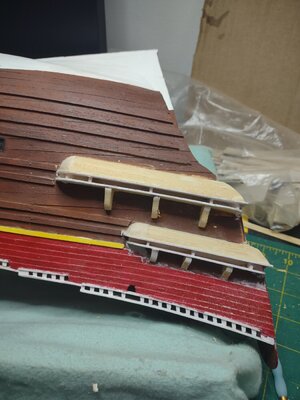
And then this is with sanding and the other side done.
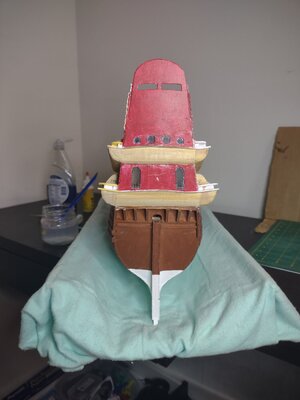
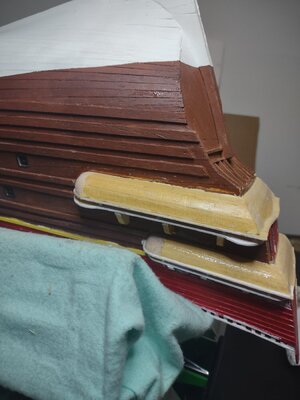
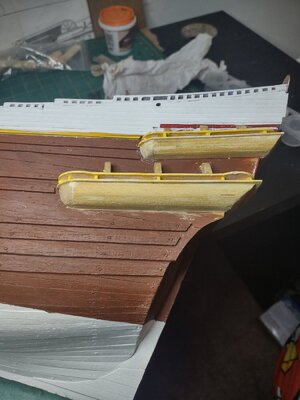
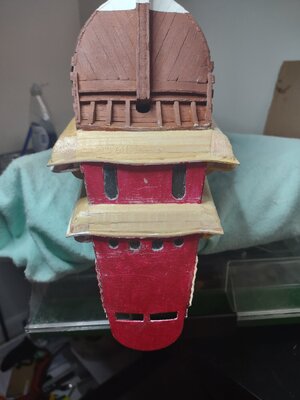


And then this is with sanding and the other side done.


That's excellent Rob. Take your time with the "bell towers". They are mean little devils.
So I'm having quite the issue with this build. I'm finding I'm fixing more then I am adding and getting frustrated....to the point where I need to put this to the side. As of now I'm not enjoying my time with her like I want to. I have received a Montanes that I will be building and going to be making a log but I wanted to make sure to explain why you won't be seeing posts on here.... And just to be clear. I am not saying I WONT be back here to this wonderful boat. I don't take things I don't intend to finish.... But I need a break and some time on something I 100% built myself. Where I fix the mistakes I made and not that others have made on something. I need to enjoy what I do though and it's something that I have learned on this forum so I will return here and there to this. Until I get to a better spot on it where I am not fixing these errors any more. So would love for you to join me on my Montanes build but if not I'll still come back here at some point like I said.
Understood. She fights back.
I enjoy your company so I’ll follow and join you on your new build log.
I enjoy your company so I’ll follow and join you on your new build log.


