You are using an out of date browser. It may not display this or other websites correctly.
You should upgrade or use an alternative browser.
You should upgrade or use an alternative browser.
VASA 490 Build Log - Billing Boats, 1:75 [Completed Build]
- Thread starter Daniel20
- Start date
- Watchers 64
-
- Tags
- billing boats vasa
Thanks Dean. Ha, it looks like hanging fruit of some kind, still not 100% sure if there is too much or not enough of the blocks.
Thank you, Ken.Hi Daniel. That looks very impessive from where I'm sat, well done
Well thank you sir.Dear Daniel
wonderful work, it's looks great progress
Good morning Daniel. Brilliant work...as always. Looking at yours and Robs Vasa makes me wonder what drives us to build these complicated vessels (rhetorical question for sure)? You guys are making me fear this rigging process no doubt. Great post Daniel.Good afternoon to all,
This log entry shows progress I made on the bowsprit and its associated mast. I forgot to mention in my last post that I made a decision to make 'served beckets' for block stropping only on those blocks that are used in the standing rigging (upper portion of dead eye strops are however non-served). All running rigging blocks will be stropped with non-served beckets. Progress is slow on the Vasa right now but fortunately my side business of cartography is keeping me busy. In the near future I'll be placing the next levels of masting with their associated shrouds and tying in the lower futtock shrouds as well.
View attachment 297207View attachment 297208View attachment 297209View attachment 297210View attachment 297211
View attachment 297212
Once again, I sure thank you all for looking in on me. Happy modeling to everyone.
Cheers
Grant
Thank you, Heinrich. This Dutch influenced design of having a sail attached to a vertical mast off the very end of the bowsprit (maybe the forerunner of the spinnaker), seems very unstable and prone to being broke off. For that matter the topgallant mast and sails of most ships seem to be just as fragile. I read or heard somewhere where a sudden strong gust of wind could catch a sail and fill it so fast it would sound as if a shotgun went off, sometimes even breaking the mast off!Hello Daniel - that looks very complicated, but extremely impressive. Well done!
Last edited:
Thank you Grant. No need to fear the rigging, yes it's a challenge but with your skill set I believe you are going to find it rewarding.Good morning Daniel. Brilliant work...as always. Looking at yours and Robs Vasa makes me wonder what drives us to build these complicated vessels (rhetorical question for sure)? You guys are making me fear this rigging process no doubt. Great post Daniel.
Cheers
Grant
Good morning, everyone.
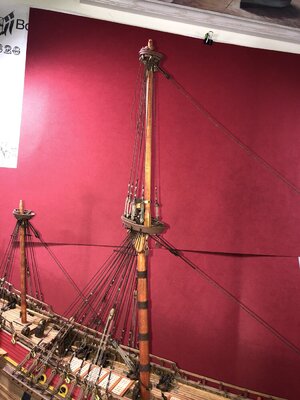
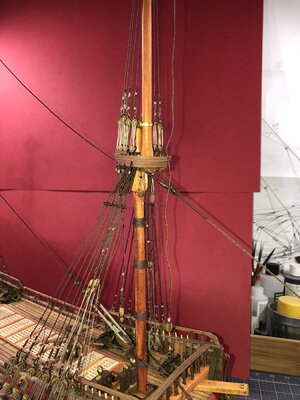
It's been about 3 weeks since my last update. I have not made a lot of progress but did want to show what I have done. I've added the fore and main topsail mast along with their shroud lines. Note I have not started the rat lines yet. I'm developing a rat line rope of approx. 0.35mm. Still experimenting with this. I've also set up the fore stays associated with the mast but have not yet anchored them.
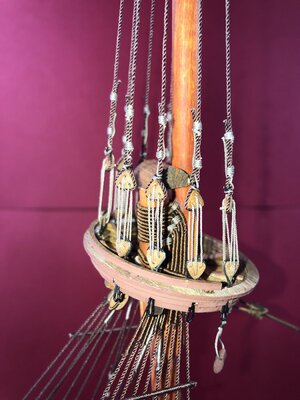
Below you see a close up of the dead eyes going thru the foretop, again for all those I used black coated wire for the stropping which I welded the ends and painted. For the benefit of those who have not done this before, I attached all the tops and blocks to the top of the mast prior to installing the mast itself.
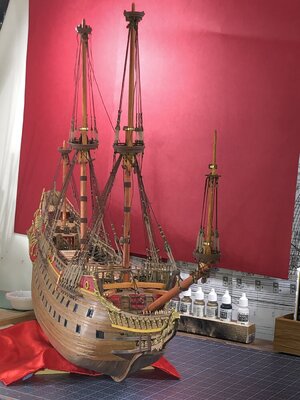
This last photo is an offset alignment shot. I don't know why but these angles and top-down shots are the most fascinating to me. One of the things on my to do list is come up with a better place to photograph this ship. It takes up all my available work space and I know there is a lot of background clutter that can be distracting.
I hope you all enjoy the photos, I'll try for greater progress next update and as always thanks for looking in on me.
Happy modeling!
It's been about 3 weeks since my last update. I have not made a lot of progress but did want to show what I have done. I've added the fore and main topsail mast along with their shroud lines. Note I have not started the rat lines yet. I'm developing a rat line rope of approx. 0.35mm. Still experimenting with this. I've also set up the fore stays associated with the mast but have not yet anchored them.


Below you see a close up of the dead eyes going thru the foretop, again for all those I used black coated wire for the stropping which I welded the ends and painted. For the benefit of those who have not done this before, I attached all the tops and blocks to the top of the mast prior to installing the mast itself.

This last photo is an offset alignment shot. I don't know why but these angles and top-down shots are the most fascinating to me. One of the things on my to do list is come up with a better place to photograph this ship. It takes up all my available work space and I know there is a lot of background clutter that can be distracting.

I hope you all enjoy the photos, I'll try for greater progress next update and as always thanks for looking in on me.
Happy modeling!
- Joined
- Jan 9, 2020
- Messages
- 10,377
- Points
- 938

I love the photos Daniel. The ship looks absolutely superb - indeed the last picture is incredibly life-like. We constantly seem to be commenting on each other's ship' color, but just look at that! It's like the real Mccoy!
Thank you Heinrich. Walnut is special, I made a tv stand out of years ago and found out then depth of its beauty. I'm somewhat curious about oak as a model material. It is probably difficult to work with because of its hardness. If you know of someone on this forum who has used it in their log I would be interested to know.I love the photos Daniel. The ship looks absolutely superb - indeed the last picture is incredibly life-like. We constantly seem to be commenting on each other's ship' color, but just look at that! It's like the real Mccoy!
- Joined
- Apr 20, 2020
- Messages
- 5,146
- Points
- 738

Dear DanielI love the photos Daniel. The ship looks absolutely superb - indeed the last picture is incredibly life-like. We constantly seem to be commenting on each other's ship' color, but just look at that! It's like the real Mccoy!
As you know in our hobby how much work we have provided is less important, but the quality of the work and its products are what defines us as professionals. In your case, your work is simply superb and beautiful at the same time and incredibly accurate.
Congratulations to you dear friend
Oh, thank you so much shota! I am very humbled by your kind words.Dear Daniel
As you know in our hobby how much work we have provided is less important, but the quality of the work and its products are what defines us as professionals. In your case, your work is simply superb and beautiful at the same time and incredibly accurate.
Congratulations to you dear friend
Hi Daniel, I too love the look of your ship in that offset angle view. Perhaps I’ll give that a shot one day. Problem is I’m not much of a photographer so I’m not sure if I can get things in proper focus with good depth of field.
Looking great Daniel! Slow progress is better than no progress!
I have resorted to using white construction board as a backdrop, and even for a base and sides, for photos. You could actually make a photo booth out of it. White is better than a colored background, because it refracts light best. Although color backgrounds make for an interesting picture!
So now I just clean up my work area, get out the construction boards and take pics, then put the boards back away.
Hello Daniel. I love your picture of the ship. You certainly have created a beautiful rendition of the Vasa. Cheers GrantGood morning, everyone.
It's been about 3 weeks since my last update. I have not made a lot of progress but did want to show what I have done. I've added the fore and main topsail mast along with their shroud lines. Note I have not started the rat lines yet. I'm developing a rat line rope of approx. 0.35mm. Still experimenting with this. I've also set up the fore stays associated with the mast but have not yet anchored them.
View attachment 303049View attachment 303050
Below you see a close up of the dead eyes going thru the foretop, again for all those I used black coated wire for the stropping which I welded the ends and painted. For the benefit of those who have not done this before, I attached all the tops and blocks to the top of the mast prior to installing the mast itself.
View attachment 303051
This last photo is an offset alignment shot. I don't know why but these angles and top-down shots are the most fascinating to me. One of the things on my to do list is come up with a better place to photograph this ship. It takes up all my available work space and I know there is a lot of background clutter that can be distracting.
View attachment 303052
I hope you all enjoy the photos, I'll try for greater progress next update and as always thanks for looking in on me.
Happy modeling!
Thank you, Paul. I just use my iPhone 8 (old by today's standards) and have found it takes incredibly good photos. I imagine you would need a DSLR 35mm to get pro grade shots though.Hi Daniel, I too love the look of your ship in that offset angle view. Perhaps I’ll give that a shot one day. Problem is I’m not much of a photographer so I’m not sure if I can get things in proper focus with good depth of field.
Thanks Dean. I do like your photo setup with the white board background. Even at 1:75, my ship is over 36" long and at this point 24" tall so I'm thinking maybe solid white or blue wrapping paper as a background. Something light weight.Looking great Daniel! Slow progress is better than no progress!
I have resorted to using white construction board as a backdrop, and even for a base and sides, for photos. You could actually make a photo booth out of it. White is better than a colored background, because it refracts light best. Although color backgrounds make for an interesting picture!
So now I just clean up my work area, get out the construction boards and take pics, then put the boards back away.
Hello Grant, thank you for your kind words.Hello Daniel. I love your picture of the ship. You certainly have created a beautiful rendition of the Vasa. Cheers Grant
- Joined
- Jan 9, 2020
- Messages
- 10,377
- Points
- 938

Hi Daniel - I'm not sure if anyone on SOS has used oak, but Kolderstok offers it as options on the Zeven Provincien and the Duyfken.Thank you Heinrich. Walnut is special, I made a tv stand out of years ago and found out then depth of its beauty. I'm somewhat curious about oak as a model material. It is probably difficult to work with because of its hardness. If you know of someone on this forum who has used it in their log I would be interested to know.
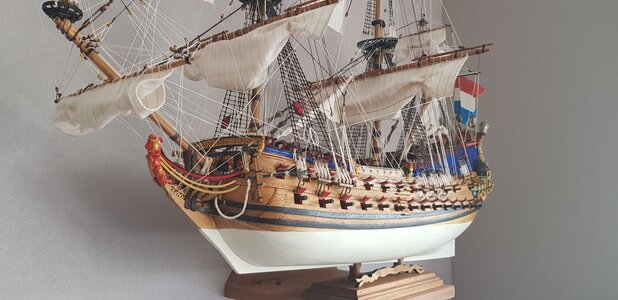
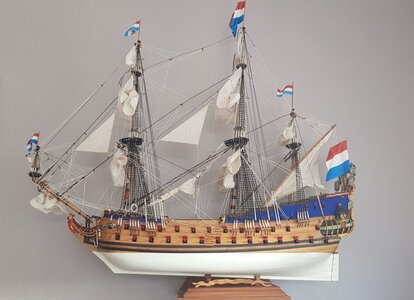
Hans Groenenberg's 7P in oak.
It is apparently a tricky wood to use - very hard and coarser-grained than walnut.


