Wonderful job! Time to take a break while your eyes get back to normal.
-

Win a Free Custom Engraved Brass Coin!!!
As a way to introduce our brass coins to the community, we will raffle off a free coin during the month of August. Follow link ABOVE for instructions for entering.
-

PRE-ORDER SHIPS IN SCALE TODAY!
The beloved Ships in Scale Magazine is back and charting a new course for 2026!
Discover new skills, new techniques, and new inspirations in every issue.
NOTE THAT OUR FIRST ISSUE WILL BE JAN/FEB 2026
You are using an out of date browser. It may not display this or other websites correctly.
You should upgrade or use an alternative browser.
You should upgrade or use an alternative browser.
Vasa build of Corel kit [COMPLETED BUILD]
- Thread starter Short John Bronze
- Start date
- Watchers 15
-
- Tags
- completed build corel vasa
Running Rigging.
As mentioned earlier the fanlike rigging structures are proving a pain. There are six of them with a similarity to a family tree: a great grandparent block, a grandparent block and two parent blocks each with more progeny than a prime minister. Tying them in situ involves threading four blocks with a total of about nine lengths of thread. The whole does not become stable and properly tensioned until it is completed.
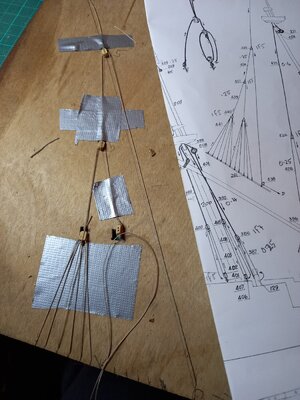
After an initial effort I tried assembling the structure on a (very primitive) jig - first picture below. This was easier but became a tangle when trying to install it on the ship. By the time I had finished experimenting with different approaches (top down, bottom up) I had got them all done.
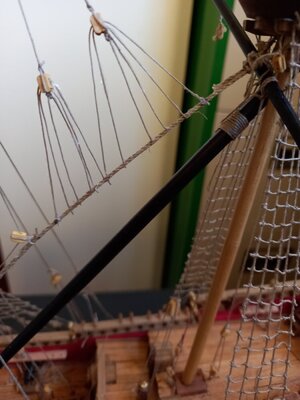
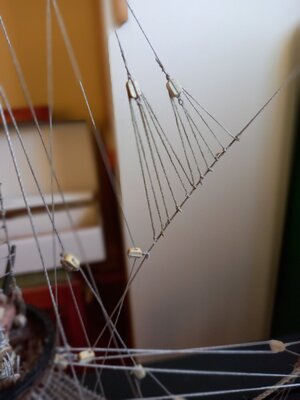
The Corel thread has been generally easy to work with: just stiff enough to push through a block but soft enough to stay in a knot. However, it was not ideal for getting up to eighteen ribs of a fan structure looking reasonably even. A solution was to use some leftover OcCre thread that is much softer.
Photos 2(Corel) and 3 (OcCre) below compare the results.
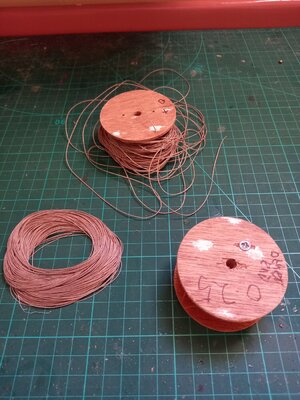
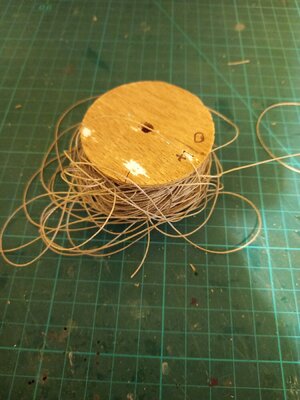
Although the Corel thread is good to work with the presentation is awful! Most manufacturers seem to supply rigging thread on a bobbin. Corel provides hanks. I tried to control these by putting then on makeshift reels but eventually they degenerated into a tangle. The kit was also well short in its supply of the finest thread. I had almost exhausted the single hank by the time I had done the standing rigging. A second hank that I subsequently bought was almost finished by the time I completed the running rigging. Given the price of the kit one might expect them to put in a second hank of fine thread.
As mentioned earlier the fanlike rigging structures are proving a pain. There are six of them with a similarity to a family tree: a great grandparent block, a grandparent block and two parent blocks each with more progeny than a prime minister. Tying them in situ involves threading four blocks with a total of about nine lengths of thread. The whole does not become stable and properly tensioned until it is completed.
After an initial effort I tried assembling the structure on a (very primitive) jig - first picture below. This was easier but became a tangle when trying to install it on the ship. By the time I had finished experimenting with different approaches (top down, bottom up) I had got them all done.
The Corel thread has been generally easy to work with: just stiff enough to push through a block but soft enough to stay in a knot. However, it was not ideal for getting up to eighteen ribs of a fan structure looking reasonably even. A solution was to use some leftover OcCre thread that is much softer.
Photos 2(Corel) and 3 (OcCre) below compare the results.


Although the Corel thread is good to work with the presentation is awful! Most manufacturers seem to supply rigging thread on a bobbin. Corel provides hanks. I tried to control these by putting then on makeshift reels but eventually they degenerated into a tangle. The kit was also well short in its supply of the finest thread. I had almost exhausted the single hank by the time I had done the standing rigging. A second hank that I subsequently bought was almost finished by the time I completed the running rigging. Given the price of the kit one might expect them to put in a second hank of fine thread.


Thanks for the heads up on this difficult phase of rigging Edmund. I am getting close to this stage as well.
Model Completed - 3 times.
1st completion. I added the figurehead: a symbolic final act that I Have carried out on previous models.
However, when I placed the ship on its display stand I noticed that the rudder was missing. It had not been accessible while the ship was in its building cradle and I forgot it.
2nd completion. I added the rudder.
While tidying up I went through the left over bits. There were not many of these: Corel are a bit frugal on this point. As noted above I had to buy some more rigging thread. I also had to supplement the supply of 4mm blocks with leftovers from OcCre kits - they are far more generous.
Among the bits was a length of brass chain. Oops! I forgot tho hang it from the rudder.
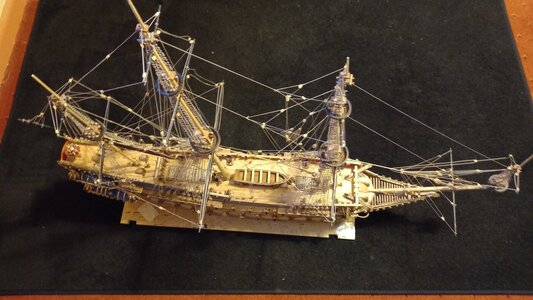
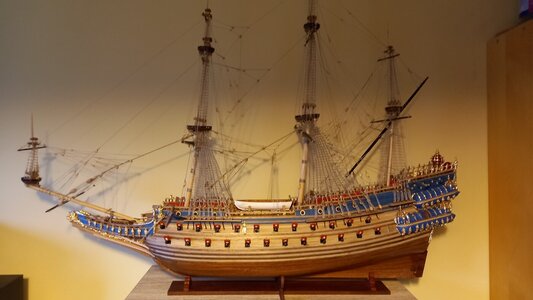
3rd completion. Figurehead, rudder and chain all present. I append a couple of photos. They are not very good; I may attempt a better one later.
In general I found the model fairly straightforward to construct. The kit lacked an English translation of the numbered parts list but I coped.
The plans and diagrams were reasonably clear and comprehensive - apart from some minor anomalies and inconsistencies between sheets. One or two of the 614 part numbers were incorrect. The materials were good and there was an adequate supply of wood strips. One or two profiles referenced in the instructions were not present (e.g. 3 x 2 mm I think) but only occasionally required in small quantities. Thanks again OcCre!


Congratulations Edmund! A beautiful result! I, for one, would love to see more photos when you have a chance to do that.
She is a real beauty, Edmund. Well done sir. I too would love to see more closup up photos.Model Completed - 3 times.
1st completion. I added the figurehead: a symbolic final act that I Have carried out on previous models.
However, when I placed the ship on its display stand I noticed that the rudder was missing. It had not been accessible while the ship was in its building cradle and I forgot it.
2nd completion. I added the rudder.
While tidying up I went through the left over bits. There were not many of these: Corel are a bit frugal on this point. As noted above I had to buy some more rigging thread. I also had to supplement the supply of 4mm blocks with leftovers from OcCre kits - they are far more generous.
Among the bits was a length of brass chain. Oops! I forgot tho hang it from the rudder.
3rd completion. Figurehead, rudder and chain all present. I append a couple of photos. They are not very good; I may attempt a better one later.
In general I found the model fairly straightforward to construct. The kit lacked an English translation of the numbered parts list but I coped.
The plans and diagrams were reasonably clear and comprehensive - apart from some minor anomalies and inconsistencies between sheets. One or two of the 614 part numbers were incorrect. The materials were good and there was an adequate supply of wood strips. One or two profiles referenced in the instructions were not present (e.g. 3 x 2 mm I think) but only occasionally required in small quantities. Thanks again OcCre!
View attachment 286606 View attachment 286607
Congratulations for finishing this very good model - very well done
I agree with the friends - I hope also to see more photos of this model
I agree with the friends - I hope also to see more photos of this model
Bilder! Bitte mehr Bilder! 
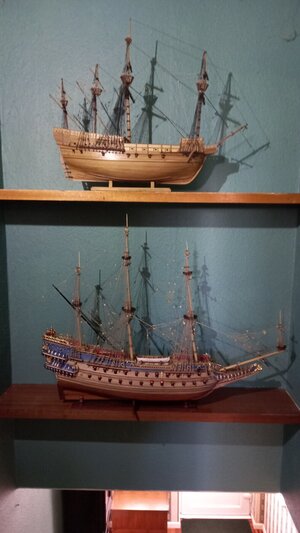
I don't think SHMBO is too keen on having my dust-gathering output moored on her piano or bookshelves in the lounge so I have created a harbour in the stairwell which I consider neutral ground. More close up photos of Vasa must wait until I next bring a ladder indoors.
Ratlines from banister to ceiling would probably not be acceptable.

Ratlines from banister to ceiling would probably not be acceptable.


Is that the Mary Rose on top? Very nice models!
No I'm afraid I didn't. I just left them in their 'golden' finish as supplied in the kit. Perhaps not authentic but they look pretty.DId you paint your figures and other decorations? If so, what did you use as a painting guide?


