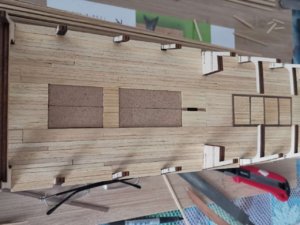
VOC SPIEGELRETOURSCHIP BATAVIA 1628 - KOLDERSTOK 1:72

Dear Uwe

Thank you very much for your observation - you are indeed spot on that the second gun from stern is out of line.

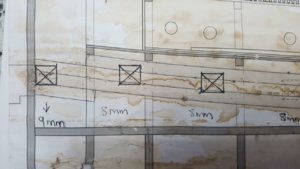
However, I am happy to say that is exactly the way that it is supposed to be on the Batavia. It's actually a case of the last gun that sits "lower" than it should. Please see the cross-section drawing. (Excuse the condition of the drawing - after I had ironed the planks on the drawing, it is now decidedly second-hand!)

WeChat Image_20200317150520.jpg

This is the first of one of a few idiosyncrasies on these Dutch ships. The other noticeable one is the line that the waterline follows when painted, but more about that much (much) later ...

Keep those eagle-eyes peeled on the build, please. I really appreciate your question.

Kind regards - Heinrich
 
Hi Heinrich,

I think Uwe means it is inside the model, not too far up or down. This means when fitting the planking you get a gap between planks and gun port.
 
@Maarten; @Uwe: Thank you Maarten. I now understand what Uwe meant. As Hans said, they are all perfect and in fact protrude slightly from the bulkheads when viewed from the side. When viewed from the top, they also protrude slightly beyond the deck-line. Everything will finally be brought into perfect alignment when the bulkheads are faired just prior to planking of the hull.

Many thanks for watching so closely and for raising the question. It is much appreciated.

Kind regards-Heinrich
 
Dear Friends

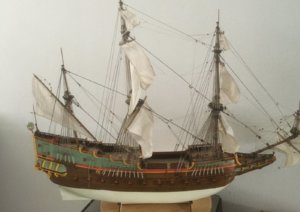
It's time for an update again. But ... before I get to that, I thought it would be good to share with you a picture on "almost-completed" Batavia by Koos from the Dutch Modelbouwforum. Koos is also a member on SOS and goes by the username of "Jacques".

B88AAE9F-1CB4-4067-86AF-7208E3568AF2.jpeg
Koos's build is not only inspirational, but he is also a source of knowledge and always ready with a kind and helping word.

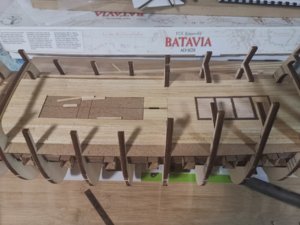
So with that as a frame of reference, it was time to move on to the next step. Here I had to decide whether to fair the bulkheads and start the hull planking or do the deck planking first. Advocates of planking the hull first, claim that it keeps the deck free from glue-smeared fingers, but despite that, I chose to do the latter. Whether it was wise or not, I have no idea, but I do know one thing ... planking the deck second would have been a LOT more difficult with the hull planking in place. As it was, it seemed if I had enough little room ...

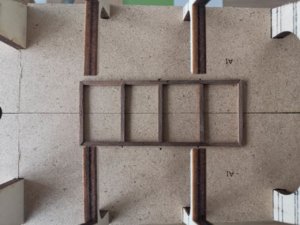
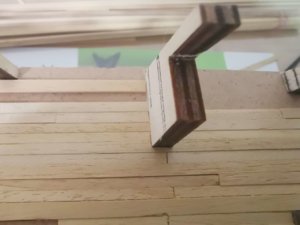
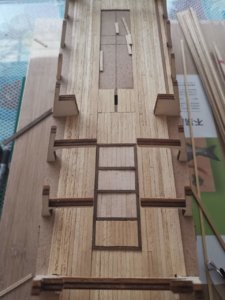
The first step in the planking process is easy. Construct a grating box with 3 crossbeams using the 1.5mm x 1.5mm walnut strips. The sides were mitred at 45 degrees, put in place and glued.

1.jpg

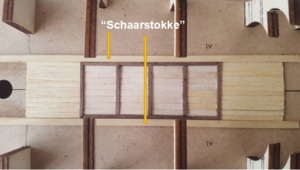
On either side of the grating, two "Schaarstokke" of 4mm x 1,5mm (I have NO idea what the English name is), from the rearmost bulkhead to be planked from, all the way to the front of the "to-be planked" section.

Schaarstokke.png

Abachi.png

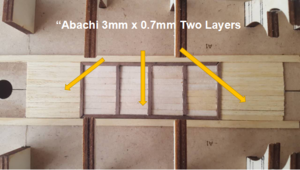
The planking between the two Schaarstokke is done with 3mm x 0.7mm Abachi planks of which there are TWO layers to be planked! So I completed the first level between the gratings and the two sections on either side of it. An then the pin dropped ... Why did I have 11 planks between the sections on either side of the grating and only 8 in the grating. Because ... Heinrich had not used the 3mm planks, but the 4 mm ones. Redface

Then I realised. This deck may look simple, but it is going to be very deceptive build which will require meticulous care. Luckily, I had only put down the first layer, so that could easily be repaired by the next layer, but the message was clear: PAY ATTENTION!

So the planking continued laboriously. At the end of Day 1, I could hardly see a difference and questioned why Kolderstok has chosen to go with such thin and narrow planks. Luckily, the 1-to-1 scale cross-drawings are excellent and point out exactly what needs to be done, but it takes time ... time and seemingly never-ending cutting small strips of wood and inserting them in the correct places. By Day 2, I still questioned the 0.7mm planks. After all with two layers between the schaarstokke that gives a combined height of 1.4mm ... with the schaarstokke at 1,5 mm, will one even be able to notice a difference.

The other thing that had me really worried, was that nowhere is there any mention of caulking the planks. I quickly realised that using permanent board markers will not work. They leave a much too pronounced edge on the narrow planks. Neither did HB 4 graphite do the trick, while black paper between the double layers was just a nightmare and soon discarded. HB2 pencil fared a little better, but since I had not done that from the beginning, I also abandoned that idea.

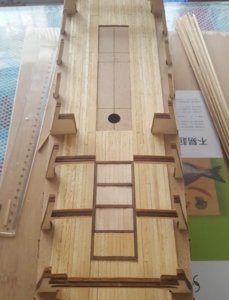
Then at the end of Day 3, it all made sense. The funny thing is that working so closely on the planking, gives you tunnel vision and doesn't really make for a good overall idea of the planking. After I had called it a day - actually my eyes did - I took a few pictures and after I had downloaded them on the PC, it all dawned. All of a sudden there was real colour - which varies greatly according to light - incredible texture to the wood and above all, clear definition between the planks.

WeChat Image_20200318081143.jpg
Picture taken in good daylight which gives the Abachi a "yellowish / orangy" colour ...

WeChat Image_20200318111152.jpg
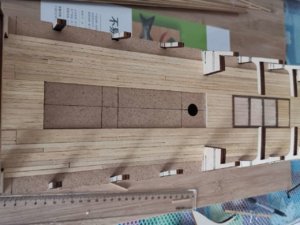
... which changes to a sombre, greyish effect with fading light.

WeChat Image_20200318131001.jpg
Great care was taken to lap the joints carefully to eliminate any unsightly gaps.

WeChat Image_20200318124104.jpg

WeChat Image_20200318130947.jpg

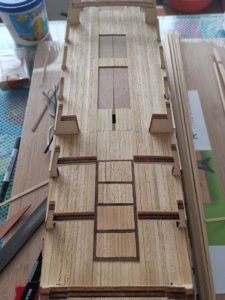
So this is where I stand at the end of Day 3. I will finish the sections of the grating with its second layer and then think that this is where we will halt the deck planking for the time being.

At this point, I would like to ask forum members what they suggest I use as finishing on the deck. Bear in mind that NOTHING has been done to it at this stage - it is not even sanded. I look forward to and welcome all your suggestions in this regard.

That is all for now ... thank you very much for your interest and for following.
Kind regards - Heinrich
 
At this moment I am busy on re-writing the building instructions of the Batavia, and a number of things are added to it. This also includes the caulking of the planks with a soft pencil. Besides this I am considering a width of 4 mm for the deck planks instead of 3 mm - as this is easier to get and the quality of it is slightly better. But keep in mind: 3 mm planks had an original width of approx. 22 cm and 4 mm planks where in real almost 30 cm (approx one foot). The Dutch used every piece of wood they had, so the real decks must have been a various mixture of small, smaller, wide and wider planks - some short (less then a few feet) up to 30 feet length.
The "schaarstokken" where two long beams along the whole length of the decks - being a reinforcement of the whole deck structure and the base to put hatches and gratings in between, and start of the rest of the deck beams and planking. They where stronger and thicker as the rest of the planks and beams, and therefore a bit higher then the rest. But it could be the case that on the real ships these schaarstokken where not higher than the rest of the deck, simply to prevent men tripping over it.
If any of the English speaking readers know the correct English word for these schaarstokken - please say!

Then regarding the finishing of the deck. When you take natural vinegar and dissolve a piece of steel wool in it - size of a large coin (dissolving might take a week or more) and "paint" the abachi planks with this mixture, the abachi slowly will colour into a darker "used" wood finish. Eventually you can put two layers on it for an even more aged look, but be carefull - it can also get to dark. Try it on a small piece of wood before applying to the whole deck.
And be carefull once again: the walnut planks will turn almost black with this mixture.

Hans
 
@Kolderstok . Dear Hans, thank you very much for the prompt reply. I absolutely love the look of the deck now that I am almost done. The 3mm planks are a lot of work - but as you say - that is the scale. I wouldn't trade-in my 3mm planks for any other variation. Very happy with the overall effect. Thank you for the tip on ageing the wood.
Heinrich
 
@Don Thank you, Don! Very happy with it!
Kind regards - Heinrich
 
@Jimsky Dear Jim. Thank you for your kind words - I am very happy to hear that you enjoy the log and appreciate you following.
Kind regards - Heinrich
 
At this moment I am busy on re-writing the building instructions of the Batavia, and a number of things are added to it. This also includes the caulking of the planks with a soft pencil. Besides this I am considering a width of 4 mm for the deck planks instead of 3 mm - as this is easier to get and the quality of it is slightly better. But keep in mind: 3 mm planks had an original width of approx. 22 cm and 4 mm planks where in real almost 30 cm (approx one foot). The Dutch used every piece of wood they had, so the real decks must have been a various mixture of small, smaller, wide and wider planks - some short (less then a few feet) up to 30 feet length.
The "schaarstokken" where two long beams along the whole length of the decks - being a reinforcement of the whole deck structure and the base to put hatches and gratings in between, and start of the rest of the deck beams and planking. They where stronger and thicker as the rest of the planks and beams, and therefore a bit higher then the rest. But it could be the case that on the real ships these schaarstokken where not higher than the rest of the deck, simply to prevent men tripping over it.
If any of the English speaking readers know the correct English word for these schaarstokken - please say!

Then regarding the finishing of the deck. When you take natural vinegar and dissolve a piece of steel wool in it - size of a large coin (dissolving might take a week or more) and "paint" the abachi planks with this mixture, the abachi slowly will colour into a darker "used" wood finish. Eventually you can put two layers on it for an even more aged look, but be carefull - it can also get to dark. Try it on a small piece of wood before applying to the whole deck.
And be carefull once again: the walnut planks will turn almost black with this mixture.

Hans
Hi hans,
The English translation of schaarstokken is binding strake. Helpfull for translation of all the English maritime terms is this glossary. I am often looking for translation of these from Dutch to English. It is often more easy to translate it to German or Russian because they use the Dutch terms. :-).

 
Last edited:
@Maarten: Hallo Maarten; thank you very much for clearing up the correct English terminology. The Glossary will surely be useful in conveying the correct meaning.
Kind regards - Heinrich
 
Hey Heinrich,
I saw this article about Haarlem on the Mariner's Mirror (Society for Nautical Research) website, and thought you'd like to have a look. Best of all, the full article pdf is available for download by the publisher.

Werz, Bruno E. J. S. “The Wreck of the Dutch East India Company Ship Haarlem in Table Bay, 1647, and the Establishment of the ‘Tavern of the Seas.’” The Mariner’s Mirror, vol. 103, no. 4, Oct. 2017, pp. 400–16. https://www.tandfonline.com/doi/pdf/10.1080/00253359.2017.1376479?needAccess=true

Cheers,
Eric
 
Last edited:
@Brewbarian: Dear Eric. What you have found is an absolute gem and the most detailed report of the stay in the Cape by the survivors of the Haarlem. Dr Werz has, in the meantime, published a book on the subject and in September of last year found (with 95% surety) the exact location of the wreck. Projects are now underway to find the necessary funding to start the salvage operations. Thank you so much for this document.
Kind regards - Heinrich
Awesome. Glad you enjoyed it.
Eric
 
Good afternoon (China time) Dear Friends

Just a very quick and short update. The first deck has been completed - no finish applied (not even sanded); hot out of the oven.

WeChat Image_20200321083454.jpg

WeChat Image_20200321083508.jpg

I am happy to let that sit for a while, while I move on to the next step at the stern.

Thank you all for your interest and for following.

Kind regards-Heinrich
 
Dear SOS Friends

Time for a small update.

My final aim in the next phase is to start the planking process, but these are still a nymber of loose ends that need to be tied up before that can begin.
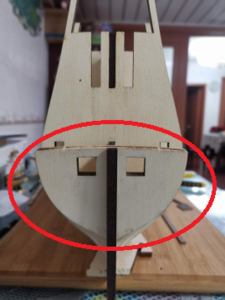
In my previous post I mentioned that work on the stern is up next. The last three bulkheads of the stern assembly are still only dry-fitted at this stage; so they obviously need to be glued in place first. For this there is a very definite order that needs to be followed. The bottom-most part of the rear spiegel assembly (I have identified this as the “wulf” in one of my previous posts), needs to go in first, then the top part directly above that and lastly the very rearmost part that contains the upper part of the spiegel and the windows.
Build 171.png

The "wulf" is marked in red.

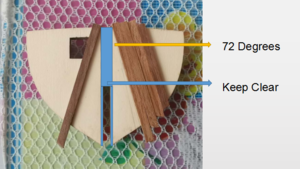
So first up was the wulf that needs to be planked with 4mm walnut strips at an angle of 72 degrees. After that has been completed, the gunports needs to be cut open - whether they are to be used or not. If the builder’s final choice is to have the gunports closed, they are covered at a later stage with the hatches provided. This is indeed the way that assembly of the Batavia is intended.

Some builders choose to do the planking with the wulf already attached permanently to the ship, but I was not that brave and chose the “easy” way of doing the planking - with the wulf removed from the ship. In retrospect, I suppose this wasn’t really easier, because now I couldn’t simply butt-up the joints against the false keel. With the wulf dry-fiited to the hull, I traced two lines on either side of the keel with a pencil. This area would represent my “keep clear” zone which had to be adhered to at all costs. Cross this line with the planking and the wulf would simply not slide over the keel. So instead of then being forced to remove wood from the keel to necessitate fitment, it was far easier just to keep the “clear zone” CLEAR!
Build 172.png

This picture shows the first part of the planking with the "Keep Clear" zone indicated in blue.

With the help of a protractor the correct angle was determined and a few explanatory planks laid down. You will notice that the thickness of some of the planks vary slightly (not much, but perceptible) which I really like in this case. They can obviously be smoothed out during the final sanding and finishing, but for now they create great definition between the planks. Also, i did not pre-select strips of walnut that were close in apperance to one another - I picked them randomly. As Hans from Kolderstok has already noted, the Dutch built ships with whatever was at hand and sometimes it led to a far less structured approach than ... say ... the British.

Once I got planking, I became so engrossed that I completely forgot to take photographs. So, unfortunately, I have no pics of the wulf doing its best rendition of a porcupine! Blame Hans’s gripping factor that he engineers into his kits for this!

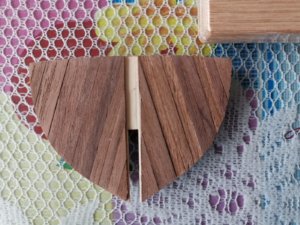
With the planking finished and the glue properly dried, I simply turned the wulf on its other side, clamped it to a cutting board and gave it a proper “haircut” by just tracing repeatedly with a box cutter around the outer edges of the wulf. This went surprisingly easy and I was very happy with the result.
Build 174 (2).jpg

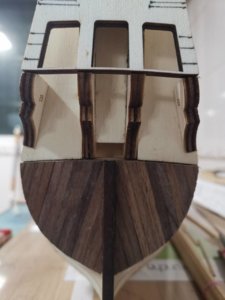
The preliminary finished wulf separate from the ship.
Build 174.jpg

And on the ship.

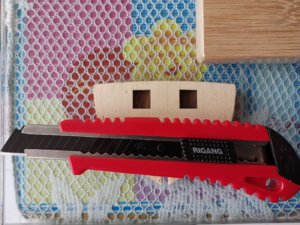
Then it was time for cutting open the gunports and configuring a way of installing cannon boxes in the very limited space available behind the wulf. And then it dawned ... there was no way that my trusty box cutter cum multi-purpose knife was going to fit into the gunports.
Build 175 (2).jpg

Neither do I possess a chisel with a 5mm (or smaller) cutting face. A visit to my hardware store also did not yield any results. So the only option left is to order an X-Acto knife from Taobao and wait the few days it takes to get delivered.
Balsa.png

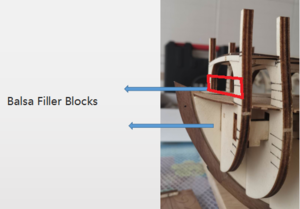
The bow section will need to be filled with balsa blacks which are then shaped into the curvature of the bow to assist when planking. However, these balsa bloks are inserted both below and above the false deck. Below the false deck, the placement is no issue, but to be sure of the exact height that it needs to be filled to above the false deck, I deemed it fit to install the forecastle deck first. As I have now grown accustomed to, the fitment of the Kolderstok decks are tight, but perfect. The decks literally “click” into the position.
Build 179.jpg

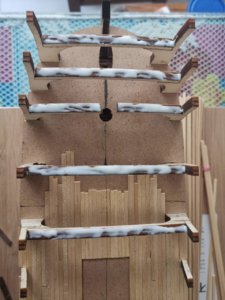
Cross-beams glued to accept the Forecastle.
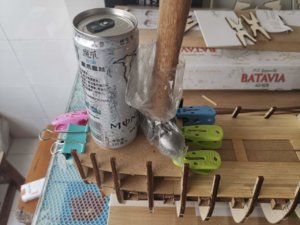
Build 180.jpg

And courtesy of clips, a Monster Energy drink (sorry NASCAR!) and my hammer, the necessary weight is applied to ensure that all areas make contact.
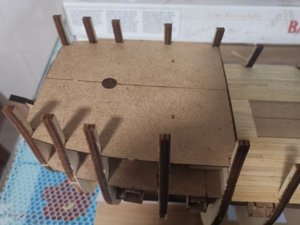
Build 181.jpg

Note the perfect seam between the two halves of the Forecastle - a Kolderstok hallmark.
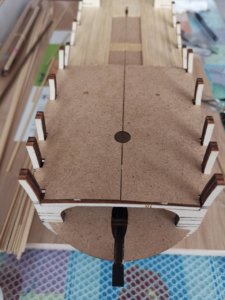
Build 182.jpg

And directly from the front and above.
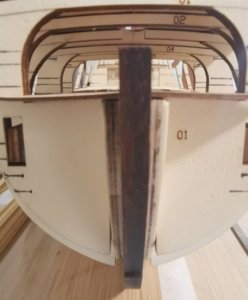
Build 183.jpg

Initially meant to show the alignment of the cross-beams, this picture also revealed something else which I will explain.

With the front deck installed, and me playing around with my camera, I also discovered something that I wasn’t too happy with. When I dry-fitted the quarterdeck (which ends against bulkhead #12 towards the stern), there remains an opening that when viewed from the bow side, offers a clear view of the unfinished area between bulkheads #12 and #14 (see the area in the red block on the photograph).
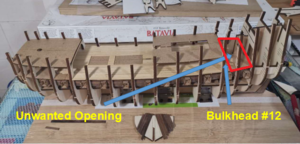
Build 185.png

When I viewed one of the earliest build logs of the Batavia, this opening was sealed off with a black-painted “wall” which gave a nice and finished-off look to the deck area below the quarterdeck. Hans informed me that because this area is not really visible with the quarterdeck and gratings in place, this piece has been omitted from later kits. Granted, I agree it is not very visible, but I can see it, and more importantly, I know about it.

I delved into my box of scrap wood and came up with a “beam” which I cut to length, bent into the curvature of the deck, painted black and glued up against the rear of bulkhead #12.
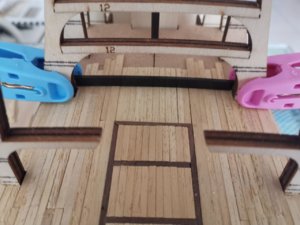
Build 185.jpg

Black-painted beam in place at the bottom of and behind bulkhead #12.
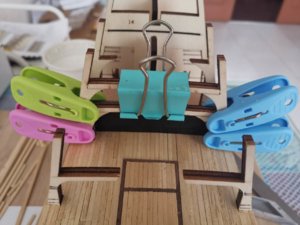
Build 187.jpg

A scrap piece of MDF was then shaped to follow the beam’s curve, painted black and glued on top of the beam and against bulkhead #12. Now I had my black wall, the unfinished area is no longer visible from the front and there is a definitive and clear line from where the planking starts.

As a second-last activity of this update, I also glued the Helm Deck into position to ensure there is an equal amount of stress on the bulkheads front to rear. Ideally I should have fitted the quarterdeck, but the deck still needs to be treenailed, sanded and finished so it is just impractical to cover such a large portion of the desk at this stage.
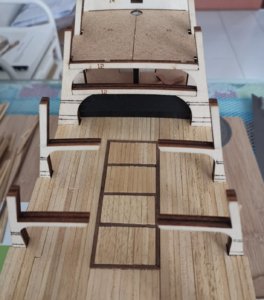
IMG_20200325_140107.jpg

Helmsman's Deck in place.

Water Levels.png

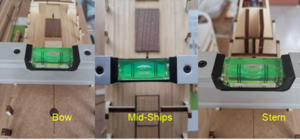
As a final measure the hull alignment and symmetry were checked.
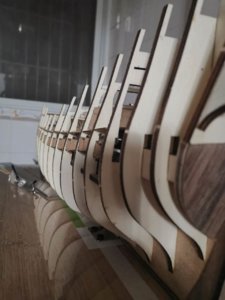
WeChat Image_20200324145200.jpg

And with that, everything was cleaned and the shipyard closed for this update.

Thank you all for your continued interest and for following - it is much appreciated.

Kind regards - Heinrich
 
Back
Top