VOC SPIEGELRETOURSCHIP BATAVIA 1628 - KOLDERSTOK 1:72

This what happens to us all Heinrich, sooner or later. But perhaps you did yourself a favor. How for instance did you plan to apply the shrouds if there is no distance between your top and and the flagpole?
And working with wood is making choices, because you always have to take in account how the fibres go (That's why I like to work with paper :)). For this sort of knees I always take the upright part for the longest fibres, so I can easily make a round part to put the cap on. The short fibres of the lower leg can be compensated by good glueing (white glue with a lot of pressure, combined with the bolts that go through both the knee and the bowsprit to attach the fore topmast stay and other small parts.
A second try is always a better one in my experience.
As for the rim around the top: who said you always have to use wood? A strip of card or plastic makes the job a breeze.
Ab
 
Wow! Didn’t see that coming! Hope your second attempt yields a satisfactory result!
With your recent bowsprit piece I was beginning to wonder if it was really a rice steaming basket??? In the mean time you can sit back momentarily and enjoy some good nourishment of your choice and plan out the next steps . . . hopefully a bit less stressful for you. Great result. Rich
 
@Ab Hoving Thank you for the encouragement Ab! You are so right - I have done myself a favour as the shrouds would have been impossible to thread between the flagpole and mast. To me just nothing felt right about this whole part of the build. Also, you make extremely valid comments with regards to the use of paper - in fact I just love the idea of constructing the knee in the way that you described. Thank you so much for your input. I now feel a LOT better!
 
@Steef66 Dear Stephan. No I'm certainly not ashamed - that is why I posted the failure on the forum. We all know that things do not always go to plan and it was just one of those periods. There was just no-way that I was going to install that on the big lady!
 
Dear Friends

So, for the last two weeks I have been busy on the bowsprit.

View attachment 251905

Bending and securing the ring around the bowsprit top was not a task that I would wish upon my greatest enemy - trying to keep the circumference correct whilst the only points of adhesion are 12 x 1mm little spar tips, was not easy.

View attachment 251906

View attachment 251907

With that done the main part of the bowsprit could be stained and the the rest of the masts scratch-built.

View attachment 251908

The Admiral could apply her magic once more and did so by wrapping the windings around the bowsprit.

View attachment 251909

The deadeyes attached. When I looked at this picture, there was this gnawing feeling where this whole effort is heading!:(

View attachment 251910

Deadeyes secured and anchored to the main bowsprit shaft itself.

View attachment 251911

Then a final look at the whole assembly from some distance. :mad::mad::mad: And decision made ...

View attachment 251912

Dustbin!

Thank you all for looking and following. I sincerely hope that your builds are going better than mine at the moment!
Hopefully you get the right feeling on the rebuild and it turns out how you would like it.
 
@Richie Hi Richie. Thank you for looking in and offering support - it is much appreciated. The right feeling on the rebuild will automatically come as soon as I start building accurately again. For me that requires 100% focus and at the moment I'm struggling to concentrate with too many things happening at the same time.
 
OOH NOOOO,

There is no joy in “Mudville”, I’m sure that after a brief respite (days, weeks, months?) another effort will be made?

Jan
I had enough of Mudville today and enough wallowing around something that should have been dispatched to the dustbin ages ago. Another effort will most certainly be made.
 
So after a quick think of what went wrong with the bowsprit, I came to the conclusion that I had to return to basics - work slowly, accurately and as perfectly as possible.

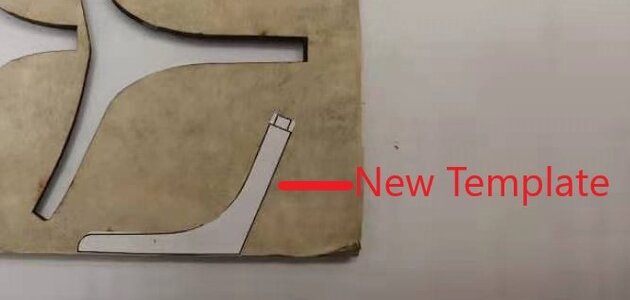
First up was scratch building the knee that goes on top of the bowsprit and acts as support for the mast platform.
RC1.jpg
I first cut out the exact shape of the knee and then glued that to a piece of scrap walnut that I still had left. Then it was a case of cutting it out and filing into shape. I laboriously toiled until I had a shape that I was with happy with.
RC2.jpg

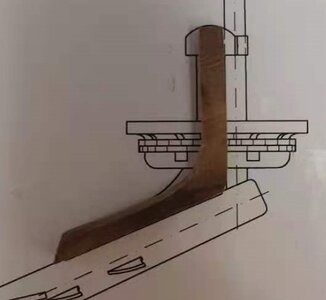
My scratch built part was overlaid on the plan to check for the correct angle. You will notice that I shaped it narrower at the bottom than what the plan indicates. On the first build, I found that the mast top assembly would not slide all the way down on the knee, because the angle at the bottom was too thick.

With that done, I could turn my attention to the bowsprit itself. This was cut to the correct length and then tapered from 9.8mm to 6mm at the extreme tip. Doing this by hand, took some time. After that I could install the first four of fourteen clamps that need to go on the bowsprit.
RC3.jpg

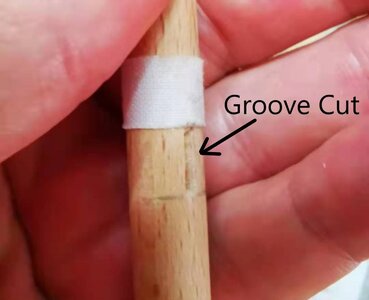
The first step was to cut a groove which would accommodate the basis of the clamp. That allows the clamp to be glued "into" the bowsprit for added strength. Once again, this was executed simply by cutting the groove with an X-Acto knife and then finishing it off with a Victorinox pairing knife.
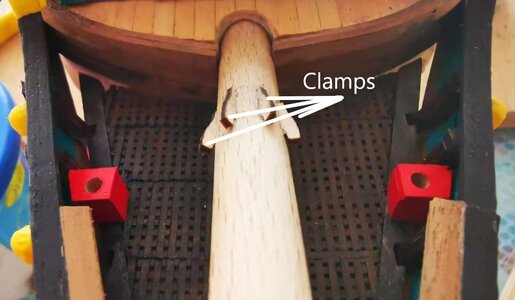
RC4.jpg

The first four clamps in position (Front View)
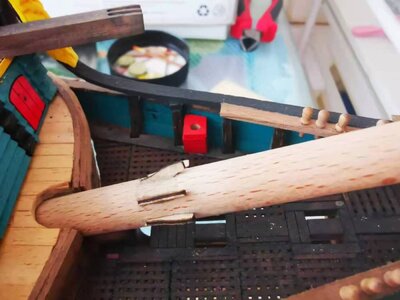
RC5.jpg

The first four clamps in position (Side View)
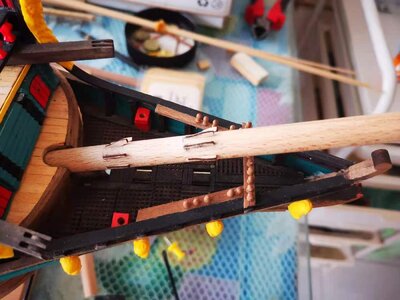
RC6.jpg

Then the next four were done - eight done, six to go. Notice the catheads and sheaves cut by hand, the red seats of ease and the symmetry of the belaying pins.

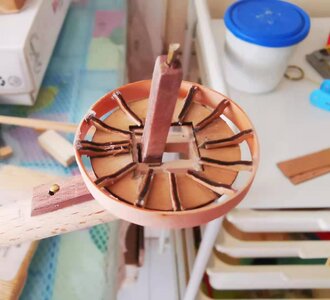
Now it was time to glue the ribs onto the mast top.
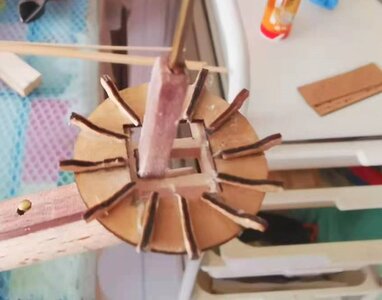
RC7.jpg

Great care was taken that each little rib has an identical overhang so that the ring which ultimately has to be glued to them will form a perfect circle. At this point I was not really worried about excess glue as removing the excess glue while the glue was still wet, would have increased the risk of dislodging or inadvertently bump the ribs out of position. Once hard, the glue will be scarped off with an X-Acto knife.

When that was finally dry, it was time to attach the ring.
RC8.jpg

I really dreaded this exercise, but in the end, it was much easier the second time around. What I have is a perfectly solid and secure assembly which is 100% round in circumference with equal gaps between the inner and outer rings. Tomorrow, when everything is dry, i will start the clean-up process. The whole assembly was slid down onto the knee and glued in place. It now sits in the correct position - nice and low down on the knee as intended.

All concerned, I am MUCH happier with this effort - in fact, I think it turned out quite well.

Heinrich
 
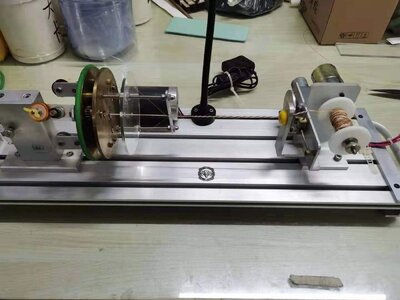
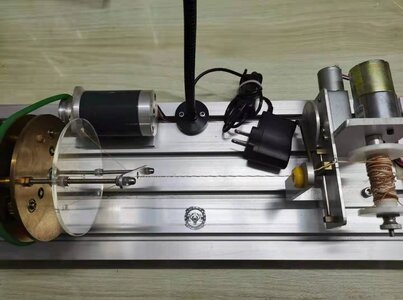
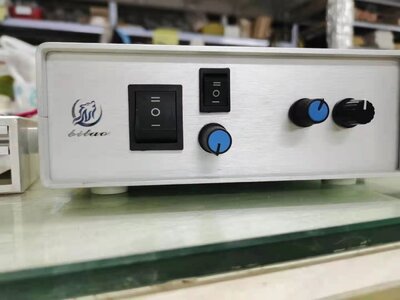
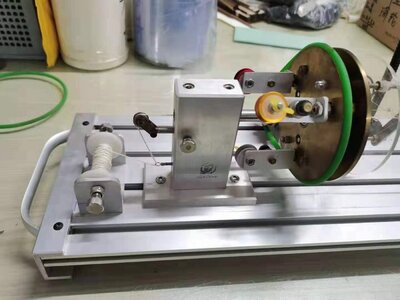
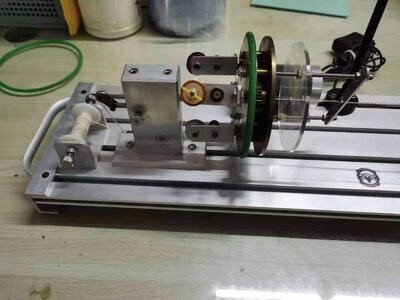
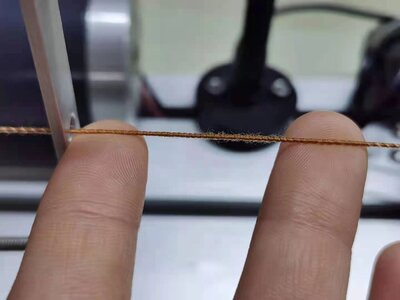
Now I have noticed that lately there has been a very strong interest expressed by modelers who want to make their own ropes. This got me thinking as to what is available in this regard from China.

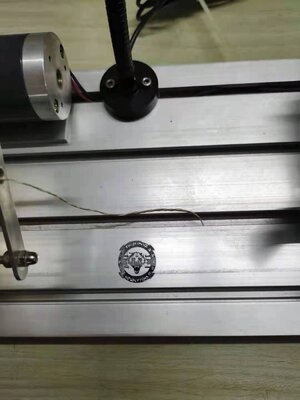
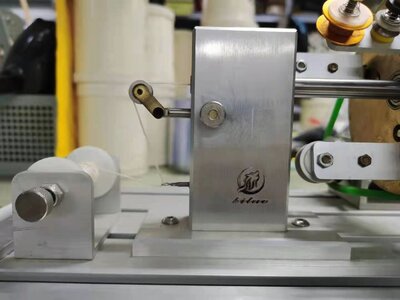
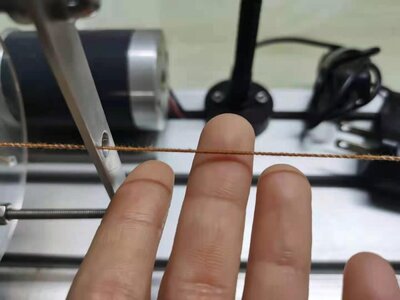
This posting therefore has to be regarded as a toe in the water. Please note that at this stage I do not have ANY specifications (they are on their way to me though), other than the pictures, and the fact that the main working parts of the machine are manufactured from refined steel and copper. However, I do think that the pictures speak for themselves.

So if there is any interest in something like this, let me know and let's see ...

RW1.jpg

RW2.jpg

RW3.jpg

RW 4.jpg

RW 5.jpg

RW 6.jpg

RW 7.jpg

RW 8.jpg

RW 9.jpg

View attachment 2e274e903354d83dfb81d5ee932923c3.mp4
 
Wow, great work on your second try of the bowsprit assembly.

That ”rope” machine looks like a tool that will last for long time. Do you plan on making all your ropes?

Jan
 
The endresult of that rope machine looks to me more like a serving tool than a rope walk. Or is it both?
My guess after looking at the bed length is that it may be too short for a rope walk unless somehow twisted rope can be fed through the right side as it is formed for longer lengths. That assumption said, I would also think of it as a serving device.
If it is a rope walk it technically puts my wood and coat hangers, hand cranked, walk in the dark ages.

You bowsprit work looks very precise and well placed. Rich (PT-2)
 
Hi Heinrich,

Your new bowsprit looks great well worth the extra effort, it is not an easy call to make initially to scrap a part, though once the decision has been made you can move onward and upward and possibly looking at the whole thing as a learning experience.

Nice looking rope making machine, I am guessing that it makes continuous rope and as Stef66 and Rich says serves as well.
What is the price of this machine?

Cheers,
Stephen.
 
Wow, great work on your second try of the bowsprit assembly.

That ”rope” machine looks like a tool that will last for long time. Do you plan on making all your ropes?

Jan
Thank you very much Jan! I am much more at ease with this second attempt. I am not following the plans slavishly, but am incorporating some ideas of my own. Not that there is anything wrong with the plan - it's just a case of the changes that I think suit my working style better.
 
Back
Top