Wood it's characteristics and use in model building

This is a big jump from your artesania kit you mentioned in the other topic in comparison to this question.....I would not recommend to start already with scratch building ..... I think this trade name wood is used mainly for carving, or?

there is some truth to this keep in mind this wood is stiff and not the best choice for bending but it can be bent you just have to be careful about it. The wood lends itself more for carving or structural members like deck beams and hull frames, carvings and small fittings.

Thank you. I'd not thought about flexibility. o_O
 
if you plan on staying with the hobby the question comes up should I purchase the wood or mill it myself?

Many model builders are more interested in building a model and not in hunting down, collecting, processing and milling their own lumber. That is way to much effort, most would rather spend the time on model building. An alternative is to purchase pre milled wood that is indeed convenient but now you are paying someone to re-saw and mill the wood. The finer the finish the longer it takes and time is money when it comes to business, if your building a model you really do not need a finished surface, dimensioned lumber is all you need the final finish is something you do as you complete the model. Buying rough lumber and doing all your own milling is one way to go if you can get the wood locally, if you have it sent then you are paying for shipping of wood that ends up as saw dust which can be up to 50% of the weight. Also you need the power tools if you don't have the tools their cost can supply you with a life time supply of milled wood.
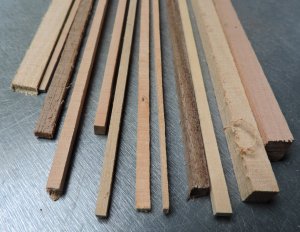
There is a middle of the road alternative to buying rough lumber and milled wood and that is to buy re-sawn material and you do the final dimensioning. You can buy all kinds of shapes and sizes in any type of wood you want.

wa5.jpg

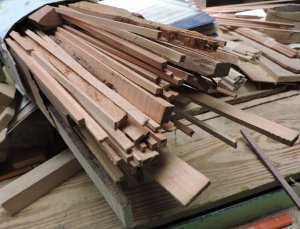
and you can buy it in bundles saving the cost of shipping that wood that ends up as saw dust on the floor

wa3.jpg

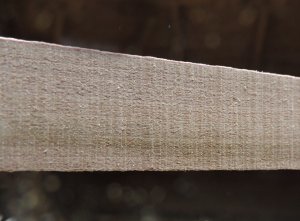
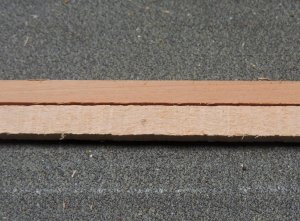
there is a catch to it and there is always a catch that is re-sawn wood is exactly what it implies there are saw marks that you have to sand out

wa657.jpg

The saw marks are not that deep and they can be sanded out with little effort

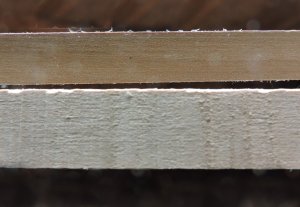
wa60.jpg


from re-sawn to a finished surface is just a matter of a few passes with sand paper

wa9.jpg

If you intend on doing your own dimensioning and finishing doing it by hand is a labor intensive process, so you might want to consider one of those hobby size thickness sanders OR build one it is not that hard to do.
warning! if you do go this way before you get frustrated and take the machine out back and beat it with a hammer then kick it to the curb because of poor results here is what you need to know up front. Most all these hobby sanders are hand fed they do not have power feed. It is going to take a little practice before you can achieve results and here is why.

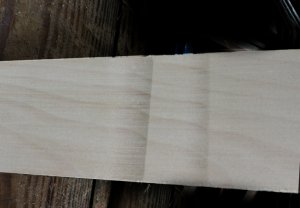
in this first example if you hesitate even the slightest you will grind in a trench because the wood stopped moving but the sanding drum did not.

wa47.jpg

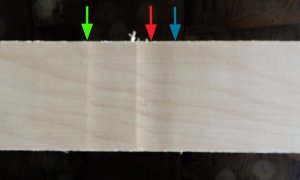
the wood has to either be fed (pushed) into the sanding drum or pulled out from under the drum the results of shifting from push to pull
the green arrow is the stop point and will leave a mark, the red arrow is the slight change from push to pull and all it takes is a fraction of a second to leave a mark and the blue arrow is where you start the pull.

wa19.jpg

hogging is when you try to take to much in one pass and you are stalling (slowing down the sanding drum) ever so slightly. so as the drum bites into the surface it leaves a starting mark and as it regains speed it cuts a trench.

wa52.jpg

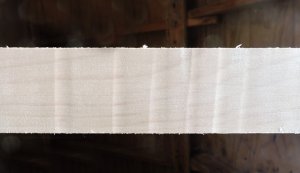
you have to have the feed constant the depth of the sanding perfect. If not enough you will be at it for hours on end just taking a dusting off per pass or to much and your hogging the machine. Most of the time you end up with a wavy surface. it is slight but it is there.

wa50.jpg


as a result you may find yourself mumbling what the @!#% might as well just buy milled wood. Or with practice you may say YES! I can now custom mill anything I want from re-sawn material.

sanders with power feed are available but expensive and if model building is just a hobby the cost invested in these machines will buy you a life time supply of pre milled wood. To go this deep into the hobby to justify the cost you will have to build a lot of model ships or if you love the great out doors and hunting for different wood then you will need to make the investment in tools
 
Last edited:
the wood dust worries me alot. My friend can mill as he makes small dolls furniture and pictures from veneers so i'd let him do that for me.
 
the wood dust worries me alot. My friend can mill as he makes small dolls furniture and pictures from veneers so i'd let him do that for me.

oh yes! I forgot about that another idea is to make friends with someone who has a woodworking shop


the dust is another big factor I can not begin to tell you about the sheer amount of dust the process creates. some wood will choke you or give you some sort or rash on your skin.
 
Thank you. I'd not thought about flexibility.
boxwood is somewhat flexible when cut thin but a first time attempt at planking why torture yourself. planking is hard enough to get right without the added problems of a wood that does not like to be bent or twisted.
 
if you plan on staying with the hobby the question comes up should I purchase the wood or mill it myself?

Many model builders are more interested in building a model and not in hunting down, collecting, processing and milling their own lumber. That is way to much effort, most would rather spend the time on model building. An alternative is to purchase pre milled wood that is indeed convenient but now you are paying someone to re-saw and mill the wood. The finer the finish the longer it takes and time is money when it comes to business, if your building a model you really do not need a finished surface, dimensioned lumber is all you need the final finish is something you do as you complete the model. Buying rough lumber and doing all your own milling is one way to go if you can get the wood locally, if you have it sent then you are paying for shipping of wood that ends up as saw dust which can be up to 50% of the weight. Also you need the power tools if you don't have the tools their cost can supply you with a life time supply of milled wood.
There is a middle of the road alternative to buying rough lumber and milled wood and that is to buy re-sawn material and you do the final dimensioning. You can buy all kinds of shapes and sizes in any type of wood you want.

View attachment 44278

and you can buy it in bundles saving the cost of shipping that wood that ends up as saw dust on the floor

View attachment 44279

there is a catch to it and there is always a catch that is re-sawn wood is exactly what it implies there are saw marks that you have to sand out

View attachment 44280

The saw marks are not that deep and they can be sanded out with little effort

View attachment 44281


from re-sawn to a finished surface is just a matter of a few passes with sand paper

View attachment 44282

If you intend on doing your own dimensioning and finishing doing it by hand is a labor intensive process, so you might want to consider one of those hobby size thickness sanders OR build one it is not that hard to do.
warning! if you do go this way before you get frustrated and take the machine out back and beat it with a hammer then kick it to the curb because of poor results here is what you need to know up front. Most all these hobby sanders are hand fed they do not have power feed. It is going to take a little practice before you can achieve results and here is why.

in this first example if you hesitate even the slightest you will grind in a trench because the wood stopped moving but the sanding drum did not.

View attachment 44283

the wood has to either be fed (pushed) into the sanding drum or pulled out from under the drum the results of shifting from push to pull
the green arrow is the stop point and will leave a mark, the red arrow is the slight change from push to pull and all it takes is a fraction of a second to leave a mark and the blue arrow is where you start the pull.

View attachment 44284

hogging is when you try to take to much in one pass and you are stalling (slowing down the sanding drum) ever so slightly. so as the drum bites into the surface it leaves a starting mark and as it regains speed it cuts a trench.

View attachment 44285

you have to have the feed constant the depth of the sanding perfect. If not enough you will be at it for hours on end just taking a dusting off per pass or to much and your hogging the machine. Most of the time you end up with a wavy surface. it is slight but it is there.

View attachment 44286


as a result you may find yourself mumbling what the @!#% might as well just buy milled wood. Or with practice you may say YES! I can now custom mill anything I want from re-sawn material.

sanders with power feed are available but expensive and if model building is just a hobby the cost invested in these machines will buy you a life time supply of pre milled wood. To go this deep into the hobby to justify the cost you will have to build a lot of model ships or if you love the great out doors and hunting for different wood then you will need to make the investment in tools

Great explanation.....you are helping a lot with these info!
Many thanks for it!
 
Great tutorial indeed, and an excellent help for selecting woods for a next model. Also the blackening of some woods with vinigar and steel wool is an excellent tip. Personally I think the colour differences of the different wood types in a model in the right spots bring a model much more into life by creating good contrasts in the model without the use of paints. Your tutorial really helps with this. Many thx.
 
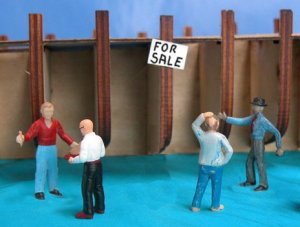
kit bashing is buying a kit then discarding all the wood and replacing it, sometimes redoing poor fittings or making corrections.

This sounds a little silly to purchase an entire kit and toss out the wood, why not just purchase a set of bulkheads? or if you can not find a set of bulkheads then create your own.

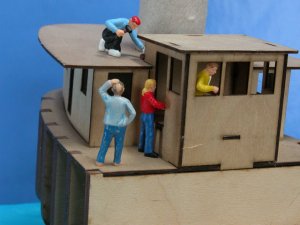
model1.jpgmodel8.jpg

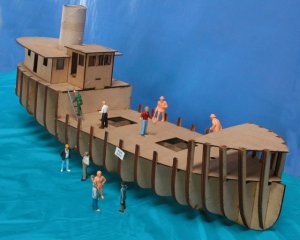
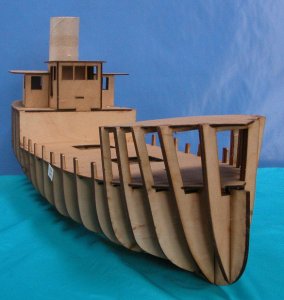
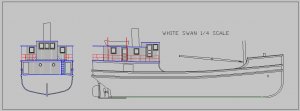
creating your own bulkhead set is quite easy and there are people on the forum that can draw them out and even laser cut a set. another advantage is creating a structure that snaps together, follow me and I will show you

model3.jpg

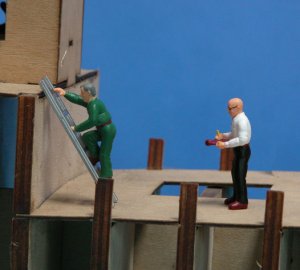
notice the tabs and slots in the wheel house structure and along the outer edge if the deck

model4.jpg

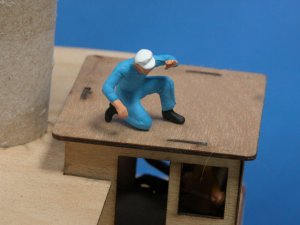
see how the roof fits to the sides with a slot and tab. Designing a bulkhead structure this way lines all the parts up and automatically lines everything up

model6.jpg

this entire structure is held together without even any glue

model7.jpg


All plank on bulkhead kits use a system of double planking. This is done because you need a solid surface to attach the planks to. If the hull was not double planked the planking will lay flat or bow out between the wide spaces between bulkheads, A fact most builders do not consider is real wooden hulls are almost a solid wall of timber or at the very least 50% of the hulls surface is timber. An alternative to double planking is to fill the space between the bulkheads with a soft wood such as Cypress, Cedar, Pine, Cottonwood and Basswood. You can also use a dense foam board.

You would think the thinner the planking the easier it is to bend, well that is true only to a certain point. The thinner the planking the less structure to the wood and at a point the wood looses its structure and strength to withstand bending. As an example 1/16 thick Basswood planking bends better than 1/32 thick planking because the thicker planking is stronger.

Another problem with planking in kits is it is all the same width, a hulls planking is wider on the bottom of the hull than on the sides. Planks also flare out and taper so you need wider planks to cut the shape of a plank.

If you see something that strikes your interest and there is no kit for it don't let that stop you. That is what this forum is for just ask how can I do this or that or is there anyone that can cut a set of bulkheads

sw2.jpg


sw12.jpg

drawing 1.JPG

drawing 2.JPG
 
Last edited:
Better yet, most woodworkers call the model-sized resawn material SCRAP. Often available free for the asking, or in a dumpster. I have been using a lot of picture frame scraps as a wood source. More work, lots of sawdust but I enjoy the process.
 
Hi Dave GREAT ARTICLE, extremly helpfull and just in time for me as I just received my order from you, I have 2 questions one is about the dust I just finished my FRAMES FOR THE BLANFORD using yourNATURAL PEARWOOD 1/4 in thick the sanding dust is unbelivable can not even open the door without a mask on, I just bought a very large wet dry vac it is bulky but gets the job done, I just noticed in the new MICRO-MARK catologue that they have what they call a downdraft work table that is suposed to get the dust in the air, REASONABLY PRICED IF IT HELPS ME AT$90.00 DO YOU THINK THIS CAN WORK AS I HAVE PLENTY MORE SANDING TO DUE, a dust colection system is not an option for me at all, NEED YOUR OPION ON THIS ,,,,,2nd question some of the new order that I got from you is resawn material, have had problems sanding previous resawn material, what grit do you start off on and what progression until acceptable, ALSO WOULD ONE OF THE COMERCIAL ORBITAL SANDER WORK OR JUST A WASTE. THANKS AGAIN Don
 
Excellent, informative and entertaining tutorial Dave.
You don't get topics like this on that other grumpy forum.


thanks Brian, you don't find this on some other forums because certain groups and their forums do not embrace the lighter side and hobby part of model building. They fancy themselves rubbing elbows with academic circles and believe this should be taken very serious.

Would be deleted because tells the truth Lol

I know that all to well a lot of my stuff was wiped clean off other forums because they were in conflict with their agenda. It is not a matter of true or false it is a matter of your ideas and information fitting their rules and their agendas and what list your on either the good list or the bad list. It comes down to supporting and maintaining their image and not about bringing information to the general ship modeling community. Everything is tightly controlled with strict censorship of information.


the sanding dust is unbelievable can not even open the door without a mask on, I just bought a very large wet dry vac it is bulky but gets the job done,

I fill a 35 gallon trash container of saw dust per week and that does not include what falls to the floor. So what I am doing in more on an industrial scale. Saw dust is just part of the building process and difficult to control. The large vac is a good idea and that will suck up a lot of the dust. If I am doing a lot of sanding like a hull I take it outside and do all the heavy sanding.

I just noticed in the new MICRO-MARK catologue that they have what they call a downdraft work table that is suposed to get the dust in the air, REASONABLY PRICED IF IT HELPS ME AT$90.00 DO YOU THINK THIS CAN WORK AS I HAVE PLENTY MORE SANDING TO DUE, a dust collection system is not an option for me at all,


the truth be told these tools and things sold as hobby tools or micro tools to me are just toys. Yes they work but only for light duty. These things are designed for someone sitting at their hobby bench and making a few passes with 120 grit sandpaper and yes it sucks that fine dust away, But sanding a hull and grinding it down with 80 grit you will quickly over whelm the system.
Zoltan posed a topic on a down draft table if you have a shop vac it might be worth checking out a home made system.

2nd question some of the new order that I got from you is resawn material, have had problems sanding previous resawn material, what grit do you start off on and what progression until acceptable,

like I said I am operating on a commercial scale and running thousands of linear feet of material. I use a double drum sander with a 36 grit on the first drum and 80 grit on the second drum. The 80 grit will leave sanding marks on the surface but that is fine and that is where I stop with the finishing. Any finer surface I do by hand with a sanding block as I am building the model or I "scrape" the surface with a blade.
there are two styles of finishing a model 1 is to finish the wood to a smooth marble like reflective finish. 2 is to leave tool marks or sanding marks to give the model a rougher wood like finish it all depends on your personal taste.

ALSO WOULD ONE OF THE COMERCIAL ORBITAL SANDER WORK OR JUST A WASTE.


I have different size hand sanders I use but mostly for the final finish where all I am doing is removing any sanding marks from the 80 grit. The usual grit is 100 grit for finishing. Like the thickness sanders it is difficult to get a flat surface because you slow down and you cut more you speed up and you cut less, rock the sander from side to side and you round off the surface.

model ship building is a hand crafted experience you take your time and get into the zone the zen of sanding. Much of the sanding I do is with a pad of sandpaper in hand sanding and stopping, checking the surface and sand a little more.


Better yet, most woodworkers call the model-sized resawn material SCRAP. Often available free for the asking, or in a dumpster. I have been using a lot of picture frame scraps as a wood source. More work, lots of sawdust but I enjoy the process.


to enjoy the process there you have the answer. if it is dumpster diving or checking woodworking shops or cruising around the neighborhood looking for tree limbs sitting on the curb. even running an ad in the local paper wanted fruit trees dead or alive will remove for free for the wood.
 
I think the colour differences of the different wood types in a model in the right spots bring a model much more into life by creating good contrasts in the model without the use of paints.

There are two schools of thought on using different woods in a model. one is to pick one wood and do the entire model in that wood. What this does is high lite the craftsmanship and not the different wood. The idea is different woods detract from the models details.

Another idea is the use of a wood as a signature style. Harold Hahn did this with his models. The ships were built from West Indian boxwood and he always added an Ebony wale and railings. sometimes adding just a small section of a different wood like on the Alfred

doliver39c.jpg
5190.jpg

sometimes by using a very rare wood as an accent or as a signature style it adds interest and value to a model.

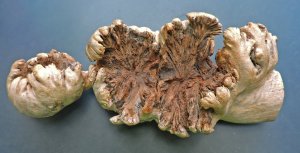
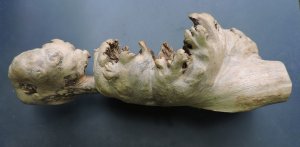
this wood is called parasite wood

pw3.jpg

pw2.jpg

This placenta-like outgrowth is where the host tree supported the large, domelike absorptive organ of the mistletoe. The host wood is often the chinaberry tree of the mahogany family and can be found only in Indonesia. This wood is extremely hard and dense and can be polished to a fine finish. Because the growths are small it can only be use for carvings and fittings, if you can obtain a large enough piece it can be used as cap rails.

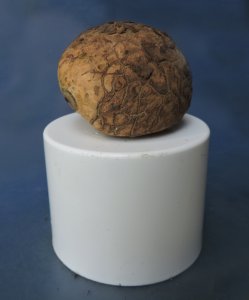
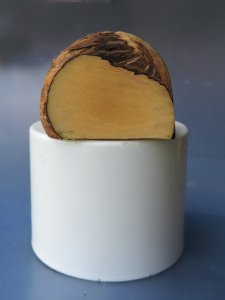
Another material is the Tagua nut also known as Plant or Palm Ivory, is produced by the Tagua palm tree which is found throughout the coastal, humid forest of Ecuador. Harvested after they fall to the ground, the nut produces carvings that are equal to the finest ivory in texture, color and density. There is no "grain" so you can carve it in any direction. Needless to say you can only get small pieces perhaps enough for a figurehead, carvings and small fittings. The nut is will not rot or decay the ones you looking at have been in my collection for over 20 years old.

t nut2.jpg

t nut3.jpg
 
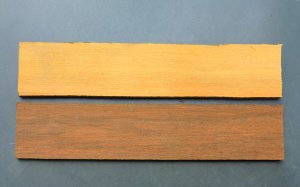
another source of woods are hiding on the lumber market because they are not really used because it is the heartwood that woodworkers are looking for. Some of these sapwoods are very dense and hard some are as fine as Boxwood.


Indonesian Laurel sapwood and heartwood

inl2.jpg
 
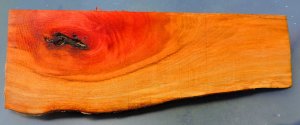
another nice sapwood is pink ivory the sapwood will range from cream to yellow. This wood is very dense, hard and you can polish it.

this type of wood you would use as an accent as cap rails or carvings, moldings and fittings. or as upper hull planking. It does not like to be bent.

to hunt down this wood it is hiding on the lumber market. Pink Ivory is sold by a number of dealers and they are selling the vibrant pink heartwood. Pieces with a lot of sapwood are not worth as much sometimes a wood dealer will buy logs and cut off the sapwood in slabs and happy to make a deal.

pi3.jpg
 
if you are going to mill exotic and rare woods for accent on a model or build with these woods you will need a 10 inch table top bandsaw and a thickness sander. With these two tools you can do most anything

there are a number of plans for a DIY thickness sander on line as well as jigs for a drill press or just buy one
 
Thank you Dave for the much detailed info. You put a lot of effort into this "tutorial" and it is greatly appreciated by all.
 
Back
Top