Working Steam powered wooden Drifter trawler, Formidable LT100, 1:24th scale

Totally outstanding and at times beyond belief, Stephen your skills and model making are truly fantastic. Cheers and respect to you.
Thank you ConsNZ,
I don't tend to think of myself as a fantastic model maker, although I do try my best(most of the time), having said that there are people on this site who leave me for dead.
I would add that a pig headed determination to achieve the mental picture I have in my head of the finished boat is what pushes me.
Thanks for all the likes. :)

Cheers,
Stephen.
 
Last edited:
Hello Stevedownunder, Asking is lawful, answering is courtesy, for sure in the future I will avoid bothering you
Hi Frank48,
I am sorry for missing your question yesterday, I don't know how I missed it but I did.
No problem with asking questions, I am happy to answer if I can.

LT100 was 88 feet or 26.8 meters long with a beam of19 feet or 5.8 meters.
The model is 4 feet or 1.2 meters long with a beam of 9.5 inches or 240 mm, I will let you in on a secret the model beam is a bit wider than it should be, I think this is because of the way I constructed the frames and inexperience on my behalf and will sailing weight about 13 kg.

Cheers,
Stephen.
Hi Stevedownunder, all quiet, Thanks for answering me, these boats are my favorite
 
Coal Bunker Rings & Lids.

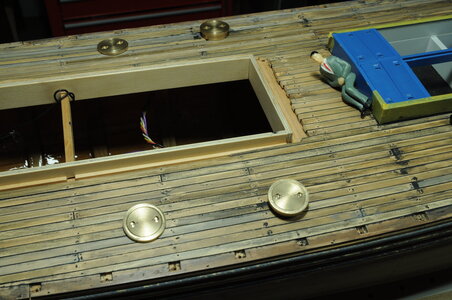
Now that the deck is basically done it is time to look at the Coal Bunker Rings & Lids.

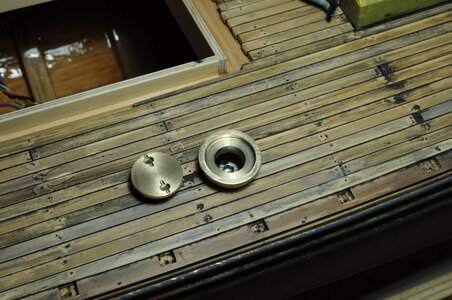
I am making the Rings & Lids from brass, 2 of them will be removable to gain access to the Cap Head screws that actuate the deck locking mechanism.

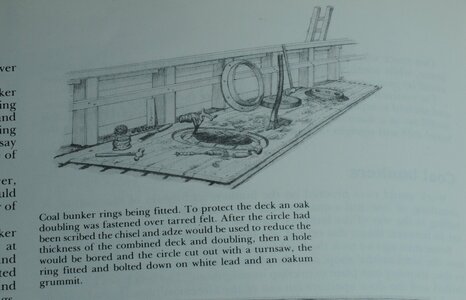
I have included a photo of the Coal Bunker Rings & Lids as drawn on the drawing and in the book on page 112 of Tree to Sea these don’t give any indication of some sort of pattern on the lids to provide an anti slip surface.
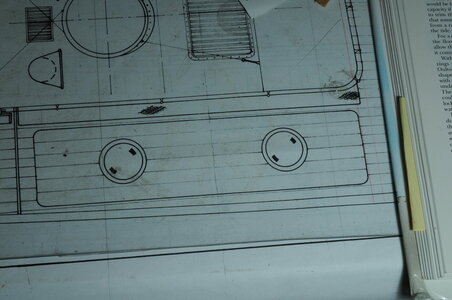
DSC_0266.JPGDSC_0267.1.JPG

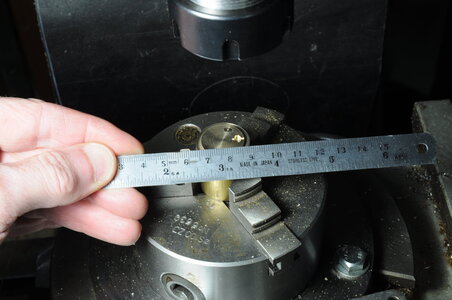
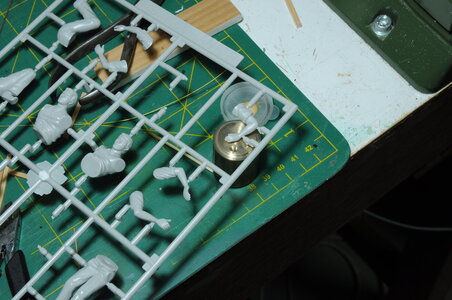
Before going much further I wanted to work out machining the hand recesses in the lids and machining the recess for a handle.
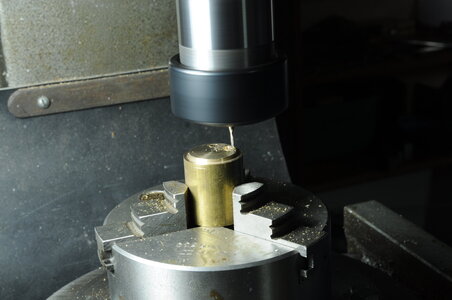
DSC_0270.JPG
DSC_0272.JPG
DSC_0273.JPG

“O” rings have been fitted to create a water tight seal. As a side note personal experience with making components with “O” rings in them has taught me that you don’t need a lot of “squash” on the “O” ring for it to seal, in fact too much squash will only cause problems with “pinching” the “O” ring and damaging it, in this application there is less than .1 mm or .004 inch of squash on a 12.5mm diameter.
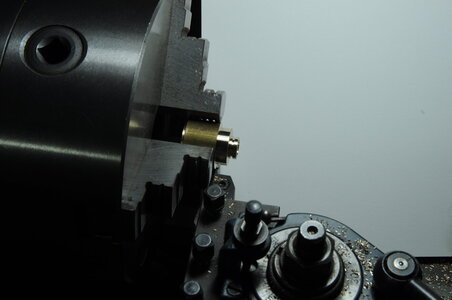
DSC_0278.JPG
DSC_0305.JPGDSC_0307.JPG

There is not a lot of information that I could find about these parts, I found a lot of photos of land based cast iron covers, think cast iron sewer covers with a staggering array of different patterns on the lid face.

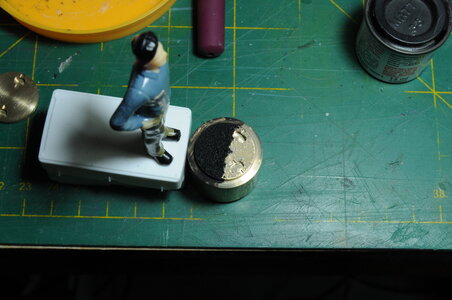
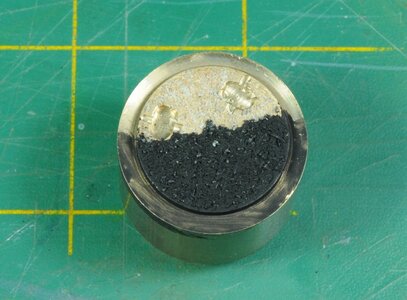
In a bit of a thought bubble I thought the surface may have been left purposefully rough, not hard to do with a casting so I did an experiment at creating a non slip surface, using some beads that you mix with paint to create a non slip painted surface, I brushed some Titebond onto the brass and dipped it into the beads, next day I painted half of it black to get a better idea of how it would look.
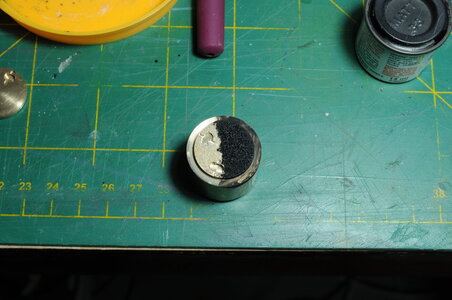
DSC_0311.JPGDSC_0312.JPG


Or may have had something like a friend of mines Danny Boys covers, when I get time I will have a go at milling some grooves into my trial piece.
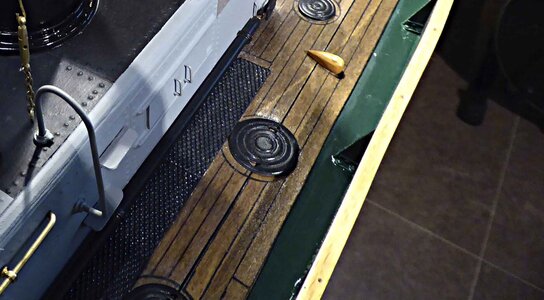
LT 53 .1.jpg

I realize OH&S was not exactly a thing back in 1919, but having a very slippery surface in the middle of the deck I tend to think would not have been done, so some sort of non slip surface would have been present I think.

With things returning to a more normal state, my hobby time has reduced significantly back to the few hours a week at most, therefore progress will return to a snails pace.

I welcome opinions on which surface to go with on the Lids.

Thanks for looking in and reading my ramblings or just looking at the photo’s and stay safe.

Cheers,
Stephen.
 
Oh, wow Stephen! Just yesterday I was browsing your log to see whether I had missed any updates and voila! today is my lucky day. Your metal work is just superb - I marvel at it because mine is non-existent and will, I am afraid, stay at being non-existent. The hand measurement to determine the size of the recess is testimony to the details of details. Personally, I would go for the first surface using the beads. The scribed rings look too much like an oven's plates! ROTF
 
Thanks Heinrich,
I am so happy that you enjoy my updates. :D
Having a well equipped workshop helps a lot. The ruler was more for a size guide, all measurements were done on the rotary table or using the axis hand wheels writing down coordinates and repeating to produce a copy of the original, no digital readouts in my workshop, not yet anyway.
Thanks for your thoughts. I tend to agree the rough surface is what I am generally trending toward. I was thinking of trying a cross hatched sort of pattern as well but haven't got that far yet. I hadn't thought of "oven" plates but you are quite right they do look a bit like that.

Cheers,
Stephen.
 
Really impressive attention to detail Stephen. What you guys can accomplish with a proper shop and tooling is remarkable.
Thanks Paul,
You are quite right, having a well equipped workshop and the skills to use the equipment is a wonderful thing for someone like me and I feel quite blessed to have both.

I would also add that I feel more like a beginner in the scratch building area and seeing the incredible work done by others and that includes you Paul without a fully equipped workshop, on this site is quite inspiring, probably one of the best things about the internet are sites like this one that bring like minded people together from around the world.

Okay I am gushing a bit there but there it is.
Cheers,
Stephen.
 
Last edited:
Coal Bunker Lids Continued.


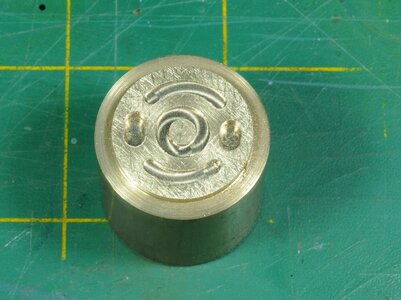
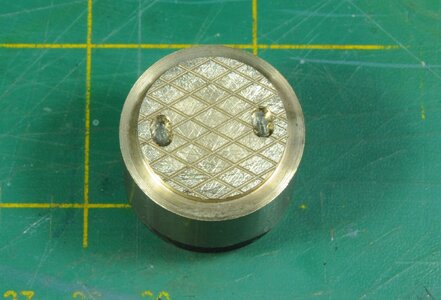
I got some hobby time today and had a go at two different stiles of lid one having circular grooves cut into it the other having a cross hatch pattern cut in using an engraving tool.

At present I don’t mind the look of the cross hatch or the textured finish. In reality they are only about 22 mm in diameter.
DSC_0319.1.JPGDSC_0317.1.JPGDSC_0318.1.JPG

Again I welcome opinions on which surface to go with on the Lids.

Cheers,

Stephen.
 
Hello Stephen. All three examples obviously show great craftsmanship so it's purely a question of aesthetics. My choice would either be cross-grain finish or the textured one. The only question I have is how the textured one will look if the textured finish has also been applied to the indentations. I think you need to cover the whole one so that we can make a fair comparison. My two cents ... :)
 
Hello Stephen. All three examples obviously show great craftsmanship so it's purely a question of aesthetics. My choice would either be cross-grain finish or the textured one. The only question I have is how the textured one will look if the textured finish has also been applied to the indentations. I think you need to cover the whole one so that we can make a fair comparison. My two cents ... :)
Thanks for your input Heinrich,

I think the indentations you are referring to are the recessed hand grips that don't have a handle yet. I wasn't intending to put the textured finish into the recessed areas mainly due to how much it would build up an area that will have a tool that is yet to be made hooked into to remove the cover, hopefully that makes sense.

The indentations were experimental on the textured lid and would still need a small piece of brass soldered in to act as a handle.

I probably should at least paint all of them black all over to get a better idea of how they will look.

Cheers,
Stephen.
Yes, my "indentations" are indeed the hand recesses ROTF ! I agree with you on painting them all black first. That may create a totally different perspective.
 
Hi Stephen. I like the top two with the top one having an 'older' feel and the middle one looking more 'modern'. Seeing them in black or blackened (Casey's) would be good. Amazing craftsmanship.
Thanks for your input Paul,
Fair comment about the "older" feel, mind you it was only just over 100 years ago when she was built.
I did try blackening brass quite a few years ago without success and tend to just paint these days.

Cheers,
Stephen.
 
Thanks for your input Paul,
Fair comment about the "older" feel, mind you it was only just over 100 years ago when she was built.
I did try blackening brass quite a few years ago without success and tend to just paint these days.

Cheers,
Stephen.
Hello Stephen, using the 'Brass black' as well as other blackening solutions is not that difficult, though. I mean, they all are chemicals that react to the surface only. While different brands may react differently, the success, for the most part, underlying in the absolutely clean surface. That said, the surface must be cleaned from grease and oxidation! I found a bath in vinegar works very well. But, not just a clean surface is the success, all brass is alloy and has diffrent components made of, so they blackened differently. Also, depending on the brand, you may dilute the solution with water. I usually dilute 'Brass black' to a proportion of 1:5 and it works well. However, there is no standard recipe, and the best suggestion is trial and error.
 
Back
Top