-

Win a Free Custom Engraved Brass Coin!!!
As a way to introduce our brass coins to the community, we will raffle off a free coin during the month of August. Follow link ABOVE for instructions for entering.
-

PRE-ORDER SHIPS IN SCALE TODAY!
The beloved Ships in Scale Magazine is back and charting a new course for 2026!
Discover new skills, new techniques, and new inspirations in every issue.
NOTE THAT OUR FIRST ISSUE WILL BE JAN/FEB 2026
You are using an out of date browser. It may not display this or other websites correctly.
You should upgrade or use an alternative browser.
You should upgrade or use an alternative browser.
Working Steam powered wooden Drifter trawler, Formidable LT100, 1:24th scale
- Thread starter Stevedownunder
- Start date
- Watchers 33
Not only that but they come in nice little plastic boxes you can use to store misc. small parts. At last count I had 125 of these. Oh yes, I spent lots of $$ on my RC hobby.Excellent engineering to fit that servo. I can commend you on those HiTec servos - they are the bees knees!
Thank you to Heinrich and rtibbs,
The photo is a bit misleading that Hitec servo is the rudder servo, so I need to confess the sail winch is not a Hitec but a low cost Bangood unit which will hopefully last more than a few runs.
Cheers,
Stephen.
The photo is a bit misleading that Hitec servo is the rudder servo, so I need to confess the sail winch is not a Hitec but a low cost Bangood unit which will hopefully last more than a few runs.
Cheers,
Stephen.
Thank you to Heinrich and rtibbs,
The photo is a bit misleading that Hitec servo is the rudder servo, so I need to confess the sail winch is not a Hitec but a low cost Bangood unit which will hopefully last more than a few runs.
Cheers,
Stephen.
Fantastic work Steve, you are a very accomplished model maker, on the engineering and the woodworking side, your LT100 is packed from stem to stern, I'm looking forward to seeing more,
Best regards John,
Thank you for your comments John,Fantastic work Steve, you are a very accomplished model maker, on the engineering and the woodworking side, your LT100 is packed from stem to stern, I'm looking forward to seeing more,
Best regards John,
I don't tend to see myself as an accomplished model maker, more someone who has a lot to learn and making mistakes along the way and maybe more like a sparrow trying to fly with the eagles, I would count you among them with the variety and quality of work you have done.
And yes there is more to come, I have been beavering away on the deck and should have an update in the next few days.
I think the best thing is we have somewhere to share our work, with like minded people in this world wide community.
Cheers,
Stephen.
More Deck Planking.
As the deck proceeds I am getting more settled in my opinion of it, that’s not to say I think it is brilliant but things have gone from “what the heck have I done to myself” with this hair brained approach and questionable results, to maybe it isn’t too bad.
It should be noted that the deck is intended to look a bit old as will the rest of the boat, this is due to it being a working boat not a pleasure yacht and even though some owners probably kept their boats in a well looked after condition I think there would be “weathered” areas and the deck would show weathering first I think and possibly within a couple of years could look a bit like I am presenting, at least that’s my guess.
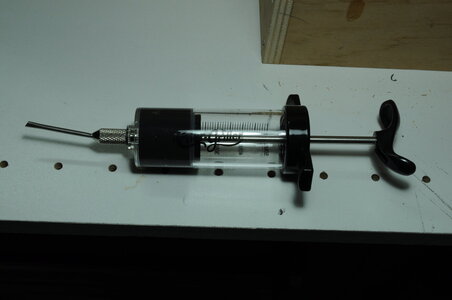
I quite quickly worked out that using a small spatula to spread the glue mix wasn’t the way to go and started looking for an alternative. I ended up with a BBQ marinade injector that has 2 different diameter nozzles that I thought would be large enough for my thick mix to pass through and it was. As I have progressed I have made the mix thinner, but still thick enough that it doesn’t flow readily, in the hope of reducing air bubbles which show up after trimming.
The first 4 rows of planks Port and Starboard, I prepared in one hit partly to get an idea of how they were going to look with regard to how much of a curve there would be fore and aft.
I now prepare two complete rows of planks, one Port and one Starboard at any one time this is to try and keep things even and when laying them I start at one end and work my way to the other end all in one sitting.
I have found there is a sweet spot for trimming the excess glue mix anywhere between 1 and 3 hours after laying, when the glue is not completely dry but not too wet.
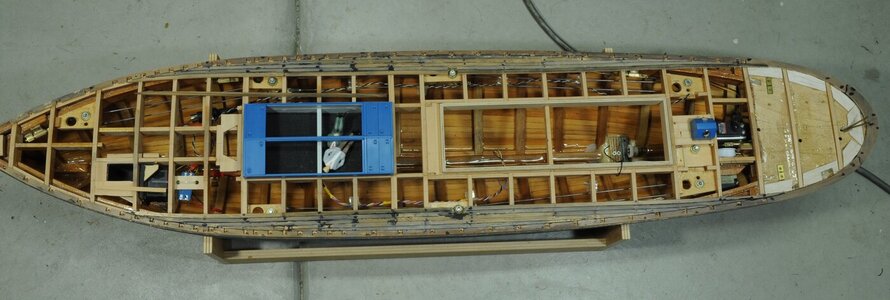
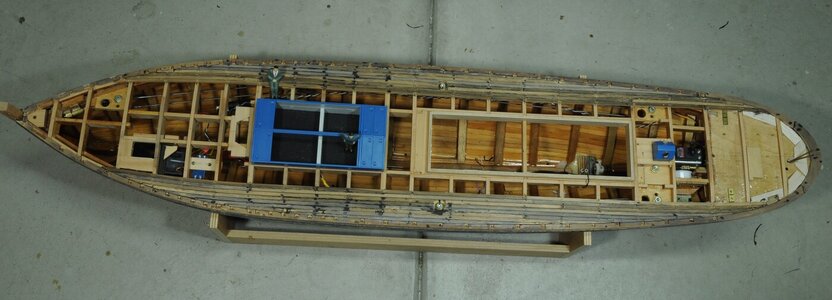
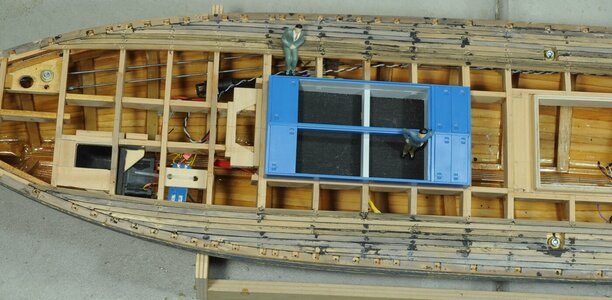
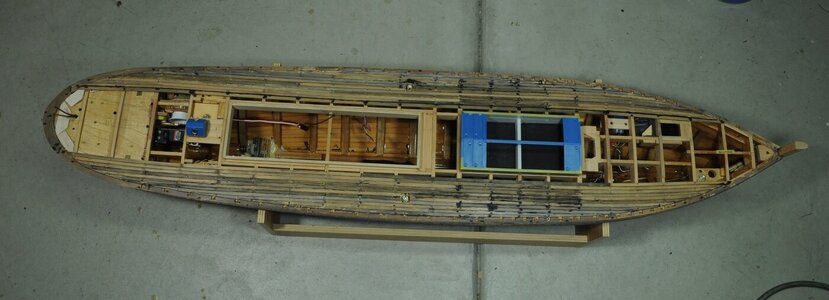
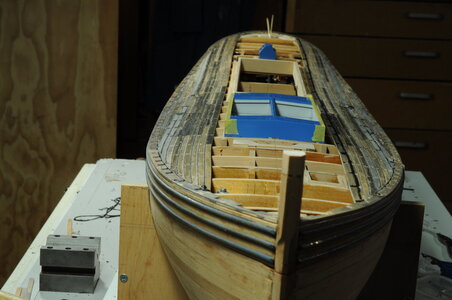
Laying the deck is something I was looking forward to doing, I can say that I never expected the amount of concern it caused early on, I am happy to say that things have settled down and I am enjoying it more and more, except for the repetition that has crept in, well you know there is no pleasing some people.
One other problem on the horizon is how the forecastle center plank is going to look, the concern is how much of a taper is acceptable.
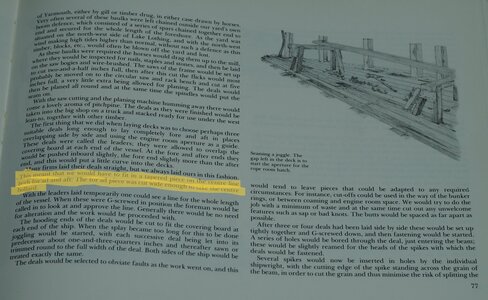
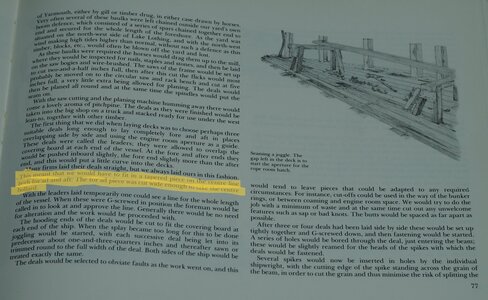
Ted says on page 77 in his book Tree to Sea, that there is a tapered plank forward and aft, though there is no mention as too how big it is and his sketch of a planked deck doesn’t show a tapered plank.
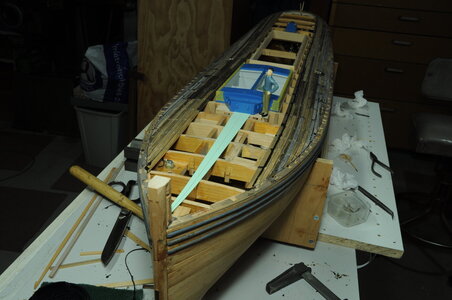
I made up a rough approximation of the amount of taper, in realty there will not be straight sides and think it is too wide at the aft end, I am going to wait and see how the planking looks when I get a bit nearer to needing a tapered plank.
I am also starting to have a go at modifying some 1/24th scale people, something I haven’t done before. Starting with the guy lying on his back, I want him to be standing though I am not sure of what sort of pose yet. This one is more for a learning experience, see how it goes when I get back to it.
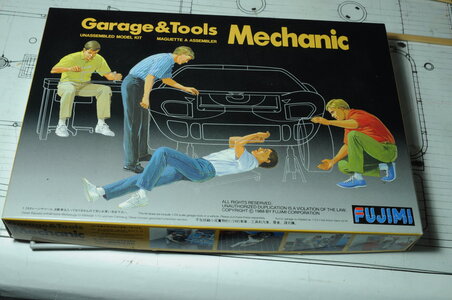
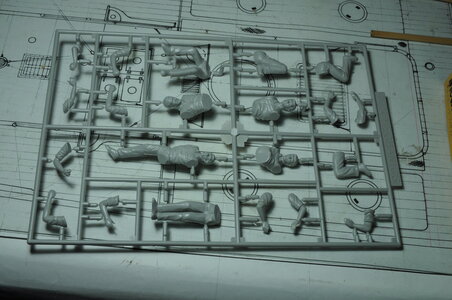
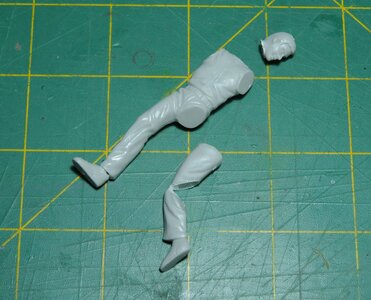
Constructive criticism is welcomed...
More to come…
Thanks for looking in and reading my ramblings or just looking at the photo’s and stay safe.
Cheers,
Stephen.
Yet More Deck Planking.
Progress is fairly slow but steady.
I glued some pieces of thin ply as a gluing guide for the forward hoodway.
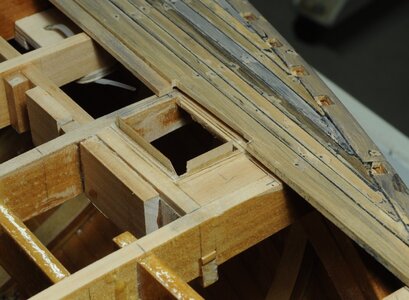
I have now got to the point where decisions about the center or king plank need to be made.
In Ted’s book on page 77, he says the center plank was tapered although there is no indication of this in his sketch's.
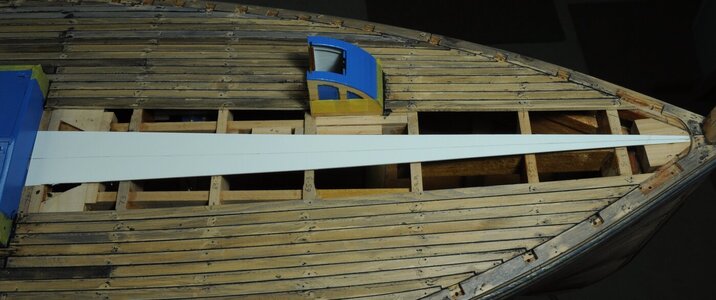
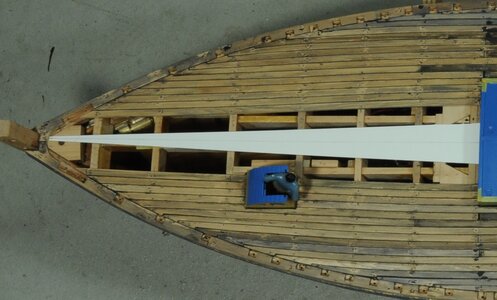
If I made a single tapered plank it would end up looking absurd in my opinion, I made up a card template to visualize it at it’s widest point the plank would be the equivalent of 2.5 feet wide.
After a bit of a search on the internet I found some deck planking photos that indicate a method of letting planks into the king plank and I think I will go for this approach although not as stylishly.
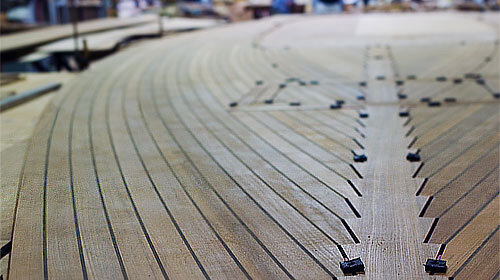
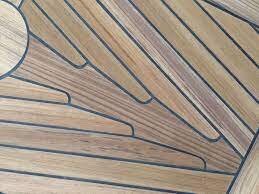
Here is a photo of my proposed method, letting 2 planks into each side of the tapered king plank to thin it down to an acceptable amount.
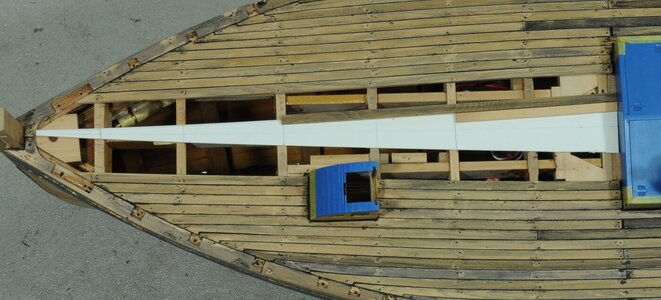
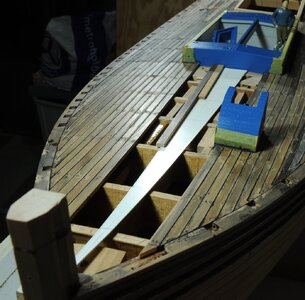
Lastly a few progress photos.
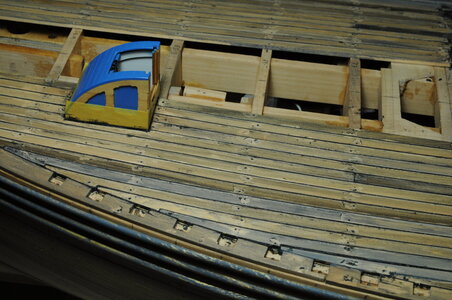
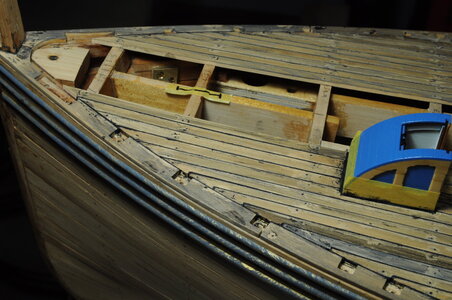
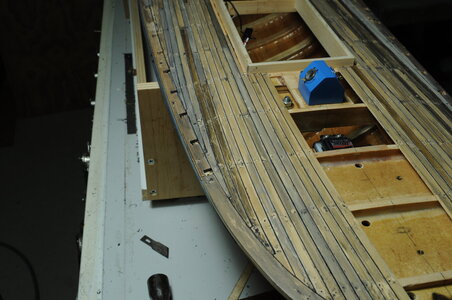
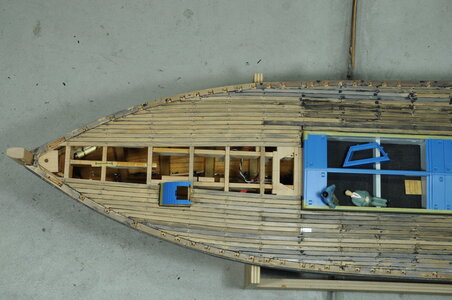
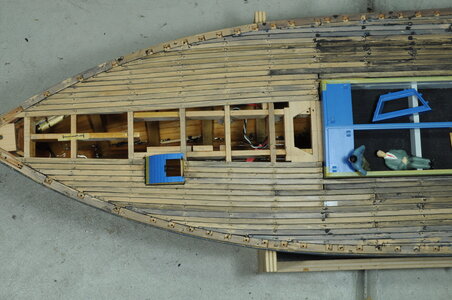
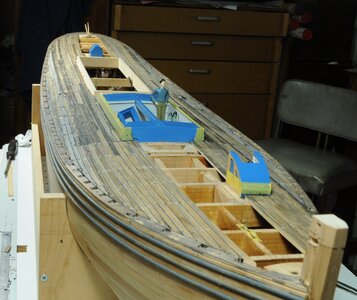
Constructive criticism is welcomed...
More to come…
Thanks for looking in and reading my ramblings or just looking at the photo’s and stay safe.
Cheers,
Stephen.
At Last Deck Planking is Done (well nearly).
Decisions were made, for better or worse on the center planks forward and aft, now that it is done I wonder why I was so worried about how it was going to look with my interpretation of Teds description, that’s not to say others will think that it is not okay, but at the end of the day this is my interpretation, right or wrong.
Making the forward and aft center planks was a very time consuming job.
Starting with some old school tracing paper to make a template. The paper was taped down to make sure it was flat then I used a sharp scalpel to cut the outline and wind up with a shape that is pretty close to being right.
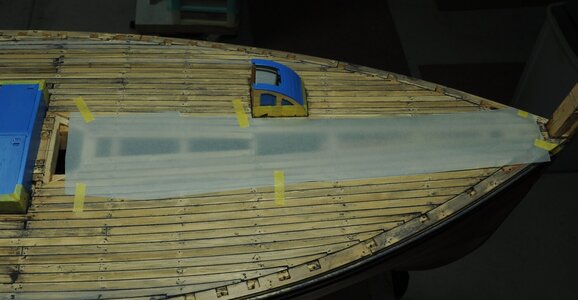
Once cut out the template was stuck down on the board using a glue stick, then traced around with a pencil this ensured the plank would be bigger than needed (easier to remove material than put it on) then roughly cut out with a scroll saw.
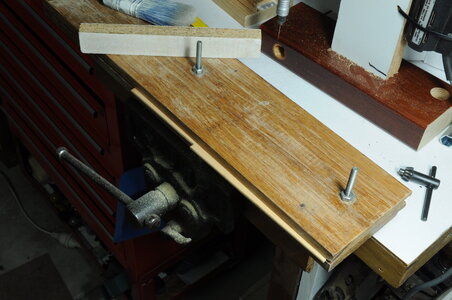
Next came the slow part of carefully trimming down to fit inside the required space without gaps, then removing the required amount for caulking would be easier or at least that’s what I thought, didn’t quite work out that way on the first one, as I removed too much material, winding up with too much clearance I had a look at trying to save the plank by moving it forward to close the gap but in the end there was nothing I could do except make another one. Apart from the wasted time the most upsetting part was the waste of material.
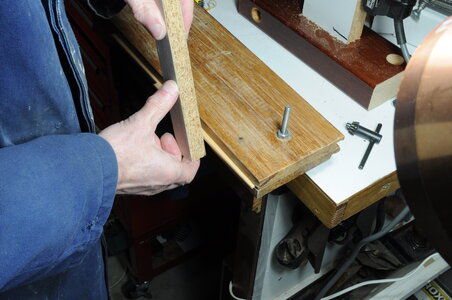
Lovely fit with no clearance at this point.
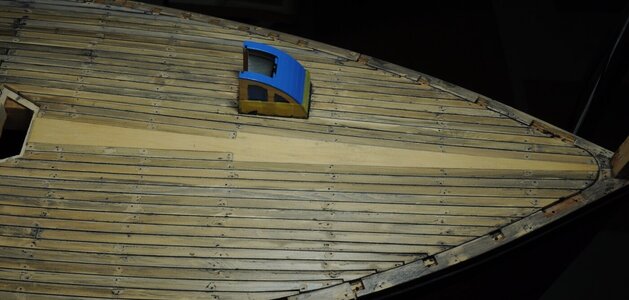
Then disaster too much clearance, even moving it further forward didn't work, the gap was too big.
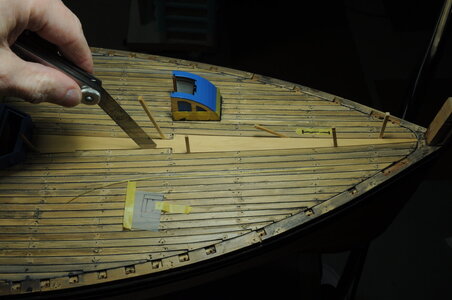
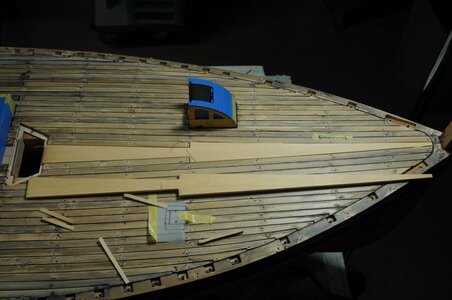
Once the fore and aft center planks were done I pinned them in place temporally before removing them to enable gluing in place, when gluing I only caulked on one side to ovoid getting my glue and paint mix everywhere.
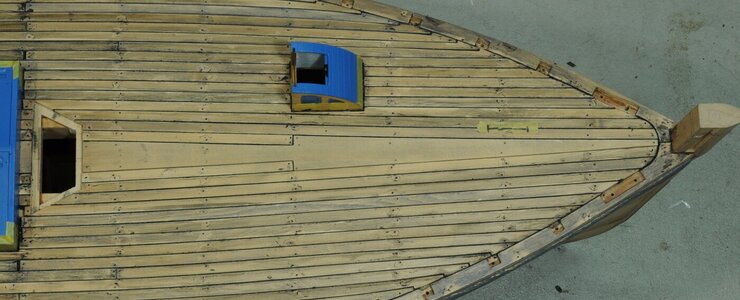
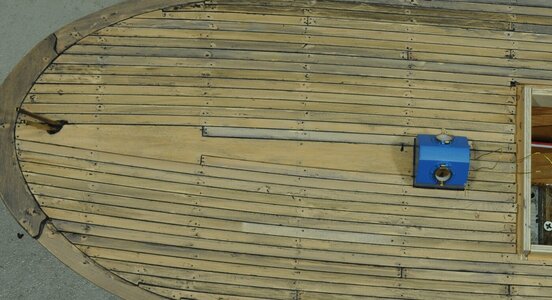
Once glued and half caulked I pushed glue mix into the remaining gap.
Each of the other center planks needed to be custom made either slightly wider or with a slight taper, these were quite quick to make and install.
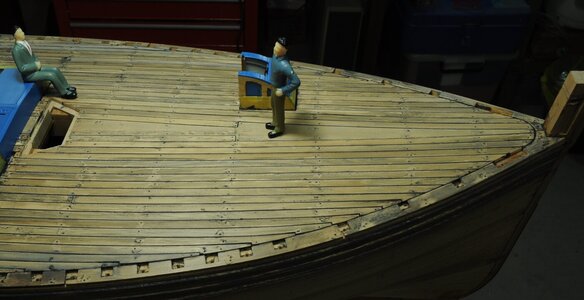

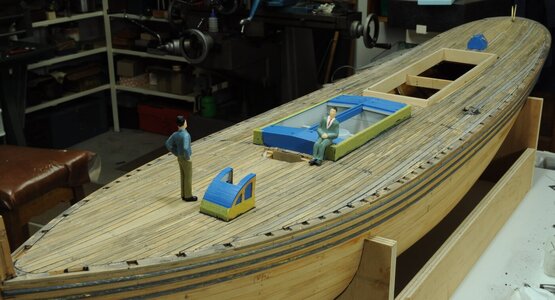

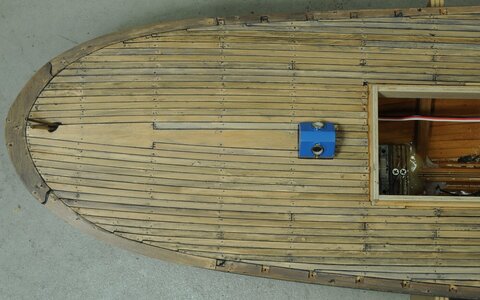
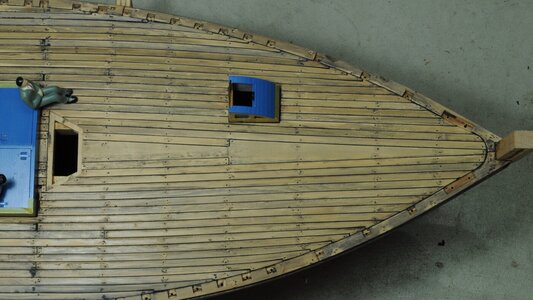
Unfortunately gluing the aft cabin skylight in place before planking turned out to be a bad idea, I managed to damage the paint work several times with the drill chuck, you would have thought I would have learnt my lesson the first time, when the drill chuck hit the paint.
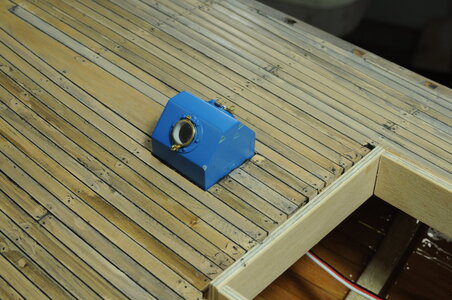
There is some cleaning up to do and I have been reducing the severity of some of the weathering to give a more unified look, this is more because when looking at the model I couldn’t help but think I had gone a bit far and it just looked poorly made.
Next time I start on Coal hatches.
Thanks for looking in and reading my ramblings or just looking at the photo’s and stay safe.
Cheers,
Stephen.
Lovely work, Stephen!! As always... 
Thanks Jim.
Cheers,
Stephen.
Cheers,
Stephen.
- Joined
- Jan 9, 2020
- Messages
- 10,566
- Points
- 938

Dear Stephen. I always sit and wait with bated breath on your next update. First off - that center plank is absolutely superb work - even though I share the pain of taking away too much material in order to get it perfect!  Ouch! The second attempt though is masterful. However, there is something else that I want to throw out at you. When the weathering of the deck is viewed in isolation, I can only stand in awe of what you have achieved, but this is where my question lies. Your deck structures are absolutely pristine and look as if they have just been installed on the ship without having been exposed to wind or weather for even a single day. To me the contrast between the brightly colored and brand-new looking deck features and the weathered deck is just too great. I hope you don't shoot the messenger!
- Joined
- Apr 10, 2020
- Messages
- 654
- Points
- 353

I found a nice video
Kind regards,Daniel
- Joined
- Oct 17, 2020
- Messages
- 1,691
- Points
- 488

Hello Stevedownunder, could you tell me the real dimensions of this boat? Thanks, great job. CongratulationsThanks Jim.
Cheers,
Stephen.
Last edited:
You made a great job with this planking, Stephen. And remaking planks is part of the job.At Last Deck Planking is Done (well nearly).
Decisions were made, for better or worse on the center planks forward and aft, now that it is done I wonder why I was so worried about how it was going to look with my interpretation of Teds description, that’s not to say others will think that it is not okay, but at the end of the day this is my interpretation, right or wrong.
Making the forward and aft center planks was a very time consuming job.
Starting with some old school tracing paper to make a template. The paper was taped down to make sure it was flat then I used a sharp scalpel to cut the outline and wind up with a shape that is pretty close to being right.
View attachment 313370
Once cut out the template was stuck down on the board using a glue stick, then traced around with a pencil this ensured the plank would be bigger than needed (easier to remove material than put it on) then roughly cut out with a scroll saw.
Next came the slow part of carefully trimming down to fit inside the required space without gaps, then removing the required amount for caulking would be easier or at least that’s what I thought, didn’t quite work out that way on the first one, as I removed too much material, winding up with too much clearance I had a look at trying to save the plank by moving it forward to close the gap but in the end there was nothing I could do except make another one. Apart from the wasted time the most upsetting part was the waste of material.
View attachment 313373View attachment 313374
Lovely fit with no clearance at this point.
View attachment 313371
Then disaster too much clearance, even moving it further forward didn't work, the gap was too big.
View attachment 313372View attachment 313375
Once the fore and aft center planks were done I pinned them in place temporally before removing them to enable gluing in place, when gluing I only caulked on one side to ovoid getting my glue and paint mix everywhere.
View attachment 313377View attachment 313378
Once glued and half caulked I pushed glue mix into the remaining gap.
Each of the other center planks needed to be custom made either slightly wider or with a slight taper, these were quite quick to make and install.
View attachment 313379View attachment 313380View attachment 313381View attachment 313382View attachment 313383View attachment 313384
Unfortunately gluing the aft cabin skylight in place before planking turned out to be a bad idea, I managed to damage the paint work several times with the drill chuck, you would have thought I would have learnt my lesson the first time, when the drill chuck hit the paint.
View attachment 313385
There is some cleaning up to do and I have been reducing the severity of some of the weathering to give a more unified look, this is more because when looking at the model I couldn’t help but think I had gone a bit far and it just looked poorly made.
Next time I start on Coal hatches.
Thanks for looking in and reading my ramblings or just looking at the photo’s and stay safe.
Cheers,
Stephen.
Regards, Peter
Thank you Heinrich,Dear Stephen. I always sit and wait with bated breath on your next update. First off - that center plank is absolutely superb work - even though I share the pain of taking away too much material in order to get it perfect!Ouch! The second attempt though is masterful. However, there is something else that I want to throw out at you. When the weathering of the deck is viewed in isolation, I can only stand in awe of what you have achieved, but this is where my question lies. Your deck structures are absolutely pristine and look as if they have just been installed on the ship without having been exposed to wind or weather for even a single day. To me the contrast between the brightly colored and brand-new looking deck features and the weathered deck is just too great. I hope you don't shoot the messenger!

Yes I was kicking myself when I stuffed up the first one, it was time to go inside at that point and try again the next day.
I am glad you have bought this up and yes there is a disparity between the deck structures and deck at the moment however I will be weathering the whole boat in due coarse. My thinking is that I want to weather all structures at the same time so to speak, once they are built to give continuity, but the deck is something I didn't think I could weather after installing.
I am also a great believer that weathering should not be used to hide sub standard work, in my opinion it doesn't work, you need a well made item before weathering to achieve the best resalts.
I whole heartedly welcome constructive criticism so thank you again.
Cheers,
Stephen.
Thank you Daniel,I found a nice video
Kind regards,Daniel
I have seen this video before, and they have done a splendid job of there covering board in a manner that seems to be the standard way this is done these days.
I know my covering boards are different, this is because of the description in the book Tree to Sea written by a shipwright that worked on LT100 when she was being made.
I think as with a lot of things there are more than one way to do it and different ship yards probably had different ways of doing things.
Cheers,
Stephen.
Thank you Peter,You made a great job with this planking, Stephen. And remaking planks is part of the job.
Regards, Peter
Yes you are right though remaking things is not my favorite past time.
Cheers,
Stephen.
- Joined
- Jan 9, 2020
- Messages
- 10,566
- Points
- 938

I am so glad that you took my comments in the way that it was intended. Weathering of that deck was a massive undertaking which you have pulled off in exemplary style. And if you plan on weathering the deck structures too to give uniformity to the ship then "Bob's your uncle", all is good and I am a happy camper!Thank you Heinrich,
Yes I was kicking myself when I stuffed up the first one, it was time to go inside at that point and try again the next day.
I am glad you have bought this up and yes there is a disparity between the deck structures and deck at the moment however I will be weathering the whole boat in due coarse. My thinking is that I want to weather all structures at the same time so to speak, once they are built to give continuity, but the deck is something I didn't think I could weather after installing.
I am also a great believer that weathering should not be used to hide sub standard work, in my opinion it doesn't work, you need a well made item before weathering to achieve the best resalts.
I whole heartedly welcome constructive criticism so thank you again.
Cheers,
Stephen.
Just between me and you Heinrich, I don't have much experience in weathering and will be approaching it in a cautious manner, a little bit at a time.I am so glad that you took my comments in the way that it was intended. Weathering of that deck was a massive undertaking which you have pulled off in exemplary style. And if you plan on weathering the deck structures too to give uniformity to the ship then "Bob's your uncle", all is good and I am a happy camper!
Cheers,
Stephen.

