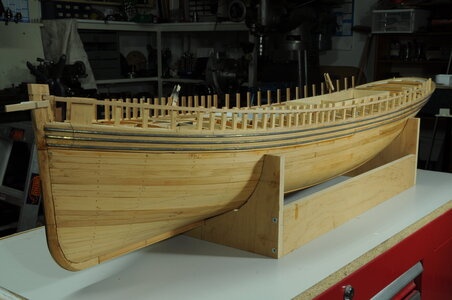
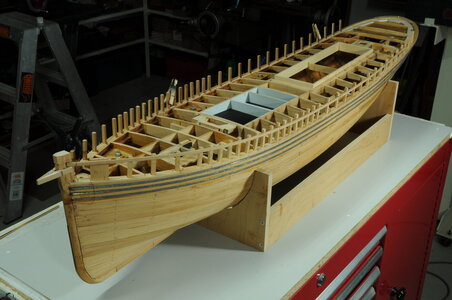
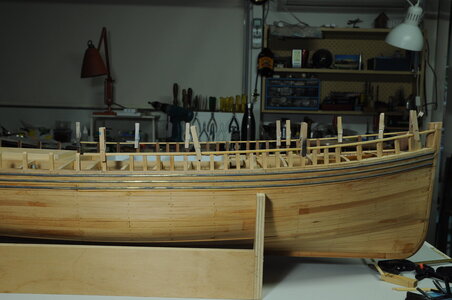
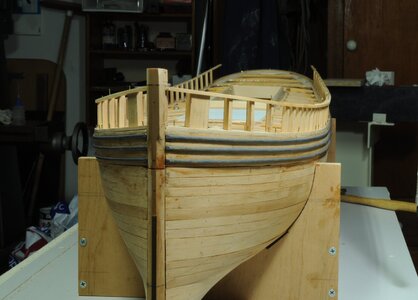
Working Steam powered wooden Drifter trawler, Formidable LT100, 1:24th scale

G'day Steve, I've found the answer to my question, so it looks like the official version is blue, I was reading up on building the fore hatch etc and it was mentioned that the colour is blue,

best regards john,
Thanks John,

Yes Ted does say it is blue though what sort of blue is the question, I have seen other models of LT100 in a light blue or one similar to the colour I mixed. I did stray from what I think the original would have been by showing the sides varnished, then who knows maybe they did varnish the sides.
Funny about the aft skylight I did find a photo after I had finished altering it, that shows it with a flat roof and no angled sides. I guess either is possible, I am not intending to alter it again, and like the forecastle hoodway I need to learn to temper my impatience with searching for information, this is clearly shown with the wonderful photos you found.
At the moment I just feel I need a break I cannot say how long at this point might just be a couple of days or it might be more.

Cheers,
Stephen.
 
Wow Stephen! I knew that your painting would follow the rest of the build and would be top-notch, and I was not wrong. However, nothing could prepare me for that lovely hue of blue which brought back lots of memories.

One of my favorite get-aways in South Africa is a small fishing village called "Gansbaai" (literally translated as "Goose Bay". Over the years the pelagic fishing and trawling-industry has been the mainstay of the town with many of the trawlers bearing the word "goose" as part of their names. There were Rietgans (Reed Goose), Berggans (Mountain Goose), Seegans (Sea Goose), Kolgans (Spotted Goose) and Blougans (Blue Goose) among others. They all belonged to one canning factory and were originally all painted in the exact same blue color that you used on the Drifter! Nowadays, not many of them have survived (they were all still wooden boats) and the ones that have, have all been substantially modified from their original shape. Even the blue color has made way for a new turquoise/teal look.
 
Thanks John,

Yes Ted does say it is blue though what sort of blue is the question, I have seen other models of LT100 in a light blue or one similar to the colour I mixed. I did stray from what I think the original would have been by showing the sides varnished, then who knows maybe they did varnish the sides.
Funny about the aft skylight I did find a photo after I had finished altering it, that shows it with a flat roof and no angled sides. I guess either is possible, I am not intending to alter it again, and like the forecastle hoodway I need to learn to temper my impatience with searching for information, this is clearly shown with the wonderful photos you found.
At the moment I just feel I need a break I cannot say how long at this point might just be a couple of days or it might be more.

Cheers,
Stephen.
G'day Steve, we all need a bit of a break now and then, thats why I like having a selection of boats on the go at one time, enjoy your reshufling of the workshop and also revitalizing yourself, it will give me a chance to catch up a bit, I'm just cutting out the wood for the fore hatch, and then like you I am thinking should I do the planking first or the bulwarks, anyway enjoy your break, will catch up later on,

best regards John,
Breaks in the work are good for the eyes and hands as when you return you likely will have new insights as to what was done and what you want to do, as you desire, next. I try to tell that to myself but often get too engaged in continuing and only look back later when I wish that I had earlier. Rich (PT-2)
 
Wow Stephen! I knew that your painting would follow the rest of the build and would be top-notch, and I was not wrong. However, nothing could prepare me for that lovely hue of blue which brought back lots of memories.

One of my favorite get-aways in South Africa is a small fishing village called "Gansbaai" (literally translated as "Goose Bay". Over the years the pelagic fishing and trawling-industry has been the mainstay of the town with many of the trawlers bearing the word "goose" as part of their names. There were Rietgans (Reed Goose), Berggans (Mountain Goose), Seegans (Sea Goose), Kolgans (Spotted Goose) and Blougans (Blue Goose) among others. They all belonged to one canning factory and were originally all painted in the exact same blue color that you used on the Drifter! Nowadays, not many of them have survived (they were all still wooden boats) and the ones that have, have all been substantially modified from their original shape. Even the blue color has made way for a new turquoise/teal look.
Lovely story Heinrich,
I hope the memory's were happy ones, thanks for sharing it.

Cheers,
Stephen.
 
G'day Steve, we all need a bit of a break now and then, thats why I like having a selection of boats on the go at one time, enjoy your reshufling of the workshop and also revitalizing yourself, it will give me a chance to catch up a bit, I'm just cutting out the wood for the fore hatch, and then like you I am thinking should I do the planking first or the bulwarks, anyway enjoy your break, will catch up later on,

best regards John,
G'day John,
What you have touched on is part of the need for a break, I am not sure which way to go.
I lack the experience and depth of knowledge that people like you have, and I don't want to force it and make more mistakes.
At least I know that to press on regardless is a recipe for disaster, it is far better to "feel" your way through.

Cheers,
Stephen.
 
Breaks in the work are good for the eyes and hands as when you return you likely will have new insights as to what was done and what you want to do, as you desire, next. I try to tell that to myself but often get too engaged in continuing and only look back later when I wish that I had earlier. Rich (PT-2)
Exactly right Rich,
This hobby can teach you many other life lessons if you choose to push your self out of your comfort zone.

Cheers,
Stephen.
 
Back to the Bulwarks.


Back to working on the Drifter after a bit of a clean up and finishing off making a Rope Making and Serving Machine.

One of the reasons I stopped working on this project is because I had reached a point where I couldn’t work out a way forward, the problem being fixing the position of Stanchions in relation to cut outs in the covering boards, my initial idea was to make the capping rail and temporarily pin it in place this presented problems, mainly with how long it would take, so I came to a halt.

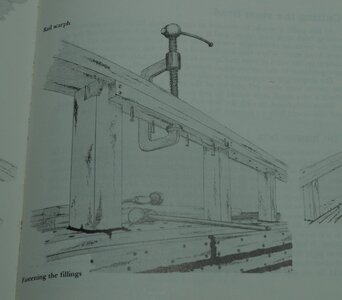
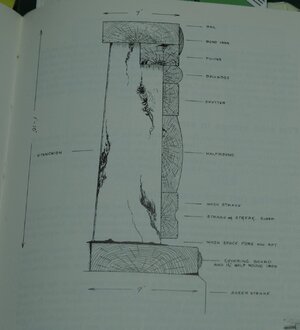
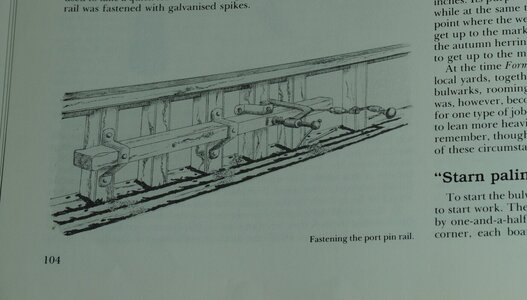
Fast forward a couple of months and after reading Tree to Sea for a while a way forward presented itself, that didn’t involve making the capping rail first. One thing that helped me was a drawing on page’s 97 & 107 that clearly showed the “filling”.
DSC_0040 1.JPGDSC_0041 1.JPG

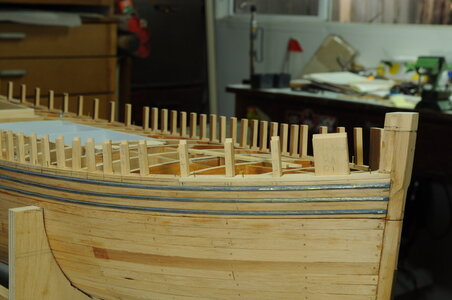
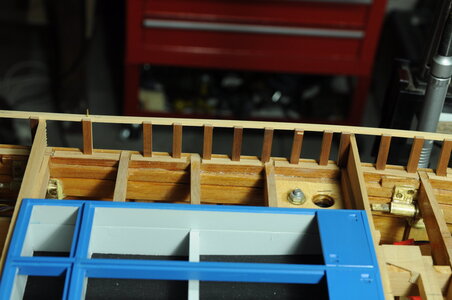
The idea was to make filling boards that are much longer than in real practice. The real ones “filling” a space between stanchions under the capping rail, my ones being long lengths that help to fix a position for the stanchions.

The first job to be done was to run a fairing batten to the correct heights and marking the stanchions then cut them to height.
DSC_0003.JPGDSC_0002.JPG

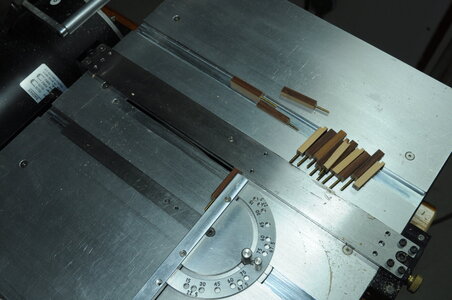
A rebate needed to be cut on each stanchion to allow the long filling strips to sit in the wright spot then be pinned in position.
DSC_0023.JPGDSC_0017.JPG

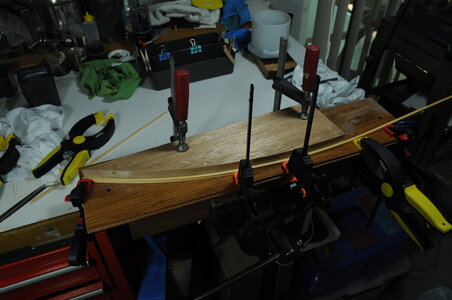
Next I made up a former to steam the strips into something resembling the right shape, this former will be handy when I come to plank the bulwarks.
DSC_0028.JPG

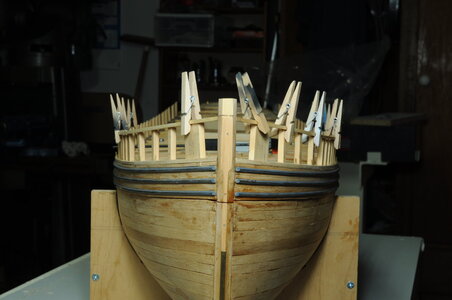
Once this was done I could sight along the rail for irregularity's a few stanchions needed some attention though in general I was quite pleased.
DSC_0030.JPGDSC_0032.JPGDSC_0037 1.JPGDSC_0038 1.JPG

More to come...

Thanks for looking in and reading my ramblings or just looking at the photo’s and stay safe.

Cheers,

Stephen.
 
Man oh man. Stephen - it's great to see you back in the shipyard. Stanchions ... those sure are some of my least favorite things to do in a build. getting them to sit straight, square and perpendicular to the hull is a nightmare in anyone's books. I really like your way of thinking and I am sure that your preparations will pay great dividends in the future. I have often discovered that we sometimes overthink things. Once you get started with the process, solutions have a way of presenting themselves. In any case, great job so far my friend!
 
Back to the Bulwarks.


Back to working on the Drifter after a bit of a clean up and finishing off making a Rope Making and Serving Machine.

One of the reasons I stopped working on this project is because I had reached a point where I couldn’t work out a way forward, the problem being fixing the position of Stanchions in relation to cut outs in the covering boards, my initial idea was to make the capping rail and temporarily pin it in place this presented problems, mainly with how long it would take, so I came to a halt.

Fast forward a couple of months and after reading Tree to Sea for a while a way forward presented itself, that didn’t involve making the capping rail first. One thing that helped me was a drawing on page’s 97 & 107 that clearly showed the “filling”.
View attachment 294585View attachment 294586

The idea was to make filling boards that are much longer than in real practice. The real ones “filling” a space between stanchions under the capping rail, my ones being long lengths that help to fix a position for the stanchions.

The first job to be done was to run a fairing batten to the correct heights and marking the stanchions then cut them to height.
View attachment 294587View attachment 294588

A rebate needed to be cut on each stanchion to allow the long filling strips to sit in the wright spot then be pinned in position.
View attachment 294589View attachment 294590

Next I made up a former to steam the strips into something resembling the right shape, this former will be handy when I come to plank the bulwarks.
View attachment 294591

Once this was done I could sight along the rail for irregularity's a few stanchions needed some attention though in general I was quite pleased.
View attachment 294592View attachment 294593View attachment 294594View attachment 294595

More to come...

Thanks for looking in and reading my ramblings or just looking at the photo’s and stay safe.

Cheers,

Stephen.
Great to see you taking up arms again! She's looking very good.

Ted
 
Man oh man. Stephen - it's great to see you back in the shipyard. Stanchions ... those sure are some of my least favorite things to do in a build. getting them to sit straight, square and perpendicular to the hull is a nightmare in anyone's books. I really like your way of thinking and I am sure that your preparations will pay great dividends in the future. I have often discovered that we sometimes overthink things. Once you get started with the process, solutions have a way of presenting themselves. In any case, great job so far my friend!
Thank you Heinrich,
It is good to be back in the ship yard. You are so right about over thinking things, something I tend to do a lot and how having a break can really help to see things from another angle and find a solution that you could not see before.

Cheers,
Stephen.
 
Backward Step Then Forward.


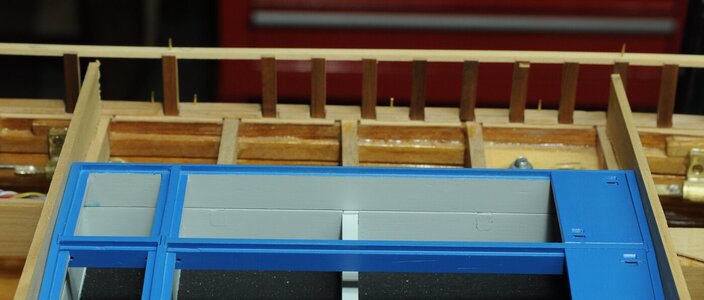
I was happy with the progress until I re-discovered a problem I had forgotten about. The problem being some Stanchions don’t line up with the Thwartship Boards something that at the time I thought would be alright, well several months later looking at it again I didn’t think it was alright.
DSC_0046 1.JPG

What to do, 3 choices came to mind, redo all of the stanchions, leave it the way it is or move the appropriate stanchions. The perfectionist in me thought the only way forward was to redo all of the stanchions which in turn would mean redoing all of the covering boards, not so happy about that idea....

After a couple of days to contemplate, I decided I would do a mock up, moving the appropriate stanchions without pinning and just see how it looked. To my surprise it didn’t look as bad as expected and after a couple of days in their new position I thought it was acceptable, I decided to try modifying the affected covering boards and see how they looked. I think that once a little bit of weathering is done it should be very hard to tell where changes were made.
DSC_0047.JPG

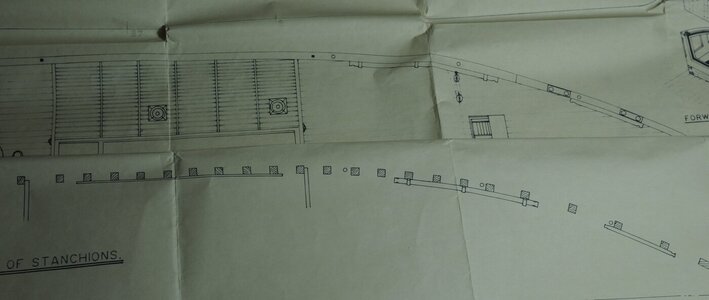
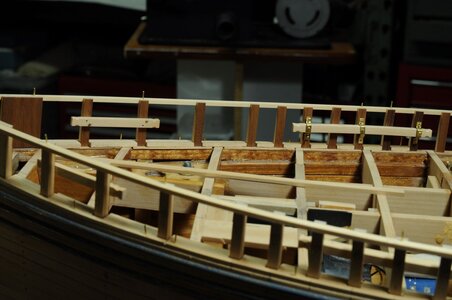
Once I was reasonably happy I proceeded to start work on the Pin Rail and Knightheads steam bending some material roughly to shape. I ended up making a couple of these because there are quite large differences in the plans for the Pin Rails, one plan shows one length while another shows a different length, while one plan was basically the same as Ted Frosts book I decided to go with that.
DSC_0100 1.JPGDSC_0101 1.JPG

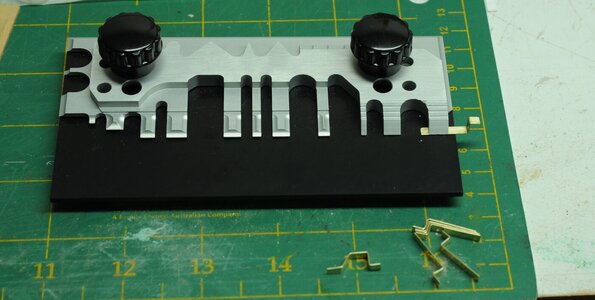
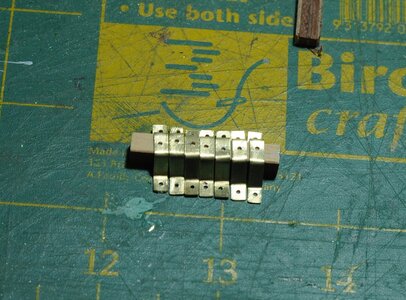
The Pin Rails needed brackets or Irons to be made these I made from Brass cutting strips then using my Hold “N” Fold to fold the Brass.
DSC_0054 1.JPG

Then marking and drilling the holes then trimming to length.
DSC_0057 1.JPG

Fitting onto the model required holding in place and drilling holes for the Brass pins to go into.
DSC_0060 1.JPGDSC_0062 1.JPG

Once again after a bit of time has passed, I have decided to re-make the forward pair of the covering boards, the main reason being where the added part lies is right where a freeing port grate is and would be quite visible.

More to come...

That’s enough waffle for now, thanks for looking in and reading my ramblings or just looking at the photo’s and stay safe.


Cheers,
Stephen.
 
Backward Step Then Forward.


I was happy with the progress until I re-discovered a problem I had forgotten about. The problem being some Stanchions don’t line up with the Thwartship Boards something that at the time I thought would be alright, well several months later looking at it again I didn’t think it was alright.
View attachment 297146

What to do, 3 choices came to mind, redo all of the stanchions, leave it the way it is or move the appropriate stanchions. The perfectionist in me thought the only way forward was to redo all of the stanchions which in turn would mean redoing all of the covering boards, not so happy about that idea....

After a couple of days to contemplate, I decided I would do a mock up, moving the appropriate stanchions without pinning and just see how it looked. To my surprise it didn’t look as bad as expected and after a couple of days in their new position I thought it was acceptable, I decided to try modifying the affected covering boards and see how they looked. I think that once a little bit of weathering is done it should be very hard to tell where changes were made.
View attachment 297147

Once I was reasonably happy I proceeded to start work on the Pin Rail and Knightheads steam bending some material roughly to shape. I ended up making a couple of these because there are quite large differences in the plans for the Pin Rails, one plan shows one length while another shows a different length, while one plan was basically the same as Ted Frosts book I decided to go with that.
View attachment 297148View attachment 297149

The Pin Rails needed brackets or Irons to be made these I made from Brass cutting strips then using my Hold “N” Fold to fold the Brass.
View attachment 297150

Then marking and drilling the holes then trimming to length.
View attachment 297151

Fitting onto the model required holding in place and drilling holes for the Brass pins to go into.
View attachment 297152View attachment 297153

Once again after a bit of time has passed, I have decided to re-make the forward pair of the covering boards, the main reason being where the added part lies is right where a freeing port grate is and would be quite visible.

More to come...

That’s enough waffle for now, thanks for looking in and reading my ramblings or just looking at the photo’s and stay safe.


Cheers,
Stephen.
Hi Stephen. The pin rails with the brass is looking very nice. With the fine details like the little ‘cutaways’ on the end off rails.
Regards, Peter
 
The pin rails look very good Stephen. About the covering boards - you know the drill, if you are not happy now, it's just going to get worse. Kudos to you for the effort my friend! That's how we roll!
 
The pin rails look very good Stephen. About the covering boards - you know the drill, if you are not happy now, it's just going to get worse. Kudos to you for the effort my friend! That's how we roll!
Thanks Heinrich,

You are quite right my eye would go straight to that area and it would appear worse to me.

Cheers,
Stephen.
 
Back
Top