Thanks Rich,Very will planned and executed! Rich
I can tell you this little assembly has had a lot of time put into it.
Cheers,
Stephen.
 |
As a way to introduce our brass coins to the community, we will raffle off a free coin during the month of August. Follow link ABOVE for instructions for entering. |
 |
 |
The beloved Ships in Scale Magazine is back and charting a new course for 2026! Discover new skills, new techniques, and new inspirations in every issue. NOTE THAT OUR FIRST ISSUE WILL BE JAN/FEB 2026 |
 |
Thanks Rich,Very will planned and executed! Rich
Hi Frank,Buon giorno , Complimenti , un vero gioiello di costruzionePollice suPollice suPollice suPollice suPollice su
For a lot of us, as with you, the time put into such small details is a good investment and enjoyment of this hobby. . . IMHO RichThanks Rich,
I can tell you this little assembly has had a lot of time put into it.
Cheers,
Stephen.
I agree and would add also the challenge of making things, working it out then doing it and maybe re-doing it.For a lot of us, as with you, the time put into such small details is a good investment and enjoyment of this hobby. . . IMHO Rich
You have crafted an excellently detailed hatchway. RichForecastle Hoodway part 2.
With most of the parts made I started trying to figure out how to assemble the Forecastle hoodway, remembering that I need to be able to open up the Forecastle hoodway as much as possible to allow a reasonable air flow through into the hull, when the steam plant is installed.
I marked out then carefully cut out the notch in the roof.
View attachment 280491
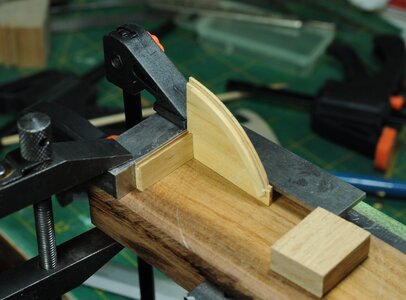
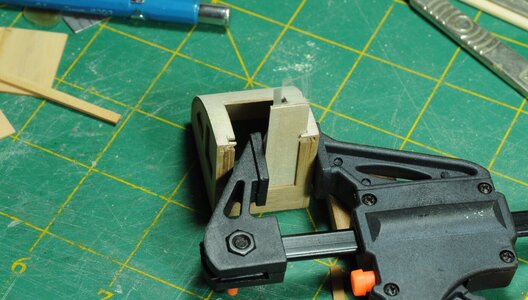
Using a spacer I was able to temporally clamp things together, checking that there is sufficient clearance for the sliding hood to operate.
View attachment 280492
After some adjusting of the sides to reduce vertical clearance I made the leap and glued a couple of bits together.
View attachment 280493
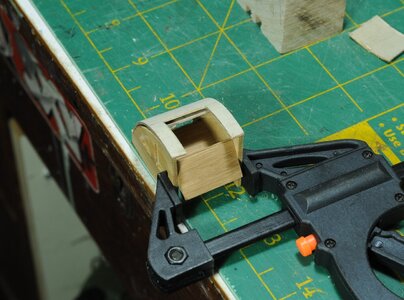
Then glued the other side and roof on, leaving out the sliding hood so there would be no risk of gluing it and also give me the opportunity to clean up any excess glue where it runs. After the main gluing was done I sanded the roof flush with the sides and general cleaned things up.
View attachment 280494
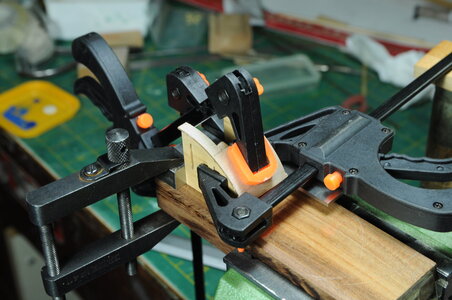
Next I glued the side guide rails one at a time, using a piece of ply with sticky tape wrapped around to prevent being glued in, each of these gluing operations were done while leaving them overnight to dry, meaning it took a few days to assemble.
View attachment 280495
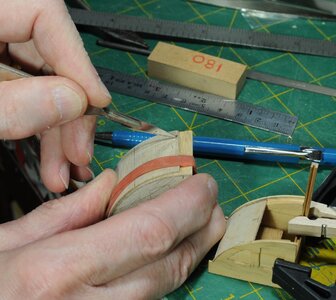
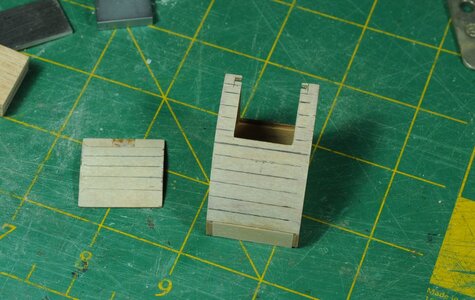
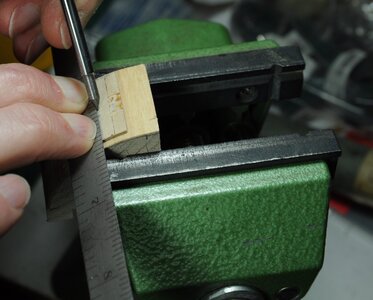
I wanted to simulate planking on the roof and sliding hatch and after carefully marking out I scribe the lines.
View attachment 280496View attachment 280497
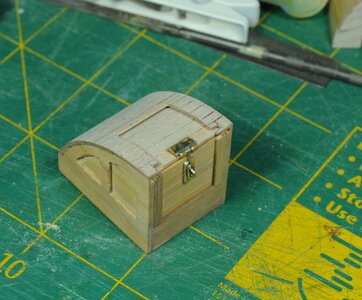
With the hasp and staple glued on the hoodway it is nearing completion only needs little bits glued in to stop the sliding hood coming out, that will be after painting the colour.
View attachment 280498
That will do it for this one, next time some painting, thanks for looking in and reading my ramblings or just looking at the photo’s and stay safe.
Happy new year.
Cheers,
Stephen.

Thanks once more for your glowing report Heinrich,I don't think anyone in the world could have done that any better, Stephen! You can be very happy with that and I can only imagine (actually, I can't), how stunning it will look when it is painted. I have to keep on reminding myself that these are miniscule parts you are working with and to have an assembly like that fully functional is just the cherry on top!
Thanks Frank,Buon pomeriggio, ottimo lavoro nei dettagli finezza e pulizia distingue il Tuo lavoro Pollice suPollice su

I have enjoyed the developing and creating of this access. Hat off, Stephen.Forecastle Hoodway part 2.
With most of the parts made I started trying to figure out how to assemble the Forecastle hoodway, remembering that I need to be able to open up the Forecastle hoodway as much as possible to allow a reasonable air flow through into the hull, when the steam plant is installed.
I marked out then carefully cut out the notch in the roof.
View attachment 280491
Using a spacer I was able to temporally clamp things together, checking that there is sufficient clearance for the sliding hood to operate.
View attachment 280492
After some adjusting of the sides to reduce vertical clearance I made the leap and glued a couple of bits together.
View attachment 280493
Then glued the other side and roof on, leaving out the sliding hood so there would be no risk of gluing it and also give me the opportunity to clean up any excess glue where it runs. After the main gluing was done I sanded the roof flush with the sides and general cleaned things up.
View attachment 280494
Next I glued the side guide rails one at a time, using a piece of ply with sticky tape wrapped around to prevent being glued in, each of these gluing operations were done while leaving them overnight to dry, meaning it took a few days to assemble.
View attachment 280495
I wanted to simulate planking on the roof and sliding hatch and after carefully marking out I scribe the lines.
View attachment 280496View attachment 280497
With the hasp and staple glued on the hoodway it is nearing completion only needs little bits glued in to stop the sliding hood coming out, that will be after painting the colour.
View attachment 280498
That will do it for this one, next time some painting, thanks for looking in and reading my ramblings or just looking at the photo’s and stay safe.
Happy new year.
Cheers,
Stephen.

Thanks Peter,I have enjoyed the developing and creating of this access. Hat off, Stephen.
Regards, Peter
The trans from Google Translator is: Good Morning, Congratulations, a real gem of construction, Thumbs up, thumps up, thumbs up.Hi Frank,
Sorry I cannot speak or read Italian, but thank you for your comments.
Cheers,
Stephen.
Thanks Kurt,The trans from Google Translator is: Good Morning, Congratulations, a real gem of construction, Thumbs up, thumps up, thumbs up.

It takes me a bit sometimes as well, I don't know if the SoS does auto translate or not.Thanks Frank,
This time I have managed to use Google translate to read your message.
Cheers,
Stephen.
SOS uses one of the sophisticated 'Forum' software for sure, but I have to disappoint you, it doesn't auto-translate. Most times, mods and admins translate. If you are using a Google browser, you can set up to automagically translate the entire page to your preferred language.I don't know if the SoS does auto translate or not.
Down load a translator app for you phone to scan/translate in real time the translation from one language to your own. Sometimes it doesn't work but it will give you the main concept. RichSOS uses one of the sophisticated 'Forum' software for sure, but I have to disappoint you, it doesn't auto-translate. Most times, mods and admins translate. If you are using a Google browser, you can set up to automagically translate the entire page to your preferred language.
But we asked again if you using your foreign language to post, please translate using 'Google', it will make the post much valuable and interesting to others.
