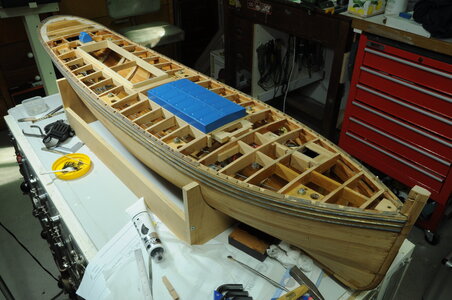
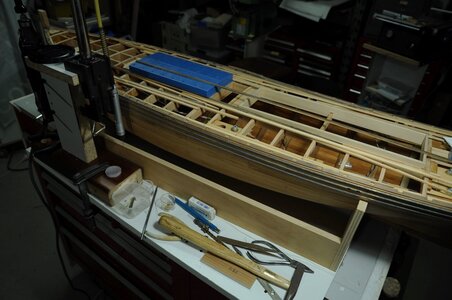
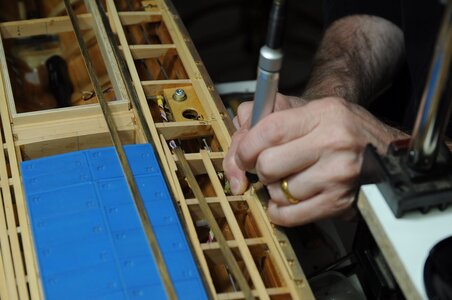
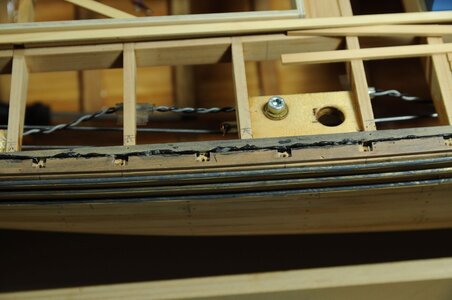
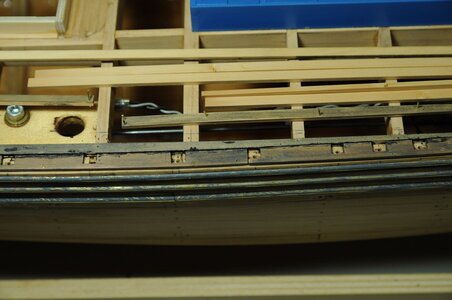
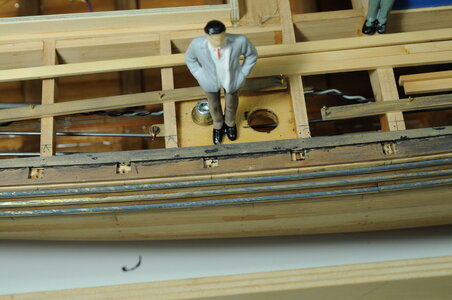
Working Steam powered wooden Drifter trawler, Formidable LT100, 1:24th scale

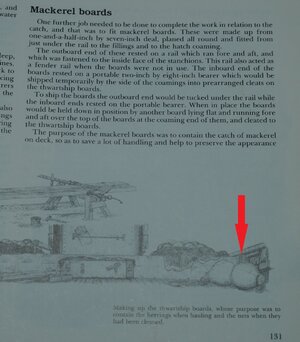
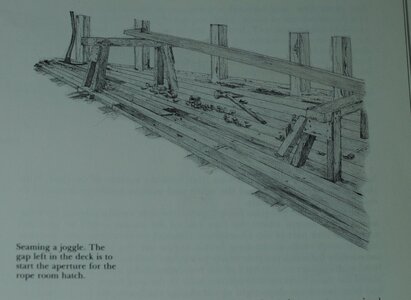
G'day Steve, she is coming along nicely, I'm about to start installing the stanchions and I was wondering about the athwartship boards, I was reading up in the book what Fred says about them, and apparently they were made to butt up against a stanchion, but if they didn't other provision was made, see pic below,

20220321_140504 (2).jpg

so my take on it is that if they didn't come in line with a stanchion an extra stanchion would be added for them to butt against, what are your thoughts on this, if its not too late it might save you a bit of work,

best regards John,

.
 
G'day Steve, she is coming along nicely, I'm about to start installing the stanchions and I was wondering about the athwartship boards, I was reading up in the book what Fred says about them, and apparently they were made to butt up against a stanchion, but if they didn't other provision was made, see pic below,

View attachment 297297

so my take on it is that if they didn't come in line with a stanchion an extra stanchion would be added for them to butt against, what are your thoughts on this, if its not too late it might save you a bit of work,

best regards John,

.
Thanks John,

Well spotted.

Yeah a bit late nearly finished the 2nd covering board.

Looks like I have done my usual and been in a rush and missed important info, I would say you are right. The way I read that is to say that spacers or "cleats" would be nailed onto stanchions to fill any gap.

As I mentioned there is a difference in length of Pin Rails depending on which drawing you go by also there is a difference between athwartship boards that I forgot to mention.

I positioned my stanchions according to the book as I found that things didn't quite add up for me on the drawing.

Cheers,
Stephen.
 
G'day Steve, she is coming along nicely, I'm about to start installing the stanchions and I was wondering about the athwartship boards, I was reading up in the book what Fred says about them, and apparently they were made to butt up against a stanchion, but if they didn't other provision was made, see pic below,

View attachment 297297

so my take on it is that if they didn't come in line with a stanchion an extra stanchion would be added for them to butt against, what are your thoughts on this, if its not too late it might save you a bit of work,

best regards John,

.
G'day John,

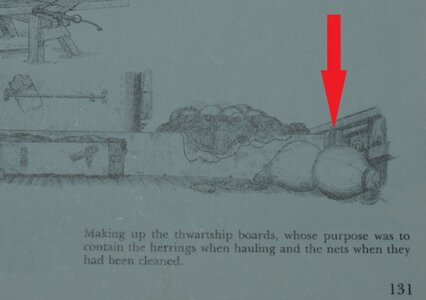
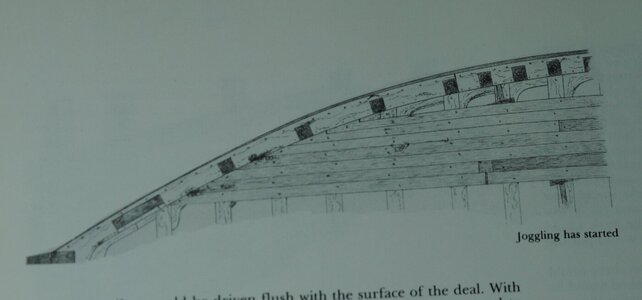
I thought I would add to what I said yesterday, after a bit of a read. I think the first 2 photos show the "cleat" arrowed. What I don't get is I would have thought the thwartship boards would over lap the stanchions on the forward side to provide a strong face for the board to sit up against for when it is used as a breakwater, then again it is only a sketch, or have I got the wrong end of the stick.
DSC_0103.2.jpgDSC_0103.3.jpg
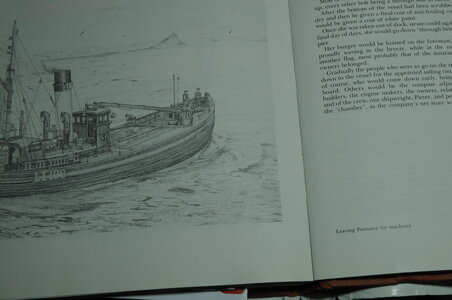
The other thing which has been shown in the 3rd sketch is the Mackerel boards in use as the caption reads.
From the description in photo 1 there should be a rail on the inside of the stanchions to support the outer end of these boards when in use and cleats on the main fish hatch coming to support a board that the Mackerel boards then sit on.
DSC_0104.JPG
 
Mmmm, it certainly looks that way Steve, I've glued my athwart ship boards in place and also glued them to a stanchion on the outer ends, I'm not sure if I am going to paint them or just varnish them, will think about it a bit,

best regards John,

.
 
Mmmm, it certainly looks that way Steve, I've glued my athwart ship boards in place and also glued them to a stanchion on the outer ends, I'm not sure if I am going to paint them or just varnish them, will think about it a bit,

best regards John,

.
Yeah I think I will do as planned, maybe adding a piece that simulates the cleat. As for painting I will stick to blue myself, although it will look good varnished as well.

Cheers,
Stephen.
 
Get the Glue Out + Look at Deck Planking.


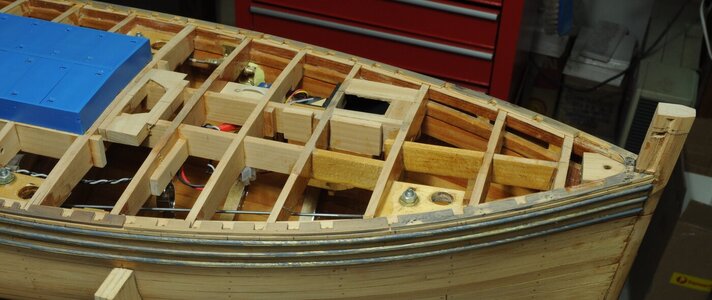
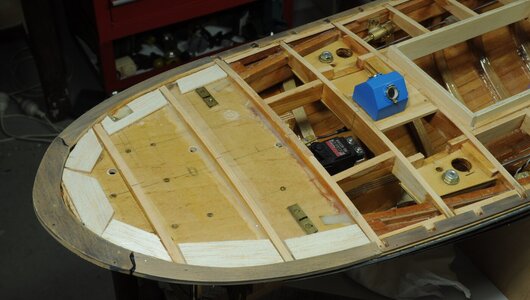
You would think I would be getting faster at making covering boards, well no such luck. After remaking the 2 covering boards it was time to remove all the stanchions again then start gluing down all the covering boards. I have also glued in place the main fish hatch and aft skylight.
DSC_0105.JPGDSC_0107.1.JPGDSC_0108.1.JPG

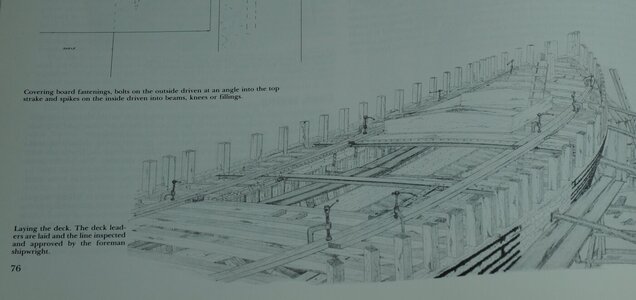
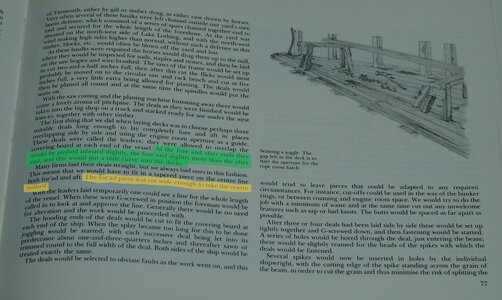
Next up is to start planking the deck, I would have thought this would be a fairly straight forward thing however that doesn’t seem to be the case. My initial thoughts were to start from the center and work my way out, straight forward I think then reading Ted’s book he says that the deck was laid out with leaders or long planks as pictured in Ted’s sketch and described in the green highlighted text.
DSC_0109.1.JPGDSC_0110.1.JPG

I have setup a couple of long planks to get an idea of how things are going to look.

The Starboard side I have pushed out so they fairly closely follow the covering board inner curve, on the Port side I have bought the ends in slightly although they appear to be straight they aren't.
DSC_0113.1.JPG

On Johns build he has gone for something in between, more curvature aft and closer to parallel with the center line forward. Which I think looks good as well.

I am not sure which way to go at present, I like the way the Starboard side looks but then, is it too pronounced a curve, is something closer to the Port side more like it?
Any constructive criticism would be welcomed.


More to come…

Thanks for looking in and reading my ramblings or just looking at the photo’s and stay safe.

Cheers,

Stephen.
 
Get the Glue Out + Look at Deck Planking.


You would think I would be getting faster at making covering boards, well no such luck. After remaking the 2 covering boards it was time to remove all the stanchions again then start gluing down all the covering boards. I have also glued in place the main fish hatch and aft skylight.
View attachment 298928View attachment 298929View attachment 298930

Next up is to start planking the deck, I would have thought this would be a fairly straight forward thing however that doesn’t seem to be the case. My initial thoughts were to start from the center and work my way out, straight forward I think then reading Ted’s book he says that the deck was laid out with leaders or long planks as pictured in Ted’s sketch and described in the green highlighted text.
View attachment 298931View attachment 298932

I have setup a couple of long planks to get an idea of how things are going to look.

The Starboard side I have pushed out so they fairly closely follow the covering board inner curve, on the Port side I have bought the ends in slightly although they appear to be straight they aren't.
View attachment 298933

On Johns build he has gone for something in between, more curvature aft and closer to parallel with the center line forward. Which I think looks good as well.

I am not sure which way to go at present, I like the way the Starboard side looks but then, is it too pronounced a curve, is something closer to the Port side more like it?
Any constructive criticism would be welcomed.


More to come…

Thanks for looking in and reading my ramblings or just looking at the photo’s and stay safe.

Cheers,

Stephen.

G'day Steve, If I had to do it again I would do it like you have the Starboard laid out with a curve at the bow and the stern,
Best regards John,
 
G'day Steve, If I had to do it again I would do it like you have the Starboard laid out with a curve at the bow and the stern,
Best regards John,
Thanks John,

I also like the Starboard setup. I am not rushing into this one this time and am trying some different amounts of curvature, a lot of my uncertainty is probably due to my lack of experience, this being my first serious scratch build.
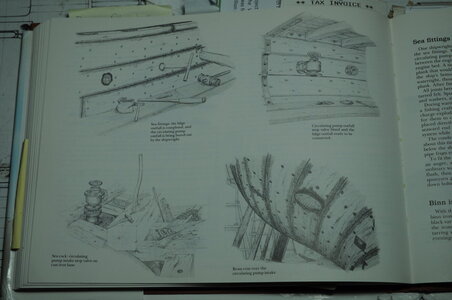
I might even go on a detour and have a go at the Bilge and Circulating pump out flow, which I think will require cutting away a short length of Bin iron to fit them in.

Cheers,
Stephen.
 
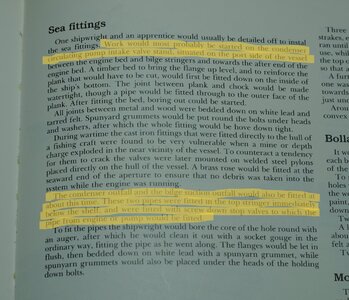
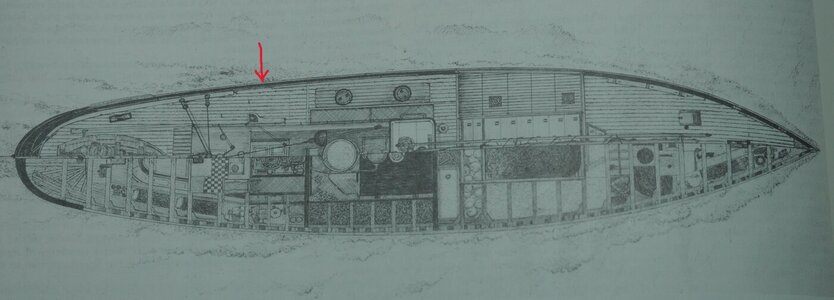
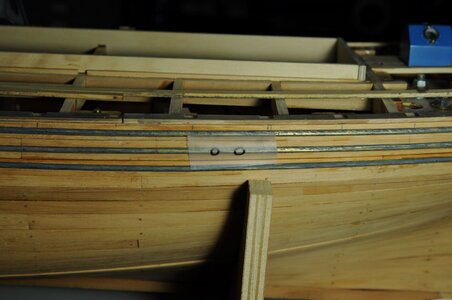
On the subject of Bilge and Circulating pump out flow there is no mention of which side of the vessel this is on however I would assume that these would be placed on the same side as the Circulating pump intake which is on the Port side.
DSC_0117.JPG
DSC_0118.2.JPG

Approximate position indicated by red arrow.
DSC_0119.2.JPG

And indicated drawn on sticky tape.
DSC_0120.1.JPG

Does all this sound about right?

Any comments welcome.

Cheers,
Stephen.
 
Making a Start, Deck Planking.


I have found out over the last week or so that there are numerous ways to plank a deck. I have seen all manor of variations in photos of the real thing and on models. I have come to the conclusion that like many things in life there are different ways of doing things and the way Ted describes in his book is different from anything I can find in photos.

After a lot of headaches and trying a couple of different deck plank arraignments, I have decided to go with deck planks that run parallel to the Deck house coaming coming into a gentle curve Forward and Aft.
DSC_0127.1.JPG


I will attempt to do something similar to the method that Ted describes in his book photos of the sketches included.
DSC_0134.1.JPG

DSC_0135.1.JPG

I still don’t know how I am going to do the forecastle so I thought I would make a start around midships and focus on getting planks parallel to the wheelhouse coaming.
Nothing is pinned or glued yet, just getting some experience in cutting and an idea of how things might look.
DSC_0128.1.JPG

DSC_0130.1.JPG

DSC_0131.1.JPG

Does this look about right? Constructive criticism is welcomed.


More to come…

Thanks for looking in and reading my ramblings or just looking at the photo’s and stay safe.

Cheers,
Stephen.
 
Making a Start, Deck Planking.


I have found out over the last week or so that there are numerous ways to plank a deck. I have seen all manor of variations in photos of the real thing and on models. I have come to the conclusion that like many things in life there are different ways of doing things and the way Ted describes in his book is different from anything I can find in photos.

After a lot of headaches and trying a couple of different deck plank arraignments, I have decided to go with deck planks that run parallel to the Deck house coaming coming into a gentle curve Forward and Aft.
View attachment 299785


I will attempt to do something similar to the method that Ted describes in his book photos of the sketches included.
View attachment 299780

View attachment 299781

I still don’t know how I am going to do the forecastle so I thought I would make a start around midships and focus on getting planks parallel to the wheelhouse coaming.
Nothing is pinned or glued yet, just getting some experience in cutting and an idea of how things might look.
View attachment 299782

View attachment 299783

View attachment 299784

Does this look about right? Constructive criticism is welcomed.


More to come…

Thanks for looking in and reading my ramblings or just looking at the photo’s and stay safe.

Cheers,
Stephen.
Very interesting to see how you approach the deck planking, Stephan. With the 'gentle curves in Forward and Aft'. Especially now that I'm also working on that with my BN.
With a different way of nibbling at the end of the planks.
Regards, Peter
 
Very interesting to see how you approach the deck planking, Stephan. With the 'gentle curves in Forward and Aft'. Especially now that I'm also working on that with my BN.
With a different way of nibbling at the end of the planks.
Regards, Peter
Thanks Peter,

The reality is I don't really know what I am doing.
I have now spent several days trying different things to try and get it to work and I'll have another go today with fresh ideas. It is the gentle curves that seem to be more of a problem at the moment.
My desire is to be as close as possible to Teds description in his book.

Cheers,
Stephen.
 
Deck Planking, Take 2.


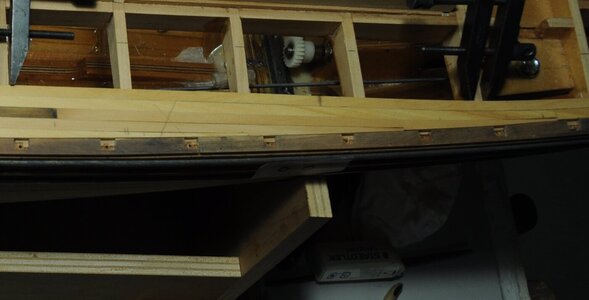
I wasn’t really happy with the thinned down planks, I mean it worked on the model but when I thought about it, they weren't right. When faced with this sort of problem I like to think about how I or the shipwrights would have done it, and in my opinion they would do things in a way that is time and material efficient and removing half of a few planks didn’t add up.

On my initial planks I had a 2.5mm step in them, this caused too much of a severe bend when laying (it doesn’t seem to show up in the photos but the bend is more than wanted) to the point that one snapped. What to do, read Teds description of how the planks were cut again to find the step was only 1 ¾” on the real thing which at 1/24th scale is roughly 1.8mm, so the planks that have a very shallow taper I tried making them with a step closer to 1mm and success. My idea is to increase the step size up to 1.8 for the planks that have a steeper angle. In reality there is no surprise when you look at after it is done, but it took me a dozen planks to work it out, all part of that learning curve.
DSC_0138.2.JPG

These planks have a smaller step.
DSC_0139.1.JPGDSC_0141.3.JPG

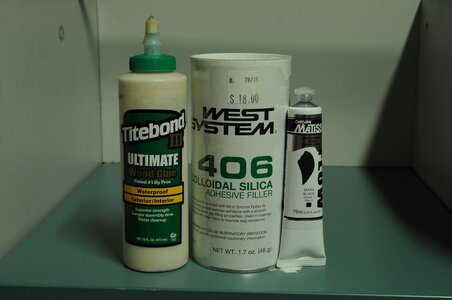
I did some experiments a couple of years ago with caulking and found that a mix of Titebond 3 + West Systems 406 filler + Black Artists Acrylic worked quite well in those experiments, this is what I decided to try.
DSC_0977.1.JPG

In the excitement to lay the first plank I forgot to do an experiment with a wider caulking gap of .8mm to see how it looked, (my earlier experiments had a gap of around .4mm) and for some reason I thought it would be alright to go with .8mm, so when I laid the first plank and looked at it I thought that is too wide, and promptly pulled it up before the glue mix set.

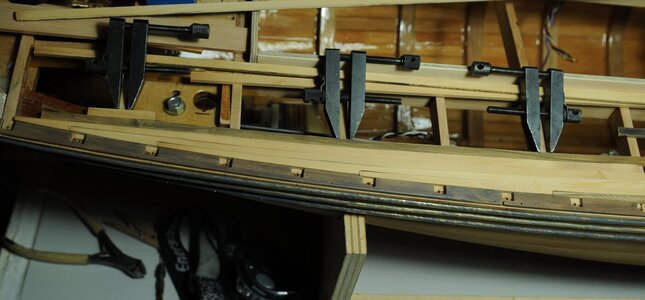
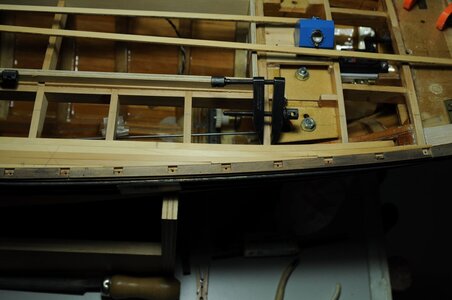
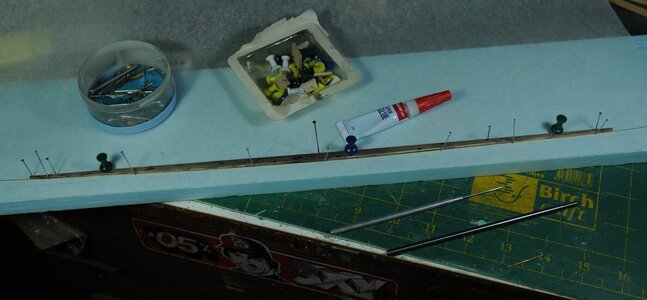
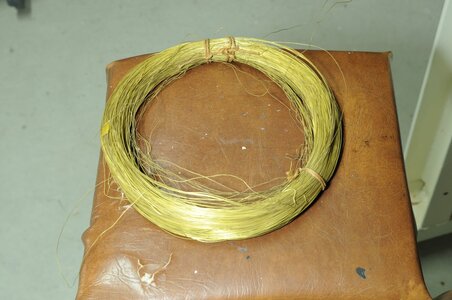
After shaping the planks, I glue a piece of .44mm brass wire (something I have plenty of, see photo) along one edge of the plank to get the spacing (I tried just sitting a piece on the deck beams but it didn’t work), then pre-drill and pinning the planks in position before removing and weathering, then the final assembly.
DSC_0150.1.JPGDSC_0157.1.JPG

Remember I am looking for an irregular finish due to Teds comment that after the tar was poured into the nail holes and seams it would be left as was in a rough state.
DSC_0146.2.JPGDSC_0149.1.JPGDSC_0152.1.JPGDSC_0154.1.JPGDSC_0158.JPG

Some days when I see the messey caulking I am not happy other days I think it is working. At the moment I am going to press on with this method as I think I need more planks laid before the effect is more apparent, at least I can remove excess glue mix to get more even results and if I really don’t like it I can sand it back.


Next time, a slight deviation.

Thanks for looking in and reading my ramblings or just looking at the photo’s and stay safe.

Cheers,

Stephen.
 
Hello my friend. I had to do a lot of reading and a lot of catch-up to do now. I love your way of thinking out aloud as part of the build process. That is something I constantly do as well. What you are attempting to achieve is a real challenge and calls for a brave approach. It is difficult for me to imagine what the deck planking must look like at this very large scale. On the much smaller scale at which I build, I have learnt to be careful of including too not too many details like caulking and treenailing as you very quickly end up with a cluttered deck. I will do what you are doing - reserve judgement on the caulking until you have first laid a few planks more so that one can get a more representative idea. Whatever you have done so far has worked out great, so I will be holding all thumbs that this pans out for you as well.
 
Thank you my friend Heinrich,

You are quite right I think that what can be done at 1/72nd is quite different to what can be done at 1/24th, 1/72nd being 3 times smaller. In a lot of ways I am feeling my way due to a lack of experience and maybe that lack of experience is what gets me to think outside the box and try unusual methods and who knows how this current endeavor is going to end. One thing is certain lessons are being learnt.

Cheers,
Stephen.
 
Installing a Sail Winch.


I have always been going to RC the Mizzen sail. Controlling both Raise & Lower and Port & Starboard using 2 servos or winches.

The original idea was to mount both servos in the Galley (aft part of deck house) later on it became apparent that the Port & Starboard servo would be best placed somewhere aft of the deck house.

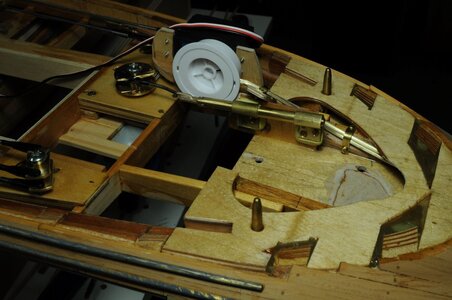
This is something I had forgotten about, although while looking at my decking attempts, I started thinking whether there was anything else I needed to do under the deck level before laying all of the deck. Then I remembered I needed to fit a servo, or should I say “shoe horn” one in as there is not a lot of space left once the steam plant is in.

The plans show 3 tackles attached to the aft end of the Mizzen boom.
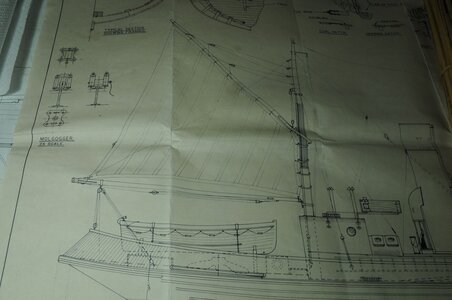
DSC_0192.1.JPG

From my limited knowledge of Gaff rigs having these 3 tackles is not generally practiced on other types of vessels, in Ted’s book there is a brief description of why the other 2 tackles are present.
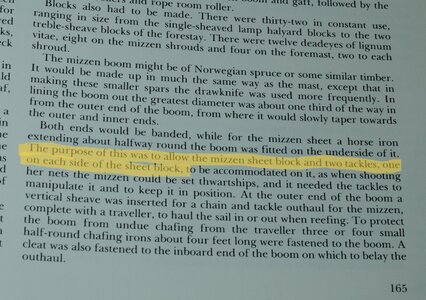
DSC_0194.1.JPG

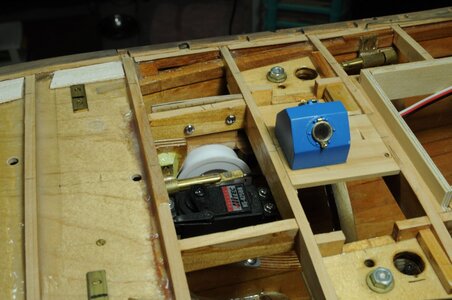
Thankfully I had a 4 turn Sail Winch in stock and could start playing around with how on earth I was going to squeeze it in. In the end it wasn’t too bad, after a bit of a fiddle I made up a cardboard template and adjusted it a couple of times, then cut the shape into a piece of plywood later adding some strengthening pieces out of Spruce.

I drilled a hole in the aft sub deck for a brass tube to be inserted into and thread it’s way to the servo position avoiding the rudder actuator, later on after much thought I decided to add a second tube to enable me to control 2 lines or I can drop back to a single. I then added a couple of clamps to keep the brass tubes in place.
The reason for this is I am concerned about the angle that the center tackle will tip over to will be very flat when the Mizzen boom is let out a fair bit, which I think will cause the boom to lift quite a bit, this is due to the mounting point being very high, that’s where the ability to try adding another tackle this time Port & Starboard should prevent the boom lifting all that much, we will see how that plays out later on.

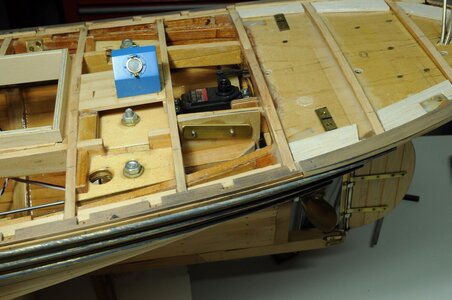
Then some more adjustments, drill mounting holes make a brass nut and glue in place, the entire servo and mount are removable if needed, to finish off I varnished the mount and areas that I had ground down in fitting the brass tubes.
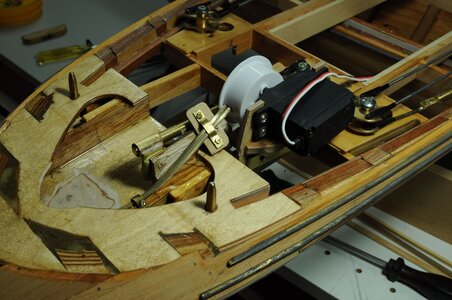
DSC_0170.1.JPGDSC_0171.1.JPGDSC_0172.1.JPG

This photo shows the mount installed without Sail Winch, but with brass nut being glued in place.
DSC_0173.1.JPG

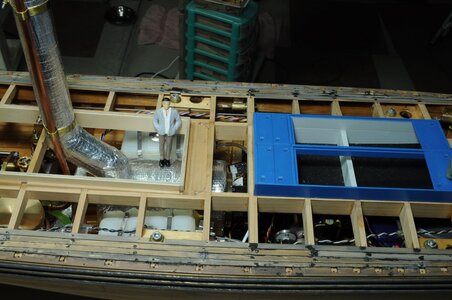
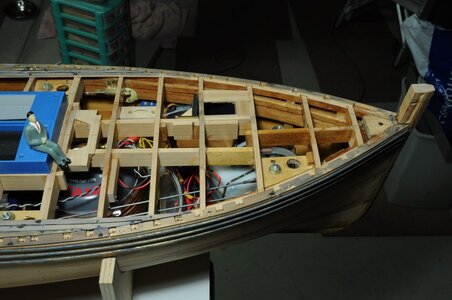
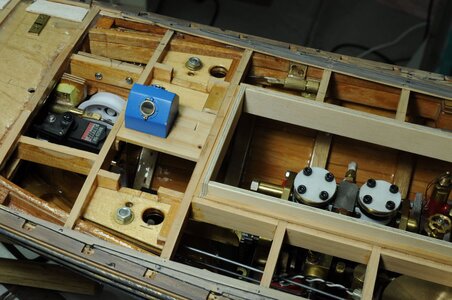
I have included some pics of the steam plant in the boat with the removable upper section in place, before the deck is fully on, I am really glad I installed all the gear before doing the deck as it would have been a nightmare to do after the deck is fitted.
DSC_0186.1.JPGDSC_0187.1.JPGDSC_0188.1.JPG


More to come…

Thanks for looking in and reading my ramblings or just looking at the photo’s and stay safe.

Cheers,

Stephen.
 
Back
Top