Working Steam powered wooden Drifter trawler, Formidable LT100, 1:24th scale

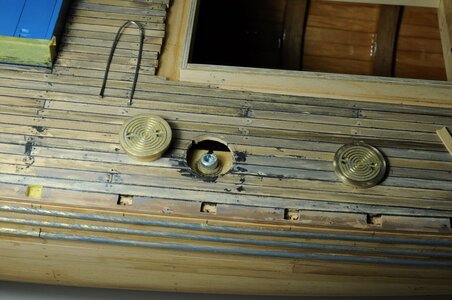
All I can say is Wow, they are just like the ones on the Lydia Eva, great turning Steve, you making me think about revisiting my Lids, these look completely authentic, just love the pic with the feet in it,
View attachment 323875
Best regards John,

View attachment 323876
Thanks John,

Yeah I think they turned out alright, using the engraving tool in the lathe was the breakthrough to making them in a timely manor.
If you are interested I could try making a mould (something I haven't done before) and you could cast some.

Cheers,
Stephen.
 
Thanks John,

Yeah I think they turned out alright, using the engraving tool in the lathe was the breakthrough to making them in a timely manor.
If you are interested I could try making a mould (something I haven't done before) and you could cast some.

Cheers,
Stephen.

G'day Steve, that is most generous of you, I have glued the one's I made in place on the deck and I don't know if I can remove them without damaging the deck so I think that I will just stay with them, but thank you very much for the offer.
Best regards John,
 
G'day Steve, that is most generous of you, I have glued the one's I made in place on the deck and I don't know if I can remove them without damaging the deck so I think that I will just stay with them, but thank you very much for the offer.
Best regards John,
G'day John,

That is a fair point, I wouldn't want to either.

Cheers,
Stephen.
 
Coal Bunker Lids continued again.


Whilst I haven’t had a lot of time lately to do much work on the Drifter I have been chipping away at it when I can.

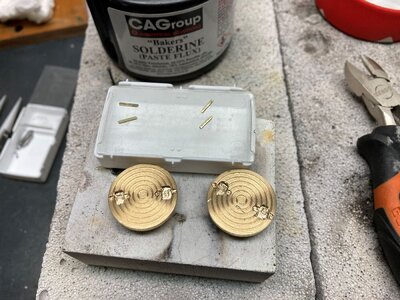
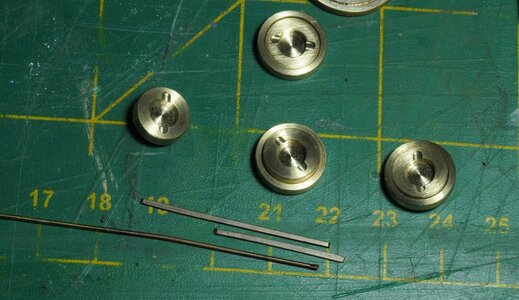
Next step for the Bunker Lids was to open up the hand recesses a bit, although in hindsight I don’t think I improved them at all. Then came soft soldering the handles on. Firstly I cleaned then carefully applying a small amount of flux to the areas to be soldered, assembled the parts and placed very small pieces of solder, applied some heat until the solder ran.
IMG_2496.1.JPG

There was a bit of solder that needed to be cleaned out of the grooves after that was done the lids were cleaned up with wet and dry sandpaper until flat.
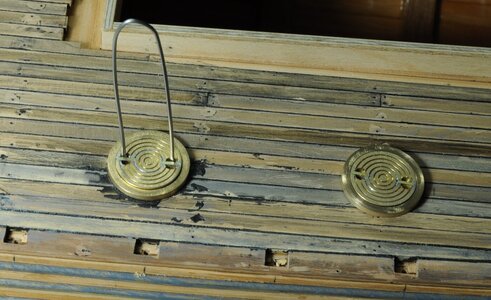
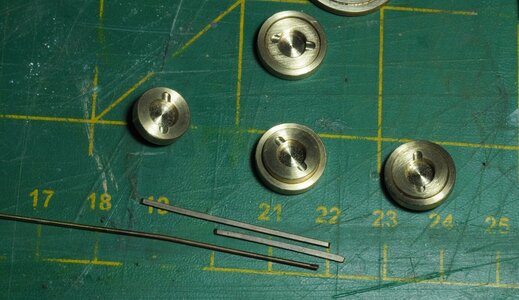
I made up a tool to remove the lids from some Stainless Steel MiG welder wire, beaten flat on each end then bent to shape.
DSC_0332.1.JPGDSC_0334.1.JPG

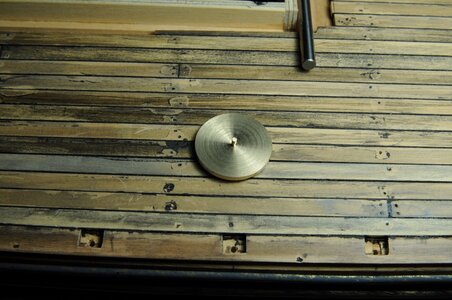
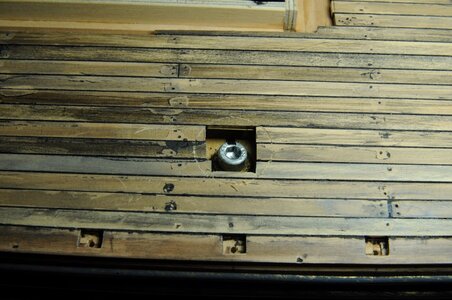
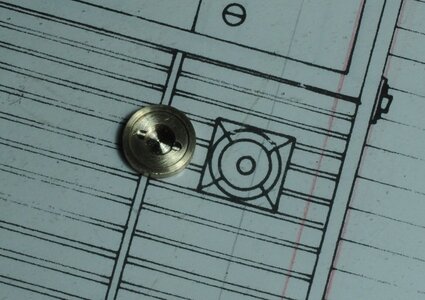
Another job was to open up the holes in the deck, to ensure the hole was centered around the screw top I made up a simple jig and scribed around it. A small carbide burr proved to be the best tool for the job.
DSC_0325.1.JPGDSC_0326.1.JPG

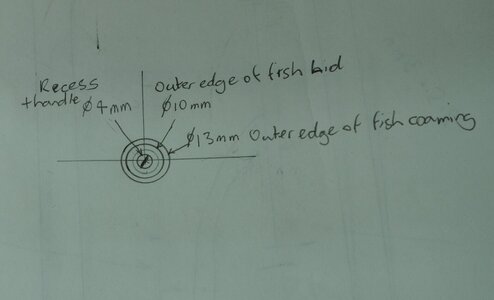
Next job is to make some Fish Hatches and Lids, I have done a simple sketch to help with building them. I might increase the hand recess up to 5mm.
DSC_0337.1.JPG

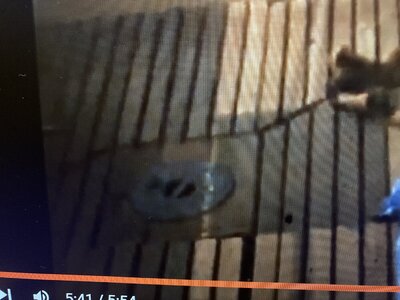
Looking for photos of Fish Hatches and Lids on the without much success. Until I found an old video of the Lydia Eva luckily near the end of the video is a brief glance of the Fish Hatch and Lid that I took a photo of, sorry about the poor photo quality. It’s not very clear but shows there is only one handle in the centre, which was to be expected considering the Lid is only 10” in diameter according to the plan.
IMG_2517.JPG


Again I welcome constructive opinions.

Cheers,

Stephen.
 
Coal Bunker Lids continued again.


Whilst I haven’t had a lot of time lately to do much work on the Drifter I have been chipping away at it when I can.

Next step for the Bunker Lids was to open up the hand recesses a bit, although in hindsight I don’t think I improved them at all. Then came soft soldering the handles on. Firstly I cleaned then carefully applying a small amount of flux to the areas to be soldered, assembled the parts and placed very small pieces of solder, applied some heat until the solder ran.
View attachment 328755

There was a bit of solder that needed to be cleaned out of the grooves after that was done the lids were cleaned up with wet and dry sandpaper until flat.
I made up a tool to remove the lids from some Stainless Steel MiG welder wire, beaten flat on each end then bent to shape.
View attachment 328756View attachment 328757

Another job was to open up the holes in the deck, to ensure the hole was centered around the screw top I made up a simple jig and scribed around it. A small carbide burr proved to be the best tool for the job.
View attachment 328758View attachment 328759

Next job is to make some Fish Hatches and Lids, I have done a simple sketch to help with building them. I might increase the hand recess up to 5mm.
View attachment 328760

Looking for photos of Fish Hatches and Lids on the without much success. Until I found an old video of the Lydia Eva luckily near the end of the video is a brief glance of the Fish Hatch and Lid that I took a photo of, sorry about the poor photo quality. It’s not very clear but shows there is only one handle in the centre, which was to be expected considering the Lid is only 10” in diameter according to the plan.
View attachment 328761


Again I welcome constructive opinions.

Cheers,

Stephen.
Hi Stephen,
As you know I do follow your work.
But I have missed quite a bit of it lately, so hopefully I will catch up with what you have been up to.
Keep up the excellent work.
I will still be keeping my eyes on your progress.
 
Hi Stephen,
As you know I do follow your work.
But I have missed quite a bit of it lately, so hopefully I will catch up with what you have been up to.
Keep up the excellent work.
I will still be keeping my eyes on your progress.
Thanks Martin,
Being on a site like this certainly helps keep the quality control set to a good level, most of the time.

Cheers,
Stephen.
 
Fish Hatches and Lids.


The Fish Hatches and Lids have progressed fairly quickly I am happy to say. Construction is basically the same as the Coal Bunker Rings and Lids.

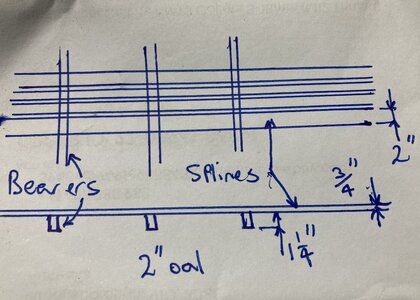
When I was looking at how deep to make the Fish Hatches and Lids I turned to Ted Frosts book Tree to Sea once again. Now I am more a visual sort of guy, a simple drawing would have been much easier for me. Anyway my interpretation of Teds description on page 131, is that overall the grating and bearer height is 2 inches with the Bearers being 1 ¼” and the Splines being ¾” as I have written on the post-it note.
DSC_0343.1.JPG

If I am wrong with my interpretation please let me know. I have done a rough sketch of what I think is being described.
IMG_2520.1.JPG

I ended up making the Fish Hatches and Lids about 2.4mm deep which is a little deeper than needed but it should be alright. Note that .041” is 1” at 1/24th scale which is around 1mm or .039”.
DSC_0344.1.JPGDSC_0342.1.JPG

I made the handles from .8mm Brass rod that was annealed then squashed in the machine vice until it was around .5mm between flats. I have found this is a lot easier and safer than trying to make fine strips on the saw.
DSC_0344.1.JPG

After cutting the handles to length they were soft soldered in then cleaned up with some wet and dry sandpaper.

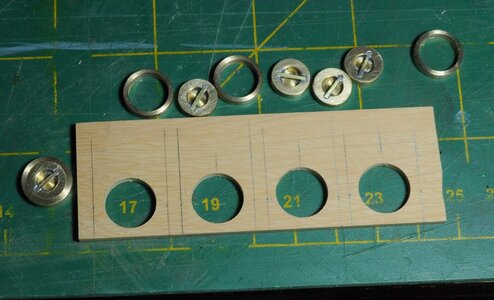
The wooden blocks that the Fish Hatches and Lids sit in were drilled then cut to size. Before I started making the Fish Hatches and Lids I found a drill that would be suitable for drilling out the Huon Pine without destroying it, this drill determined the outside diameter of the Fish Hatches.
DSC_0347.1.JPG

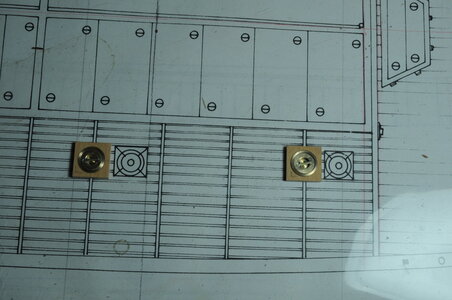
I made the wooden blocks a little bit bigger than the plans indicate mainly because I didn’t want a very thin section that may snap on assembly also I think it looks a bit more like the ones on Lydia Eva as shown in the previous post.
DSC_0350.1.JPGDSC_0351.1.JPG


Thanks for the having a look.

Again I welcome constructive opinions.

Cheers,
Stephen.
 
Hi Stephen,
As you probably know I don't know much about the construction of ships and boats but looking at photos 4 and 6 on the drawings it show lines going to each corner of the square, dose that mean that the surrounding wood work should taper to the sides ?
Great detail on the covers.
Your work truly amazes me.
Keep it up.

Martin.
Thanks Martin,
I am not 100% sure I understand the tapered bit, but the splines seem to butt up the the squares this is what I intend to do when I get that far.
Maybe this photo will clarify the overall picture.
DSC_0350.JPG

It is interesting that what I assume to be the bearers are drawn sitting on top of the splines, or maybe they are anti slip-boards.

Cheers,
Stephen.
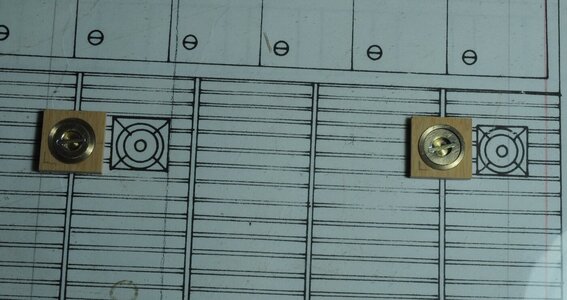
 
I've said it before, but I'll say it again...it is so impressive when a guy with tools who knows how to use them fabricates something like these little covers. Simply stunning Stephen. In my wildest dreams I could never accomplish what you sometimes accomplish.
Thanks Paul,
I tend to think you probably could do this sort of thing if you decided to. But thank you I do appreciate it.

Cheers,
Stephen.
 
Back
Top