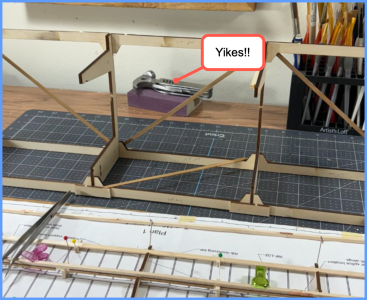
Hi Ron, yes fragile looking indeed. It looks like the torque of the engine alone would fold the bird in half. I bet the individual wings will handle like a fly rod until I can get both wings strutted together. Thanks for looking in."Good thing their first flights were at a very low altitude"
-

Win a Free Custom Engraved Brass Coin!!!
As a way to introduce our brass coins to the community, we will raffle off a free coin during the month of August. Follow link ABOVE for instructions for entering.
-

PRE-ORDER SHIPS IN SCALE TODAY!
The beloved Ships in Scale Magazine is back and charting a new course for 2026!
Discover new skills, new techniques, and new inspirations in every issue.
NOTE THAT OUR FIRST ISSUE WILL BE JAN/FEB 2026
- Home
- Forums
- Ships of Scale Build Logs
- Super Detailing Static Models / Other Genres
- Historical Trailways, Guns, Aircraft, and Cars
You are using an out of date browser. It may not display this or other websites correctly.
You should upgrade or use an alternative browser.
You should upgrade or use an alternative browser.
Hi Daniel. Just found your nice build-log of the Wright Flyer. Hopefully there is a chair left for me? Looking great, those fragile first flyers, like the Spider of Johan.
Regards, Peter
Regards, Peter
Hi Peter, glad you found my build. It's been many years ago since I last built a plane.Hi Daniel. Just found your nice build-log of the Wright Flyer. Hopefully there is a chair left for me? Looking great, those fragile first flyers, like the Spider of Johan.
Regards, Peter
- Joined
- Jun 17, 2021
- Messages
- 3,198
- Points
- 588

I had an employee, Steve Thal Larsen, that I trained in the antique furniture restoration business who went on to become a builder of 1:1 Wright aircraft for the Edvar Hazy Museum and the USNA. He worked for a company called the "Wright Experience" out of VA that reproduced Wright aircraft and restored classic wood and fabric aircraft. Steve now resides in Arizona, where he is currently employed by the University of Arizona at Tempi.
in 2002 I built the full size replica that sits in the Virginia Air and Space, in Hampton Rhodes Virginia. The wings on the original were indeed covered in undoped cloth, played on the bias and laced together in tree sections.wings built with a droop, anhedral.the year rudder was connected to the wing warping cradle, and the front rudder, elevator controlled with a lever.I have a full set of back engineering drawings in my possesion,, from which I built. The replica, build time from start to finish 10 weeks.
I had an employee, Steve Thal Larsen, that I trained in the antique furniture restoration business who went on to become a builder of 1:1 Wright aircraft for the Edvar Hazy Museum and the USNA. He worked for a company called the "Wright Experience" out of VA that reproduced Wright aircraft and restored classic wood and fabric aircraft. Steve now resides in Arizona, where he is currently employed by the University of Arizona at Tempi.
Hello Peter and Robert, those are great stories you guys have. Thanks for checking out my build and sharing your stories and experiences.in 2002 I built the full size replica that sits in the Virginia Air and Space, in Hampton Rhodes Virginia. The wings on the original were indeed covered in undoped cloth, played on the bias and laced together in tree sections.wings built with a droop, anhedral.the year rudder was connected to the wing warping cradle, and the front rudder, elevator controlled with a lever.I have a full set of back engineering drawings in my possesion,, from which I built. The replica, build time from start to finish 10 weeks.
Greetings to all
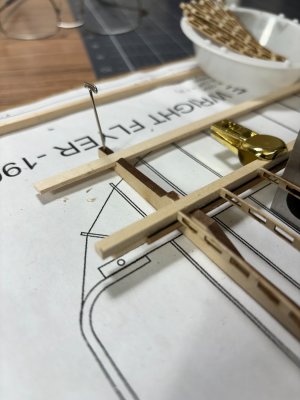
Here is a method and thought process update. Working with the wing jig I first checked to see how it was going to work with placing the rib elements.
I found out aft end of the forward element had no ledge to sit on in case it came up a little shy of tight fit, so I added a small 1/2 mm strip (see second photo) to catch it if needed. The ribs are 1mm thick and have very small surfaces for glue up, this fact may preclude me from using a shrinking silk span cover as it may deform the fragile ribs. I will experiment with this because I really do want to cover the wings at this time.
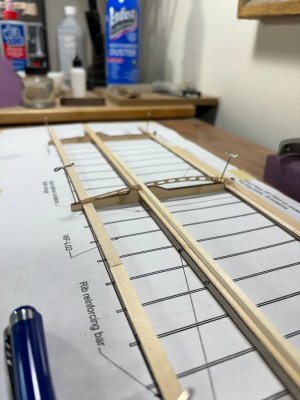
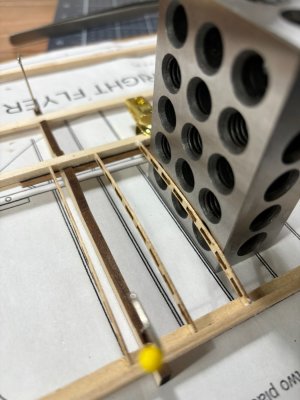
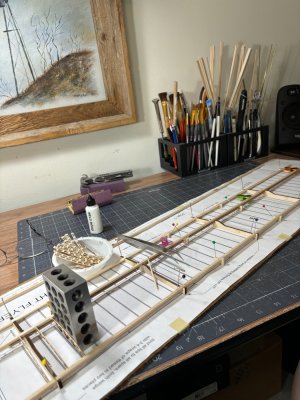
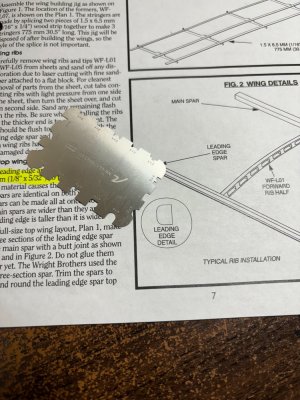
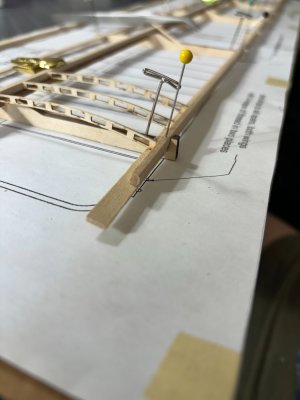
Next the leading-edge spar calls for a rounding profile, my Micro Shaper was perfect for this.
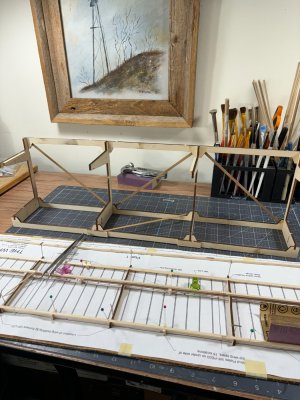
Ok this last picture is overkill for the multi jig but now it will not bend or twist, I need all the help I can get.
Thanks for checking in.
Till next time hope you have a great time.
Here is a method and thought process update. Working with the wing jig I first checked to see how it was going to work with placing the rib elements.
I found out aft end of the forward element had no ledge to sit on in case it came up a little shy of tight fit, so I added a small 1/2 mm strip (see second photo) to catch it if needed. The ribs are 1mm thick and have very small surfaces for glue up, this fact may preclude me from using a shrinking silk span cover as it may deform the fragile ribs. I will experiment with this because I really do want to cover the wings at this time.


Next the leading-edge spar calls for a rounding profile, my Micro Shaper was perfect for this.


Ok this last picture is overkill for the multi jig but now it will not bend or twist, I need all the help I can get.

Thanks for checking in.
Till next time hope you have a great time.
Wow! Those ribs look crazy fragile!
After the last picture I went back to your first. I find out that what I see was correct ….. indeed: a wingspan of 768mm!Greetings to all
Here is a method and thought process update. Working with the wing jig I first checked to see how it was going to work with placing the rib elements.
I found out aft end of the forward element had no ledge to sit on in case it came up a little shy of tight fit, so I added a small 1/2 mm strip (see second photo) to catch it if needed. The ribs are 1mm thick and have very small surfaces for glue up, this fact may preclude me from using a shrinking silk span cover as it may deform the fragile ribs. I will experiment with this because I really do want to cover the wings at this time.
View attachment 467295View attachment 467296View attachment 467297View attachment 467298
Next the leading-edge spar calls for a rounding profile, my Micro Shaper was perfect for this.
View attachment 467302
View attachment 467301
Ok this last picture is overkill for the multi jig but now it will not bend or twist, I need all the help I can get.
View attachment 467303
Thanks for checking in.
Till next time hope you have a great time.
This will be a eyecatcher for sure!
And I see you started with a solid approach
Regards, Peter
Last edited:
Hi Peter, this airplane will have to hang from the ceiling in the corner where my shipyard is. If I do it right, it should look fairly decent.After the last picture I went back to your first. I find out that what I see was correct ….. indeed: a wingspan if 768mm!
This will be a eyecatcher for sure!
And I see you started with a solid approach
Regards, Peter
Ha! I love it, Ron! I've never used this little hammer for demolition though it does come in handy in a surprising number of situations while modeling. I had it out this time to lightly tap some of the vertical walls of the multi jig down into the tight-fitting spacers at the bottom.
Kurt Konrath
Kurt Konrath
Most use of hammer in my projects have to to reseal varnish cans....
Yes, another good use.Most use of hammer in my projects have to to reseal varnish cans....
Looking forward to pulling up a chair and watching. Brings me back to the 60"s and Balsa wood models that we covered with tissue paper and dope. I can still remember the smell.
I think we all remember the smell Rob444, that's why we are such a happy creative group 
Jim
Jim
So that explains it!I think we all remember the smell Rob444, that's why we are such a happy creative group
Jim

Indeed, the smell and memories associated with it will always be with me. Welcome aboard Rob.Looking forward to pulling up a chair and watching. Brings me back to the 60"s and Balsa wood models that we covered with tissue paper and dope. I can still remember the smell.
Ahhhhh yes the smell of Ambroid cementI think we all remember the smell Rob444, that's why we are such a happy creative group
Jim


