Looks very promising my friend!
-

Win a Free Custom Engraved Brass Coin!!!
As a way to introduce our brass coins to the community, we will raffle off a free coin during the month of August. Follow link ABOVE for instructions for entering.
-

PRE-ORDER SHIPS IN SCALE TODAY!
The beloved Ships in Scale Magazine is back and charting a new course for 2026!
Discover new skills, new techniques, and new inspirations in every issue.
NOTE THAT OUR FIRST ISSUE WILL BE JAN/FEB 2026
- Home
- Forums
- Ships of Scale Build Logs
- Super Detailing Static Models / Other Genres
- Historical Trailways, Guns, Aircraft, and Cars
You are using an out of date browser. It may not display this or other websites correctly.
You should upgrade or use an alternative browser.
You should upgrade or use an alternative browser.
- Joined
- Sep 3, 2021
- Messages
- 5,190
- Points
- 738

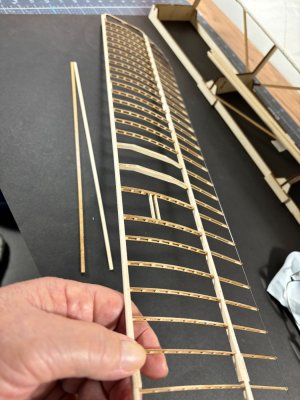
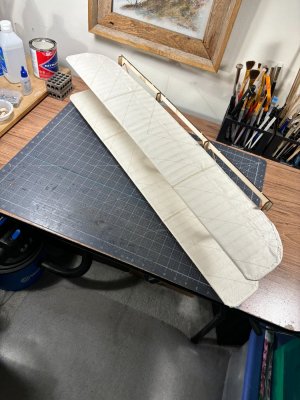
I'm rather anxious on how that concave covering will look after applying some dope...Hello everyone, a short update here to highlight a proof of concept that has such good results I couldn't wait to show it. As you know the underside of each wing is concave in design, so covering the wing surface had to be done in a glue each rib then roll the material over it and gently smooth it out. Normally you would glue down the trailing edge all the way then pull the covering as a sheet over the whole wing and glue down on the leading edge. I will use this method on the top side of the wing. Check it out.
View attachment 469135View attachment 469136View attachment 469137
So far, my plan is working, the seam between the top and bottom cover will be fairly easy to effect on the leading edge, not so much on the trailing edge.
Thanks for looking in.
Actually, Johan I will not be applying any dope, just the muslin glued on and that's it. The original Flyer only had unbleached muslin non doped as well.I'm rather anxious on how that concave covering will look after applying some dope...
Here is a view of the top and fully covered wing. I was able to pull it reasonably taught without any rib bending or deflection.
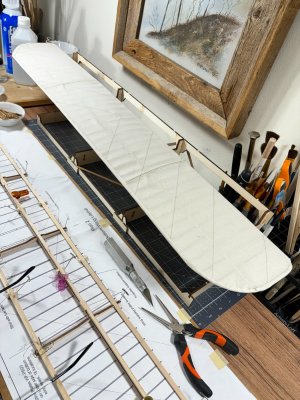
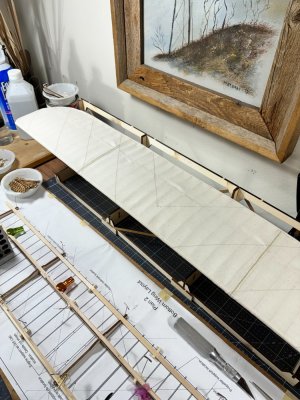
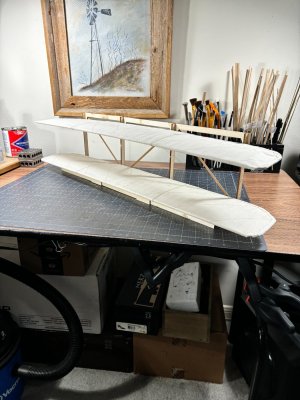
Just a little more progress here. Finished the lower wing with the extra pilot supports and engine support elements. I still have the elevator wings and rudder surfaces to go.
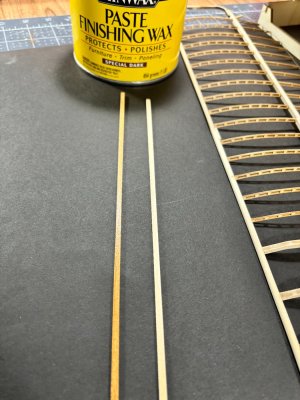
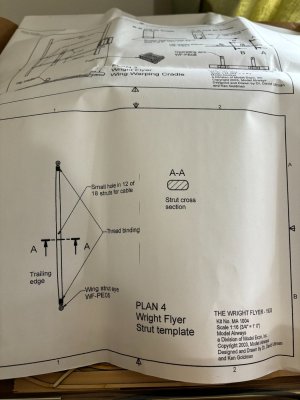
I began experimenting turning the basswood struts into a semblance of Ash or Spruce and like the results so far. I wiped on a water-based stain of Golden Oak then applied 2 coats of Minwax. I scraped the profile shown in the plans in prior to the staining.
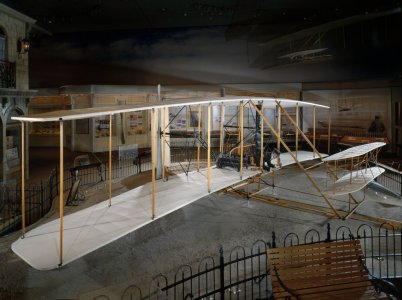
Here is a nice photo curtesy of the National Air and Space Museum. I will try to capture the contrast of wood and muslin shown on my Flyer. There will be some tricky metal work involved in the connections of the struts to the wings.
Thanks for taking the time to look in.


I began experimenting turning the basswood struts into a semblance of Ash or Spruce and like the results so far. I wiped on a water-based stain of Golden Oak then applied 2 coats of Minwax. I scraped the profile shown in the plans in prior to the staining.


Here is a nice photo curtesy of the National Air and Space Museum. I will try to capture the contrast of wood and muslin shown on my Flyer. There will be some tricky metal work involved in the connections of the struts to the wings.

Thanks for taking the time to look in.
I never realized how much anhedral there was in the wings. I wonder if most of that came out in flight. Of course in more modern times our B-52 bomber has wing tip wheels while on the ground.
I hope I can replicate the sag as well. I do have some built in but not that much, hoping to cable in some more during rigging. The multi jig has this sag accounted for, I just have to wait and see.I never realized how much anhedral there was in the wings.
Good question Johan. So far, I haven't read of that type of information. I doubt it exists knowing the plane only flew twice on the same day then while being unattended the wind flipped it over, broke it, and it never flew again. But I suppose they could have had some kind of tattle tale rigged up that would reveal that kind of data.Those wings look real good.
I wonder though how much upsweep these wings would see, if any, while under airload
Well, in the movie version there was a tonGood question Johan. So far, I haven't read of that type of information. I doubt it exists knowing the plane only flew twice on the same day then while being unattended the wind flipped it over, broke it, and it never flew again. But I suppose they could have had some kind of tattle tale rigged up that would reveal that kind of data.
 .
.You lost me there Paul, or I haven't seen the movie yet?Well, in the movie version there was a ton.
- Joined
- Sep 3, 2021
- Messages
- 5,190
- Points
- 738

And as we all know, what's shown in a movie is the undeniable truth...Well, in the movie version there was a ton.

- Joined
- Sep 3, 2021
- Messages
- 5,190
- Points
- 738

On the web I found a drawing, stating a 10" anhedral. Don't know the accuracy of that value though.Good question Johan. So far, I haven't read of that type of information. I doubt it exists knowing the plane only flew twice on the same day then while being unattended the wind flipped it over, broke it, and it never flew again. But I suppose they could have had some kind of tattle tale rigged up that would reveal that kind of data.
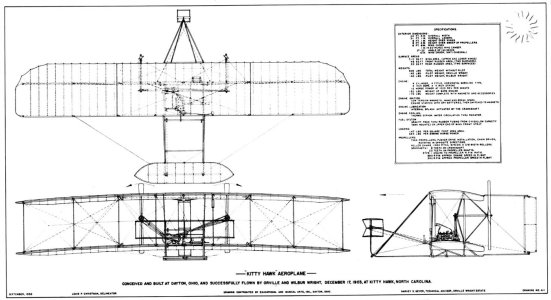
C’mon Daniel. Every kid who went to school in the US saw the ‘movie version’ in 8th grade science class. That’s how we know Americans were first in flight.You lost me there Paul, or I haven't seen the movie yet?
Well here is my metal work update. There are 36 strut fittings, a plate and open loop which attaches to the wing surface at the spars and a looped piece that attaches to the ends of the struts. These are tiny little buggers which challenged my welding skills, so the following is my weld up jig.
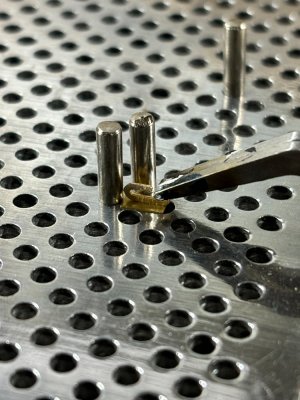
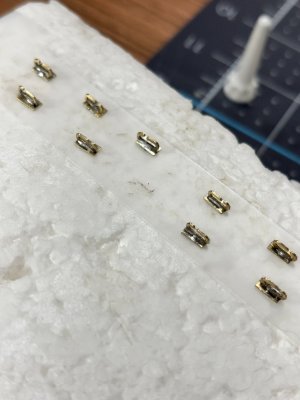
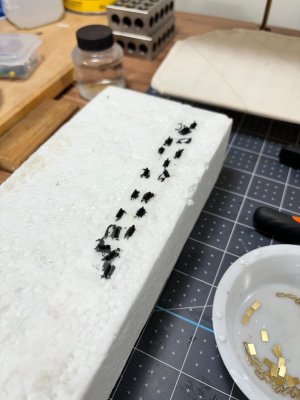
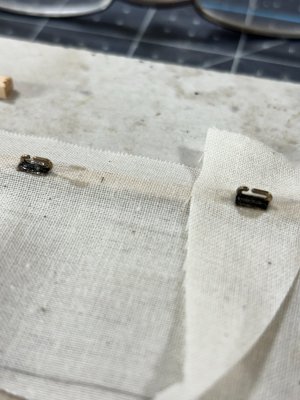
At first, I only welded up a couple then glued them to a test piece representing single and double muslin covered spars. The CA penetrated the fabric and holds very well so that's a big relief! I just need to be careful not to use too much CA or it will leak out and make a stain.
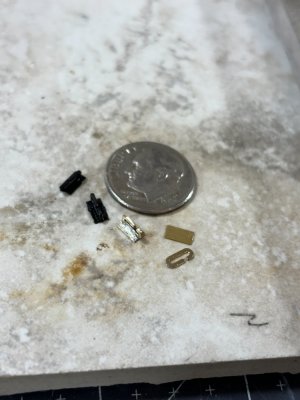
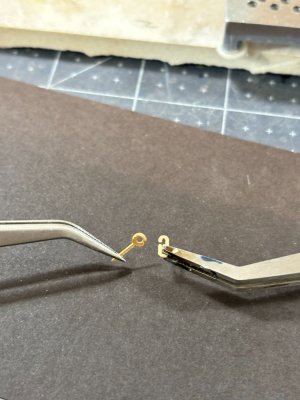
Lastly here you can see the strut loop and open loop. the strut loop is too thick to fit into the slot of the open loop, so I have to file down 36 loops thin enough to slide into the open loop.
I hope this helps future builders, thanks for checking in.


At first, I only welded up a couple then glued them to a test piece representing single and double muslin covered spars. The CA penetrated the fabric and holds very well so that's a big relief! I just need to be careful not to use too much CA or it will leak out and make a stain.

Lastly here you can see the strut loop and open loop. the strut loop is too thick to fit into the slot of the open loop, so I have to file down 36 loops thin enough to slide into the open loop.

I hope this helps future builders, thanks for checking in.
Thats good information, like you I wonder how much that dimension reduced under flight load.On the web I found a drawing, stating a 10" anhedral. Don't know the accuracy of that value though.
View attachment 470082
Hmm, must have been absent the day they showed it PaulC’mon Daniel. Every kid who went to school in the US saw the ‘movie version’ in 8th grade science class. That’s how we know Americans were first in flight.
- Joined
- Sep 3, 2021
- Messages
- 5,190
- Points
- 738

That statement is up for debate, although I'm not looking forward opening this can of worms.C’mon Daniel. Every kid who went to school in the US saw the ‘movie version’ in 8th grade science class. That’s how we know Americans were first in flight.
There are others who claimed first powered and controlled flight: Clement Ader, Gustave Whitehead, Samuel Pierpont Langley, Alberto Santos-Dumont, to name a few.
A more truthful statement would be that it is very likel that the Wrightbrothers were first to fly, based on the available evidence.
Me too! I was home that day sitting in front of the TV with my mom. I still can picture it like it was yesterday.I did see Niel Armstrong's first step on the moon live though
Last edited:
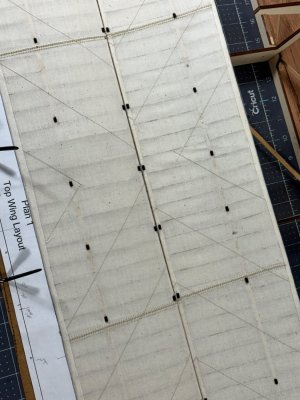
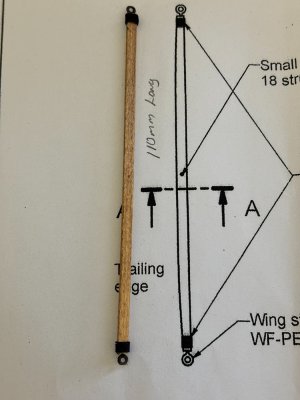
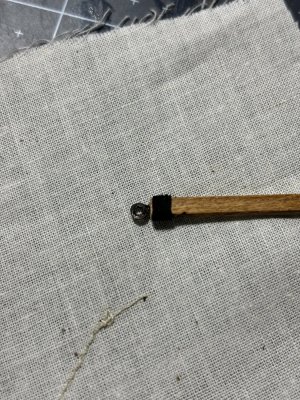
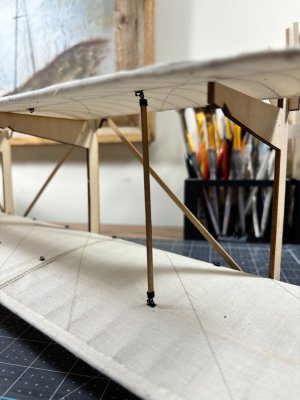
I must have jumped on Grants @GrantTyler rabbit, I'm all over the place on this build. After attaching the strut fittings to the wing, I just had to see how durable they really were going to be. So, I made a strut and hooked it up, they seem like they will work fine! I'm liking the contrast as well. I had painted the open loops and plate but decided to use Paul's @dockattner recipe with the brass black to color the closed loop pieces that go on the struts which worked really well. The black bindings on the strut are my handmade rope. Check it out.
Hope you all have a great day!


Hope you all have a great day!


