Wright Brothers "Flyer" 1903

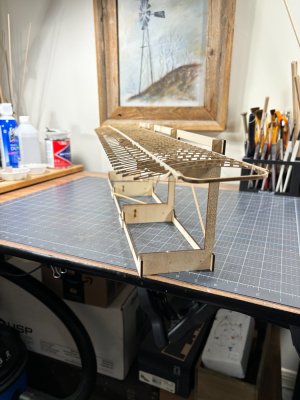
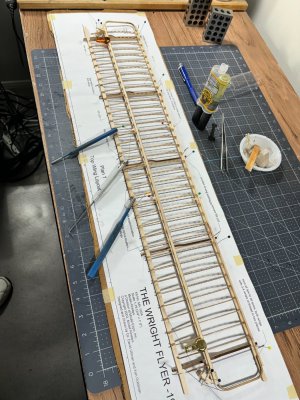
Good afternoon, all, the top wing ribs are all in as you can see from this overall shot. The trailing edge is a 0.35mm wire glued into a notch on the aft ribs. You can barely see the wire, but I have weighted it down in the first 8 grooves (working from the center out each way) and applied a touch of epoxy at each joint. When this sets up, I'm hoping it will be anchored and I can glue it down out to the ends.


IMG_0266.jpg

IMG_0262.jpg

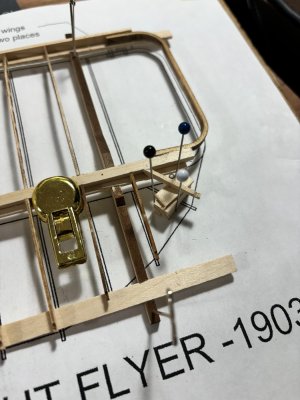
The two aft ribs are much shorter and have no ledge to rest on, so I had to fabricate a rest. In addition, the instructions said to fabricate the last shortest rib from scratch, you can see its homemade look.
IMG_0260.jpg

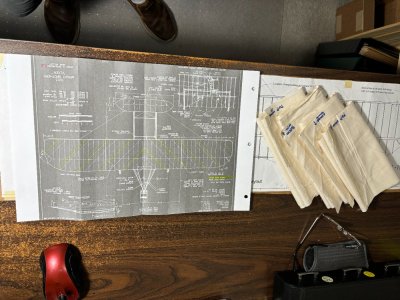
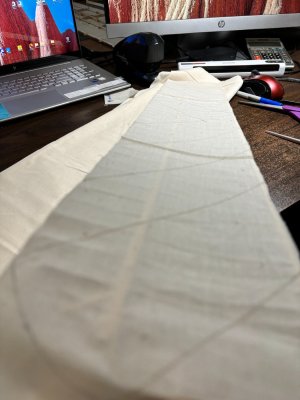
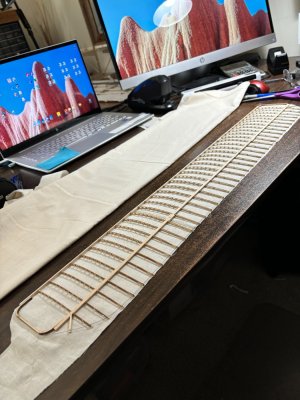
I do not see any way this model design will support a stress related silk span, shrinking and doping method of wing covering so I have chosen to do what the Wright Brothers did and cover them in an off-white muslin non doped covering. The next photos are what I am aiming for.

IMG_0264.jpgIMG_0265.jpg

I was so glad my sewing days were over when I completed the sails for the Blue Nose. Well apparently, not so I leave you with this last photo.
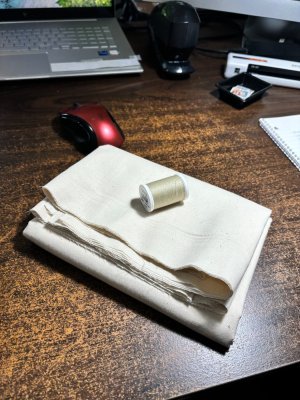
IMG_0263.jpg

Till next time I hope you all have a wonderful time.
 
I do not see any way this model design will support a stress related silk span, shrinking and doping method of wing covering so I have chosen to do what the Wright Brothers did and cover them in an off-white muslin non doped covering. The next photos are what I am aiming for.
You could also do a "Peter Voogt": when I told him that I would cover the wing of my Fokker Spin with some cloth, he challenged me to use tissue paper instead, like he did on his Bluenose build. So I "disassembled" a sheet of kitchen tissue and used one of the three layers tissue on the wing, with amazing results.
 
You could also do a "Peter Voogt": when I told him that I would cover the wing of my Fokker Spin with some cloth, he challenged me to use tissue paper instead, like he did on his Bluenose build. So I "disassembled" a sheet of kitchen tissue and used one of the three layers tissue on the wing, with amazing results.
Food for thought Johan, I will have to try the cloth first though. In my mind's eye the cloth is the right texture and color so if I can make it work then success. From what I can tell most model aircraft wings have flat bottoms where mine have concave bottoms. This presents a further challenge as I will have to glue the fabric to each rib before I can gently pull it taught.
 
Food for thought Johan, I will have to try the cloth first though. In my mind's eye the cloth is the right texture and color so if I can make it work then success. From what I can tell most model aircraft wings have flat bottoms where mine have concave bottoms. This presents a further challenge as I will have to glue the fabric to each rib before I can gently pull it taught.
Key word here is 'GENTLY'
 
Food for thought Johan, I will have to try the cloth first though. In my mind's eye the cloth is the right texture and color so if I can make it work then success. From what I can tell most model aircraft wings have flat bottoms where mine have concave bottoms. This presents a further challenge as I will have to glue the fabric to each rib before I can gently pull it taught.
Yes, I had it a bit easier, having only one (top) layer to deal with, but...
I think using diluted wood glue (50/50) may help you there. It still requires delicate handling, but is definitely doable. I first laid down the tissue and then applied the diluted wood glu. The tissue I used responded brilliantly to this treatment: it made a perfect rendition of doped cloth.
Post pictures please. I'd love to see the results!
 
Post pictures please. I'd love to see the results!
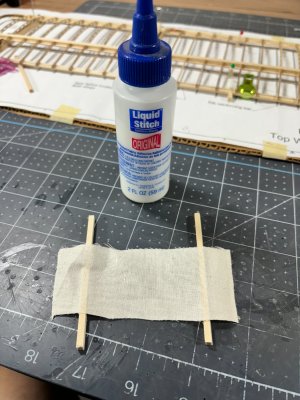
Hi Peter, here is a sample glue up using a product called Liquid Stitch. It is designed to glue fabric to fabric, it seems to work really well on fabric to wood so I'm encouraged. I'll be more than happy to post pictures if the end product is satisfactory. IMG_0267.jpg
 
Fun! I'll pull up a chair to see what my friend can do with this kit!

Oh, and you opened a can of worms with the first flight claim. In the US we know this to be true - but our friends across the Atlantic mistakenly think otherwise ROTF.
Some here in the US are still not convinced. Some still argue the case for Gustave Whitehead having the first flight in Connecticut, 1901.
 
Good afternoon, all, the top wing ribs are all in as you can see from this overall shot. The trailing edge is a 0.35mm wire glued into a notch on the aft ribs. You can barely see the wire, but I have weighted it down in the first 8 grooves (working from the center out each way) and applied a touch of epoxy at each joint. When this sets up, I'm hoping it will be anchored and I can glue it down out to the ends.


View attachment 468051

View attachment 468077

The two aft ribs are much shorter and have no ledge to rest on, so I had to fabricate a rest. In addition, the instructions said to fabricate the last shortest rib from scratch, you can see its homemade look.

View attachment 468054

I do not see any way this model design will support a stress related silk span, shrinking and doping method of wing covering so I have chosen to do what the Wright Brothers did and cover them in an off-white muslin non doped covering. The next photos are what I am aiming for.

View attachment 468075View attachment 468076

I was so glad my sewing days were over when I completed the sails for the Blue Nose. Well apparently, not so I leave you with this last photo.

View attachment 468078

Till next time I hope you all have a wonderful time.
Just out of curiosity, do you know what the function of the 0.35 wire on the trailing edge is? Is it to move the control surfaces? Also I have used tissue soaked in 50/50 glue water to represent canvas covers in plastic model building. It does work well and once it dries is actually stronger than you would believe. It might be an alternative to cloth.
 
do you know what the function of the 0.35 wire on the trailing edge is?
Hi Rob, great question. So far, I have found no specified reason for it. Just as a guess I would say it may help keep aft edge of the ribs evenly spaced (which is the reason on the model), and it would serve as a support of the fabric between the ribs. The real plane has a rear spar made of spruce close to the trailing edge, so I imagine the wire is just a wing cover support. The brothers were aggressive about limiting the weight of the craft.

Good suggestion with the tissue paper but man the ribs are just flimsy. This model design was intended for non-covered display.
Those ribs do look flimsy!
 
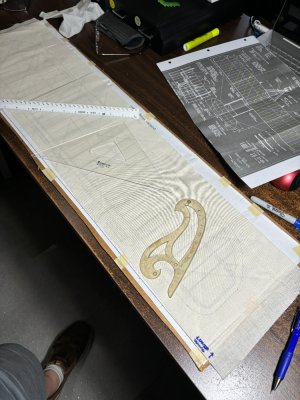
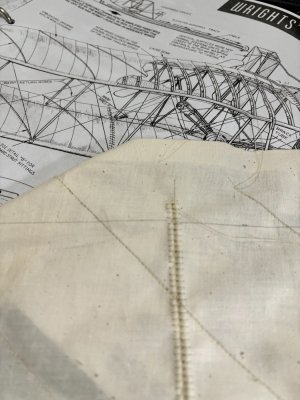
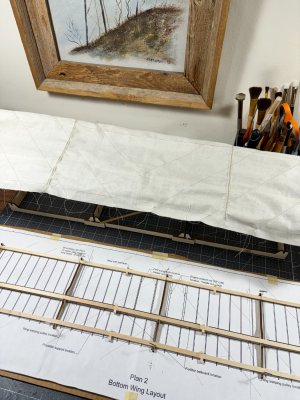
Good afternoon, I am well on my way sewing the Wright Brothers Flyer's wing coverings. I started by tracing the stitching pattern from a source I found online onto my muslin fabric. I left a 1/2 selvedge for working with the edges. I have prepared 4 panels for top/bottom of each wing. I also successfully removed the first completed wing from its jig and placed it on the multi jig. This was one of those rare times in my life I actually had a reason to use a French Curve, Ha! The stitching patter for the top wing is slightly different than the bottom. So far, I couldn't be more pleased, but this is still the easy part. Check this out.

IMG_0272.jpgIMG_0273.jpgIMG_0268.jpg

Notice above that thin wire on the trailing edge is the only support for the aft portion of the aft ribs!

Here is a close in of what I am trying to achieve with the stitching.


IMG_0274.jpgIMG_0275.jpg
I reset the wing jig onto the bottom wing plan as well.

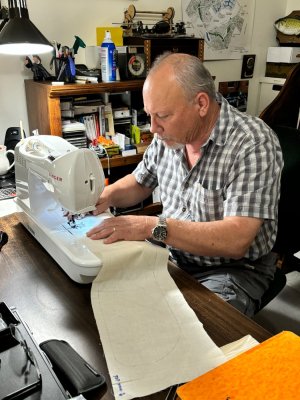
My flight commander suggested I show everyone what the flight engineer looks like at the controls.

IMG_0276.jpg

Thanks for taking a look and till next time, enjoy!
 
Good afternoon, I am well on my way sewing the Wright Brothers Flyer's wing coverings. I started by tracing the stitching pattern from a source I found online onto my muslin fabric. I left a 1/2 selvedge for working with the edges. I have prepared 4 panels for top/bottom of each wing. I also successfully removed the first completed wing from its jig and placed it on the multi jig. This was one of those rare times in my life I actually had a reason to use a French Curve, Ha! The stitching patter for the top wing is slightly different than the bottom. So far, I couldn't be more pleased, but this is still the easy part. Check this out.

View attachment 468577View attachment 468578View attachment 468579

Notice above that thin wire on the trailing edge is the only support for the aft portion of the aft ribs!

Here is a close in of what I am trying to achieve with the stitching.


View attachment 468580View attachment 468581
I reset the wing jig onto the bottom wing plan as well.

My flight commander suggested I show everyone what the flight engineer looks like at the controls.

View attachment 468582

Thanks for taking a look and till next time, enjoy!
I hope you are licensed by the FAA for that machine!
 
Good afternoon, I am well on my way sewing the Wright Brothers Flyer's wing coverings. I started by tracing the stitching pattern from a source I found online onto my muslin fabric. I left a 1/2 selvedge for working with the edges. I have prepared 4 panels for top/bottom of each wing. I also successfully removed the first completed wing from its jig and placed it on the multi jig. This was one of those rare times in my life I actually had a reason to use a French Curve, Ha! The stitching patter for the top wing is slightly different than the bottom. So far, I couldn't be more pleased, but this is still the easy part. Check this out.

View attachment 468577View attachment 468578View attachment 468579

Notice above that thin wire on the trailing edge is the only support for the aft portion of the aft ribs!

Here is a close in of what I am trying to achieve with the stitching.


View attachment 468580View attachment 468581
I reset the wing jig onto the bottom wing plan as well.

My flight commander suggested I show everyone what the flight engineer looks like at the controls.

View attachment 468582

Thanks for taking a look and till next time, enjoy!
That's going te be a nice wing cover. I see that you have everything under control, Daniel. I suppose the foot pedal you’re using is for the rudder …. Oeps it’s the machine throttle……
Regards, Peter
 
That's going te be a nice wing cover. I see that you have everything under control, Daniel. I suppose the foot pedal you’re using is for the rudder …. Oeps it’s the machine throttle……
Regards, Peter
Thanks Peter, that rudder pedal is really sensitive... just a little too much pressure and the material flies off missing the runway completely Ha!
 
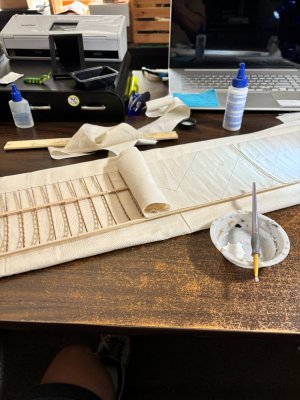
Hello everyone, a short update here to highlight a proof of concept that has such good results I couldn't wait to show it. As you know the underside of each wing is concave in design, so covering the wing surface had to be done in a glue each rib then roll the material over it and gently smooth it out. Normally you would glue down the trailing edge all the way then pull the covering as a sheet over the whole wing and glue down on the leading edge. I will use this method on the top side of the wing. Check it out.

IMG_0283.jpgIMG_0284.jpgIMG_0285.jpg

So far, my plan is working, the seam between the top and bottom cover will be fairly easy to effect on the leading edge, not so much on the trailing edge.

Thanks for looking in.
 
Back
Top