Greetings fellow masochists!!
This is my first build log on this forum. I had been using another site but it was all getting a bit prissy and perfectionist for me so I thought I would give this one a try.
I have made a lot of models now so I won't list them all on a completed page. Suffice to say lots of boats, carriages, planes etc etc.
This particular boat I thought was a bit different so I will give it a try.
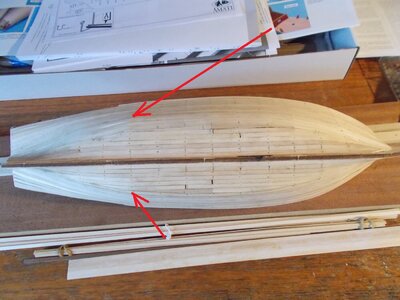
Pictures of the box and contents to start with. Picture instructions useful, Italian script not useful. However there is a small extra supplementary leaflet with English instructions. Four sheets of plans although one is just of the laser cut pieces. Wood seems to be of good quality as are the various metal pieces, sailcloth, pendants and thread all included.
So, here goes with the first set of pictures.


This is my first build log on this forum. I had been using another site but it was all getting a bit prissy and perfectionist for me so I thought I would give this one a try.
I have made a lot of models now so I won't list them all on a completed page. Suffice to say lots of boats, carriages, planes etc etc.
This particular boat I thought was a bit different so I will give it a try.
Pictures of the box and contents to start with. Picture instructions useful, Italian script not useful. However there is a small extra supplementary leaflet with English instructions. Four sheets of plans although one is just of the laser cut pieces. Wood seems to be of good quality as are the various metal pieces, sailcloth, pendants and thread all included.
So, here goes with the first set of pictures.


")


")