NoShould the earlier post of this build, on this thread be deleted?
-

Win a Free Custom Engraved Brass Coin!!!
As a way to introduce our brass coins to the community, we will raffle off a free coin during the month of August. Follow link ABOVE for instructions for entering.
-

PRE-ORDER SHIPS IN SCALE TODAY!
The beloved Ships in Scale Magazine is back and charting a new course for 2026!
Discover new skills, new techniques, and new inspirations in every issue.
NOTE THAT OUR FIRST ISSUE WILL BE JAN/FEB 2026
You are using an out of date browser. It may not display this or other websites correctly.
You should upgrade or use an alternative browser.
You should upgrade or use an alternative browser.
current build images Your actual Ship Modeling Project - briefly introduced at a glance -> present it here
- Thread starter Uwek
- Start date
- Watchers 113
-
- Tags
- current project
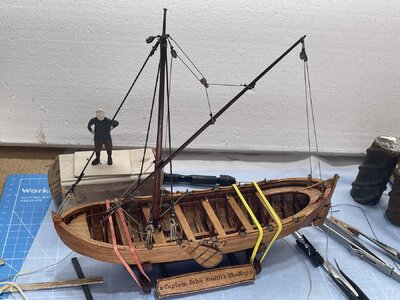
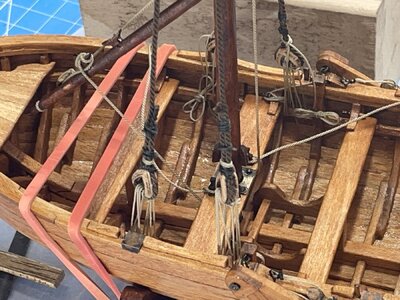
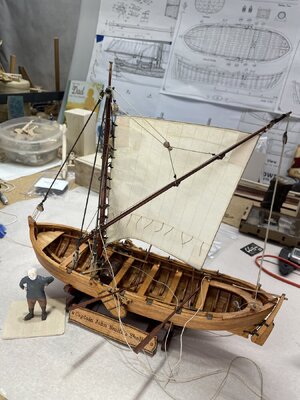
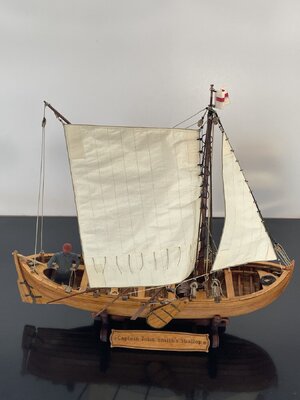
step by step - looking goodCaptain John Smith’s Shallop had the main sail hoisted. Still working on the stay sail.
View attachment 463133
Many thanks for showing
Congrats!! Very nice model!
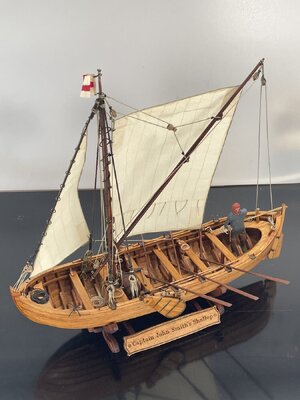
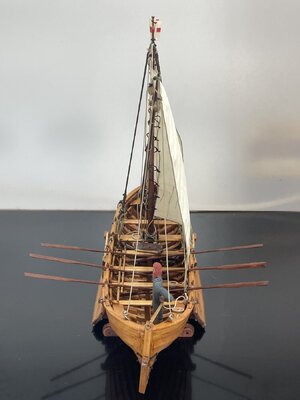
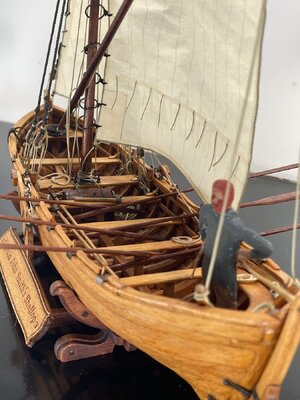
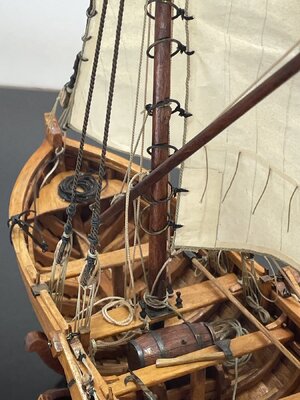
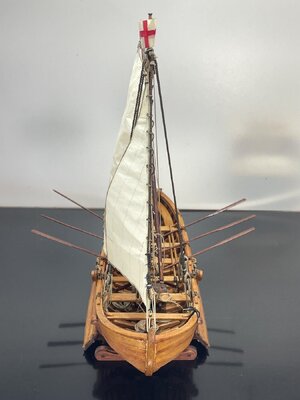
That is a wonderful job !Completed Captain John Smith’s shallop. Here’s a few pics.
View attachment 465619
View attachment 465621
View attachment 465622
View attachment 465623
View attachment 465624
View attachment 465625
Looks very, very good.
Congratulations also from my side - very well done !!!
I love that you used rope instead of string. Rigged models are a challenge and when done right, including using miniature rope, makes it stand out so nicely compared to using sewing thread or string. And the leg and fall block is a really nice detail! Bravo! Did you watch the Kroum Batchvarov video about this shallop?
Allan
I did, I’ve worked on this build for 4 months and read most logs and videos I’ve found. I’m new to the hobby and rigging seems to be the most difficult for me. As soon as I finished, I ordered Nave Egizia an Egyptian boat that was held together with ropes. Not that much rigging but it seems to be quite a bit of knot tyingI love that you used rope instead of string. Rigged models are a challenge and when done right, including using miniature rope, makes it stand out so nicely compared to using sewing thread or string. And the leg and fall block is a really nice detail! Bravo! Did you watch the Kroum Batchvarov video about this shallop?
Allan
- Joined
- Jun 29, 2024
- Messages
- 1,504
- Points
- 438

I particularly like the oars. They look like ones that could really be rowed in choppy water without catching a crab!
Roger
Roger
- Joined
- Dec 3, 2022
- Messages
- 1,547
- Points
- 488

Last Chance Build of HM Sloop Alert (1777) Vanguard Models
Hello everyone. I found this thread by accident while exploring the site yesterday and it's exactly what I didn't know I needed. You see, I'm keen to share a build with you because model making can sometimes be a lonely hobby. However, I don't want to start a full scale build log for my current project because I'm about half-way through already and more importantly, because I'm not entirely confident that I will ever finish it. I've had nothing but failures in recent years and I'm shy of staging a disaster in the public eye.
Following my series of dead ends, I have vowed that if this kit defeats me I will give up the hobby, sell my tools and kits and take up knitting, baking or jigsaw puzzles instead. I'm glad to say that making that promise to myself seems to have helped and the build is going well, if slowly. I only work on her when I'm really in the mood so some weeks there is nothing done and then I might put in a ten hour day.
And now some photographs:
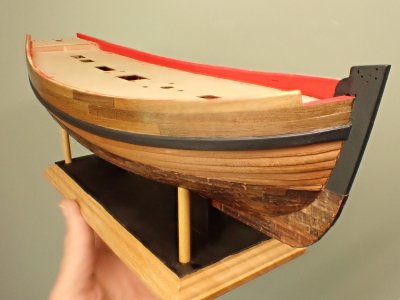
Here's a recent picture taken to celebrate the end of hull planking and coppering and the attaching of the base. Those of you who know the kit will see that I have made it mine own with some modifications.

I used walnut for the outer bulwarks because I read in Goodwin's Anatomy of the Ship that Alert was not painted but varnished. It it was going to be varnished then I wanted some pretty wood and to show that the model was made of many small pieces. My choice of contrasting colours was rather unsubtle but it's too late to worry about that now.
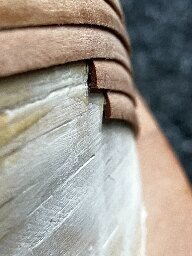
I hand shaped the planks below the wale to suggest Alert's clinker-built construction.
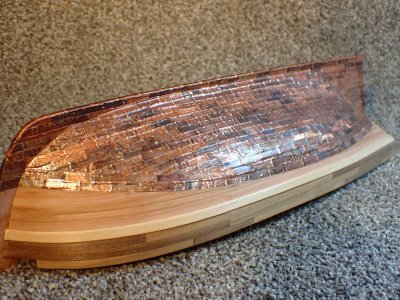
I didn't have to fake much clinkering as I had some copper plates left over from one of my fails and used them to copper Alert.

There was a lot of fun to be had with the copper, and some pain. I annealed the sheets of plates so that I could easily bend them to fit the hull, and each other. This gave me a variety of colours and textures and led to much experimentation as I treated batches of plates with various household chemicals to differentiate them. I was working on the assumption that mid eighteenth century, mass produced copper would be very impure and after a few months at sea, there would be many chemical reactions taking place. The copper would have been almost any colour but never, never shiny.

The stand is intended to suggest a boat on blocks in a boatyard - something we are all familiar with. When she's finished I intend to add some barrels, blocks, timber and rope to improve the look of the setting.
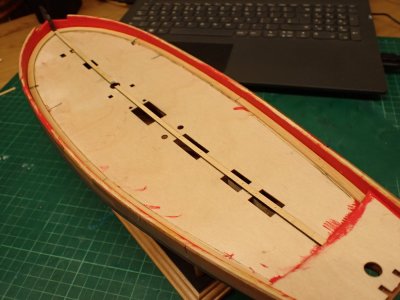
Moving onto the deck, I'm using maple (I think) which I have sawn into strips from a single stick bought at a local timber merchants - mostly to see whether I could do it. I've incorporated a margin plank as you see and have planked over most of the holes in the under-deck as unnecessary. The deck furniture doesn't allow a view inside and there's no interior detail down there anyway.
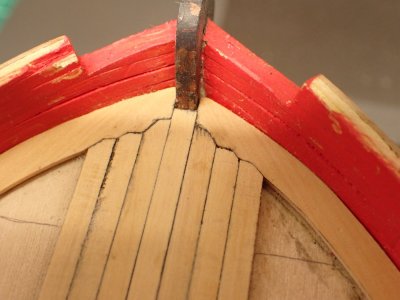
AotS shows that the deck planking was joggled into the margin planks. It's easier that you might think to joggle to this standard. Perfection would be very difficult but at my point on the learning curve, that doesn't really worry me.
She's an odd looking thing next to the beautifully decorated, white bottomed, carvel-planked, acrylic mounted Alert models that come out of the box but she might be slightly closer to the real thing and crucially, she's mine and I'm a bit proud of her.
All being well, I hope to have her finished by the end of 2024 and whatever I build next can have the full build log treatment in the new year.
- Joined
- Jul 27, 2021
- Messages
- 443
- Points
- 323

My actual small project 

cheers
Dirk

cheers
Dirk
- Joined
- Dec 3, 2022
- Messages
- 1,547
- Points
- 488

My actual small project

cheers
Dirk
It is very well built - perfect. How big is it and what scale?
You can find a very good building log here:It is very well built - perfect. How big is it and what scale?
Ten-oared boat 25 feet, Scale 1:72 by Falconet
Falconet ten-oared boat 25 feet scale 1:72 Check out my review of the kit here: https://forum.dubz-modelling-world.com/thread-57.html Now it's time to build this small boat :-) The kit Starting with the keel. Layered for strength and grain orientation. The Jig Having...
shipsofscale.com
- Joined
- Jun 29, 2024
- Messages
- 1,504
- Points
- 438

Re; Smithy, Alert Model; You’re doing a great job and it looks like you’ve gone the hardest part done!
Roger
Roger
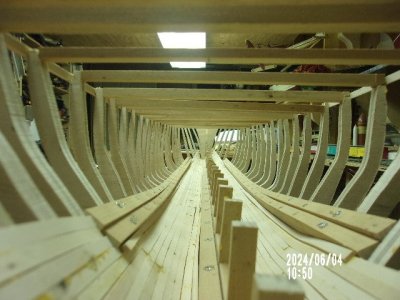
I don't know what your problem is but what you show here is very nice looking. I have several "first" builds that are way less than well done but never has one been called a failure. Each build makes for a better build the next time and that's the way it works. You build something wrong then you have learned how to do it right the next time. Keep everything you build and look at all of them from time to time and you can see how you have improved whether you realize it or not. Here's a picture of my current build. Never built anything like it before and really jumped off the edge to do this. There are so many mistakes in this picture that they probably can't be counted but this is not a failure at all. As wrong as some things are this is a huge accomplishment for me and there will be more mistakes and accomplishments as the build progresses. I have not failed at anything. I have taught myself a better way of doing things instead. Keep at it. You are doing just fine.

- Joined
- Jun 29, 2024
- Messages
- 1,504
- Points
- 438

I have been building ship models for as long as I can remember. I have never built one that I was completely satisfied with. It’s part of the Hobby.
Roger
Roger
- Joined
- Dec 3, 2022
- Messages
- 1,547
- Points
- 488

I have never built one that I was completely satisfied with. It’s part of the Hobby
I agree entirely. If it were possible to build a perfect model there wouldn't be much point in doing it.
I have been building ship models for as long as I can remember.
Have you kept them all?


