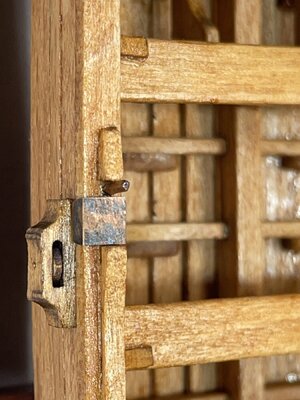
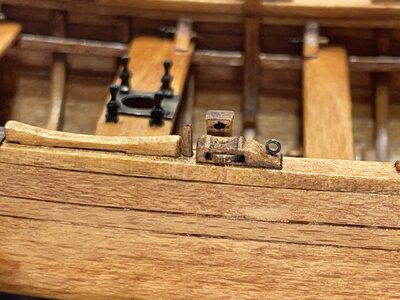
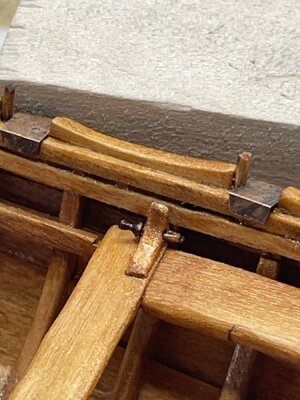
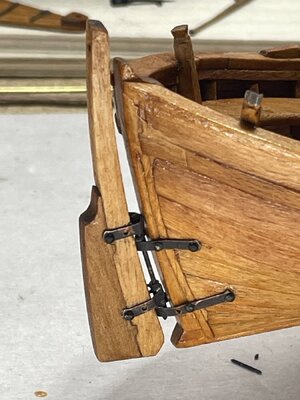
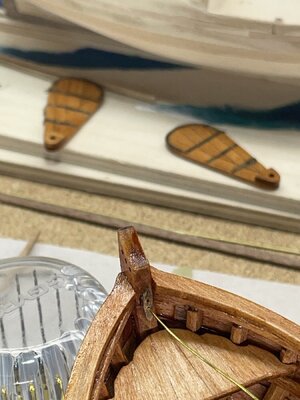
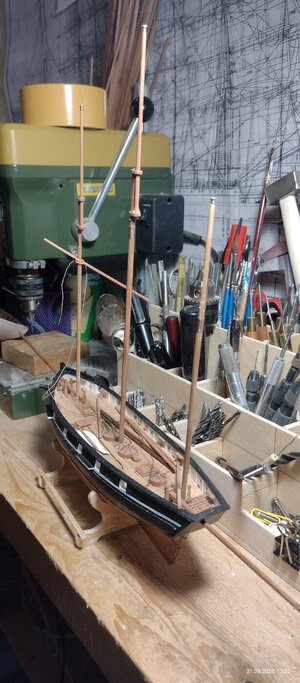
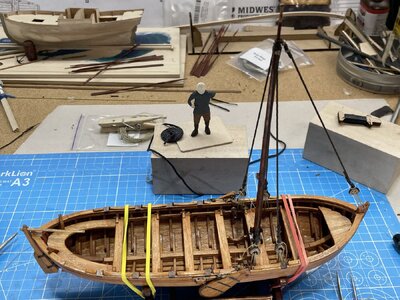
This looks fantastic!Hi All: Updated build photos below, re did planking to be parallel to handrail amongst others with guidance from @Ab Hoving
View attachment 433650
View attachment 433651
-

Win a Free Custom Engraved Brass Coin!!!
As a way to introduce our brass coins to the community, we will raffle off a free coin during the month of August. Follow link ABOVE for instructions for entering.
-

PRE-ORDER SHIPS IN SCALE TODAY!
The beloved Ships in Scale Magazine is back and charting a new course for 2026!
Discover new skills, new techniques, and new inspirations in every issue.
NOTE THAT OUR FIRST ISSUE WILL BE JAN/FEB 2026
You are using an out of date browser. It may not display this or other websites correctly.
You should upgrade or use an alternative browser.
You should upgrade or use an alternative browser.
current build images Your actual Ship Modeling Project - briefly introduced at a glance -> present it here
- Thread starter Uwek
- Start date
- Watchers 113
-
- Tags
- current project
Hallo @ShaycoHi everyone,
My name is Shay Cohen and I am from Israel.
I haven't been doing any ship modeling for 20 years now (I am 45) but finally getting back around to it. I started this La Belle model kit by CAF a few weeks ago and having lots of fun!
I am amazed of how evolved these kits have become... My dream project is La Renommee but I saw so many cool kits here already, that I can't make up my mind
Cheers!
Shay
View attachment 342961
we wish you all the BEST and a HAPPY BIRTHDAY

Good afternoon.
I was building the Occre Polaris, but I found that my ignorance was causing me to make too many mistakes, and before ruining the model, I decided to start with a simpler one, the Amati First Step Bounty.
Here I put a photo half-assembled, so you can see how it goes, with a million mistakes and botches, but I don't care, because from each one of them I have learned something to later apply it when I continue with the polaris.
Greetings!
Nacho.
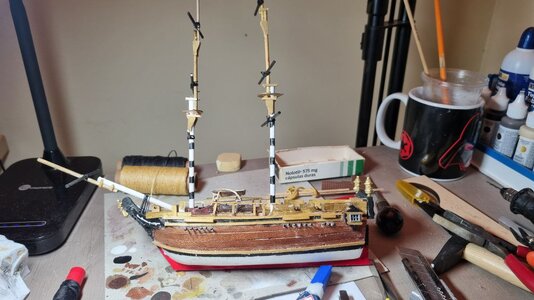

It’s all about learning… and not giving up…and enjoying the journey…and…Good afternoon.
I was building the Occre Polaris, but I found that my ignorance was causing me to make too many mistakes, and before ruining the model, I decided to start with a simpler one, the Amati First Step Bounty.
Here I put a photo half-assembled, so you can see how it goes, with a million mistakes and botches, but I don't care, because from each one of them I have learned something to later apply it when I continue with the polaris.
Greetings!
Nacho.
View attachment 448863
Just keep it up Nacho!
Hi Natcho. Don't feel bad if things don't go right. I've been building models for over fifty years and things are still going wrong. One thing I have always done is take apart anything that didn't meet my approval and do it over again. I wish I still had the first boat I did to show you but believe me, it was awful. Building these sailing ships is sometimes complicated and the plans aren't usually very helpful either. Maybe you can find an already built one on this forum and use pictures of it to help out. However whatever you do DON"T QUIT. Put the boat up for awhile and come back to it when you feel better about it. It takes time and lots of patience to build these things and that doesn't happen fast at all. But then one day everything comes out good and you can sit back and admire your work. Works every time. Norgale
I have a couple things to say about your model now that I've studied it for awhile.
First I think you are using a quick set kind of glue to attach the planks to the hull. DON'T! get some Elmers yellow glue or Titebond glue at a hardware store. This type of glue sets up fairly fast but you will still have some wiggle room to slide the planks down tight together. This way you won't have the space between the planks. You will have to figure out a way to hold the planks on while the glue dries (15 minutes or so) maybe some clamps or even a pile of heavy bookes or something. The glue may take over night to set depending on the temperature.
I see you have drilled the holes for the ratline rigging by eyeball. DON'T! Do draw a straight line with a small ruler where the holes go. Measure them apart and put a sharp pencil point mark at each hole. With the dimple from the pencil you will start each hole on a straight line and with each dimple they will be evenly spaced apart. Actually with the rest of the rigging installed you probably won't even notice the holes at all.
Your masts and spars ( the cross pieces) look ok but they should be tapered heavier at the bottom and thinner at the top. Just a bit. Take the bowsprit and sand it down from it's center to the outboard point. Make a rounded end,sort of blunt, and it will look much better. Same with the spars on the masts. Sand them from the center to each end rounding the ends off. Spars need to be heaviest at the center to hold the weight but get thinner towards the outboard ends where there is less weight.
Also on the threads on the bowsprit, those threads need to be pushed tightly together and you may have just a bit too many turns on there. See if you can unwind the thread and push them all together tightly. Some ships have this rope wound around their bowsprit to keep it from bouncing around. They tie a rope around the center of all the thread to pinch it together. It should show that on your plans if this ship had that on the real thing.
The last thing I can see right now is the black bands on the lower masts. You could have used a ruler and measured out the spacing and the width of the strips making the strips all the same size and equally distant from each other but there again, with all the rest of the rigging in place I doubt the stripes will be very visible.
Maybe try some of these things wherever you can and see if the model doesn't start to look better. It's all in the little details. Let's see what happens. Norgale
Best advice by Norgale: DON'T QUIT.
Read lots of build logs and use the tricks you learn on your own models.
Read lots of build logs and use the tricks you learn on your own models.
Ok, thank you very much to everyone, especially Norgale. A detailed analysis and in all sincerity, wow!!!
There is no fear that I will quit, I am determined to continue and learn. I quite enjoy the activity, regardless of the results. I imagine what that enjoyment will be like when things start to go better for me.
Many of the problems that Norgale point out to me come from my rush to do things quickly, I have already been improving them. I have the Polaris waiting and the final goal of the Occre Endurance that I asked for from christmas, that I hope will be a decent, showable build.
Thank you very much and greetings to all!!
Nacho.
- Joined
- Mar 22, 2024
- Messages
- 396
- Points
- 168

I have mentioned elsewhere that I had been gifted a tampered-with Heller Victory, or most of one, in a sack. I have been pondering what to do with it, and experimenting (and thinking about methods too.)
A few external factors come into play, for example, parts of the stand (and more) are missing, also the ship is a monster in relation to the modelling space I have available. So never being famous for lack of courage, I decided to make it smaller by cutting it down to the waterline, this required a new razor saw and a lot of sweat, but here's the result. At the moment everything is held together by clips and elastic bands.
Cutting off the lower hull close to what the Hackney/Longridge drawings suggest is the waterline had an unanticipated effect, in that relieving the internal stresses locked in during manufacture caused it to twist a little but nothing that can't be overcome, though the twist toward the bow and the lack of joint area on the remaining stub of the stem means I will need to fabricate something sturdier to replace the lower stem
I discovered something useful for others perhaps. I have become increasingly allergic to superglue, it gives me something like hay-fevercertainly hay-fever medication helps. Because of this I use solvents or PVA whenever possible. the trouble is that PVA gives very poor adhesion onto plastic, An intermediate layer was called for. I have discovered that Limonene, sold as less toxic plastic modeller's liquid cement is slow enough acting to allow you to stick paper onto plastic very easily. I used gift-wrap tissue, just cut a piece of tissue, lay it on the surface you want to cover and brush the limonene through it. Quick and easy. I have done this on the poop deck and then PVA'd a sheet of 1/16" balsa on top of it. The balsa is because Longridge says the poop had more camber (10") than the other decks and my plastic deck looked pretty flat. Sanding the balsa towards the deck margins to recreate some camber was easy enough, and it really is well stuck down so i can build a boxwood (or maybe white hornbeam) veneer planked deck on top of it.
All my thinking has borne some fruit, though maybe not everyone will like the taste. Does the world need another plastic Victory? Lovely though they can be, probably not. Do I enjoy painting acres of plastic to look like wood? Definitely not. So I have decided to build what might be described as a 'fantasy model.' This will be planked and varnished like a dockyard model, a Victory-class first rate to be called 'Vixen'. The Royal Navy has had a few (4) real Vixens, but these were mostly smaller craft. I am also drawn to the look of the first Victory when newly built, with open stern galleries as depicted in a model in the National Maritime Museum. I think all this may take me years. I hope I have the strength t get there.
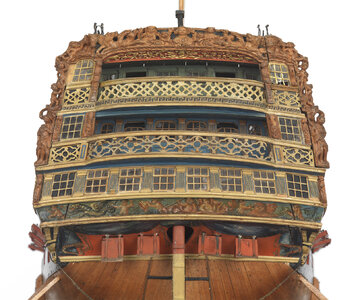
The NMM model of the Victory with open stern galleries
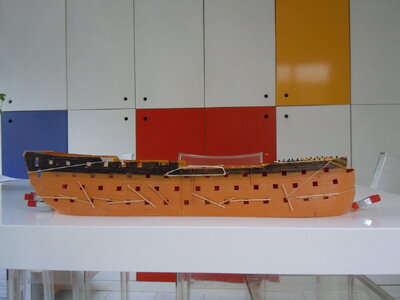
Victory as a waterline model
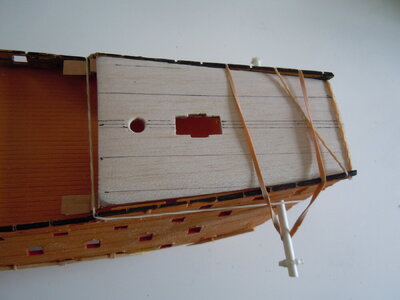
Balsa PVA glued onto the poop using solvent cemented paper as an intemediate layer.
A few external factors come into play, for example, parts of the stand (and more) are missing, also the ship is a monster in relation to the modelling space I have available. So never being famous for lack of courage, I decided to make it smaller by cutting it down to the waterline, this required a new razor saw and a lot of sweat, but here's the result. At the moment everything is held together by clips and elastic bands.
Cutting off the lower hull close to what the Hackney/Longridge drawings suggest is the waterline had an unanticipated effect, in that relieving the internal stresses locked in during manufacture caused it to twist a little but nothing that can't be overcome, though the twist toward the bow and the lack of joint area on the remaining stub of the stem means I will need to fabricate something sturdier to replace the lower stem
I discovered something useful for others perhaps. I have become increasingly allergic to superglue, it gives me something like hay-fevercertainly hay-fever medication helps. Because of this I use solvents or PVA whenever possible. the trouble is that PVA gives very poor adhesion onto plastic, An intermediate layer was called for. I have discovered that Limonene, sold as less toxic plastic modeller's liquid cement is slow enough acting to allow you to stick paper onto plastic very easily. I used gift-wrap tissue, just cut a piece of tissue, lay it on the surface you want to cover and brush the limonene through it. Quick and easy. I have done this on the poop deck and then PVA'd a sheet of 1/16" balsa on top of it. The balsa is because Longridge says the poop had more camber (10") than the other decks and my plastic deck looked pretty flat. Sanding the balsa towards the deck margins to recreate some camber was easy enough, and it really is well stuck down so i can build a boxwood (or maybe white hornbeam) veneer planked deck on top of it.
All my thinking has borne some fruit, though maybe not everyone will like the taste. Does the world need another plastic Victory? Lovely though they can be, probably not. Do I enjoy painting acres of plastic to look like wood? Definitely not. So I have decided to build what might be described as a 'fantasy model.' This will be planked and varnished like a dockyard model, a Victory-class first rate to be called 'Vixen'. The Royal Navy has had a few (4) real Vixens, but these were mostly smaller craft. I am also drawn to the look of the first Victory when newly built, with open stern galleries as depicted in a model in the National Maritime Museum. I think all this may take me years. I hope I have the strength t get there.

The NMM model of the Victory with open stern galleries

Victory as a waterline model

Balsa PVA glued onto the poop using solvent cemented paper as an intemediate layer.
Hello modelers,
I’m currently working on Captain John Smith’s shallop by Pavel Nikitin. I started in late January of this year. I put i on the shelf for a month while I built the Peterboro canoe for a gift for some friends. Plus I had to make a box, and structure it so I can safety ship it.
Now I remember why it was easy to put it on the shelf and start the canoe I had finished planking the hull and it seemed to be a good stopping point. The next steps were mostly small details that seem to take me a while and don’t really show results until a bunch are on. I probably take quite a bit of confidence boosting and thinking before the rigging starts
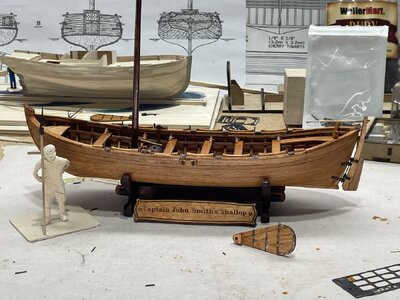
I’m currently working on Captain John Smith’s shallop by Pavel Nikitin. I started in late January of this year. I put i on the shelf for a month while I built the Peterboro canoe for a gift for some friends. Plus I had to make a box, and structure it so I can safety ship it.
Now I remember why it was easy to put it on the shelf and start the canoe

- Joined
- Mar 1, 2022
- Messages
- 683
- Points
- 308

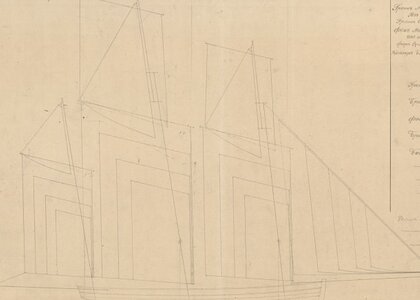
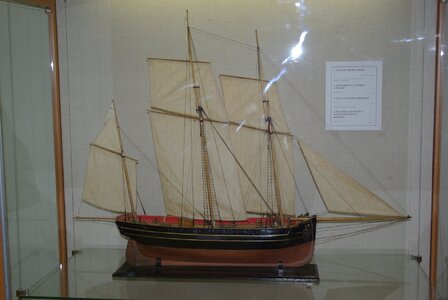
A topmasts scheme I have never seen before. Is it correct?
- Joined
- Mar 22, 2024
- Messages
- 396
- Points
- 168

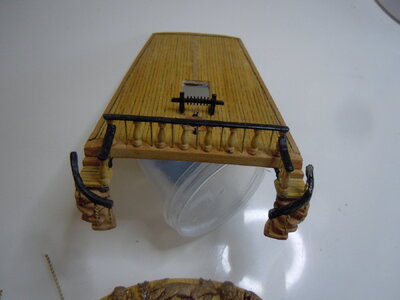
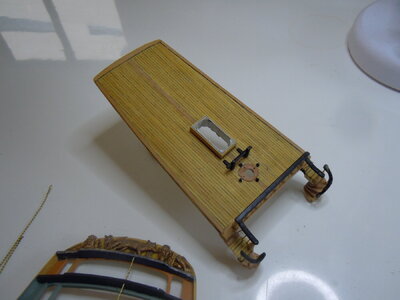
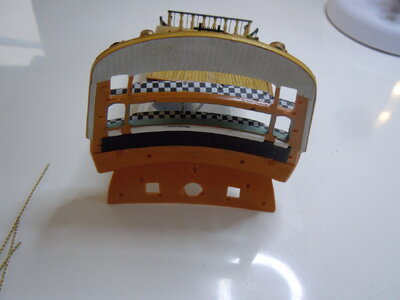
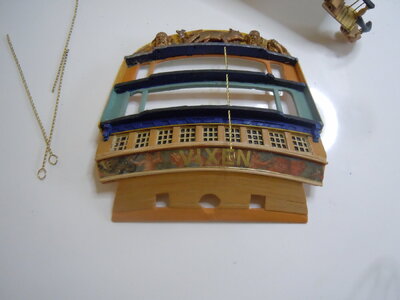
I mentioned before that I had been gifted an early issue Heller Victory in a sack. Somewhat tampered with and missing a few parts. I have been tampering too, it has become 'VIXEN' a Victory class battleship - entirely imaginary of course. Boxwood planking and a little pear veneer. It will have open stern galleries and a companionway where the (missing ) skylight should be. The structure in the skylight opening is due for the chop - happily not glued in.


- Joined
- Mar 22, 2024
- Messages
- 396
- Points
- 168

Progress so far is the result of 2 or 3 attempts at everything. Often it's a case of do it once to see if it can be done and how, twice to do it better and then a third time to get a result I am (mostly) happy with. But as this is the first ship model I have attempted for 50 years, that is no surprise.
- Joined
- Mar 22, 2024
- Messages
- 396
- Points
- 168

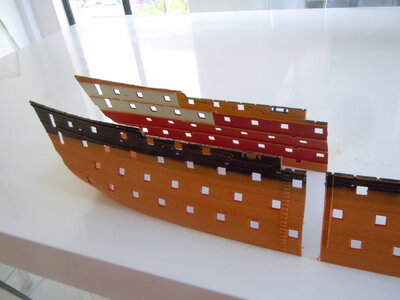
I think you need to create a half-cut sub chapter- quarter cut. I already cut this much tampered with kit down t the waterline, now I cut it in half. The reason is the restricted space I have to work in (mostly) and difficulties I foresee with assembly if done 'by the book'. At least I can picture how to work on it more comfortably in my head now. If all goes to plan the cut will be covered externally with planking and internally with 'quickwork' . Or blood and tears, whichever comes first.
