current build images Your actual Ship Modeling Project - briefly introduced at a glance -> present it here

First thing to do is to drill 2 holes through each bulwark, about 1/8thinch.

If you want lights in the cabin drill 1 hole on each side from the cabin area to the 2 bulwarks towards the bow. Also drill 2 holes through the keel between the 2nd and 3rd bulwark at the stern. Make sure the 2 holes in the bulwarks are at least 1/2 inch apart and one over the other).this helps to prevent short circuits when you attach the resisters and LEDs.. These holes will allow you to put 2 wire buses on each side of the keel. I will send pictures this week. Also I will send the web site for the LEDs and resistors. The supplier is pcboard.ca


I used a lot of LEDs as when the hull is planked the only places light comes through are the very small deck ports, a hole I cut below where the sky light structure goes and the one under the helm binacle. Also 4 lanterns on deck.

You must attach a resistor of the proper value to the negative lead of each LED AND THEN ATTACH THE OTHER END OF THE RESISTOR TO THE NEGATIVE BUS.

The value of theresistor depends on your source voltage, the number of LEDs used and the forward voltage of the LEDs( which is printed on the package).
 
Hi Zolly,
I found my supplier when I couldn’t find the independent flickering LEDs at the advertiser on SOS.
The independent flicker is really important if one wants to have the authentic look. Didn’t mean to offend you, I just wanted to stress the ind. flicker.
 
Mary Rose - state of play
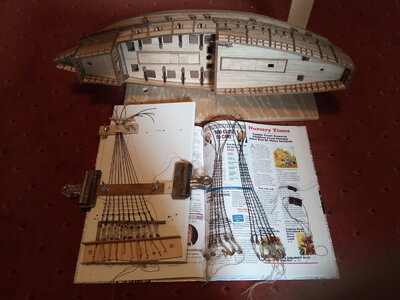
Hull almost complete. Foremast shrouds safely pressed in an old 'Private Eye' manual.
Main mast shrouds currently being knotted. Some parrels threaded.
I am trying to diversify my efforts between different tasks so things don't get too samey (e 500+clove hitches)
I hope I can remember where I put the spars completed back in May
Status Oct 7.jpg
 
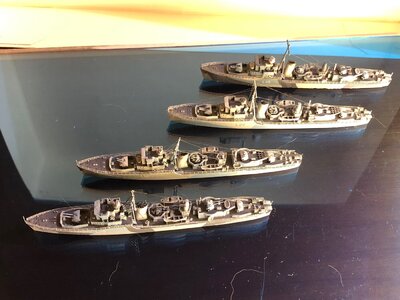
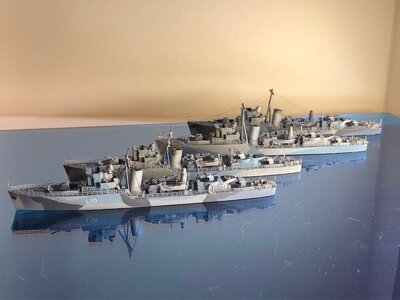
I'm building the IBG 1/700 scale Royal Navy destroyers assigned to the Polish Navy in World War Two. So far the three Hunt class destroyers have been attempted. There are four models because I repeated ORP Krakowiak ( front and rear) after research showed some flaws in the model. I also added metal gun barrels, PE doors, brass mast and got a little more ambitious with the rigging.
IMG_0404.jpgIMG_0402.jpg
 
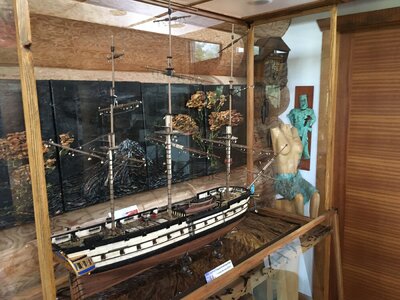
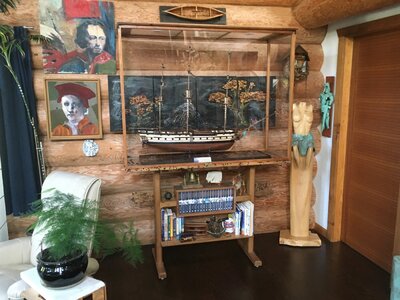
My Build AL's HMS Surprise; Just about to start rigging. Case is my design and build as well. Designed to hold 20 volumes of the Aubrey/Maturin novels and companion books.

View attachment 185438View attachment 185439
What I forgot to mention directly in my post in your Introduction topic
I like very much the idea of the seawater under the stand - this is a great presentation of the model
To everybody else here: Please check out his video in his introduction.
 
How do you get the sails to billow?
The build log goes into detail, but here's a summary. The sail cloth is ivory colored stretch satine. It's 3% spandex and 97% cotton, and 100% awesome fabric. It stretches in one direction. After sewing the panel lines. staining the sail with diluted pine tar, and attaching the boltrope all around, with head and clew cringles, you clamp the head of the sail in a wooden jug to keep that edge straight and suspend the clews with thread. You soak the sail with fabric stiffener and place either ziplock bags filled with sand or water and let gravity stretch the sail while it dries overnight. It becomes as stiff as parchment. The rest is rigging.
 
The build log goes into detail, but here's a summary. The sail cloth is ivory colored stretch satine. It's 3% spandex and 97% cotton, and 100% awesome fabric. It stretches in one direction. After sewing the panel lines. staining the sail with diluted pine tar, and attaching the boltrope all around, with head and clew cringles, you clamp the head of the sail in a wooden jug to keep that edge straight and suspend the clews with thread. You soak the sail with fabric stiffener and place either ziplock bags filled with sand or water and let gravity stretch the sail while it dries overnight. It becomes as stiff as parchment. The rest is rigging.
Your log photos are very expressive of the skill and care that you take in producing scaled details for a build to be proud of. Well done! PT-2
 
There's a video? Who's ship video are you talking about? I wanna see it . . .
Scroll back up to posting #68 and at the end of Hello from Saltry Bay on the bottom is a link to shipsofscale.com click on that and you will be taken to #1 where just below the top is a video of the first 500 hours of the build plus more. Confusing????? I had to hunt around a bit to re-find it myself but it is there. PT-2
 
Back
Top