YQ Bluenose by Johan [COMPLETED BUILD]

Hey Nomad,

I'll try and explain...

In the picture below you see the basic frame work for the aft cabin; two transverse floorbeams and two longerons, more or less in the longitudinal axis direction.
The two floorbeams should be sitting with their aft side to the fwd side of the adjacent frame, see the green arrows in the picture, where the aft beam sits properly against the frame. The forward beam however doesn't sit against the adjacent aft frame, but instead sits with its fwd side against the aft side of the frame, see red arrows. The blue arrows then show the to-be situation, where the aft side af the beam sits against the fwd face of the adjacent frame, just like his little brother on the aft side of the aft cabin.
I think the root cause is mainly twofold: the frame itself measures 82mm, that does not match the intended pitch of 80mm, as indicated by the jig. Secondly, I know now quite sure, that I have some poorly positioned frames, paying insufficient attention to maintain the pitch between the frames along the entire circumference of the frame.
I hope you now have a somewhat better understanding of the issue.

View attachment 310091
Ok got it. I hope this small error does not have too many serious knock-on effects, or that you are able to work around them. I look forward to seeing how you resolve this problem Johan, good luck Thumbsup
 
Waddling into uncharted territory. Scary!
Top foto, initial lay-out for the lights.
Second foto, hole(!) drilled in keel for "power" supply. Those were some very anxious minutes. Hand drilled; I had the idea I had more control over the process, than when using a power drill.
Next steps now are to fine tune the lay-out, sort out the connections, test fitting the harness in terms of connectivity and installation and simultaneously starting the installation of the deck beams.
Good Afternoon Johann. I always wondered where your model was.....and here I find a POF Bluenose. Difficult for sure, not something I would attempt. Going through your log I found lovely and precise work and even then a few fractions of a mm has caused the aft cabin to be off. Non the less it is looking outstanding. Will be following this from now on. Off the topic- where in the Netherlands
 
Good Afternoon Johann. I always wondered where your model was.....and here I find a POF Bluenose. Difficult for sure, not something I would attempt. Going through your log I found lovely and precise work and even then a few fractions of a mm has caused the aft cabin to be off. Non the less it is looking outstanding. Will be following this from now on. Off the topic- where in the Netherlands
Hey Tyler, thanks for your compliments.
I embarked on this journey in early January, this year. After rebuilding the Billing Boats Bluenose my father build and having seen the various build logs here on SOS of the beautiful POF Bluenose, I couldn't help myself and committed to building one myself.
It turned out to be a very interesting journey, with a couple of panic-filled moments, but also with moments of riding on top of the clouds.
As far as the errors go; I found to my dismay that minor deviations in the early build accumulate to rather big ones later on, as was shown with the support structure of the aft cabin.
Inspired by the customizations, done by Peter (@Peter Voogt) on his Bluenose build, I am now seriously deviating from the original build instructions. That implies that progress is slow, but fortunately, I am not in a hurry.
You're more than welcome to follow my tribulations, I hope you enjoy this one as much as I enjoy your build of the Victory.

Off-topic, I live in a small town called Loosdrecht, some 30km SE of Amsterdam. A beautiful environment, with lots of lakes, but also with some forest to make it a fantastic biking environment.
 
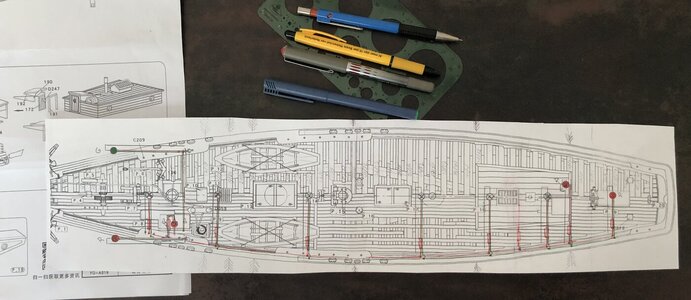
Since I parted ways, for now, with the YQ 's build instructions, progress is slow. Quite a few items have to be considered, sketches to be made, templates to be made. Before closing off the below decks, I need to have the lights installed and the bulkheads prepared.

Preparing the manufacturing of the light installation:

DC7D8D53-5054-4C76-A753-8590A484F30B.jpeg

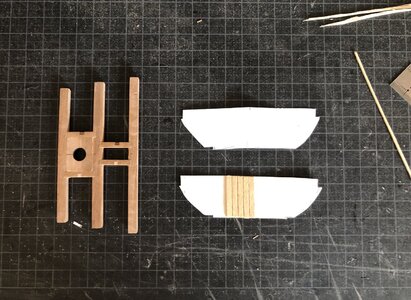
Simultaneously working on the bulkheads below decks and the upper deck beam assemblies:

B4E9D059-A7EB-4DC2-A8F2-4F975D51A1DD.jpeg
 
Since I parted ways, for now, with the YQ 's build instructions, progress is slow. Quite a few items have to be considered, sketches to be made, templates to be made. Before closing off the below decks, I need to have the lights installed and the bulkheads prepared.

Preparing the manufacturing of the light installation:

View attachment 311570

Simultaneously working on the bulkheads below decks and the upper deck beam assemblies:

View attachment 311571
Hello Johan, It is nice to see you back at your YQ-Bluenose again. I am still working on mine but there is very little time for the Old Ship Yard these days. Between caring for my Admiral, house keeping and cooking and now yard work added to my list. I have did a bit more on the Aft Cabin, the lower half but do have a long way to go. Will be adding my Led Lights soon.
Regards Lawrence
 
Since I parted ways, for now, with the YQ 's build instructions, progress is slow. Quite a few items have to be considered, sketches to be made, templates to be made. Before closing off the below decks, I need to have the lights installed and the bulkheads prepared.

Preparing the manufacturing of the light installation:

View attachment 311570

Simultaneously working on the bulkheads below decks and the upper deck beam assemblies:

View attachment 311571
Johan you're a brave man to part ways with your kit instructions, but I'm looking to see how to put your light installation progresses. Good luck! Thumbsup
 
Hello Johan, It is nice to see you back at your YQ-Bluenose again. I am still working on mine but there is very little time for the Old Ship Yard these days. Between caring for my Admiral, house keeping and cooking and now yard work added to my list. I have did a bit more on the Aft Cabin, the lower half but do have a long way to go. Will be adding my Led Lights soon.
Regards Lawrence
Johan you're a brave man to part ways with your kit instructions, but I'm looking to see how to put your light installation progresses. Good luck! Thumbsup
Thanks for your encouragements, I really need those!
 
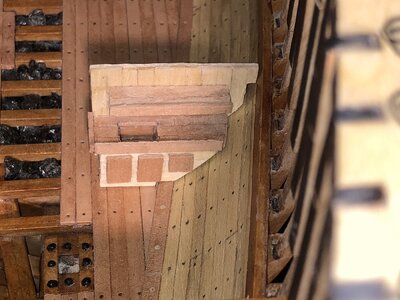
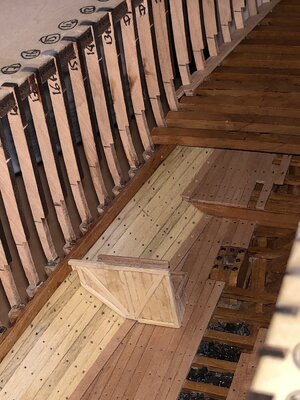
Today saw some shipyard activity on the galley installation in the focsle.
It's something I've never done before, but since being inspired by fellow builders, I decided to give it a go.

Temporary install in what's to become the focsle.
190831B3-5D79-4E0C-BADF-3724CE7AC9BC.jpeg
5CF6AE1D-9C01-458B-8EFE-39ADB9BD925C.jpeg

Aft view of the galley, raw, unfinished.
4C063F36-5A9E-481A-9AB4-D3FCB57B5D65.jpeg

Forward view of the galley, with sink. Also raw, unfinished.
9AE30DB6-2A8C-4781-82FF-2499CF92E838.jpeg
 
Today saw some shipyard activity on the galley installation in the focsle.
It's something I've never done before, but since being inspired by fellow builders, I decided to give it a go.

Temporary install in what's to become the focsle.
View attachment 311879
View attachment 311880

Aft view of the galley, raw, unfinished.
View attachment 311881

Forward view of the galley, with sink. Also raw, unfinished.
View attachment 311882
Good evening Johann- fantastic. So much fine detail. This is going to be a great Bluenose. Cheers Grant
 
That is a really nice result at this scale! Awesome!
Good evening Johann- fantastic. So much fine detail. This is going to be a great Bluenose. Cheers Grant
Thank you so much.
This is about as good and small as I can get it at the moment with my current tools and capabilities. At one point I considered adding hinges, but that idea was disregarded as in being way over my head.
Up to the next challenges; a couple of bulkheads below decks... And the lights...
 
Nice job, Johan. For these parts: size does matters! But its looking great!
Regards, Peter
These are the actual dimensions I used:
Distance between deck beams and lower deck 25mm (1") =1.80m (approx 6ft)
Height of countertop 11mm (0,44")=79cm (31"), depth of countertop 9mm (0,35")=65cm (25.6"). Quite reasonable, I would say.
 
Back
Top