YQ Bluenose by Johan [COMPLETED BUILD]

I sometimes really have to scratch my head when it comes to Billings Boats.
Well, it isn't all Billing Boats, to be honest.
The model in the picture is about 38 years old and saw a restauration two years ago. Two years back I severely lacked capabilities and background information; gradually, during the restauration I came across essential information, sometimes too late to be useful.
The kit itself has been modernized, I believe, with quite some changes/improvements. Furthermore, Billing Boats has been quite helpful by supplying hard-to-get-by parts and drawings.
I could not incorporate the later changes/improvements, without touching upon the base structure. Look for instance at the number of shrouds, just to name one.
 
This afternoon I could spend some time on the shipyard, allowing me to complete the installation of the main- and foremast shrouds. This means all lanyards are "tensioned" and tied off.
When viewed from a distance the overall view is nice, but any macro picture is condemning.

Left hand side view:
View attachment 377406
Right hand side view:
View attachment 377407
Detail of fore mast shrouds:
View attachment 377408
Detail of main mast shrouds:
View attachment 377409
Detail picture of all mast shrouds and lanyards:
View attachment 377410
While I was responding to @Daniel20 's post on his planking job and his ideas about what finish to apply, I thought back about my own tribulations concerning the finish. One of the main reasons I started this kit are a) the POF-build itself and b) the possibility to show the structure behind the planks. Initially my idea was to display the "open" side. After applying the finish I'm not so sure anymore; the closed and painted port side is stunning to look at. From a technical point of view the starboard side is the side to look at, but esthetically it's the port side, hands down.
(I think I'm in love with this little build.)
Switch sides every week… ROTF
 
Good evening Johan. You hibernating ? Oh wait it’s your summer …as bad as my winter ROTF. Jokes aside - are you having a BN sabbatical? Cheers Grant
Morning Grant,

Nah, not really hybernating, nor having a sabbatical, but:
It's hot and humid over here, temps ranging between 25 and 30 centigrade, with humidity being high, not much is getting done.
Plus the garden requests its' attention and, in anticipation of my new organ to arrive, I have to redecorate/refurbish my music- annex hobby room.
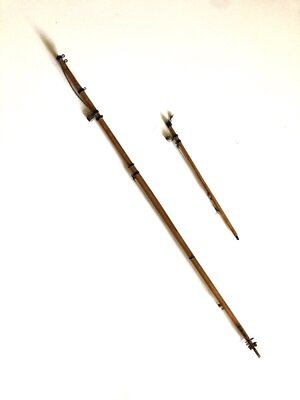
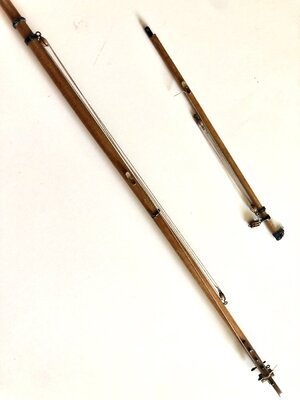
As far as my BN is concerned, I am working on the spars, more specific, installing blocks. It happens to be very time consuming, with little progress to show for. The main- and fore booms are complete, focus is now on the two gaffs, with lots of blocks to be added. Block sizes range from 3- to 5mm, single, double and triple and the rope sizes are 0,3-, 0,4-, 0,5- and 0,6mm. Way too small and way too large fingers to deal adequately with these small parts. Quite frequently I have my share of re-do's and my bad-word-yars are filling up quite nicely...

Below the two booms with the boom tackles and walk ropes attached:
IMG_0326.jpeg

Close-up of the boom tackles:
IMG_0328.jpeg

In all, not much to show.
 
Last edited:
What you do have to show Johan is still very impressive to me as well as informative by way of process.
Thanks Dan,
As far as the process goes, I need to constantly remind myself that the sails will form large obstructions.
That means that almost everything on the masts, spars and the decks and railings need to be in place, prior to the attachment of sails. That pretty much drives the entire current process. As far as sail attachment goes, my present idea is to start with the lower fore sail, followed by the lower main, the jumbo, jib and outer jib and finally the two top sails and the fisherman's stay sail. But... still open for amendment.
 
Back
Top