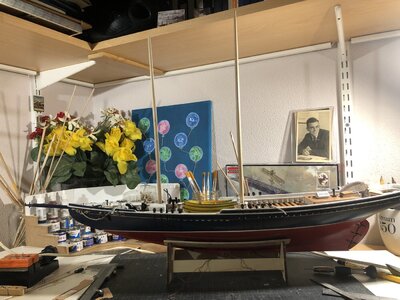
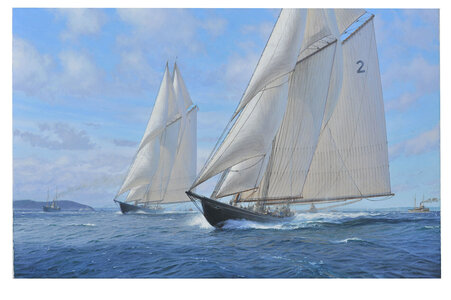
YQ Bluenose by Johan [COMPLETED BUILD]

Twenty deadeyes with shackles attached to the chainplates attached to the hull. This really feels like an accomplishment: twenty self-fabricated shackles, twenty chainplates and twenty M0,8 bolts and nuts, given by a generous friend, plus 100 nails, simulating bolts; finally I am able to close this chapter.
And yes, I scaled down the deadeyes to 5 and 4mm...

View attachment 357503
Yes, Mission accomplished! Nice work, Johan. It needs some patience and time, but the result ....... :).
Regards, Peter
 
Twenty deadeyes with shackles attached to the chainplates attached to the hull. This really feels like an accomplishment: twenty self-fabricated shackles, twenty chainplates and twenty M0,8 bolts and nuts, given by a generous friend, plus 100 nails, simulating bolts; finally I am able to close this chapter.
And yes, I scaled down the deadeyes to 5 and 4mm...

View attachment 357503
Good evening Johan. The chain plates are done brilliantly. I don’t know the scale relativity of the BN but you made the right call going smaller with the deadeyes. Cheers Grant
 
Good evening Johan. The chain plates are done brilliantly. I don’t know the scale relativity of the BN but you made the right call going smaller with the deadeyes. Cheers Grant
If memory serves me correctly, @Peter Voogt did some research on this subject and came to the conclusion the deadeyes needed to be even smaller. The chosen sizes are doing justice to the scale though.
 
If memory serves me correctly, @Peter Voogt did some research on this subject and came to the conclusion the deadeyes needed to be even smaller.
Correct, Johan.
I posted this before:
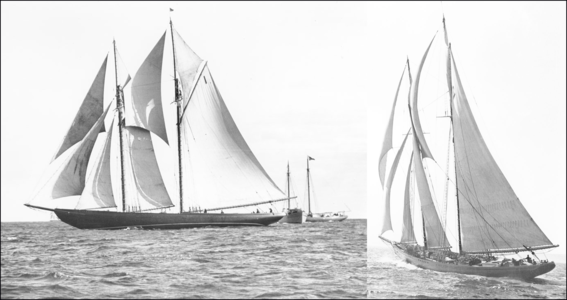
“Chapelle and Jenson are talking about 7" and 5.5" blocks. That is 17.8 and 14 cm. MS listed 1/8" and 3/32" in 1:68 scale. All this in 1:72 scale would be 2.82 and 2.46 mm. That's small.”
After some test, comparing the outcome with old pictures, related to the overall looks of the YQ-kit and in mind to make new brackets to fit the deadeyes on the chainplates, I choose for the 5mm and 4mm deadeyes.
With your 5 mm and 4 mm, you made (IMHO) the right choice, Johan.
Regards, Peter
Thanks for your complementary remarks, Peter.
 
Oké, here's an additional picture, taken from the port side, providing a little more detail.
At this stage the chainplates and deadeyes were not yet painted and were dry fitted to check alignment and general fit. For the aft chainplates it was critical to check again the alignment of the slits in the rails and monkeyrails. This was already established and confirmed during the installation of the rails, but it doesn't hurt to perform an additional check. During the dry fit I found that the pre-made slits for the main mast deadeyes are so tight that they also determine the orientation of the chainplates; there's no wriggle room left. The fore mast chainplates do give you a little more leeway though, since they pass through one rail only, but here you have to make sure that you position the chainplates parallel to one another.

It appears as if the chainplates are too long, but the chainplates are not yet lying flat against the hull.
The holes for the chainplate bolts are already pre-drilled.
At final installation, I used just a bit of CA-adhesive on the nails, the nails will have to take all the load coming from the shrouds... Fingers X-ed.

BB3A2035-93D9-4A86-B6A1-F6971E3F742C.jpeg
 
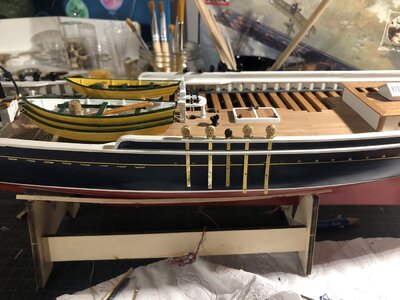
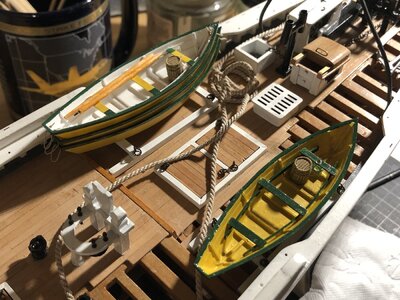
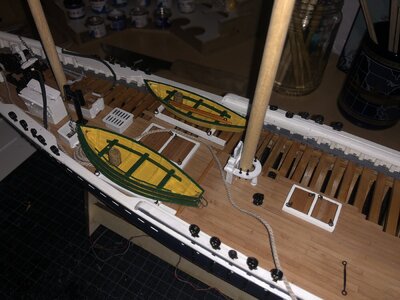
In my previous post, concerning the chainplates installation, the four dories can also be seen. A stack of three at the port side and a single dory on the starboard side. This was a deliberate choice to maintain the openness of the starboard side.
One of the things I didn't came to appreciate is the color of the inside of the port side dories: white.
The dark yellow inside of the single starboard dory, togheter with the contrasting dark green accents, is way more appealing.
That led to some quality re-do time and now the port side dories present a far more convincing sight, at least to my eyes and, more importantly, they now meet the Admiral's approval...

Initial color scheme, with the inside of the port dories painted white.
43946633-E6BB-4C56-A5F9-D646C9992916.jpeg

Updated color scheme, with the inside of the port dories painted dark yellow:
D48CD60B-21C9-434F-B26B-349AB7152F1C.jpeg
 
Last edited:
This transition from hull to masts takes more time than anticipated. Happy as I am having completed the chainplates installation, there's still a huge variety of tasks to complete.
First now is to complete the installation of all hardware on deck, like shackles, eyebolts, nails, etc, etc.
One other issue during the dry fit of the fore- and main mast I noted was that the angle between the two mast appeared to be off. At that time it was just eyeballs; the main mast seemed to be right, but the foremast appeared to be leaning forward a tad too much. I didn't pay too much attention though, thinking my eyes deceived me, yeah, right.
But it kept nagging me; whenever I temporary installed the masts, I noticed this phenomenon, so tonight it could no longer be avoided and I took out some measuring tape and the drawings and started taking measures. And lo and behold, bóth masts were off; the fore mast was definitely leaning fwd, about 6mm (0,24") at the top, measured from the bowsprit tip, whereas the main mast was some 4mm (0,16") leaning aft, measured from the aftmost edge of the monkey rail. Also the distance between the tops of the two masts was 10mm (0,4") too large, which makes quite a bit of sense.
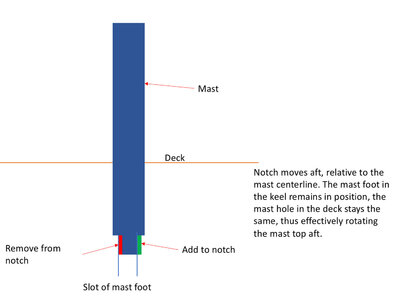
Since I had no intention changing the masts or the deck at decklevel, I solved this issue by modifying the feet of both masts. Both masts have a square shaped notch 4x4mm (0,16"x0,16"), which matches the slot in the mastfeet in the keel.
The mast holes in the decks were used as a hinge point of sorts; having to move the fore mast aft ment I had to move, so to speak, the notch of the mast aft as well, thus forcing the lower part of the mast to move forward, thus rotating the mast part above decklevel aft. For the main mast this had to be repeated, but in the opposite direction.
Theory:
DAA32E05-106C-46CC-A88D-E63BF76314BF.jpeg

Reality:
The masts still appear to be off, probably due to photographic distortion, (check the vertical bookshelf support rails left and right of the Bluenose) but I checked all dimensions, thrice and they are all within 1mm of the drawings. When looking at it, using the human eyeball, the masts look a lot better. It should be noted that, depending which source is being used, the angle between the two masts is about a degree and a half.
DB0AF2EE-B1D6-42FD-A107-03F97C4C606D.jpeg
 
Last edited:
This transition from hull to masts takes more time than anticipated. Happy as I am having completed the chainplates installation, there's still a huge variety of tasks to complete.
First now is to complete the installation of all hardware on deck, like shackles, eyebolts, nails, etc, etc.
One other issue during the dry fit of the fore- and main mast I noted was that the angle between the two mast appeared to be off. At that time it was just eyeballs; the main mast seemed to be right, but the foremast appeared to be leaning forward a tad too much. I didn't pay too much attention though, thinking my eyes deceived me, yeah, right.
But it kept nagging me; whenever I temporary installed the masts, I noticed this phenomenon, so tonight it could no longer be avoided and I took out some measuring tape and the drawings and started taking measures. And lo and behold, bóth masts were off; the fore mast was definitely leaning fwd, about 6mm (0,24") at the top, measured from the bowsprit tip, whereas the main mast was some 4mm (0,16") leaning aft, measured from the aftmost edge of the monkey rail. Also the distance between the tops of the two masts was 10mm (0,4") too large, which makes quite a bit of sense.
Since I had no intention changing the masts or the deck at decklevel, I solved this issue by modifying the feet of both masts. Both masts have a square shaped notch 4x4mm (0,16"x0,16"), which matches the slot in the mastfeet in the keel.
The mast holes in the decks were used as a hinge point of sorts; having to move the fore mast aft ment I had to move, so to speak, the notch of the mast aft as well, thus forcing the lower part of the mast to move forward, thus rotating the mast part above decklevel aft. For the main mast this had to be repeated, but in the opposite direction.
Theory:
View attachment 357693

Reality:
The masts still appear to be off, probably due to photographic distortion, (check the vertical bookshelf support rails left and right of the Bluenose) but I checked all dimensions, thrice and they are all within 1mm of the drawings. When looking at it, using the human eyeball, the masts look a lot better. It should be noted that, depending which source is being used, the angle between the two masts is about a degree and a half.
View attachment 357695
With the masts on deck, she is showing here lines more and more, Johan. It’s good that you have taken your time to align the masts. You can trim them later with the tension of the shrouds and stays.
Regards, Peter
 
With the masts on deck, she is showing here lines more and more, Johan. It’s good that you have taken your time to align the masts. You can trim them later with the tension of the shrouds and stays.
Regards, Peter
Thanks, Peter. Initially my idea was to use the masts as is and to regulate the proper alignment of the masts by applying more less tension on the shrouds. But... this ment my starting point would be out of spec. The more I thought about it, the more I became set against it. Having corrected the alignment in advance of attaching the shrouds means my starting point is now close to nominal. I feel way more confident about it.
 
Mast alignment is critical to achieve a good effect on the rigging. Obviously on a POF build of this magnitude, it is difficult as there are so many variables to consider, and which can possibly come into play. Taking your time with the alignment is a wise decision.
 
Mast alignment is critical to achieve a good effect on the rigging. Obviously on a POF build of this magnitude, it is difficult as there are so many variables to consider, and which can possibly come into play. Taking your time with the alignment is a wise decision.
Heinrich, you're spot on with your analysis. It's something I came to fully appreciate when I was dry fitting the masts for the first time. A typical POB build often has very distinct features, ensuring proper mast location and orientation. The POF Bluenose kit lacks these locating features; it is a realistic possibility to install the two mastfeet at the keel just slightly out of position in the horizontal plane. That possibility extends to the two mast feedthroughs in the fore- and quarter decks. Adding to misery is, that, due to the ratios of mastlength above deck to the mastlength below deck being in the order of approx 7,5, slight misalignments in the keel or the deck feedthrough result in quite a deviation at the top of the masts.
That I needed some tweaking in order to get the mast orientation being within spec, shouldn't have come as a surprise.
 
Not much work at the shipyard in terms of cutting, sawing, drilling, sanding, etc. Instead I found myself in a far too familiar pIace; the drawing board. As I stated before, I'm rather particular in having sails on my little empress of the grand banks. IMHO a sailing vessel without sails is like a Mustang minus a Merlin engine and propellor. No offense to anyone not sharing my views, I really appreciate builds, showing the dance of all standing and running rigging, the forest of masts ,yards, gaffs.
Back to the drawing board it is; sails.
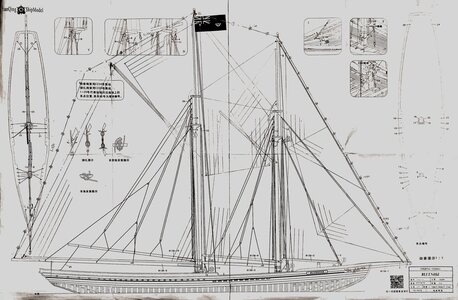
The YQ plans show the model without sails and all booms and gaffs are pictured in their stored positions.
Luckily there are some plans out there: the Saga, the Model Shipyard plans, the Billing Boats plans, etc.
Before effectively start work on the spars, I need to look ahead and establish which sails to add to which spar and in what sequence before stepping masts. For instance, attaching the mainsail to the main boom after installing all spars is rather undoable. The same applies for attaching the mainsail to the mast hoops after the mast is stepped and the shrouds installed. Currently I am leaning towards assembling the lower- and top masts, including all hardware, required for the installation of the rigging. The main- and foremast lower sails are required to be attached to their respective booms and gaffs, whereas the topsails will need to be attached to the top masts. The jibs will be installed later, after stepping the foremast.
These considerations imply I need to have the sail definitions in advance of finalizing the spars

As starting point I used @Peter Voogt 's spreadsheet, see https://shipsofscale.com/sosforums/...nson-lankford-and-chapelle.10917/#post-276247 for the dimensions of masts, booms and gaffs and the MS sail plans. The latter since I will be using the MS plans as starting point for all the standing and running rigging as these plans seem to be the most comprehensive.
The jibs, the sails in front of the foremast, appeared to be rather straightforward, nothing really more than transferring the MS definitions to the YQ plans.
The fisherman’s stay sail, the sail, sitting between the two top masts, also posed little problems.
The other four sails, the lower- and top sails, needed a little more attention and a little tweaking. In the end I maintained the dimensions of the spars as given in the earlier mentioned spreadsheet and used the templates Peter made for the two lower sails as reference for the definition of these sails.
The picture below shows the configuration I am aiming for. First order of business is now to start preparing the spars, but that cannot start before I receive an order for the various blocks to be attached to the various spars...

F061B229-F286-4259-97B2-9033DAD7C223.jpeg
 
There is a methodical order, that is determined by what your final goal is. Sails, furled sails, no sails...or a combination of any or all. And finally what tack you want to represent, if any! ;)
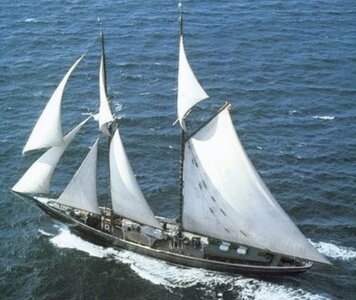
I think it was one of those Sail Amsterdam festivals, where a huge number of tall ships visit Amsterdam, where I saw a square rigged barque, almost under full sail. It was then that I fell for the beauty of sailing vessels with sails set.
 
Back
Top