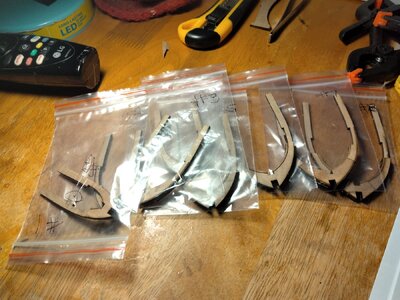
Check my last post, I edited it some.
- Home
- Forums
- Ships of Scale Group Builds and Projects
- Bluenose PoF Group Build
- Bluenose Group Build Logs
You are using an out of date browser. It may not display this or other websites correctly.
You should upgrade or use an alternative browser.
You should upgrade or use an alternative browser.
YQ Bluenose Ted R
- Thread starter Ted Robinson
- Start date
- Watchers 19
- Joined
- Oct 1, 2023
- Messages
- 1,138
- Points
- 393

I think all of the sanding lines are ok. I double checked ,I'm good. Thanks for looking out.I kept the keel notch aligned in both directions. Also keep in mind there is a front and back to the pieces that make a total frame. You do not want to 'hide' any of the sanding or fairing lines, they are your guide. You may have covered up the one you show, not sure though.
- Joined
- Oct 1, 2023
- Messages
- 1,138
- Points
- 393

- Joined
- Oct 1, 2023
- Messages
- 1,138
- Points
- 393

I've seen treenails added to the frames on a couple of build logs. Are these installed on both sides of the frame. All the photos only show one aspect. Are the insides ( where the fresh face one another) finish sanded prior to glueing to the keel.
I see that you found your pace to make the frames, Ted.I am confused on a frame building detail.
For vertical alignment of the forward and aft frame halves. Is the alignment point the keel notch or the lower deck level.
View attachment 431239
View attachment 431240
Perhaps this pictures will help you a bit more.
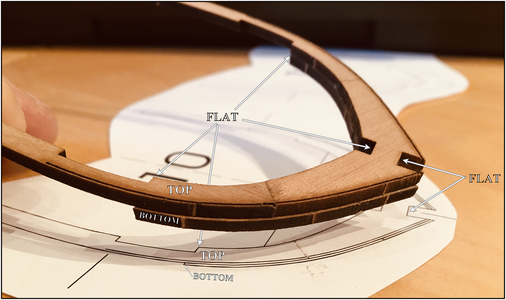
The drawing of each frame shows the position of both. The two recesses, where the frame will later fit into the keel, are flush with each other. With a flat bottom. Also at the bilge, both parts align flat to each other.
In some of the build-logs you can see that some of us used a small piece of wood, exact the size of the recess:
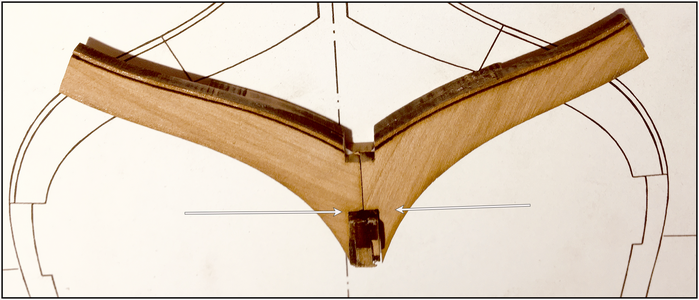
When you build the top and the bottom part of each frame separate, you get 2 fragile 'spider legs'.
On this page of my build-log a showed step-by-step how I build the frame up, to get a nice alignment:
--> Frame Step-by-Step <-- (click)
Perhaps a bit (too) much information, but the proper alignment of the keel and the frames is crucial for the later result.
And above all, keep asking questions if something is not clear. There is only 1 stupid question: that is the question not asked.
Regards, Peter
Last edited:
- Joined
- Oct 1, 2023
- Messages
- 1,138
- Points
- 393

Thank you Peter. I will adopt this procedure for frame building. I'm also going to look up your post on beveling.
- Joined
- Oct 1, 2023
- Messages
- 1,138
- Points
- 393

I have adopted Heinrich's and Peter Voogt's build log essentially as a practicum. This build would be impractical without the assistance of SOS and it's members.
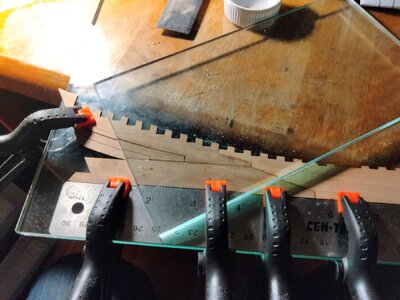
Started keel assembly this AM. Planning on a full day of fun.
Btw, note the glass building base recommended by another member. (I'm sorry I forget who/m).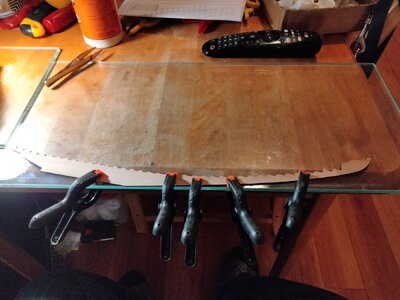
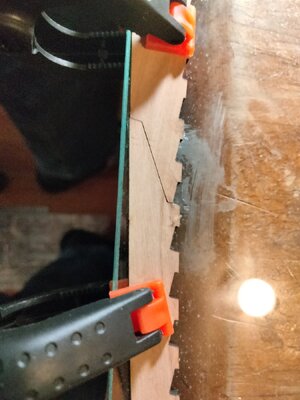
Started keel assembly this AM. Planning on a full day of fun.
Btw, note the glass building base recommended by another member. (I'm sorry I forget who/m).


That’s looking good, Ted.I have adopted Heinrich's and Peter Voogt's build log essentially as a practicum. This build would be impractical without the assistance of SOS and it's members.
Started keel assembly this AM. Planning on a full day of fun.
Btw, note the glass building base recommended by another member. (I'm sorry I forget who/m).View attachment 431357View attachment 431358
PS: I don't have all the wisdom either, it has gotten ‘out of hand’ sometimes.
Regards, Peter
- Joined
- Oct 1, 2023
- Messages
- 1,138
- Points
- 393

- Joined
- Oct 1, 2023
- Messages
- 1,138
- Points
- 393

The bottom 3/8" of the keel and the stern post is all that will be seen, and not even that much if you decide to paint the hull on its color scheme. Well this is true for the planked side however the on the exposed rib side it will all be seen so maybe you can blend it by sanding I don't really know. I do know pear wood can still be very attractive even with uneven shades next to each other once it is sanded out and a poly coat matte finish applied.
Last edited:
- Joined
- Sep 3, 2021
- Messages
- 4,847
- Points
- 688

Plus in real life chances are that the keel parts would not have been made from the same tree and might have shown different grains and different shades.The bottom 3/8" of the keel and the stern post is all that will be seen, and not even that much if you decide to paint the hull on its color scheme. Well this is true for the planked side however the on the exposed rib side it will all be seen so maybe you can blend it by sanding I don't really know. I do know pear wood can still be very attractive even with uneven shades next to each other once it is sanded out and a poly coat matte finish applied.
- Joined
- Oct 1, 2023
- Messages
- 1,138
- Points
- 393

I'm going to paint one side. Want a clear natural finish in this sideThe bottom 3/8" of the keel and the stern post is all that will be seen, and not even that much if you decide to paint the hull on its color scheme. Well this is true for the planked side however the on the exposed rib side it will all be seen so maybe you can blend it by sanding I don't really know. I do know pear wood can still be very attractive even with uneven shades next to each other once it is sanded out and a poly coat matte finish applied.
- Joined
- Oct 1, 2023
- Messages
- 1,138
- Points
- 393

Thank yougreat progress
- Joined
- Oct 1, 2023
- Messages
- 1,138
- Points
- 393

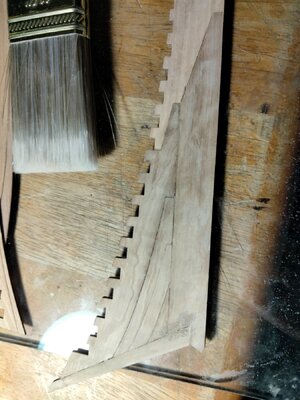
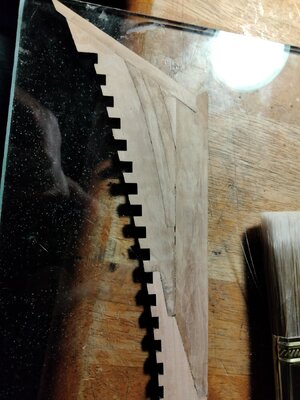
This really took the wind out of my sails. I can't imagine spending countless hours trying to create a beautiful model and have one part that is wildly discolored.
I checked Peter Voogt's build log and nothing like this. (His model is #10; mine is #11. )
I sanded but practically the same. The discoloration is in the wood. Not surface.
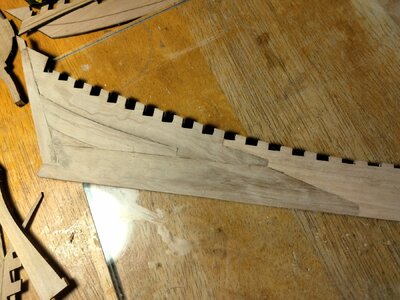
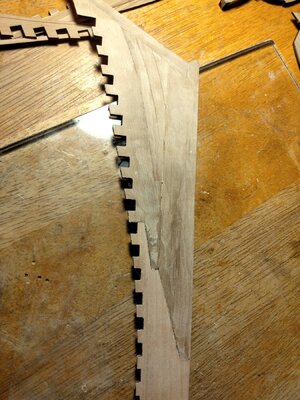
I checked Peter Voogt's build log and nothing like this. (His model is #10; mine is #11. )
I sanded but practically the same. The discoloration is in the wood. Not surface.


Hi Ted,This really took the wind out of my sails. I can't imagine spending countless hours trying to create a beautiful model and have one part that is wildly discolored.
I checked Peter Voogt's build log and nothing like this. (His model is #10; mine is #11. )
I sanded but practically the same. The discoloration is in the wood. Not surface.
View attachment 431397
View attachment 431398
To get an impression of what the combination of different wood parts might look like later, I slightly wet those parts during the build with a damp cloth.
Perhaps the dark distortion then looks slightly less dominant.
There will be parts added on both sides, 17/18/20/21/22. Place them dry-fit and see what it looks like.
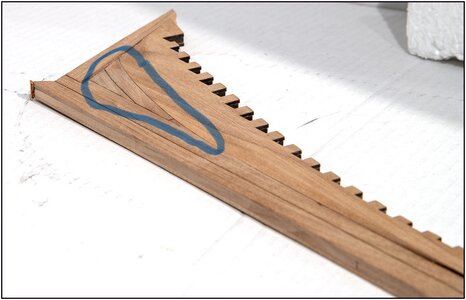
Only a smaller triangle in the lower corner of the deadwood on the non-planked side will be in view.
Regards, Peter
Last edited:
- Joined
- Oct 1, 2023
- Messages
- 1,138
- Points
- 393

Thank you Peter. I may be overthinking the situation. I'm so committed to building a really beautiful model like the others I've seen on this site. At this point the discolored wood would be fairly easily replaced. My lack of experience creates uncertainty.Hi Ted,
To get an impression of what the combination of different wood parts might look like later, I slightly wet those parts during the build with a damp cloth.
Perhaps the dark distortion then looks slightly less dominant.
There will be parts added on both sides, 17/18/20/21/22. Place them dry-fit and see what it looks like.
View attachment 431428
Only a smaller triangle in the lower corner of the deadwood on the non-planked side will be in view.
Regards, Peter
- Joined
- Sep 3, 2021
- Messages
- 4,847
- Points
- 688

I stained the non-painted parts with a reddish (cherry-colored) stain. This for the most part evened-out the differences in the wood colors.Thank you Peter. I may be overthinking the situation. I'm so committed to building a really beautiful model like the others I've seen on this site. At this point the discolored wood would be fairly easily replaced. My lack of experience creates uncertainty.
Yup Ted I forgot about the veneer overlay which will indeed cover most of what you are concerned about. Could be why YQ wasn't concerned either. Do be sure to maintain the tightest joinery you can, you will be amazed at what you have to deal with if you don't.There will be parts added on both sides,


