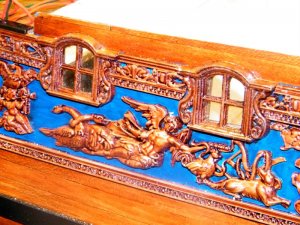
ZHL Royal Caroline Kit, scale 1/30

G'day John
Welcome back mate, I hope you and Maureen are feeling ok now.
I have missed your logs on the RC. It a
Is another perfect example of your ability to improve on one of the best model that I have seen.
Your stand looks like it's ready for some thought movement. Well done.
Regarding the Surprise model, I would love to see more photos of her build.
I assume that the person in the Supply photo is the buyer, not you.
Happymodeling mate in your new shipyard.
Greg
 
Great job on your built......good to have you back, we missed your posts very much.
I agree with Greg completely and I want to confirm, that we want to see some photos of your HMS Surprise also.....
Best would be to start a new thread ..... many thanks in advance - would be great
 
G'day John
Welcome back mate, I hope you and Maureen are feeling ok now.
I have missed your logs on the RC. It a
Is another perfect example of your ability to improve on one of the best model that I have seen.
Your stand looks like it's ready for some thought movement. Well done.
Regarding the Surprise model, I would love to see more photos of her build.
I assume that the person in the Supply photo is the buyer, not you.
Happymodeling mate in your new shipyard.
Greg


Assumption is the Mother of most mistakes Greg, it is me in the photo, I have just changed out of my Emu costume, :eek::eek::eek:,

best regards John.

,
 
Thank you Zoly, I'm glad to be back, I had to come back I was missing Greg's twisted sense of humor and his psychedelic writing, :p:p:p:p:p
 
G'day John
Assumption is the Mother of most mistakes Greg, it is me in the photo, I have just changed out of my Emu costume, :eek::eek::eek:,

best regards John.

,

I should have guessed that it was you! That proves one thing.....
When you assume, you make an ASS out of U & ME!

Thank you Zoly, I'm glad to be back, I had to come back I was missing Greg's twisted sense of humor and his psychedelic writing, :p:p:p:p:p
THAT'S A CHALLENGE
My dearmattie.
I've only got started....lol:mad::p
Happymodeling
Greg:D
 
A Cultural Differences
Thank you Zoly, I'm glad to be back, I had to come back I was missing Greg's twisted sense of humor and his psychedelic writing, :p:p:p:p:p
I presume that the above statement might seams strange to some Non-Ozzies.
Let me put this record straight. In Australia, we Ozzies make fun of our closest friends, that's our culture.
The above statement, to me proves that John thinks very highly of me as a friend. I thank him very much, and I also feels John us one of my closest friends.
The reason why I'm putting this post in, so other people will know that there were no harm or mallis ment, in that statement by John.
Havagooday to all.
Greg
 
For everybody else not living in Australia - now it is clear, that it is not good for the brain to stand the whole day upside down on the lower side of the globe ;)
 
A Cultural Differences

I presume that the above statement might seams strange to some Non-Ozzies.
Let me put this record straight. In Australia, we Ozzies make fun of our closest friends, that's our culture.
The above statement, to me proves that John thinks very highly of me as a friend. I thank him very much, and I also feels John us one of my closest friends.
The reason why I'm putting this post in, so other people will know that there were no harm or mallis ment, in that statement by John.
Havagooday to all.
Greg


There you go again Greg, Assuming, :p:p:p:p:p:p
 
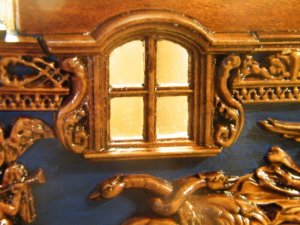
Next up are the cabin details starting with glazing the windows,

727.jpg
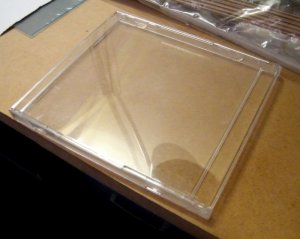
for the glazing material I used the cover of a DVD,


728.jpg
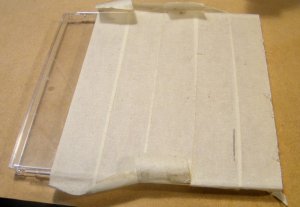
I covered it with strips of masking tapeso it is easy to draw on and also will not get scratched when being slid over
the saw table,


729.jpg
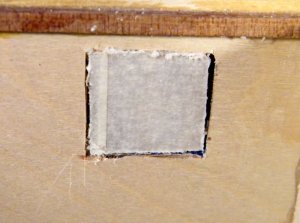
one window cut to size, it looks a little bit rough, but it is covered by the window frame on the inside,


730.jpg
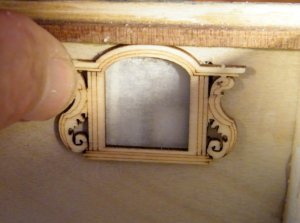
shows how the inside frame sits over it,


731.jpg
the window with the glazing fitted,


733.jpg
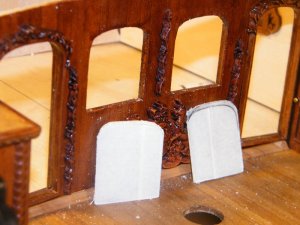
Cutting and fitting the two windows that look out onto the deck,


736.jpg
another view,


734.jpg
after fitting the internal walls with the inside frames attached, guess who forgot to varnish the inside of the
window frames, also I broke off the top part of the framing,


735.jpg
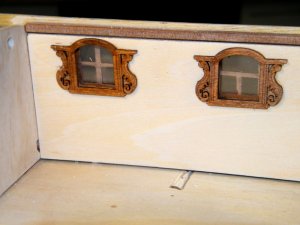
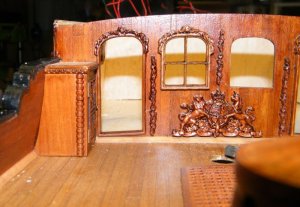
exterior view of the back two starb side windows,
 
Just a little bit of an update on the Cabin,

737.jpg
Starb side window frame in place,


738.jpg
both frames in place, you got to be very careful when installing these as there is not much difference between
the window frame and the hole it covers if I was to build this ship again I would do a lot of this work on the bulkhead
before attaching it to the model,


739.jpg
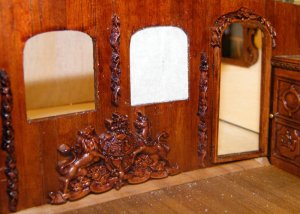
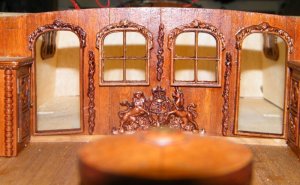
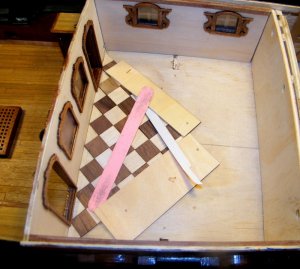
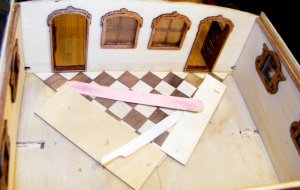
I have now glazed all the windows and attached the trims, and as you can see have started laying the floor, the
scrap ply is nailed in place to stop the edges of the Parquet tiles from curling up,


740.jpg
Fore and aft view,
 
Hi John
Welcome back from another upside down place.
Can you tell me what kit is the Surprise.

Denis.
 
It is realy looking good.
I can imagine, that it is not so easy to work at these filigree parts on an installed bulkhead, with limited access and visibility
 
the window frame and the hole it covers if I was to build this ship again I would do a lot of this work on the bulkhead.

G'day John
Thank for the advice, I'll decently do this on my build. Thanks for the heads up mate.
Havagooday
Greg
 
Back
Top