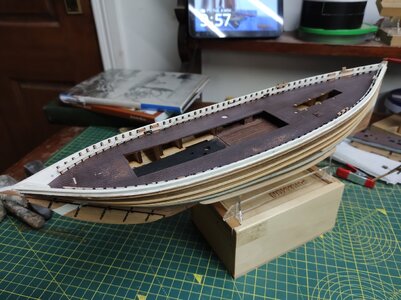
Zulus, Scottish herring drifters circa. 1890. [COMPLETED BUILD]

Hi JJ,
I was enjoying the video, it was a shame to see a beautiful ship like that having a modern Radar bolted on.
I was also surprised to see that MDF wood is creeping into these kits instead of plywood.
Suppose the manufacture must think it is cheaper than ply. however they will not lower the prices.
It is good to see you are making progress.
Keep it up.
Hi Martin, I agree with you, there is more bad about MDF than good, my particular bugbear is that nails and pins do not hold too well when pushed into the 'end grain' (hell its all end grain!), it also sucks up paint and glue like there is no tomorrow. As to the radar, one word 'Jobsworths'. With H&S these days it would not have got out of harbour without it. A pity as it really does spoil the classic look. I would not want to haul by hand one of those huge lug sails on a wet and windy night. Cheers JJ.
 
Hi Folks,
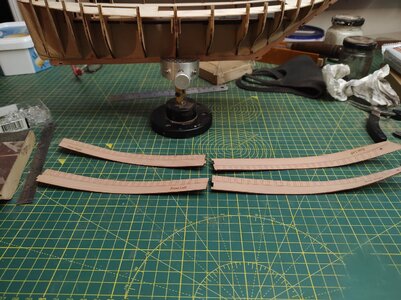
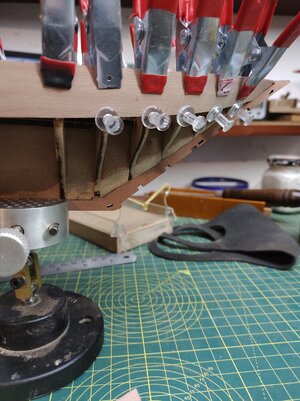
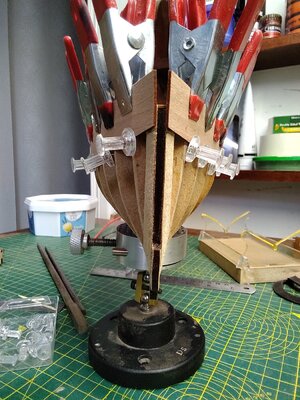
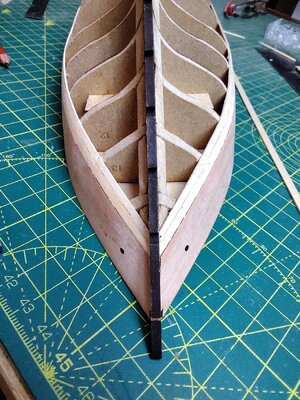
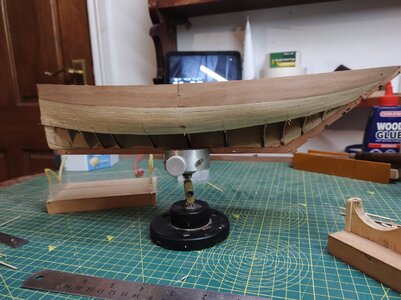
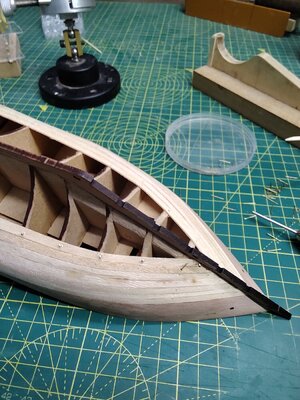
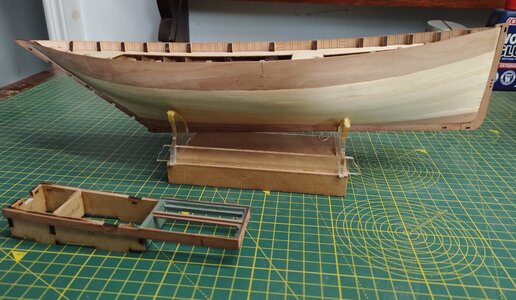
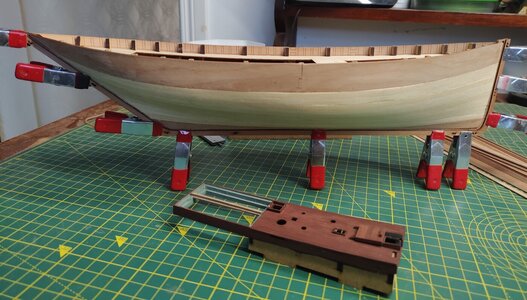
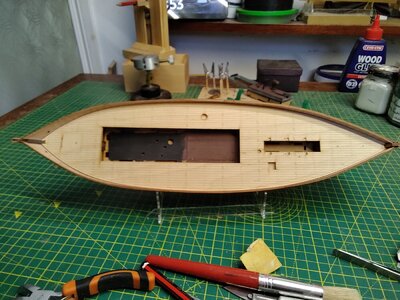
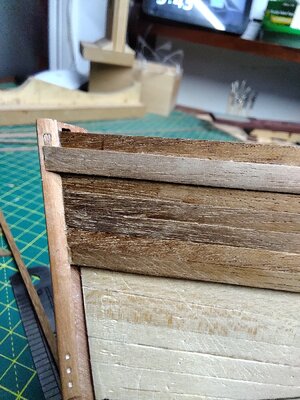
Just a quick update showing what I have been up to since the weekend. After leaving the bulwark sections to dry overnight they turned out fine so I went on an attached them. At the stern they curve in both horizontal and slightly vertical so I had no choice but to use a spot of CA Glue along their bottom edges to get a fast grip. I needed to press them firmly to the MDF bulkhead and hold them there for about a minute. When all was firm I clamped and pinned all four pieces and left to dry.IMG_20221009_074738.jpgIMG_20221009_081725.jpgIMG_20221009_114548.jpg

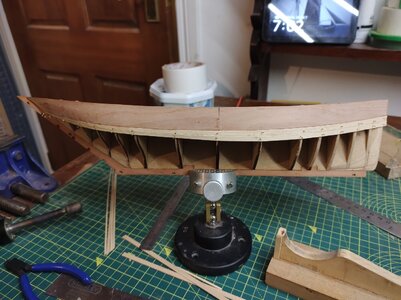
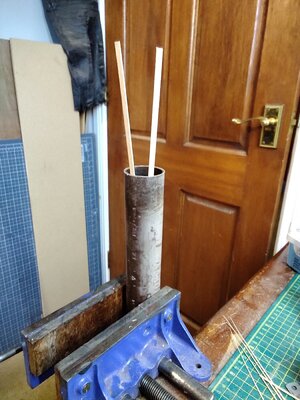
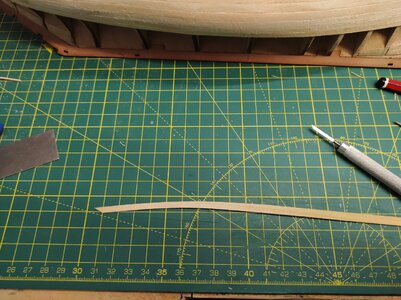
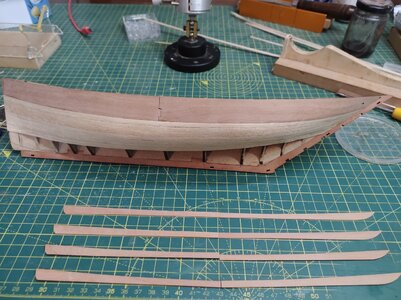
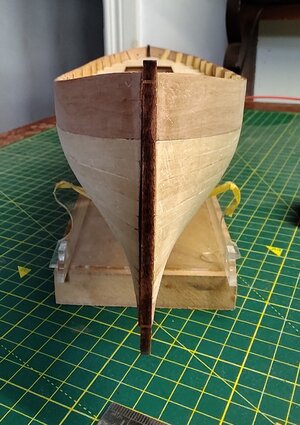
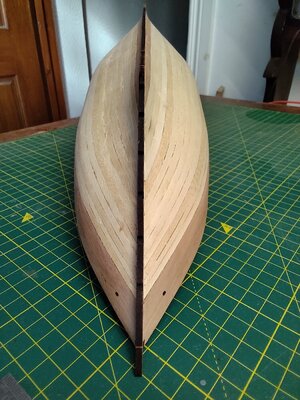
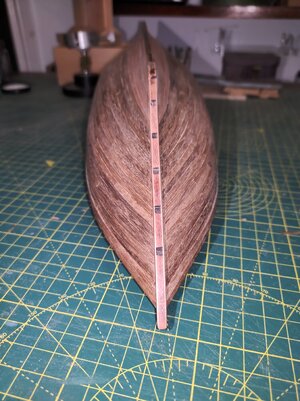
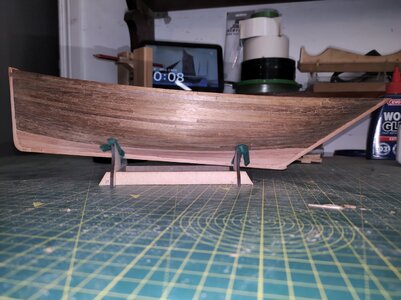
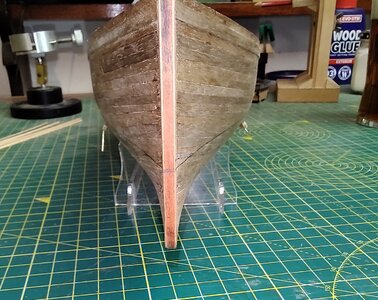
The first planking is described as 1x5x410mm limewood and there is 30 of them, I recon you will need 13 per side so you have a choice of which to use, this is useful as some I mm thick strips are a less generous 1 mm than others so I will be careful no to use a thick one and follow it with a thin one thus leaving a step,(yet more sanding). From the start I recon that stern planking will need quite a bit of tapering although the booklet suggests that it takes only mild tapering at the top. The instructions also warn that due to the severe rake of the stern the planks may over lap looking like clinker build! By more radical tapering at the start I hope to avoid this. Soaking for a short while in lukewarm water and heat will be needed to bend these first planks. The last pic shows the blocked off drainage pipe filled with water that I use to soak the planks.
IMG_20221010_070221.jpgIMG_20221010_072915.jpgIMG_20221010_074344.jpg

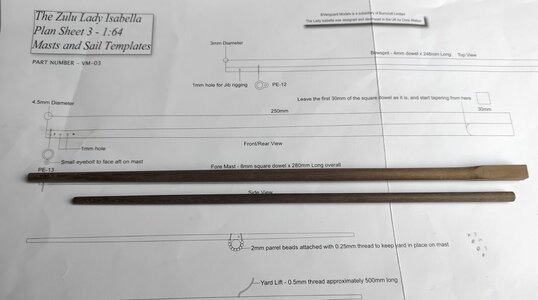
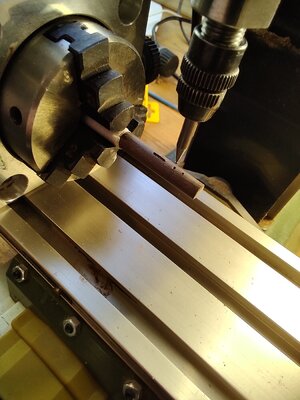
Between waiting for the planks to soak I made a start on the masts. The fore mast has a square section base and has to be turned from a length of 8 mm sq. walnut, the mizzen from 6 mm round, although some pictures show this mast looking like it also has a square base I think this is just the top of the wedges holding it in place. Also there is a drawing in March's 'Sailing Drifters' showing it as round down to the step so I will run with round. I cut some fake sheaves into the top of both masts, they are hard to see but I expect I will paint the top of the masts white and they will show better.

IMG_20221012_115427.jpgIMG_20221010_095409.jpg

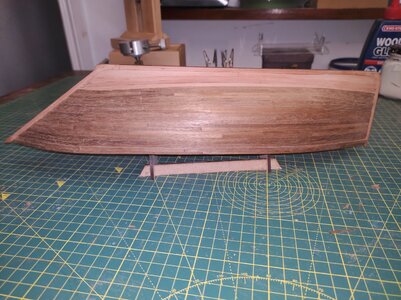
This morning I have continued downward planking, by the seventh plank there was so much lateral stress near the stern that I have started to edge bend the planks using a hot air gun. While the planks now need more bending they need less tapering and it is all looking well. It is now time to look at starting working from the bottom up. The kit supplies already cut garboard strakes for the second planking, so never looking a gift horse in the mouth I have copied them, band sawing them out of a piece of scrap 1 mm pear to use for the first planking. Hope to fit them this evening, ( that is If I don't watch Rangers / Liverpool instead). Cheers JJ.

IMG_20221010_230305.jpgIMG_20221011_103200.jpgIMG_20221011_104425.jpgIMG_20221012_094936.jpg
 
Always good to get the first planking finished. Another sanding and it will be ready to cover. I have also been working on the net hold, I have removed the front and sides to enlarge it. I will also replace the hatch covers, ( kit has them in one piece), with individual ones. Probably leave it for a while then while I get back to adding the frame fillers to Blandford, (whole lot more de-charring and sanding!). JJ.

IMG_20221015_095846.jpgIMG_20221015_100008.jpgIMG_20221015_100109.jpg
 
Always good to get the first planking finished. Another sanding and it will be ready to cover. I have also been working on the net hold, I have removed the front and sides to enlarge it. I will also replace the hatch covers, ( kit has them in one piece), with individual ones. Probably leave it for a while then while I get back to adding the frame fillers to Blandford, (whole lot more de-charring and sanding!). JJ.

View attachment 334421View attachment 334422View attachment 334423
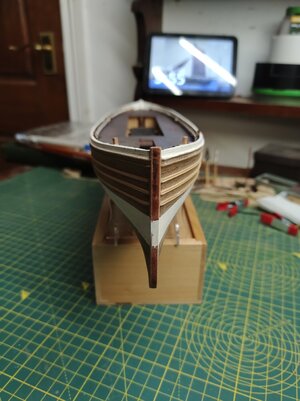
Good morning Jack. She is a beautiful little ship. Your planking is looking great. I love the hull line, especially the bow. Cheers Grant
 
mz4 001.jpg

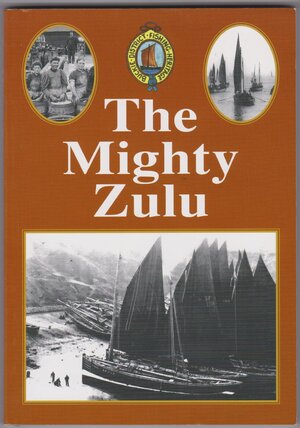
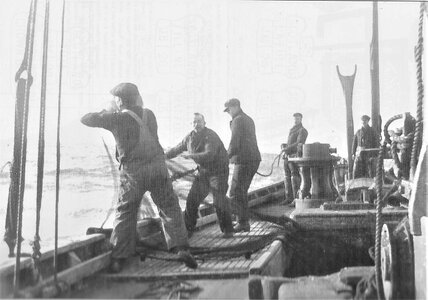
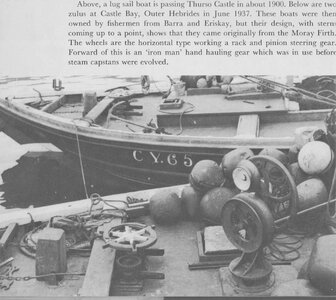
I found this book on the site of the Buckie fishing heritage, it will never be a best seller but for anoraks it is heaven. I have been looking for the name of a genuine Zulu and hit paydirt when I found this wee book. Along with some very good photographs of the era it contains a list of every Zulu registered in the Buckie district. Each boat listed has its own short description and history. Some of the pics. are outstanding for their age and really helpful to me. Two of my favourites are reproduced below.mz1 002.jpg Can you imagine, you have to be brave or desperate to work on an open deck with barely a foot of bulwark, little wonder the crewman in the foreground pitching the buoy has his foot wedged under the rail.


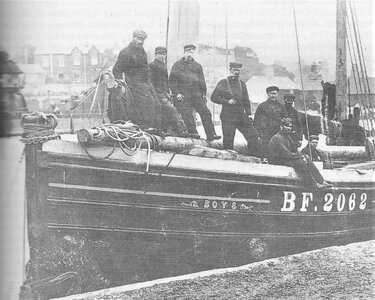
As to a name for my wee Zulu I think I got to go with 'Boys', simply because I love this photograph of her and her crew. The book 'The Mighty Zulu' informs that she swam for over sixty years and was owned by the Geddes clan. mz2 001 (2).jpg The pic. (circa 1902), shows her owner and skipper William 'Wildie' Geddes and his crew, his sons 'Sunny', 'Dazzle', 'Quites', 'Kitch and a man named Sinclair! In the picture they look like escapees. from the 'Hole in the Wall Gang '. Boys is listed as a little shorter than the kit Zulu but I think I will do a Nelson and turn a blind eye to that fact.

Anyway back to my wee boat, along with scratching my head over Blandford, I got a bit done this week. I have started the second planking after adding VM's very cleaver additions to the keel that act as a rabbet. Only trouble is they add the equivalent of over four inches to the thickness of the stem, making it twelve inches + wide where it should be around eight inches, so I have had to sand it down a bit, ending with a width of around nine inches. The rest of my time I worked on the 'poop deck, net hold ' section adding a small skylight and opening up the cabin hatch. I didn't like the look of the cover to the net well ( it looked too symmetrical ) so I made some individual hatch covers.
The 4mm wide second planking strip that came with the kit seems to me just a bit too wide ( 10+ inches) so I have used some 3x1 mm strip, (African Sipo), instead. I will most likely use this down to the water line and then maybe go back to the kit wood.

Here are some pics. of how I have got along.


IMG_20221017_124154.jpgIMG_20221018_153919.jpgIMG_20221018_162322.jpgIMG_20221021_225512.jpgIMG_20221023_094333.jpg

Cheers JJ.
 
I found this book on the site of the Buckie fishing heritage, it will never be a best seller but for anoraks it is heaven. I have been looking for the name of a genuine Zulu and hit paydirt when I found this wee book. Along with some very good photographs of the era it contains a list of every Zulu registered in the Buckie district. Each boat listed has its own short description and history. Some of the pics. are outstanding for their age and really helpful to me. Two of my favourites are reproduced below.View attachment 336164 Can you imagine, you have to be brave or desperate to work on an open deck with barely a foot of bulwark, little wonder the crewman in the foreground pitching the buoy has his foot wedged under the rail.


As to a name for my wee Zulu I think I got to go with 'Boys', simply because I love this photograph of her and her crew. The book 'The Mighty Zulu' informs that she swam for over sixty years and was owned by the Geddes clan. View attachment 336165 The pic. (circa 1902), shows her owner and skipper William 'Wildie' Geddes and his crew, his sons 'Sunny', 'Dazzle', 'Quites', 'Kitch and a man named Sinclair! In the picture they look like escapees. from the 'Hole in the Wall Gang '. Boys is listed as a little shorter than the kit Zulu but I think I will do a Nelson and turn a blind eye to that fact.

Anyway back to my wee boat, along with scratching my head over Blandford, I got a bit done this week. I have started the second planking after adding VM's very cleaver additions to the keel that act as a rabbet. Only trouble is they add the equivalent of over four inches to the thickness of the stem, making it twelve inches + wide where it should be around eight inches, so I have had to sand it down a bit, ending with a width of around nine inches. The rest of my time I worked on the 'poop deck, net hold ' section adding a small skylight and opening up the cabin hatch. I didn't like the look of the cover to the net well ( it looked too symmetrical ) so I made some individual hatch covers.
The 4mm wide second planking strip that came with the kit seems to me just a bit too wide ( 10+ inches) so I have used some 3x1 mm strip, (African Sipo), instead. I will most likely use this down to the water line and then maybe go back to the kit wood.

Here are some pics. of how I have got along.


View attachment 336179View attachment 336180View attachment 336181View attachment 336182View attachment 336183

Cheers JJ.
Good morning Jack. Wonderful post and modelling! Interesting that I have been visiting KwaZulu Natal the past few days the home of the Zulu’s. Cheers Grant
 
Been running on empty this last week or so, so didn't get too much work done on the wee Zulu. However I have now managed to finish the second planking to some sort of satisfaction. On reflection, although the 3mm strakes look right size wise, the African Sipo wood was very hard to work with regarding finishing as it would tear out very easily when you tried to scrape it, thus I had to resort to sanding, pity.
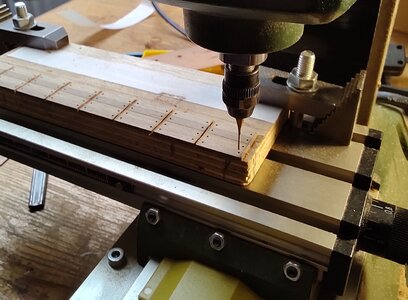
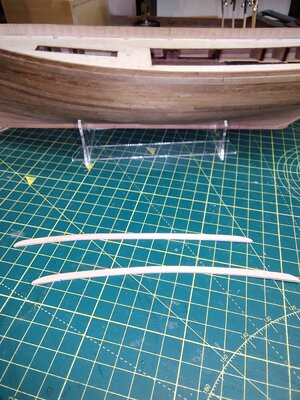
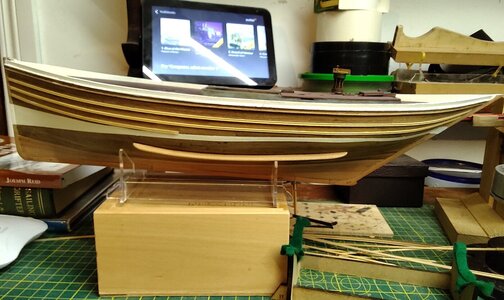
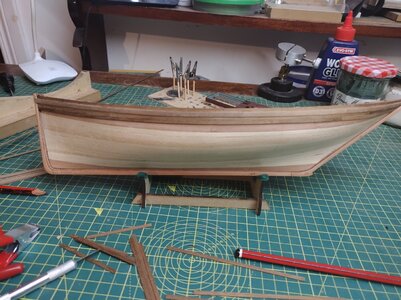
Anyway the next stage is to add the rubbing strakes to the hull along with the first major deviation from the kit in the addition of a bilge keel. I was in two minds about this but they can be clearly seen on several photograph of both Zulus and Fifies, I guess that despite the cost anything that would help in stopping a drifting boat roll would have been embraced, so there in. Another change will be the design of the rubbing strakes themselves. The kit has them made from 1 x 1 mm square but in the photo of the Zulu 'Boys' and in others they are moulded with a central channel, so I have made some, out of scrap boxwood, on my little Proxxon mill, they turned out at 1.4 x 0.8 mm and should look ok.
After these have been added it will be time to paint the hull. The only question is to the colour of the hull under the water line (every photograph I have seen has shown them black above the white cut). The pics. in the kit instruction book has the hull red but I doubt there where too many painted red at the turn of the 19th century. There is bits of evidence that some where not painted at all!
Here are some pics. of my progress. Cheers JJ.
IMG_20221102_100608.jpgIMG_20221102_100719.jpgIMG_20221102_100806.jpgIMG_20221102_145353.jpgIMG_20221102_221255.jpgIMG_20221102_220445.jpgIMG_20221102_220500.jpgIMG_20221102_220549.jpgIMG_20221102_220559.jpg
 
Hi Folks, Still not feeling the John West, but I have had a few pleasurable hours working on the wee Zulu. After marking out the white cut I applied on a coat of off white matt acrylic by brush. When this had dried for 24 hours I lightly rubbed it back and will use the result as the bases for the finish. The same white was used for the gunnels and internal rails, I wasn't too fussy applying this coat as it will be the subject to a bit of weathering later on, but it lets me see the contrast with the pre-formed deck I already had started adding spray washes in dark red/brownish coats to.
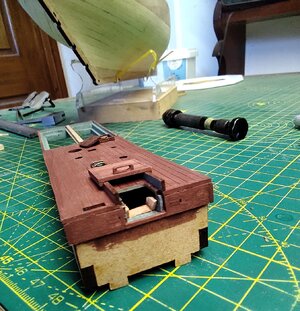
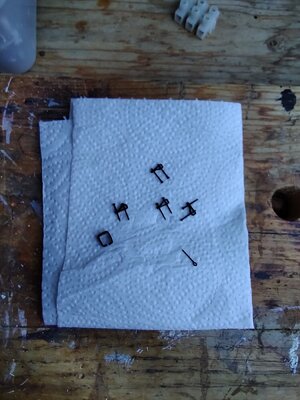
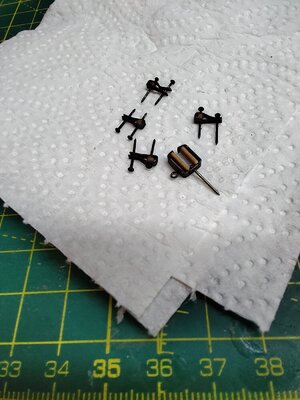
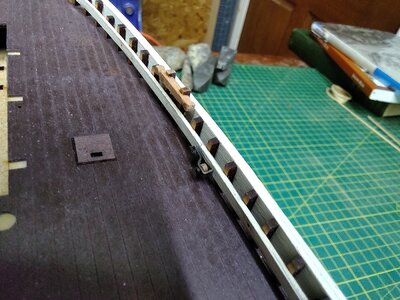
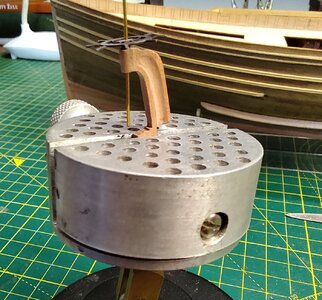
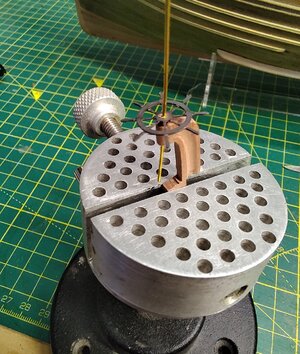
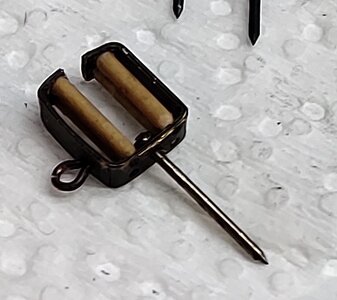
While waiting for the contact adhesive to hold the deck in place nice and tight I added the hinges to the rudder. From the box the rudder had been laser cut from 4mm pear and looked pretty plain so I thinned it down a bit and added some 3 x 0.5mm wood strip ( Tanganika I think ). The next job was a bit fiddly in that you have to add the individual timber heads to the inside of the gunnels. When you look at some of the old photographs of Zulus you can see that additional fillers where also used in places, this was I think called doubling and across the tops of them where steel plates bored to take 38mm pins (real size, 0.6 to scale). I will make these out of scrap brass, blacken them and add them later. The rails themselves as well as the wooden cleats supplied also had various other bits attached, such as through bolts that would have been used to hook various lines to, the same for several moveable belaying pins. There are also two per side metal cased single sheaves used for the yard halliards. I made these out of 2 x 0.7 scrap brass and added little turned sheave made from 2mm dia walnut drilled to 0.7mm., see pics.
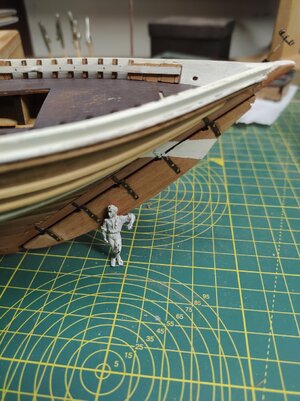
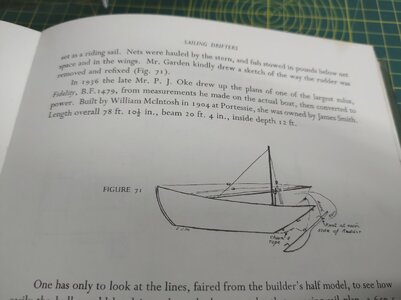
Also among the photos you will see a pic of the rudder with a 64th scale little sailor to illustrate the massive size of the rudder, little wonder the needed a mechanical system to turn it. I still cant believe the the crew removed the rudder when the boat set to drift what a job and you better pray that you can reattach it! However it is mentioned and described in the E March book 'Sailing Drifters' again see pic.

Here are some photographs of my progress. Cheers JJ.IMG_20221104_191717.jpgIMG_20221108_125210.jpgIMG_20221108_163108.jpgIMG_20221108_215555.jpgIMG_20221108_215641.jpgIMG_20221108_215759.jpgIMG_20221108_215839.jpgIMG_20221108_220012.jpgIMG_20221108_220753.jpg
 
Hi Folks, Still not feeling the John West, but I have had a few pleasurable hours working on the wee Zulu. After marking out the white cut I applied on a coat of off white matt acrylic by brush. When this had dried for 24 hours I lightly rubbed it back and will use the result as the bases for the finish. The same white was used for the gunnels and internal rails, I wasn't too fussy applying this coat as it will be the subject to a bit of weathering later on, but it lets me see the contrast with the pre-formed deck I already had started adding spray washes in dark red/brownish coats to.
While waiting for the contact adhesive to hold the deck in place nice and tight I added the hinges to the rudder. From the box the rudder had been laser cut from 4mm pear and looked pretty plain so I thinned it down a bit and added some 3 x 0.5mm wood strip ( Tanganika I think ). The next job was a bit fiddly in that you have to add the individual timber heads to the inside of the gunnels. When you look at some of the old photographs of Zulus you can see that additional fillers where also used in places, this was I think called doubling and across the tops of them where steel plates bored to take 38mm pins (real size, 0.6 to scale). I will make these out of scrap brass, blacken them and add them later. The rails themselves as well as the wooden cleats supplied also had various other bits attached, such as through bolts that would have been used to hook various lines to, the same for several moveable belaying pins. There are also two per side metal cased single sheaves used for the yard halliards. I made these out of 2 x 0.7 scrap brass and added little turned sheave made from 2mm dia walnut drilled to 0.7mm., see pics.
Also among the photos you will see a pic of the rudder with a 64th scale little sailor to illustrate the massive size of the rudder, little wonder the needed a mechanical system to turn it. I still cant believe the the crew removed the rudder when the boat set to drift what a job and you better pray that you can reattach it! However it is mentioned and described in the E March book 'Sailing Drifters' again see pic.

Here are some photographs of my progress. Cheers JJ.View attachment 339479View attachment 339480View attachment 339481View attachment 339482View attachment 339483View attachment 339484View attachment 339485View attachment 339486View attachment 339487
Good evening Jack. That little guy will need help removing the rudder. ;). I love your detail you add to your ships. I have noticed this in your other builds as well. Cheers Grant
 
Good evening Jack. That little guy will need help removing the rudder. ;). I love your detail you add to your ships. I have noticed this in your other builds as well. Cheers Grant
Thanks Grant, I think it is the little extra bits that make the model your own. I look at the extra rigging you are adding to your Victory and I am in AWE. Cheers JJ.
 
A ZULU gets her war paint
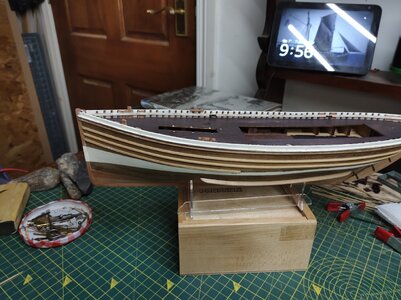
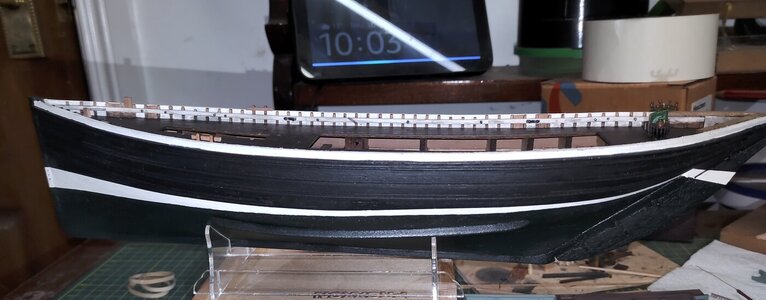
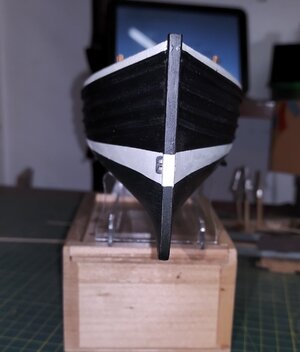
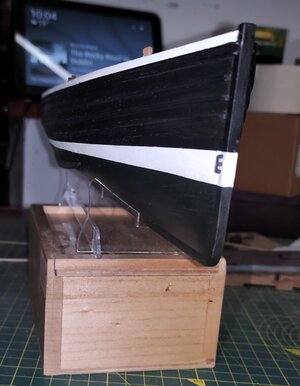
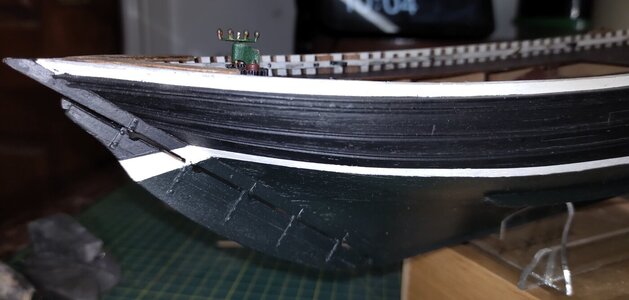
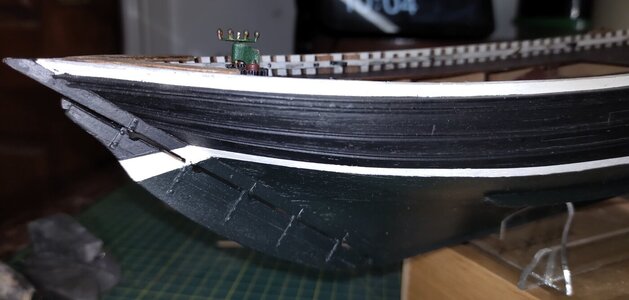
Hi folks, decided that black was the new black, so the hull has been sprayed in two 'shades' of black, Below the waterline I gave the final coat a slight sheen to imitate pitch, there wasn't much by way of anti-fouling back then. As all the old photographs are obviously black and white it is impossible to tell exactly what colour the bottom of these boats really was back then, but they all certainly look dark. In 'Sailing Trawlers' the Zulu 'Winsome BCK119' is described with a dark green bottom, and although it doesn't show in the pics. the black I used below the water line has a greenish tone to it.

IMG_20221110_220355.jpgIMG_20221110_220427.jpgIMG_20221110_220435.jpg
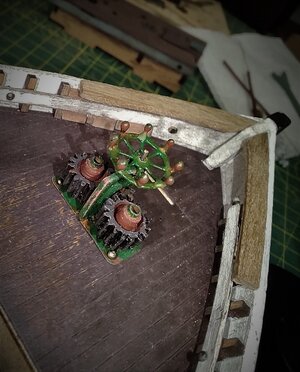
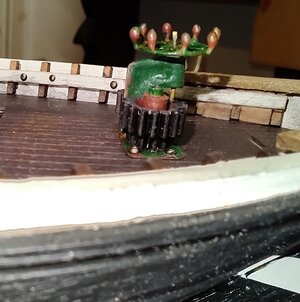
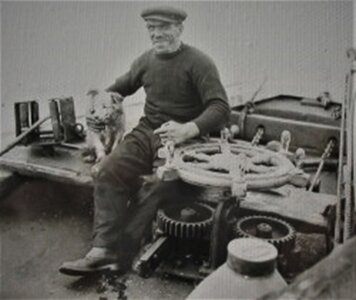
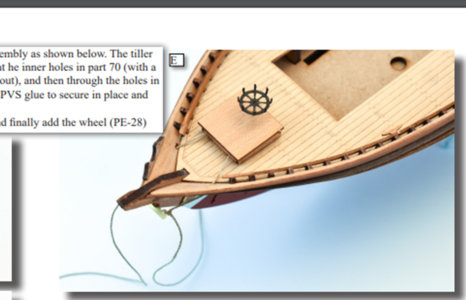
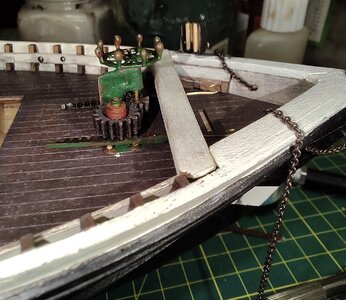
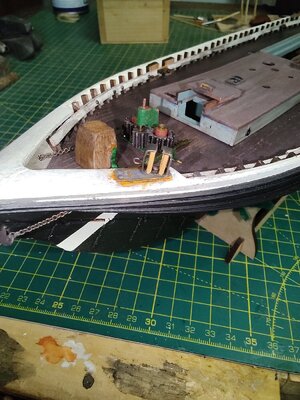
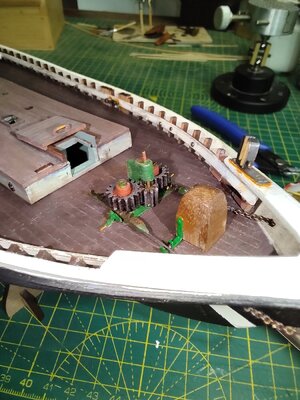
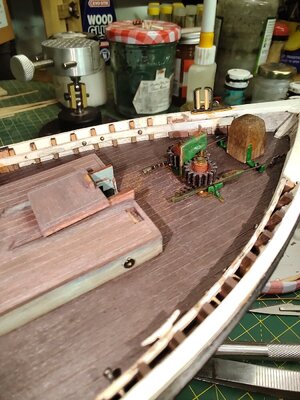
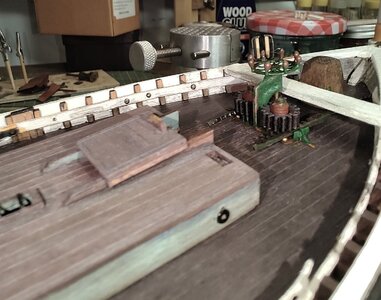
The outer hull will be 'weathered' after I add her name and number etc.. In the meantime I have returned to finish the deck fittings and my next big diversion from the kit which simplifies the steering by covering the mechanism in a box, but, to my mind, it looks too interesting to cover up so I built my own from scratch. The following pics. show an exposed steering gear and as how the kit looks also my attempt at a well used wheel and gear.

IMG_20221110_220226.jpgIMG_20221110_220247.jpgIMG_20221110_220500.jpgzulu steering.jpg


1668103304519.png

There is plenty more metal work to be done on deck to keep me busy for a few days. Cheers JJ..

IMG_20221110_220500.jpg
 
A ZULU gets her war paint
Hi folks, decided that black was the new black, so the hull has been sprayed in two 'shades' of black, Below the waterline I gave the final coat a slight sheen to imitate pitch, there wasn't much by way of anti-fouling back then. As all the old photographs are obviously black and white it is impossible to tell exactly what colour the bottom of these boats really was back then, but they all certainly look dark. In 'Sailing Trawlers' the Zulu 'Winsome BCK119' is described with a dark green bottom, and although it doesn't show in the pics. the black I used below the water line has a greenish tone to it.

View attachment 339892View attachment 339893View attachment 339894
The outer hull will be 'weathered' after I add her name and number etc.. In the meantime I have returned to finish the deck fittings and my next big diversion from the kit which simplifies the steering by covering the mechanism in a box, but, to my mind, it looks too interesting to cover up so I built my own from scratch. The following pics. show an exposed steering gear and as how the kit looks also my attempt at a well used wheel and gear.

View attachment 339898View attachment 339899View attachment 339900View attachment 339901


View attachment 339823

There is plenty more metal work to be done on deck to keep me busy for a few days. Cheers JJ..

View attachment 339895
Great work JJ.
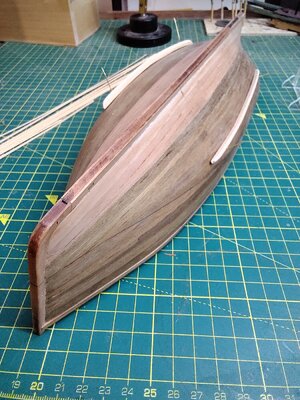
I think it look's right in black.
Do you plan on adding a little dog.ROTF
 
Great work JJ.
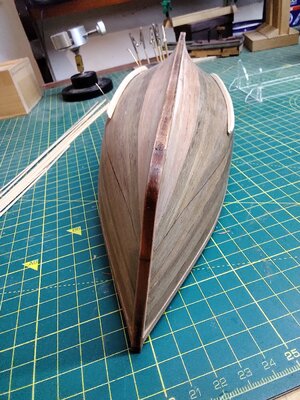
I think it look's right in black.
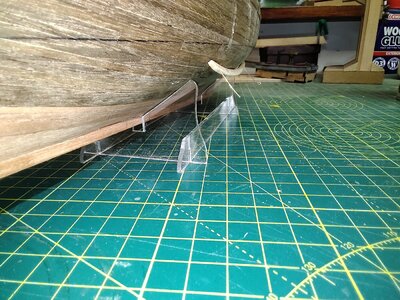
Do you plan on adding a little dog.ROTF
Hi Martin,
No that would be beyond my skill level although nearly every old picture showing a Zulu's crew has someone holding a dog. Don't suppose anyone asked the dogs if the got seasick!
 
I think she looks superb Jack. I believe that both options (black and dark green) would be appropriate, so you made the right call. I love your weathered steering mechanism - very realistic-looking.
 
I think she looks superb Jack. I believe that both options (black and dark green) would be appropriate, so you made the right call. I love your weathered steering mechanism - very realistic-looking.
Thanks Heinrich,
Thank you for your comments, I am happy with the colours of the hull and believe that it will contrast well with the sails when I get them made. Its all a bit messy at the moment but I am sure it will turn out well. VM advertise this as suitable for a novice but there has been a lot of fiddly parts and the second planking took a bit of getting, the other wee trawler 'Erycina' was no where near as challenging. I would not like this as a first kit. Cheers JJ..
 
Hi Folks,
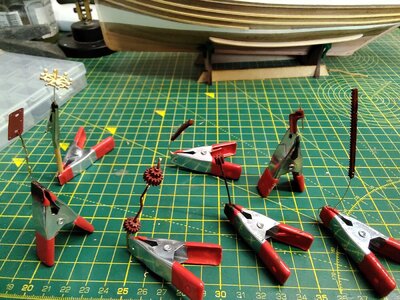
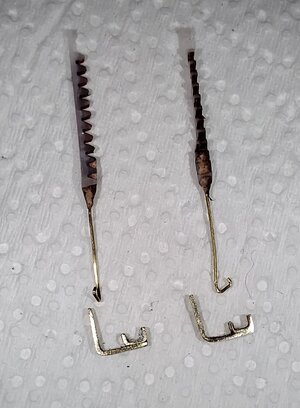
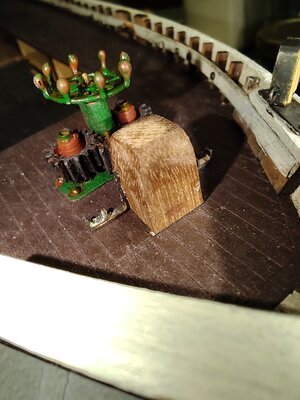
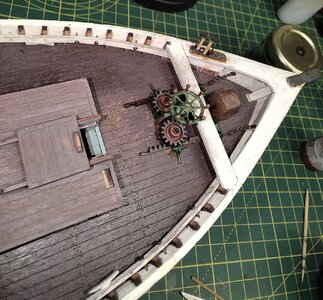
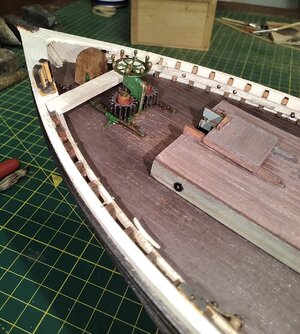
I have finished my scratch build of the Zulu's steering and I am quite pleased with the outcome, for sure it looks better than a box with a steering wheel poking out. Like I hope to do with the rest of the boat I have tried to add a bit of weathering. It looks a bit over the top in these photographs (macro), but when seen with the naked eye it all blends in quite nicely. I think if you where to make a working trawler as dirty as they really are no one would believe you. When I was still at school I worked two summers on a drifter harboured in Peel on the IOM. Being just a pup I got all the cleaning jobs but you could never get her clean, you had to take a spade to the herring scales that dried as if super glued to the deck! The boat was called the 'Mary Ann', she was smaller than a Zulu at fifty odd feet and driven by a big Perkins marine diesel. She was owned and skippered by an uncle of mine and was loved and well looked after but rust never sleeps, wire brush and paint the only answer. Anyway I will try not to over do it with the weathering.

Here are some pics. of my progress.

IMG_20221104_125023.jpgIMG_20221104_125042.jpgIMG_20221106_103734.jpgIMG_20221112_153001.jpgIMG_20221112_213139.jpgIMG_20221112_201510.jpgsteering 001.jpg I don't know the reason for the big chopping block behind the wheel although most /, maybe all, Zulus have it, The guides for the steering rods are attached to it, but it seems a bit extreme if it is only there for that, any guesses ?

IMG_20221113_104713.jpgIMG_20221113_105011.jpgIMG_20221113_105046.jpgIMG_20221113_105223.jpgIMG_20221113_105256.jpgIMG_20221113_110002.jpg

I made the little roller fairlead from scrap brass and 1mm dia box.
IMG_20221108_163108.jpg Next job will be making and fitting the rear spar that supports the mizzen lug sail it attaches to the port side of the stern and the top of the 'poop deck'. Cheers JJ..
 
Back
Top