-

Win a Free Custom Engraved Brass Coin!!!
As a way to introduce our brass coins to the community, we will raffle off a free coin during the month of August. Follow link ABOVE for instructions for entering.
-

PRE-ORDER SHIPS IN SCALE TODAY!
The beloved Ships in Scale Magazine is back and charting a new course for 2026!
Discover new skills, new techniques, and new inspirations in every issue.
NOTE THAT OUR FIRST ISSUE WILL BE JAN/FEB 2026
- Home
- Forums
- Ships of Scale Group Builds and Projects
- HMS Alert 1777 1:48 PoF Group Build
- HMS Alert 1777 1:48 Group Build Logs
You are using an out of date browser. It may not display this or other websites correctly.
You should upgrade or use an alternative browser.
You should upgrade or use an alternative browser.
Yes, Poul. You are correct, the bur size is 009, but the wire I use for the bolts is 0.4mm.
Very accurate work - great to see your progress
Thx gents for the comments and likes.
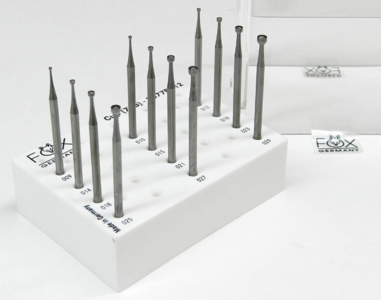
I received my cup burrs and ofcourse tested them on a test piece.
I bought a 0,8 mm and a 1,2 mm and use them for 0,4 mm and 0,6 mm wire.
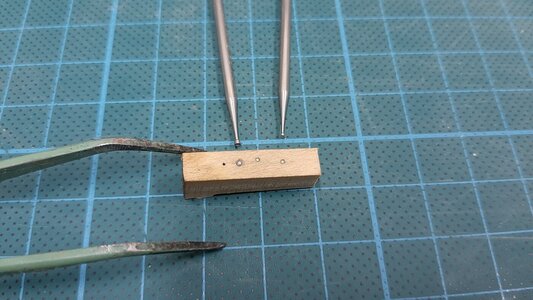
When you just cut the wire and then apply the burr you just get a nice bolt head which is counter sunk into the wood, just perfect. Right the 0,4 mm bolts for the frames, left the 0,8 mm for the frame to keel. I will finish all my outside bolt heads with it after finally sanding and scraping the hull.
@Jimsky this is a great tip, love it. The American Russian methode 2.0.
I directly see a second option, when you use it on a larger diameter wire you are getting a bolt head with a rove, I still need to properly test that.
For the rest it is working on the last fwd cant frames.
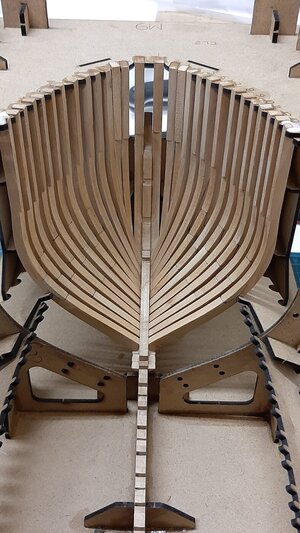

Step by step, only one remaining fwd cant frame to finish, it takes me about 1 hour for a set of cant frames to prepare and place them, now 15 finished and some 60 to go, pff where is the time of the block model.
I received my cup burrs and ofcourse tested them on a test piece.
I bought a 0,8 mm and a 1,2 mm and use them for 0,4 mm and 0,6 mm wire.

When you just cut the wire and then apply the burr you just get a nice bolt head which is counter sunk into the wood, just perfect. Right the 0,4 mm bolts for the frames, left the 0,8 mm for the frame to keel. I will finish all my outside bolt heads with it after finally sanding and scraping the hull.
@Jimsky this is a great tip, love it. The American Russian methode 2.0.
I directly see a second option, when you use it on a larger diameter wire you are getting a bolt head with a rove, I still need to properly test that.
For the rest it is working on the last fwd cant frames.


Step by step, only one remaining fwd cant frame to finish, it takes me about 1 hour for a set of cant frames to prepare and place them, now 15 finished and some 60 to go, pff where is the time of the block model.
Last edited:
we learn from each other!!!When you just cut the wire and then apply the burr you just get a nice bolt head which is counter sunk into the wood, just perfect. Right the 0,4 mm bolts for the frames, left the 0,8 mm for the frame to keel. I will finish all my outside bolt heads with it after finally sanding and scraping the hull.
@Jimsky this is a great tip, love it.
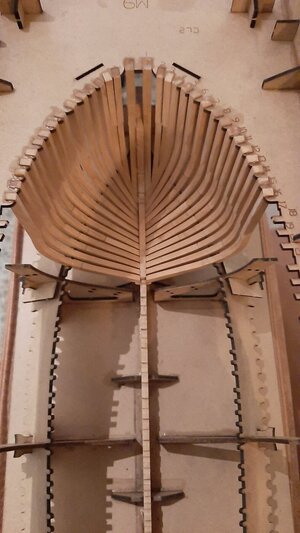
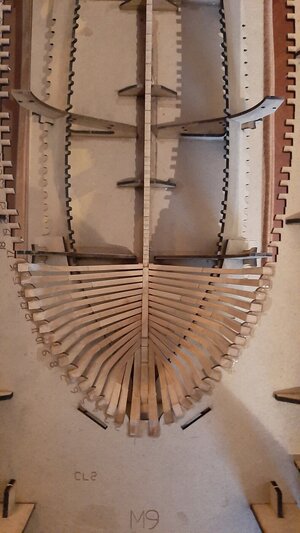
Today the last fwd cant frame reached it final place on the deadwood which finishes the construction of the bow, so on to the the stern.
Starting the stern by shaping the upper/deck transome, for this again handy stickers are provided helping you to easily reach the shape needed. I quickly sand this into shape on my sanding disc.
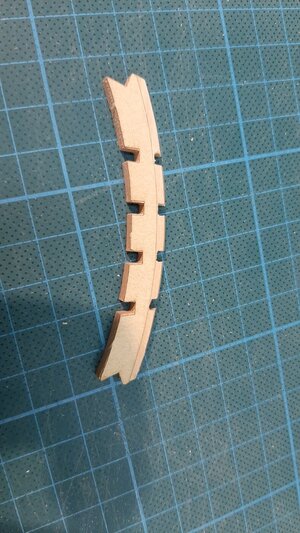
The upper transom is connected to the lower/wing transom via 6 counter pieces. The counter pieces at the corners are shaped again with the help of two stickers. On the left the untrimmed piece on the right side the finished counter piece.
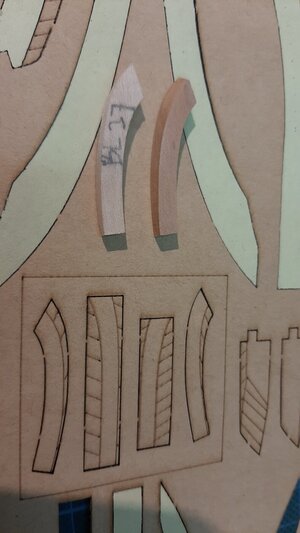
Now I finish the 4 inner counter pieces to fit them snug fit into the slots on the wing and deck transom. The ens of the counter pieces I shape in the curvature of the deck transome.
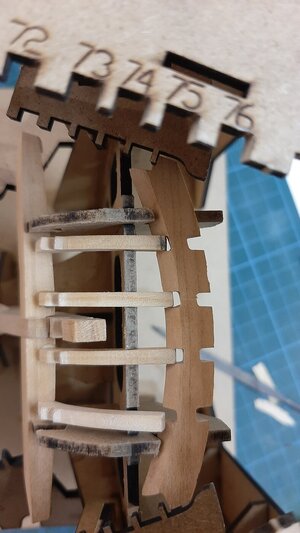
And after file and fit and file etc etc you get a proper fit which remains in place even without glue.
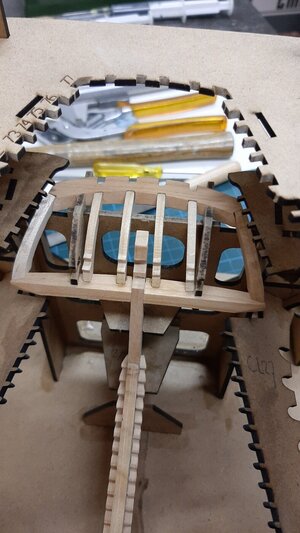
Next time final fitting of the counter pieces and deck transome


Starting the stern by shaping the upper/deck transome, for this again handy stickers are provided helping you to easily reach the shape needed. I quickly sand this into shape on my sanding disc.

The upper transom is connected to the lower/wing transom via 6 counter pieces. The counter pieces at the corners are shaped again with the help of two stickers. On the left the untrimmed piece on the right side the finished counter piece.

Now I finish the 4 inner counter pieces to fit them snug fit into the slots on the wing and deck transom. The ens of the counter pieces I shape in the curvature of the deck transome.

And after file and fit and file etc etc you get a proper fit which remains in place even without glue.

Next time final fitting of the counter pieces and deck transome
That's looking very good. We have some very valuable Alert build logs/tutorials that will help others in the future.
Do you have a picture of the completed forward deadwood where it meets the frames (from outside the ship)?
Do you have a picture of the completed forward deadwood where it meets the frames (from outside the ship)?
Great look at the finished bow!! 

Hi John,That's looking very good. We have some very valuable Alert build logs/tutorials that will help others in the future.
Do you have a picture of the completed forward deadwood where it meets the frames (from outside the ship)?
First all thx for the comments and likes.
See the pictures below, the cant frames cut into the deadwood. This will be finally trimmed flush when the hull leaves the berth.
Ps below.
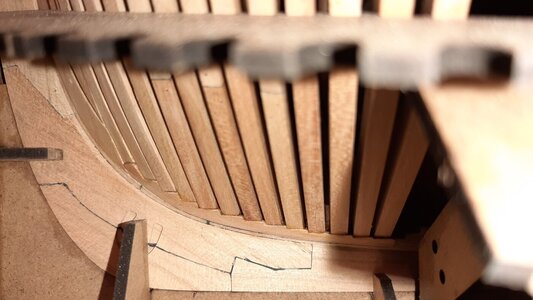
And SB
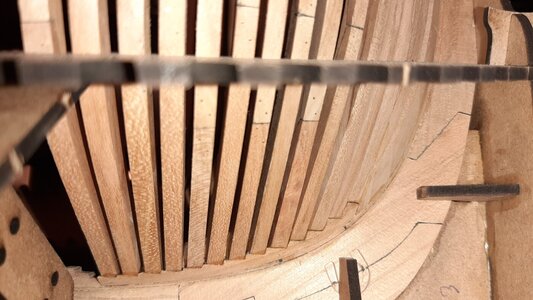
The rear transom is a fun challenge, the next mid cross section I liked to call the swear jar! Great Job. I think that's the hardest part of the build, due to a re think of how to assemble.
Thank you, that looks excellent- well doneHi John,
First all thx for the comments and likes.
See the pictures below, the cant frames cut into the deadwood. This will be finally trimmed flush when the hull leaves the berth.
Ps below.
View attachment 187731
And SB
View attachment 187732
Maarten, shouldn't the counter pieces on the corners be made up with 2 pieces of BL37 'laminated' together?The upper transom is connected to the lower/wing transom via 6 counter pieces. The counter pieces at the corners are shaped again with the help of two stickers. On the left the untrimmed piece on the right side the finished counter piece.
View attachment 187630
This is how I interpreted the plans:
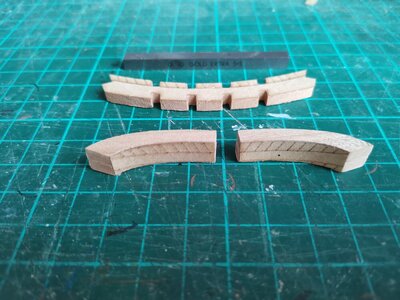
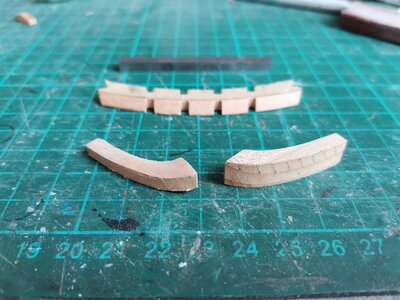
Oeps, I think you are right, was already looking into why it doesn't fit properly yet. I have to redo these.Maarten, shouldn't the counter pieces on the corners be made up with 2 pieces of BL37 'laminated' together?
This is how I interpreted the plans:
View attachment 187733View attachment 187734
That happens when you don t read the manual and just build.
Once heared an "saying" from an English colleague, do not asume it makes an ass of you and me. Think that was here the case
Thx for the tip
Last edited:
acording to my manual Picture 3.2 there was no (!) "Fix with Glue" pointer to these parts ...so I also didn't glue them ...
Thank you
No dont glue them. When you remove the ship from the cradle these will lift up together with the hull because they enclose the transom pieces.Hello Maarten
are these wing transom holder pieces should be glued in in the cradle?
View attachment 187741
Thx to @Jolley Roger I have corrected my counter pieces.
First doubled them, luckily there are 6 pieces in the kit and only need 4.
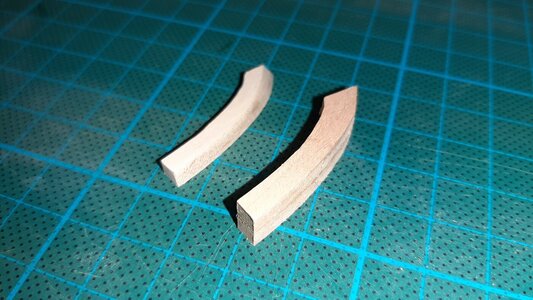
After that time for shaping, the new pieces in the middle.
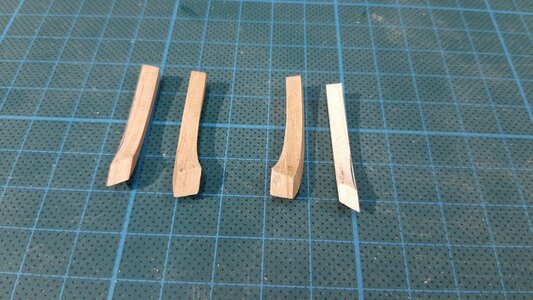
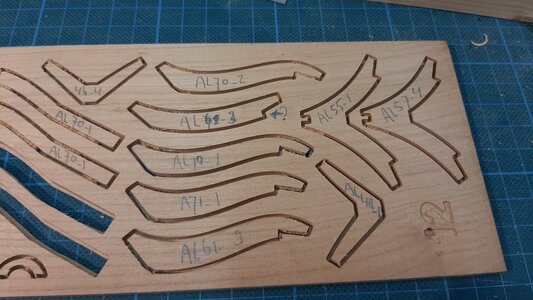
I also assembled the stern frame, be aware the the numbering mentioned for these parts is incorrect, AL 61-3 should be 71-1 and the top 71-1 should be 61-3. You will directly notice due to the difference in size, can t do it wrong as otherwise tge frame doesn t fit the template.
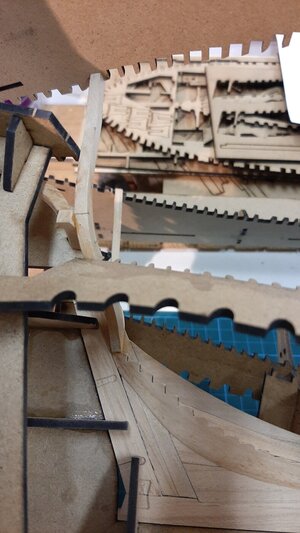
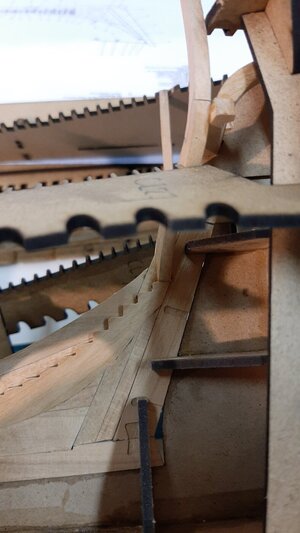
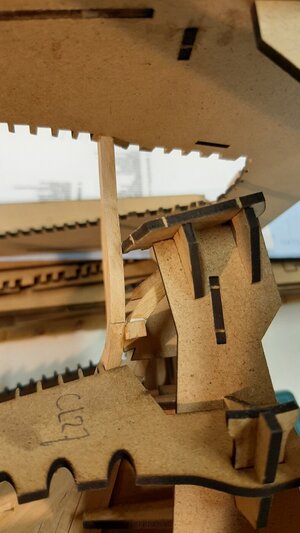
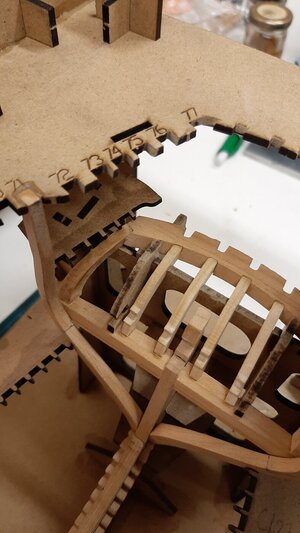
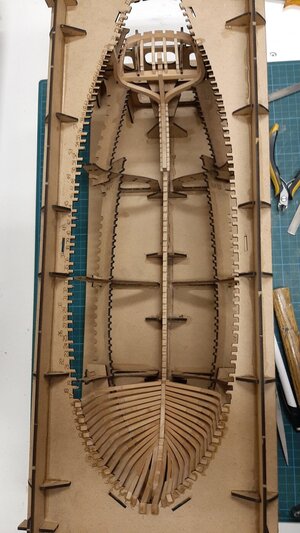
Finally fitting all these parts, I love these multishaped wood constructions. I have added a lot of pictures to clearly show how this contruction is shaped. The wing transome is larger than needed and is finally shaped when the hull is removed from the berth.
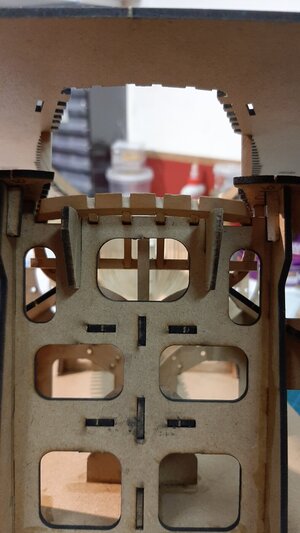
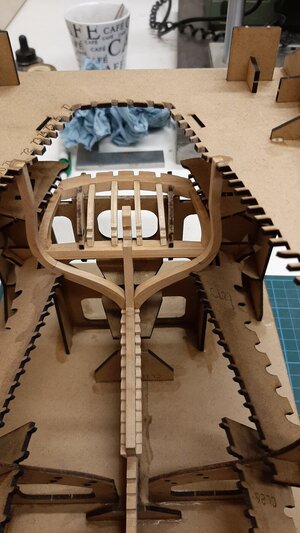
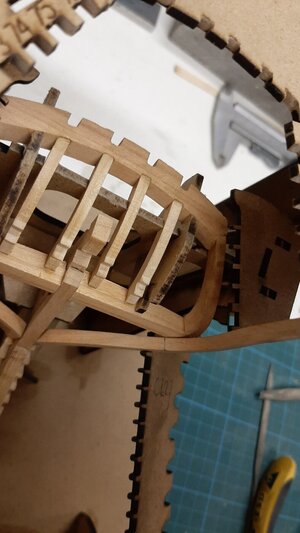
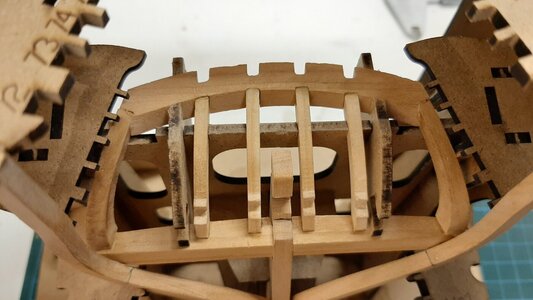
First doubled them, luckily there are 6 pieces in the kit and only need 4.

After that time for shaping, the new pieces in the middle.

I also assembled the stern frame, be aware the the numbering mentioned for these parts is incorrect, AL 61-3 should be 71-1 and the top 71-1 should be 61-3. You will directly notice due to the difference in size, can t do it wrong as otherwise tge frame doesn t fit the template.

Finally fitting all these parts, I love these multishaped wood constructions. I have added a lot of pictures to clearly show how this contruction is shaped. The wing transome is larger than needed and is finally shaped when the hull is removed from the berth.


