Bluenose

Joined
Jul 2, 2020
Messages
4,110
Points
588

Location
Eugene, Oregon
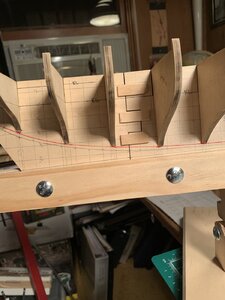
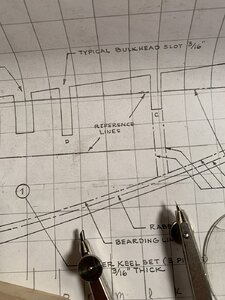
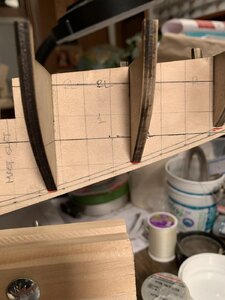
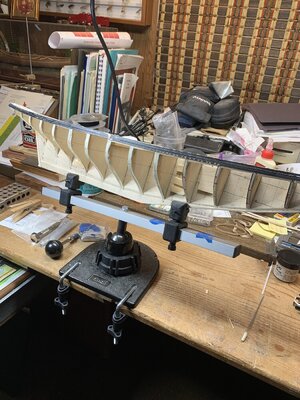
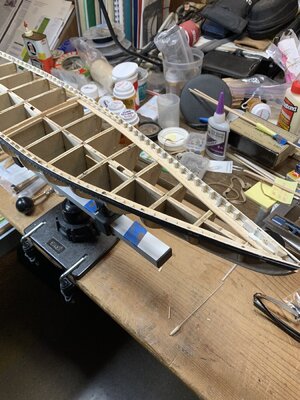
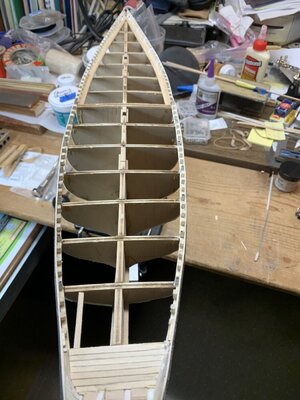
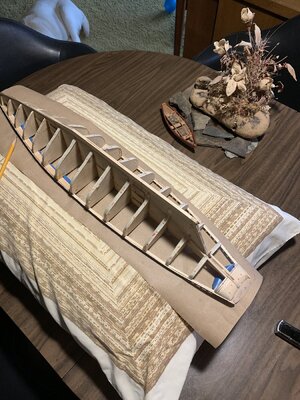
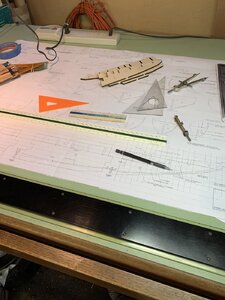
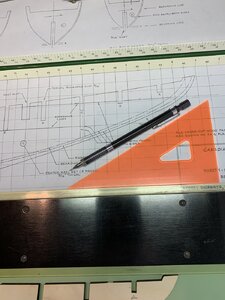
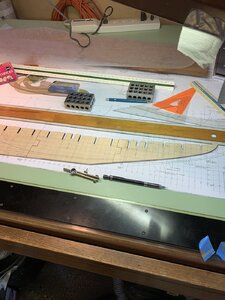
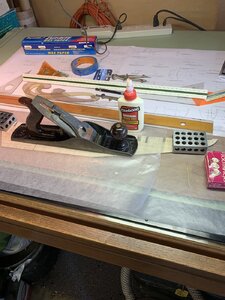
I will attempt to leave the dock and start a log while probably tacking and luffing along the winding way as I find out how to create one. Last three show the difference between the lines from the plan on the keel and the bottom of the aft bulkheads (high). Then the plan lines at bulkheads C & D followed by the same bulkheads which are too low!!! These are the ones that I need assistance with before proceeding and creating a problem that will compound itself. PT-2Drafting control grid on plan.jpgTools of a retired architect for lofting grid.jpgLines drawn for keel rabbit and bearding lines.jpgGluing the keel parts.jpgBluenose Aft Bulkheads.jpgBluenose Bulkheads C & D Plan.jpgBluenose Blukeheads C & D.jpg of my starting layout of control lines for the keel and bulkheads. I posted a request tonight for some help with photos in the "Help!!!!" forum to work around a problem between the plan rabbit and beardng lines and the actual bulkheads when dry fit. Looking forward to learning from the masters. . . possibly in trade for my own log photos. I still have plenty of layout in the fairing lines on the bulkheads to keep me occupied for a while. PT-2
 
I will attempt to leave the dock and start a log while probably tacking and luffing along the winding way as I find out how to create one. Last three show the difference between the lines from the plan on the keel and the bottom of the aft bulkheads (high). Then the plan lines at bulkheads C & D followed by the same bulkheads which are too low!!! These are the ones that I need assistance with before proceeding and creating a problem that will compound itself. PT-2View attachment 178025View attachment 178026View attachment 178027View attachment 178028View attachment 178029View attachment 178030View attachment 178031 of my starting layout of control lines for the keel and bulkheads. I posted a request tonight for some help with photos in the "Help!!!!" forum to work around a problem between the plan rabbit and beardng lines and the actual bulkheads when dry fit. Looking forward to learning from the masters. . . possibly in trade for my own log photos. I still have plenty of layout in the fairing lines on the bulkheads to keep me occupied for a while. PT-2
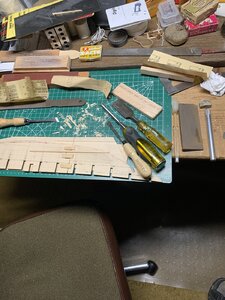
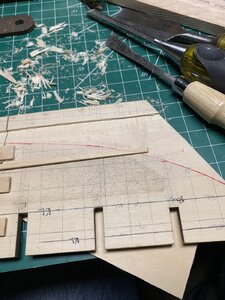
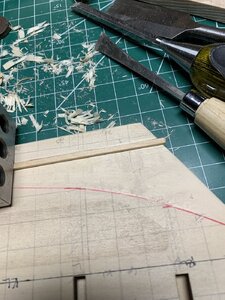
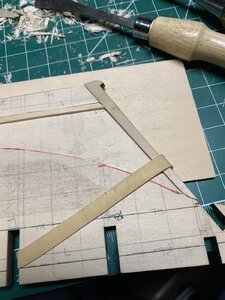
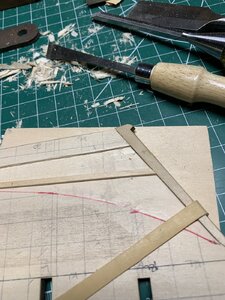
After some delays in putting up better lighting over my work area in the den I began slowly cutting out the starboard aft bearding to rabbit lines for the aft third part of the keel using an assortment of chisels, files, sandpaper with blocks, and sharpening stone and other sharpening touch-up items to keep the carving easier.
I will attempt to leave the dock and start a log while probably tacking and luffing along the winding way as I find out how to create one. Last three show the difference between the lines from the plan on the keel and the bottom of the aft bulkheads (high). Then the plan lines at bulkheads C & D followed by the same bulkheads which are too low!!! These are the ones that I need assistance with before proceeding and creating a problem that will compound itself. PT-2View attachment 178025View attachment 178026View attachment 178027View attachment 178028View attachment 178029View attachment 178030View attachment 178031 of my starting layout of control lines for the keel and bulkheads. I posted a request tonight for some help with photos in the "Help!!!!" forum to work around a problem between the plan rabbit and beardng lines and the actual bulkheads when dry fit. Looking forward to learning from the masters. . . possibly in trade for my own log photos. I still have plenty of layout in the fairing lines on the bulkheads to keep me occupied for a while. PT-2
Well now. . . I hit some key and lost my original commentary for the evening somewhere. Maybe it will pop up and there will be a similar posting of my reply to my self. Oh my. . . Aging is different. Anyhow, Started the carving out starboard aft bearding to rabbit with an assortment of chisels kept well sharpened. Used a 1/16" wale control piece for depth and fairing both along the rabbit, then with the keel stem in place low and again mid height. I'll go to port next for the same work before going midships and forward.
With some of your patience I may learn how to set up the build log with a proper title and entry update system. Not caught in irons but close to it with building a log. PT-2
Stbd Aft Bearding 9.11 A.jpgStbd Aft Bearding Wale  9.11 B.jpgStbd Aft Bearding Check 9.11 A.jpgStbd Aft Beardikng Wale End  Check 9.11 B.jpgStbd Aft Bearding Check Higher Wale End 9.11 C.jpg
 
After some delays in putting up better lighting over my work area in the den I began slowly cutting out the starboard aft bearding to rabbit lines for the aft third part of the keel using an assortment of chisels, files, sandpaper with blocks, and sharpening stone and other sharpening touch-up items to keep the carving easier.

Well now. . . I hit some key and lost my original commentary for the evening somewhere. Maybe it will pop up and there will be a similar posting of my reply to my self. Oh my. . . Aging is different. Anyhow, Started the carving out starboard aft bearding to rabbit with an assortment of chisels kept well sharpened. Used a 1/16" wale control piece for depth and fairing both along the rabbit, then with the keel stem in place low and again mid height. I'll go to port next for the same work before going midships and forward.
With some of your patience I may learn how to set up the build log with a proper title and entry update system. Not caught in irons but close to it with building a log. PT-2
View attachment 178644View attachment 178645View attachment 178646View attachment 178647View attachment 178648
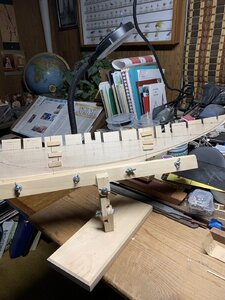
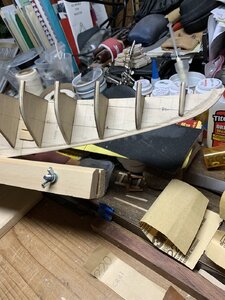
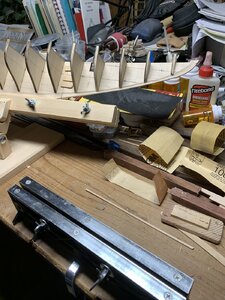
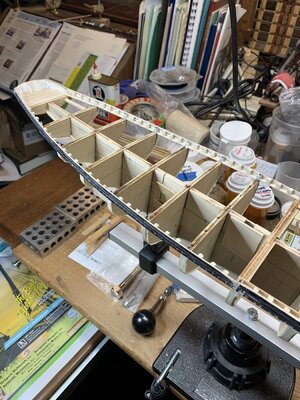
Sunday progress as much for my records and lookbacks as posting the progress which only approximates the accuracy and care of the experienced and well equipped shipwrights in SoS. Cut the rabbits and bearding lines as shown. Then plowed them out with a variety of chisels and a good old Exacto blade. Dryfitting the bulkheads and beginning of outboard fairing with checks using a 12 inch 1/16 inch thick batten. They go from the keel station to a vise for filing to form and back again over and over., Once I get these fore and aft I'll go back and trim off the bulkheads as stancheons angled the same as on the outboard face. Once everything is in order I'll begin the process of verifying for a last time the square and plumb of the bulkheads before setting them with TIghtbond to dry overnight. One major lesson learned from the first canoe build (my first with stripping/planking) is to dryfit and get to size before any gluing! This will be my mantra for the whole build. Thank you Gilles.
I will bounce back to the second canoe with those stations now solidly in place and set the first strips as the foundation lines for all to follow. Probably giving a light moisture and possible heat bending to aid in the process if the mahogany is more stiff than I want to deal with. Following strips will be edge faired as needed for a tighter fit than before. PT-2 Rabbit and Bearding Plowing Out.jpgBulkheads dry fit for fairing.jpgStarting Outboard Foreward Fairing.jpg
 
Sunday progress as much for my records and lookbacks as posting the progress which only approximates the accuracy and care of the experienced and well equipped shipwrights in SoS. Cut the rabbits and bearding lines as shown. Then plowed them out with a variety of chisels and a good old Exacto blade. Dryfitting the bulkheads and beginning of outboard fairing with checks using a 12 inch 1/16 inch thick batten. They go from the keel station to a vise for filing to form and back again over and over., Once I get these fore and aft I'll go back and trim off the bulkheads as stancheons angled the same as on the outboard face. Once everything is in order I'll begin the process of verifying for a last time the square and plumb of the bulkheads before setting them with TIghtbond to dry overnight. One major lesson learned from the first canoe build (my first with stripping/planking) is to dryfit and get to size before any gluing! This will be my mantra for the whole build. Thank you Gilles.
I will bounce back to the second canoe with those stations now solidly in place and set the first strips as the foundation lines for all to follow. Probably giving a light moisture and possible heat bending to aid in the process if the mahogany is more stiff than I want to deal with. Following strips will be edge faired as needed for a tighter fit than before. PT-2 View attachment 178946View attachment 178947View attachment 178948
I would like to get the title into a bold and not as hidden as it is. Also I don't know how to create the buttons for each entry to get off of this ever lengthening train. PT-2
 
I will attempt to leave the dock and start a log while probably tacking and luffing along the winding way as I find out how to create one. Last three show the difference between the lines from the plan on the keel and the bottom of the aft bulkheads (high). Then the plan lines at bulkheads C & D followed by the same bulkheads which are too low!!! These are the ones that I need assistance with before proceeding and creating a problem that will compound itself. PT-2View attachment 178025View attachment 178026View attachment 178027View attachment 178028View attachment 178029View attachment 178030View attachment 178031 of my starting layout of control lines for the keel and bulkheads. I posted a request tonight for some help with photos in the "Help!!!!" forum to work around a problem between the plan rabbit and beardng lines and the actual bulkheads when dry fit. Looking forward to learning from the masters. . . possibly in trade for my own log photos. I still have plenty of layout in the fairing lines on the bulkheads to keep me occupied for a while. PT-2
Hallo @PT-2 ,
we wish you all the BEST and a HAPPY BIRTHDAY
Enjoy your special day
Birthday-Cake
 
Thank you very much. Rich
Well on the eve of my birthday it is past time to at least put up a few photos of the MS2130 Bluenose SLOWWWWW progress (delayed by my doing a new carriage and firing the small muzzle loading cannon).
Poor iPhone shots in an equally bad lighting and background of the long hull which after some paint touchup and scuttle holes reworking will begin planking which has been marked out. I'll go hull first and then the deck. I'll sand the cabin and hatches to the deck curve and glue them down.

Inboard bulwarks and stanchions to be touched up along with the waterways before setting the main railing which has been cut and dry fitted in five pieces per side.
Aft portion with transom decking placed.jpg

Next the forward portion with the gury sluce needing to be cut in and the placed dory launching protective planks inboard of the launching stanchions. I will be presenting the schooner in full fishing arrangement.Stbd side bulkheads with bands marked for planking.jpgForeward Section with dorie guards on stanchions.jpg
Planking bands marked with only some of the 8 planks per band/bulkhead. Scuppers need reworking before the inboard painting is touched up on the bulwarks.Forward view with waterways set awaiting planking.jpg
And this is the view that I continually shrink myself down to envision standing at the wheel looking forward, to windward and the sail set along what was a magnificent fishing and racing schooner. . like an arrow in a drawn bow ready to be let fly. Not well crafted work on my part as a first venture but it will be what it is and in anticipation of the POF Bluenose which demands much more care all the way as some conditions are not covered/planked over as with this POB. My objective is to spend my time as well as I am able and divide it between the social side of SoS forums/threads and projects small and large.
 
I look forward to following your progress on the Bluenose. It's on my wish list for the future, so I am sure I will learn a lot.
 
Well on the eve of my birthday it is past time to at least put up a few photos of the MS2130 Bluenose SLOWWWWW progress (delayed by my doing a new carriage and firing the small muzzle loading cannon).
Poor iPhone shots in an equally bad lighting and background of the long hull which after some paint touchup and scuttle holes reworking will begin planking which has been marked out. I'll go hull first and then the deck. I'll sand the cabin and hatches to the deck curve and glue them down.

Inboard bulwarks and stanchions to be touched up along with the waterways before setting the main railing which has been cut and dry fitted in five pieces per side.
View attachment 194069

Next the forward portion with the gury sluce needing to be cut in and the placed dory launching protective planks inboard of the launching stanchions. I will be presenting the schooner in full fishing arrangement.View attachment 194071View attachment 194070
Planking bands marked with only some of the 8 planks per band/bulkhead. Scuppers need reworking before the inboard painting is touched up on the bulwarks.View attachment 194072
And this is the view that I continually shrink myself down to envision standing at the wheel looking forward, to windward and the sail set along what was a magnificent fishing and racing schooner. . like an arrow in a drawn bow ready to be let fly. Not well crafted work on my part as a first venture but it will be what it is and in anticipation of the POF Bluenose which demands much more care all the way as some conditions are not covered/planked over as with this POB. My objective is to spend my time as well as I am able and divide it between the social side of SoS forums/threads and projects small and large.
Thanks. My progress is slow and I skipped a lot of photo ops up to this stage but will try more. My skills are not that great and I am trying to think head to do now to eliminate problems later on, not strictly following the instructions with the kit. Rich (PT-2)
 
Happy Birthday Rich Birthday-Cake
Looks like you’re well on your way. My only suggestion in your build log is to post only 1 or 2 pics each time with your explanation. There’s one section that seems to have quite a few, around your keel and bearding. Very nice clear pics. I didn’t see an answer about the pages. Maybe they happen automatically???
Thank you. Yes, when I first started the kit I put up several photos and then a couple asking separately how to deal with the misaligned cut bulwarks and the rabbit trim lines. Ended up doing both some sanding and shimming. I skipped a lot I the middle as I am building primarily for my own interest but will try to post up some more. Embarassed with my own poor work compared to that of so many other SoS "craftsmen". I work fairly slowly with a lot of time spent here in the forums and threads absorbing more than I can remember. Rich (PT-2)
 
Just catching up on your build log Rich, and happy birthday from down under.
Thank you. Not the type of work that I would like to do but I proceed as I am able and old enough to accept whatever that may be. I'll try to put up periodic posts as I am sure that questions will arise that I should not make assumptions as to how to best proceed. Rich
 
Happy Birthday!
Keep building...and don’t worry about the level of your craftsmanship. Not everyone is at the same level, yet we all appreciate seeing each others work and approach to building. No one knows everything, and everyone has something they can teach someone else. So share your build and your approach, regardless of your skill level, you will certainly share something of value and others will help with any obstacles you may encounter.
 
Finally I get to catching up on all the other build logs. This is good work Rich. I am going through the same slow and tedious process of strengthening inner bulwarks so I know how slow it is. Keep going - you are doing fine!
 
thank you for your support and recommendation. Rich (PT-2)
Happy Birthday!
Keep building...and don’t worry about the level of your craftsmanship. Not everyone is at the same level, yet we all appreciate seeing each others work and approach to building. No one knows everything, and everyone has something they can teach someone else. So share your build and your approach, regardless of your skill level, you will certainly share something of value and others will help with any obstacles you may encounter.
Finally I get to catching up on all the other build logs. This is good work Rich. I am going through the same slow and tedious process of strengthening inner bulwarks so I know how slow it is. Keep going - you are doing fine!
I'll make a log update later today of progress with the main railing. rich
 
thank you for your support and recommendation. Rich (PT-2)


I'll make a log update later today of progress with the main railing. rich
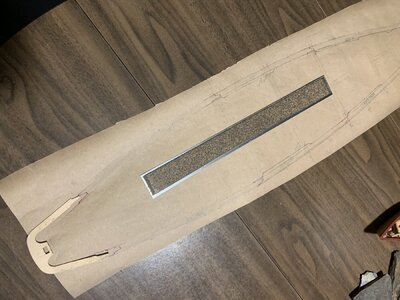
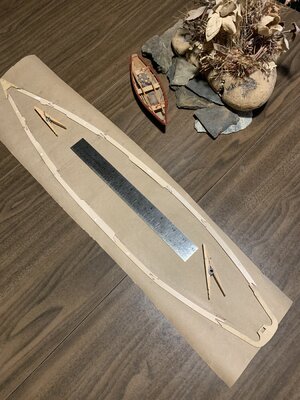
Here are a few of my procedure making a tracing of the outer inverted hull to draw the main railing and dividing it into manageable sections to cut and fit before securing them in place after the repainting and touch up are done beneath that rail. Then I may do the deck planking before hull for access from beneath as may be needed.Tracing the hull.jpg
Next to draw the rail and separate sections to cut from the stock material providedHull Main Rail Parts drawn patterns.jpg
Then the rough cut sections laid out again for the pic after dry setting them on the stancheonsMain Rail parts rough cut.jpg
When placed on the stanchions for some unknown reason the forward most did not quite match with the laser cut bow rail (Y shape) but as those were too long I an cut and file them back to fit with the bow piece as needed for the hull itself. Those two will be the last ones set as I will work aft to fore. Some patching filler (sawdust and glue) will likely be needed for some small cracks between the complex joining ends when rotated into final alignment athwartships. The top will be painted out white anyway so that may be one of those covered issue. Rich (PT-2)
 
Here are a few of my procedure making a tracing of the outer inverted hull to draw the main railing and dividing it into manageable sections to cut and fit before securing them in place after the repainting and touch up are done beneath that rail. Then I may do the deck planking before hull for access from beneath as may be needed.View attachment 194379
Next to draw the rail and separate sections to cut from the stock material providedView attachment 194380
Then the rough cut sections laid out again for the pic after dry setting them on the stancheonsView attachment 194381
When placed on the stanchions for some unknown reason the forward most did not quite match with the laser cut bow rail (Y shape) but as those were too long I an cut and file them back to fit with the bow piece as needed for the hull itself. Those two will be the last ones set as I will work aft to fore. Some patching filler (sawdust and glue) will likely be needed for some small cracks between the complex joining ends when rotated into final alignment athwartships. The top will be painted out white anyway so that may be one of those covered issue. Rich (PT-2)
Good job Rich, as you know these kits never fit perfectly and there is always adjustments necessary. The only error, would be to assume it will go together perfectly without adjusting! ;)
 
Good job Rich, as you know these kits never fit perfectly and there is always adjustments necessary. The only error, would be to assume it will go together perfectly without adjusting! ;)
Adjusting is like life itself as adjustments are frequently needed. When in the Navy I had a chief advise me to keep my feet dancing on the shifting deck so that I wouldn't fall down. Rich (PT-2)
 
Back
Top