YUANQING BLUENOSE - Heinrich

Hello Everyone

Work continued today in the Nantong Shipyard. With the Starboard side of the keel finished, it was now time to focus on the Port Side. Part #17 was glued to the inner keel from midships to the bow and then it was the turn again of that pesky Part #18 that goes at the top from midships to the stern. In my previous post I cautioned you guys to be careful with this. Work slowly and at very little of an angle. I used a little diamond file which probably looks more like a toy than a tool, but which, nevertheless, got the job done. I would file a little and walk away to rest my eyes - then back at it again. This piece is wafer thin once beveled - concentrate and execute caution!

View attachment 199193
When gluing Part #18 to the inner keel, make sure that it is clamped properly. Because the piece is so thin once beveled, the beveled part will not lie completely flat against the keel - that is what the four big, black clamps were used for. The fitment at the top of the keel is no issue - just make sure that all notches are properly aligned and that the rearmost part is aligned perfectly with the sternpost.

View attachment 199194
Done correctly, this is what she should look like. ROTF ExplosionBottle That's how I felt when Part #18 was finally installed and when the end result looked like that. The lighter wood colour indicates the section of Part #18 that has been beveled. The accuracy of the laser-cutting is UNBELIEVABLE and the grain in that wood ... !

View attachment 199197
This picture shows the midships section where all keel parts join. I have coloured Part #20 green for the picture because even with a macro-closeup, the joint line between Parts #20 and @21 is almost invisible. With the naked eye is well nigh invisible.

So let's see next how our keel stacks up against that of the YuanQing test builder.

View attachment 199198
YuanQing - Starboard Side

View attachment 199199
SOS Starboard Side

View attachment 199200
YuanQing Port Side

View attachment 199204
SOS Port Side

And with that, we have come to the end of the keel assembly! And next? Yep ... you guessed it ... FRAMES! :eek:

But first, it's back to the administrative office of Bluenose to send PM's to the next two clients who will receive PayPal Bills tomorrow. Wonder who they are ...

View attachment 199202
Excellent work Heinrich! Looking awesome.
PayPal bills? Pick me...pick me! :)
 
Now just in case you all thought I was all administration and no build - think again! ROTF

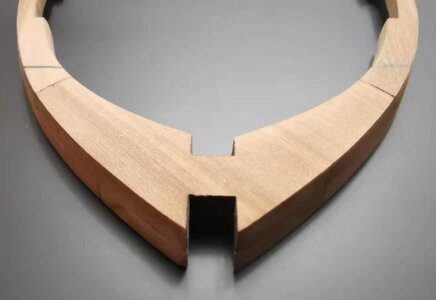
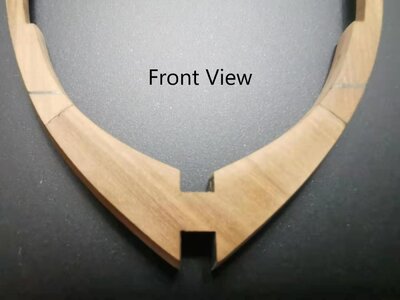
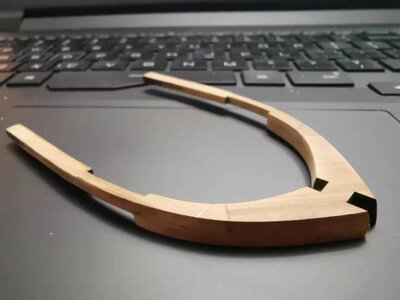
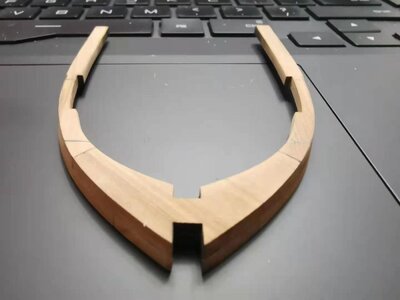
Bluenose - Completed Frame #8 - Told you, #8 was a lucky number!

微信图片_20201219090438.jpg

微信图片_20201219085132.jpg

微信图片_20201219085122.jpg

微信图片_20201219084122.jpg

微信图片_20201219083648.jpg

I will obviously do the full sequence with instructions and explanations as soon as I have some time, but I just wanted to share with you for the time being.

Kind regards - Heinrich
 
Now just in case you all thought I was all administration and no build - think again! ROTF

Bluenose - Completed Frame #8 - Told you, #8 was a lucky number!

View attachment 199794

View attachment 199795

View attachment 199796

View attachment 199797

View attachment 199798

I will obviously do the full sequence with instructions and explanations as soon as I have some time, but I just wanted to share with you for the time being.

Kind regards - Heinrich
Glad to see you have time for building! I suppose this is the phase of the build where you make the two frames to join the keel and frames to the jig? And frame 8 is the large one of the two? Just guessing at this point. ;)
 
@donfarr For the purpose of all our members I am actually going to explain at the process at the hand of two frame constructions - No 8 and No 20. I will combine everything to explain. The frames are really easy - but it is the finishing and beveling that takes the time.

@Dean62 Deane, the frame that I showed is the fully assembled and completed frame #8 but comprising of two different halves that are joined together. I just wanted to complete one frame to see how the process works and what recommendations - if any - I can make. Hopefully I will be able to post the full explanation later today or tomorrow. At the moment my days are really running out of hours!
Nice start to keep our attention. You have a strange keyboard as I don't see any Chinese characters. How to you type in Chinese with their bazillion of those complex (brush) strokes? Nice clean tightly joined frame. RIch
 
@donfarr For the purpose of all our members I am actually going to explain at the process at the hand of two frame constructions - No 8 and No 20. I will combine everything to explain. The frames are really easy - but it is the finishing and beveling that takes the time.

@Dean62 Deane, the frame that I showed is the fully assembled and completed frame #8 but comprising of two different halves that are joined together. I just wanted to complete one frame to see how the process works and what recommendations - if any - I can make. Hopefully I will be able to post the full explanation later today or tomorrow. At the moment my days are really running out of hours!
As I was once told by a smart supervisor, "we all have the same 24 hours in a day, so prioritize what matters, reallocate tasks and things to be done, and make the most of your day you can"

I think you are doing a great job with what few hours you have to spend on building your kit.
 
Nice start to keep our attention. You have a strange keyboard as I don't see any Chinese characters. How to you type in Chinese with their bazillion of those complex (brush) strokes? Nice clean tightly joined frame. RIch
Hi Rich. Even though it's a Chinese laptop, they still have conventional keyboards. :) The frame came out very nice - I am just doing a second one now so that I have a reference and see how the two compare. The frames should not present a problem.
 
FRAMES PART 1

PLEASE NOTE THAT FRAME CONSTRUCTION IS THE FIRST PART OF THE BLUENOSE BUILD
- I have only done the keel first, because of sentimental reasons. For me the keel-laying was a symbolic sign that harks back to the history of this great schooner.

In this first Part I will show you what can be called the "Preparatory" stage for frame construction and also offer some explanations.

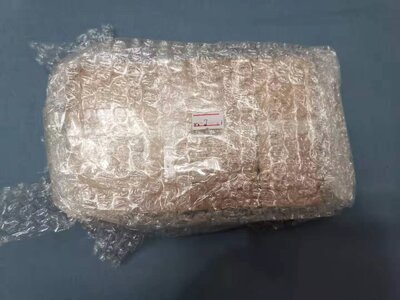
The frames come in a package which is marked with the #7 so this is all that you need to remove from the kit box.

Build 76.jpg

Here you can clearly see the #7 on the bubble wrap. Yours will be a lot neater than mine - we opened this beforehand for the kit review.

Build 77.jpg
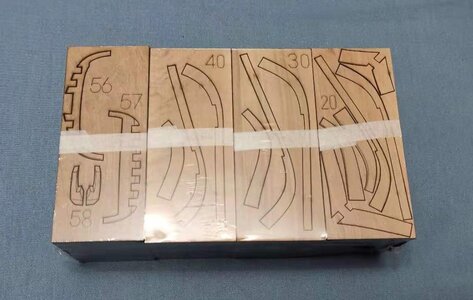
With the bubble-wrap removed, you will be presented by this. simply cut open the plastic wrapping and remove whatever sheet containing the frame that you want to build, from it.

Build 81.jpg

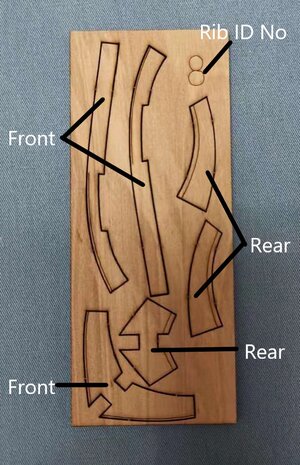
This is what your frame sheet looks like. In the right, upper hand corner you can clearly see the number of the frame identified. Each frame consists of two halves which are made up of three parts each. In each case there will be a centre-section and the two ribs that go on either side of the centre-section. I chose Frame #8 to begin with as the #8 is deemed a very lucky number in China.

Now is also the time to open your instruction manual containing the information on frame construction. One of the two manuals is specifically dedicated to this. Opening the first page - you will incidentally see Frame #8 first (for reasons as described above)

Build 78.jpg

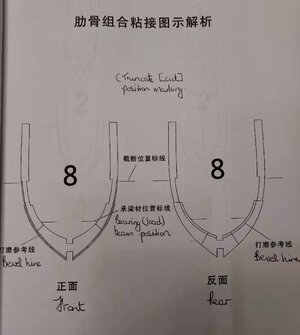
You will then be faced with two full-scale (1:1) drawings of the frames (one from the front, one from the back) and two sets of hieroglyphics! ROTF One in Chinese and one my hand-scribbled translation attempts. Not to despair - have a look at the next image.

Build 79.jpg

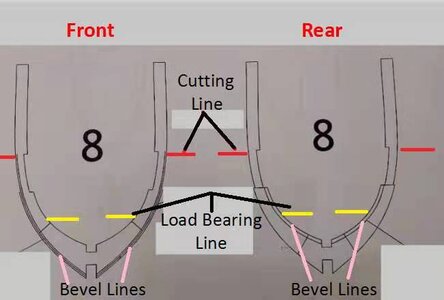
Here you have a duplicate of the previous image. Let's work from the top of the page down. In red, you will clearly see "Front" and "Rear" to indicate which is which.

Next, you will see as indicated by the red lines what is described by YuanQing as the "Cutting Lines" (we will get to those later).

In line with that, it is obvious that we are working with Frame #8.

Below that, and marked by the yellow lines is what YuanQing calls the markings for the "Load Bearing Line". The next picture will indicate clearly what that is meant by that and its function later in the build.

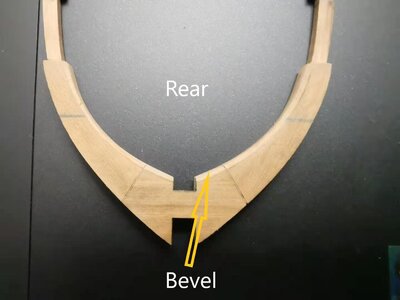
The Pink lines at the bottom of the page indicate the bevel lines which are also clearly marked on the frames themselves.

Build 80.png

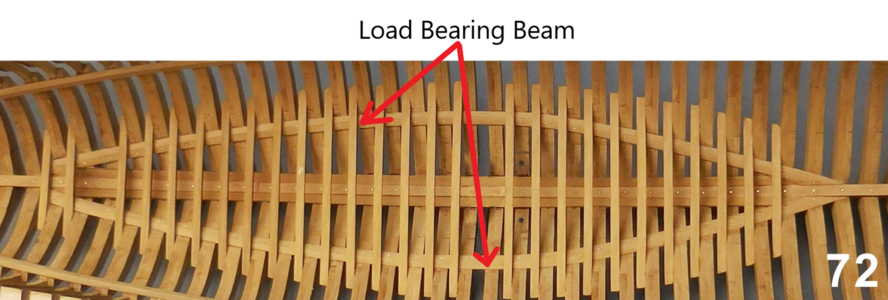
Above I mentioned the "Load Bearing Line". In essence these are the markings that indicate the exact positioning of the two "Load Bearing Beams" which are to be installed later in the build. For our purposes now though, we just need to know what those markings mean and realize that they will play a part later on. In my next posting - which I hope to do tomorrow night (China time), we will start the actual construction of the frames.

Until tomorrow.

Thank you all for watching, for your tremendous support and for being part of this great Bluenose family!

Heinrich
 
FRAMES PART 1

PLEASE NOTE THAT FRAME CONSTRUCTION IS THE FIRST PART OF THE BLUENOSE BUILD
- I have only done the keel first, because of sentimental reasons. For me the keel-laying was a symbolic sign that harks back to the history of this great schooner.

In this first Part I will show you what can be called the "Preparatory" stage for frame construction and also offer some explanations.

The frames come in a package which is marked with the #7 so this is all that you need to remove from the kit box.

View attachment 199870

Here you can clearly see the #7 on the bubble wrap. Yours will be a lot neater than mine - we opened this beforehand for the kit review.

View attachment 199875
With the bubble-wrap removed, you will be presented by this. simply cut open the plastic wrapping and remove whatever sheet containing the frame that you want to build, from it.

View attachment 199876

This is what your frame sheet looks like. In the right, upper hand corner you can clearly see the number of the frame identified. Each frame consists of two halves which are made up of three parts each. In each case there will be a centre-section and the two ribs that go on either side of the centre-section. I chose Frame #8 to begin with as the #8 is deemed a very lucky number in China.

Now is also the time to open your instruction manual containing the information on frame construction. One of the two manuals is specifically dedicated to this. Opening the first page - you will incidentally see Frame #8 first (for reasons as described above)

View attachment 199877

You will then be faced with two full-scale (1:1) drawings of the frames (one from the front, one from the back) and two sets of hieroglyphics! ROTF One in Chinese and one my hand-scribbled translation attempts. Not to despair - have a look at the next image.

View attachment 199879

Here you have a duplicate of the previous image. Let's work from the top of the page down. In red, you will clearly see "Front" and "Rear" to indicate which is which.

Next, you will see as indicated by the red lines what is described by YuanQing as the "Cutting Lines" (we will get to those later).

In line with that, it is obvious that we are working with Frame #8.

Below that, and marked by the yellow lines is what YuanQing calls the markings for the "Load Bearing Line". The next picture will indicate clearly what that is meant by that and its function later in the build.

The Pink lines at the bottom of the page indicate the bevel lines which are also clearly marked on the frames themselves.

View attachment 199882

Above I mentioned the "Load Bearing Line". In essence these are the markings that indicate the exact positioning of the two "Load Bearing Beams" which are to be installed later in the build. For our purposes now though, we just need to know what those markings mean and realize that they will play a part later on. In my next posting - which I hope to do tomorrow night (China time), we will start the actual construction of the frames.

Until tomorrow.

Thank you all for watching, for your tremendous support and for being part of this great Bluenose family!

Heinrich
Please give me the location of the drawing with the Chinese and your annotations as I cannot find that in my kit books (white frames binder) I made a copy of sheet with frame 8 and made the same notes for later reference. Are you working from another set of instructions/diagrams? Rich
 
Back
Top