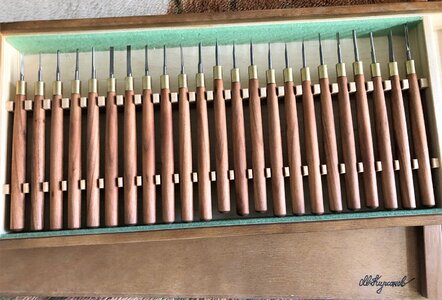
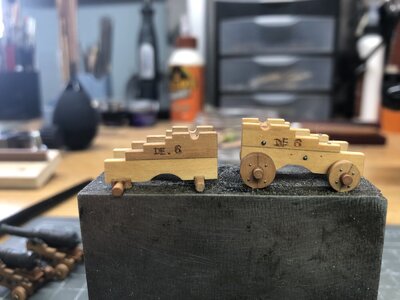
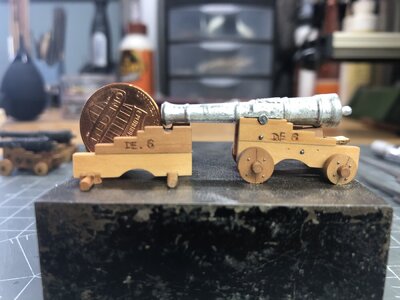
Greeting everyone. Today, I will show you a couple of ways to make your own tracks (wheels) for cannon carriages. How many times we saw the tracks supplied with the kit are out of scale, made with plywood, and not perfectly round both outside and inside? Those required some improvements so they are presentable to your cannons. Well...why not make your own, from scratch? There is no way the methods I will show you are the only ones and the best. I am sure you will find other suitable methods, you may like more. What method to use - is your preference. Alright, enough preambles', Jim, show us the methods!
1. Method # 1 Using the round dowels
I think, this method is commonly used by modelers by its simplicity and availability of materials. Ready-made dowels should be widely available in wood stores in a variety of diameters and most commonly used wood species. Some dowels quality are better than others but they should be perfectly round for our purpose. Here I have some dowels stock in basswood, poplar, and cherry. I bought them in the Art store, surprisedly, they have more sizes and timber variety.
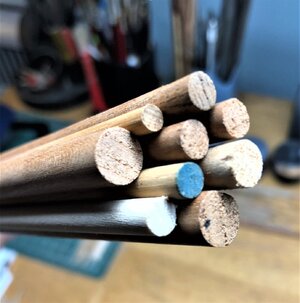
It is worth mentioning that either method will require some power tools. Hopefully, the dowels stock you will plan to use for your trucks is perfectly round. If this is not the case, you will have to round it using a wood-turning lathe (preferably), or regular drill as the turning source.
For the demonstration, the trucks are made from a 6.25mm diameter dowel in this example. First, using a miniature table saw, set up so that the trucks could be cut to the required thickness. The saw blade was used 0.8mm so that the parts would have a clean and sharp edge to them. You may experiment with the blade thickness, otherwise, using the thick blade may cause the trucks to fly when cut, and thus generate the 'kneeling' event on the floor
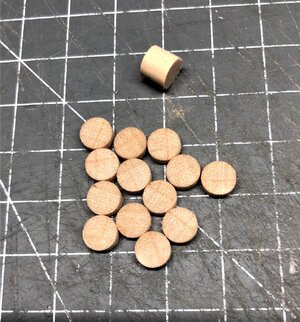
The next step is to drill a hole in the center of each truck. I make a simple jig, it servers well for all of my methods. It is very simple, hence very convenient for such jobs. Just make sure to position right on the center, otherwise... you know.
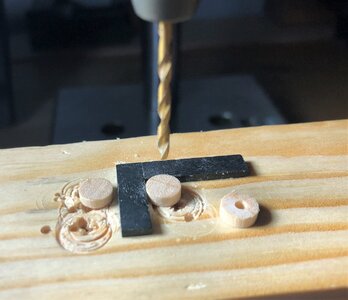
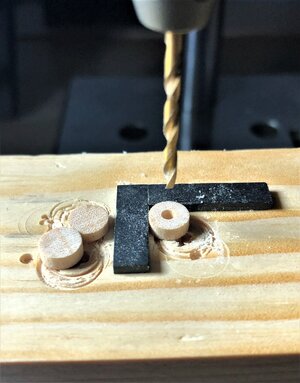
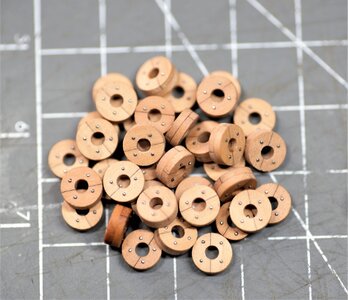
Next..? Well...there is no next! You made your own trucks. Congrats! They will suffice to use as-is. Depending on the color of the carriages you may optionally paint or dye to make them look similar. But look...they look round and sounds. However, in my eyes, they are plain and simple. We will make them more presentable by adding bolts imitation. Be sure to continue reading method #2.
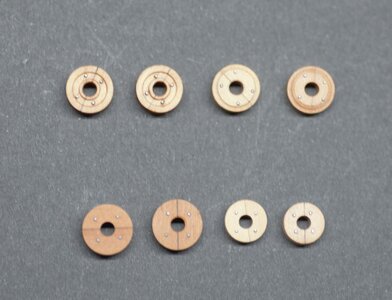
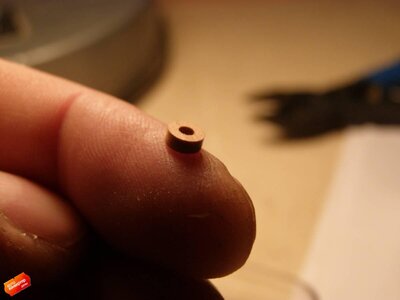
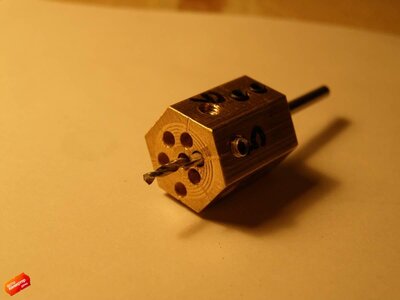
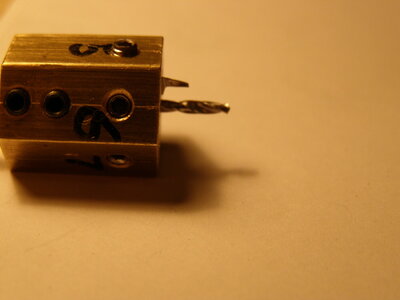
Method #2 is much advanced and required some machinery skills to make the tool. This method was invented by Sergey @bibigon and the first time I saw it, I wanted to try it. It makes the truck and the hole in one shot. Intrigued enough??? Here are some images courtesy of Sergey with the tool and ready trucks made by using this tool.
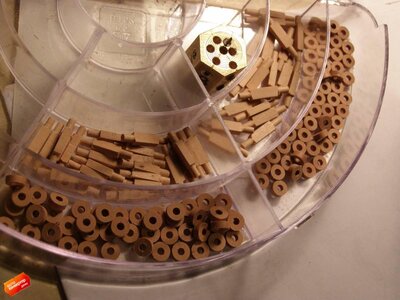
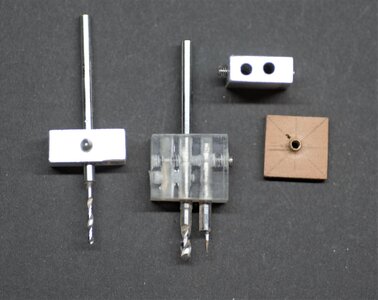
So...I have neither skills nor machinery Sergey has but really wanted to make those trucks. So...I tried. The principle is really simple and used in the tool to cut paper circles. The only difference and challenged to make is the cutter, It must be a specific shape to cut thru the wood and not burn it. I start with the jewelry saw blade, It is made of tooling steel and thin enough. I shape and sharpen to cut the wood. Using the aluminum block, I made the tool.
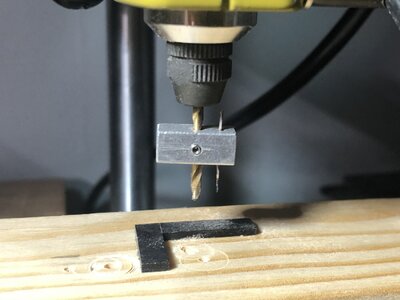
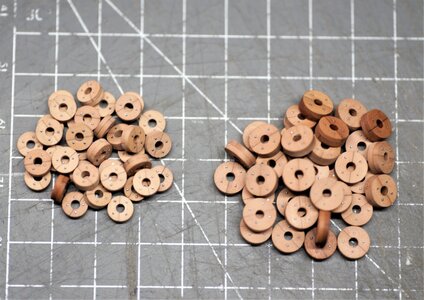
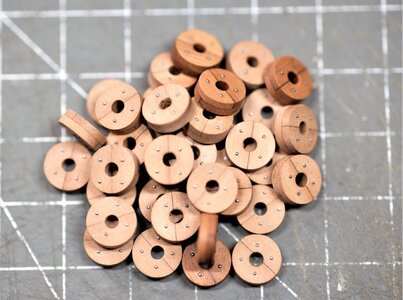
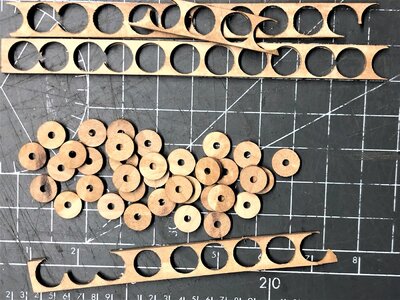
...and, the results exceeded all my expectations. In 5 minutes, I was able to make a batch of trucks with identical diameters (inside\outside). Check for yourself...
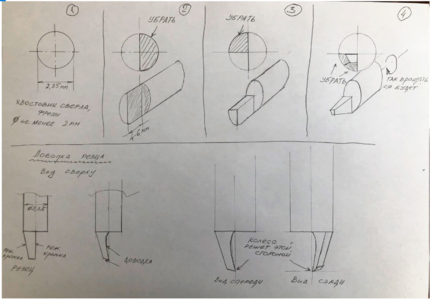
However, I quickly realize, that cutter gets hot and burns the edges of the wood. The cutter obviously needs modifications. But the proof of concept works! I contacted Sergey @bibigon and he sketched the cutter. What a brilliant guy! Many, many thanks, Sergey!
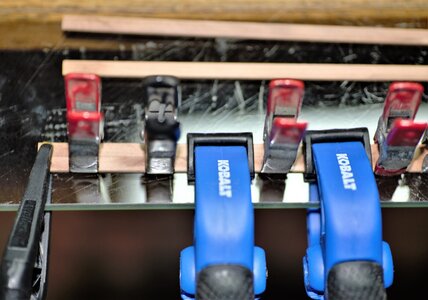
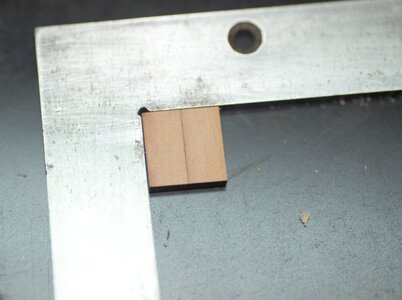
But first things first. I prepared the timber for the trucks. The same techniques were used when I experiment with trucks for my Alert build. I decided to make trucks in halves.
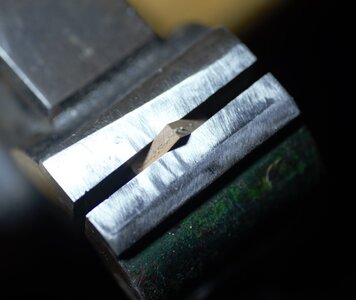
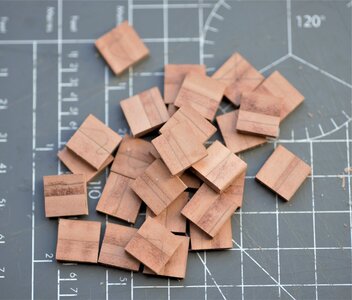
Then, I made a new tool according to Sergey's diagram. I didn't have an aluminum block, so use a piece of Plexiglas. This does the job pretty well, but in the long run, I will have to make a solid base from brass (similar to Sergey's). Plexiglas base has two holes to accept the cutter: on the left for larger truck, on the right for the smaller. Start by drilling the hole, as you deepen in the wood, it makes the center hole first, then, the cutter touches the surface and will cut the outside the truck. NOTE: if it burns the wood, stop and check the cutter. You will probably need to adjust the shape. IT DOES require specific shape (see the sketch from Sergey)
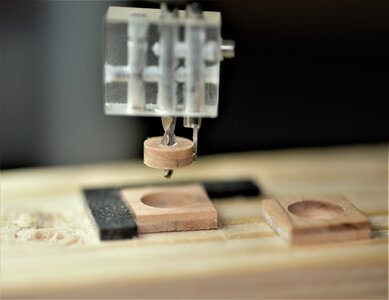
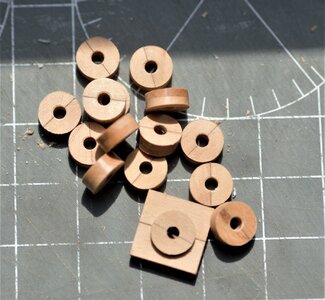
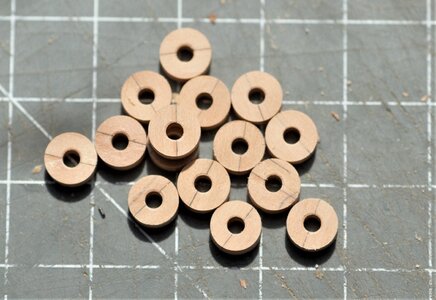
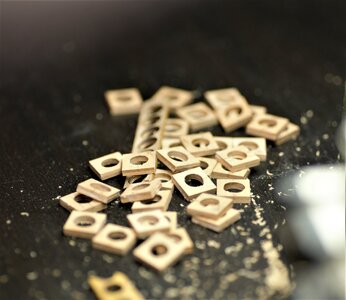
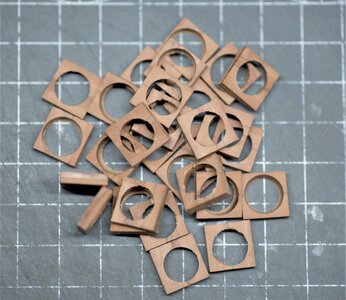
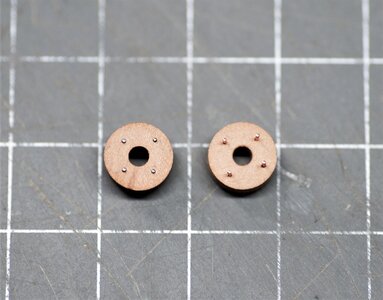
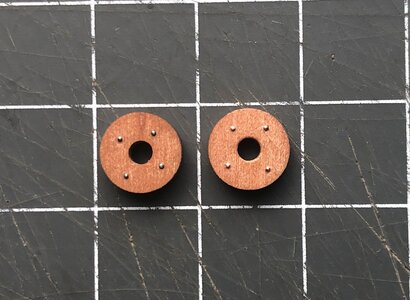
As you can see, they are ready for use as is, but I promised you in the first method to make those trucks more presentable, we will imitate bolts. Will use the same drill press and making another jig, thanks to @Maarten idea.
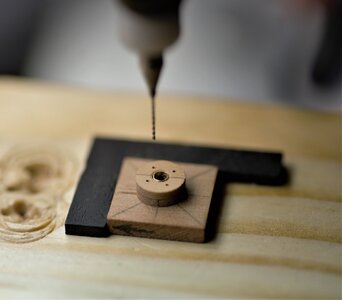
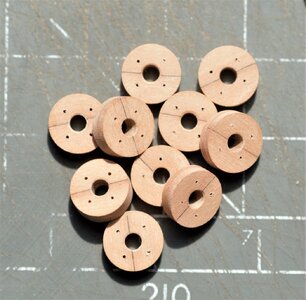
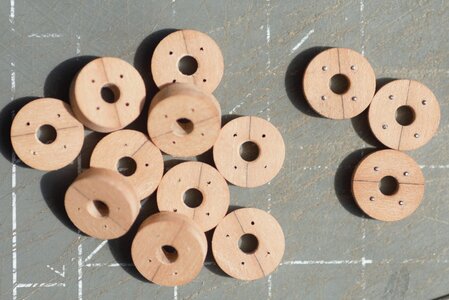
For the bolts, I use Dark Annealed Steel wire by company Hillman, It is very soft and pleasant to work with. First, insert the wire in all 4 holes and cut about 3mm.

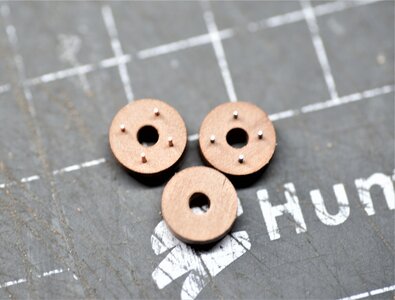
We Will continue on to the next post (25 images limit for a single post)
1. Method # 1 Using the round dowels
I think, this method is commonly used by modelers by its simplicity and availability of materials. Ready-made dowels should be widely available in wood stores in a variety of diameters and most commonly used wood species. Some dowels quality are better than others but they should be perfectly round for our purpose. Here I have some dowels stock in basswood, poplar, and cherry. I bought them in the Art store, surprisedly, they have more sizes and timber variety.

It is worth mentioning that either method will require some power tools. Hopefully, the dowels stock you will plan to use for your trucks is perfectly round. If this is not the case, you will have to round it using a wood-turning lathe (preferably), or regular drill as the turning source.
For the demonstration, the trucks are made from a 6.25mm diameter dowel in this example. First, using a miniature table saw, set up so that the trucks could be cut to the required thickness. The saw blade was used 0.8mm so that the parts would have a clean and sharp edge to them. You may experiment with the blade thickness, otherwise, using the thick blade may cause the trucks to fly when cut, and thus generate the 'kneeling' event on the floor

The next step is to drill a hole in the center of each truck. I make a simple jig, it servers well for all of my methods. It is very simple, hence very convenient for such jobs. Just make sure to position right on the center, otherwise... you know.


Next..? Well...there is no next! You made your own trucks. Congrats! They will suffice to use as-is. Depending on the color of the carriages you may optionally paint or dye to make them look similar. But look...they look round and sounds. However, in my eyes, they are plain and simple. We will make them more presentable by adding bolts imitation. Be sure to continue reading method #2.
Method #2 is much advanced and required some machinery skills to make the tool. This method was invented by Sergey @bibigon and the first time I saw it, I wanted to try it. It makes the truck and the hole in one shot. Intrigued enough??? Here are some images courtesy of Sergey with the tool and ready trucks made by using this tool.


So...I have neither skills nor machinery Sergey has but really wanted to make those trucks. So...I tried. The principle is really simple and used in the tool to cut paper circles. The only difference and challenged to make is the cutter, It must be a specific shape to cut thru the wood and not burn it. I start with the jewelry saw blade, It is made of tooling steel and thin enough. I shape and sharpen to cut the wood. Using the aluminum block, I made the tool.

...and, the results exceeded all my expectations. In 5 minutes, I was able to make a batch of trucks with identical diameters (inside\outside). Check for yourself...

However, I quickly realize, that cutter gets hot and burns the edges of the wood. The cutter obviously needs modifications. But the proof of concept works! I contacted Sergey @bibigon and he sketched the cutter. What a brilliant guy! Many, many thanks, Sergey!

But first things first. I prepared the timber for the trucks. The same techniques were used when I experiment with trucks for my Alert build. I decided to make trucks in halves.


Then, I made a new tool according to Sergey's diagram. I didn't have an aluminum block, so use a piece of Plexiglas. This does the job pretty well, but in the long run, I will have to make a solid base from brass (similar to Sergey's). Plexiglas base has two holes to accept the cutter: on the left for larger truck, on the right for the smaller. Start by drilling the hole, as you deepen in the wood, it makes the center hole first, then, the cutter touches the surface and will cut the outside the truck. NOTE: if it burns the wood, stop and check the cutter. You will probably need to adjust the shape. IT DOES require specific shape (see the sketch from Sergey)


As you can see, they are ready for use as is, but I promised you in the first method to make those trucks more presentable, we will imitate bolts. Will use the same drill press and making another jig, thanks to @Maarten idea.


For the bolts, I use Dark Annealed Steel wire by company Hillman, It is very soft and pleasant to work with. First, insert the wire in all 4 holes and cut about 3mm.


We Will continue on to the next post (25 images limit for a single post)
Last edited:


