• "Thank you for your Donations and Support"
    As we close this Annual Donations Drive, I want to thank you all for your Generosity in Donating to Ships of Scale. It is Greatly Apreciated !!!
    Ships of Scale continues to explore exciting things to offer to the Ship Building Community.

NORSKE LOVE - Billing Boats 1:75 scale

Din62, good afternoon. I watch your construction site with interest. But now that day I cannot understand how the deck will go. Will there be an additional add-on in the place that I have allocated, or is it supposed to be something else?View attachment 268427
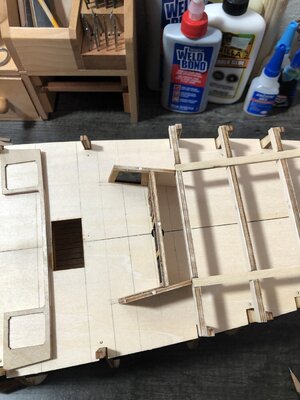
Hi Alexander, the picture angle, along with the placement of the wall is causing an illusion to some degree. So let’s look at the issue I discovered when building the wall.
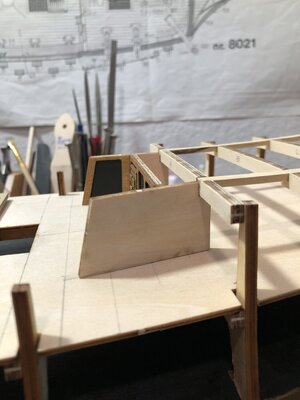
The notches in the side walls are supposed to locate everything from the beam…
DEFA7E98-B548-4A15-BE80-BFB54E95CD65.jpeg
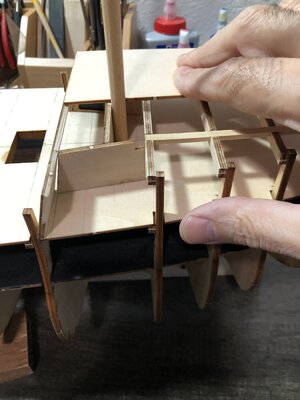
The deck planks will increase the height of the wall, and I can sand everything flush and level prior to installing the upper deck sheet. Which will look something like this…
0137F617-7764-4B18-8773-74C10E14D963.jpeg

Here is the problem…
AEFEBE26-A914-4689-AF17-0C19F541ACFD.jpeg
Using the provided notches, the wall ends up in the middle of the mizen mast! No good!
EE5CB507-E4B3-45B8-89F7-FB788CD3D8CB.jpeg

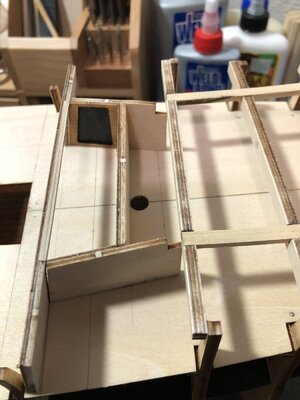
So I have to move everything forward as show above. But that makes the furthest wall at the edge of the upper deck, too far out with no overhang of the deck!
So now I have to notch the back of the wall in front of the mast, to allow the wall to move back towards the deck beam. And this will require making a spacer block for both sides to locate the wall properly, because the notches can’t be fully seated! Big mess!
This kit keeps you on your toes…because almost all these walls are at angles, and you have to locate them precisely and adjust them…with some compound angle corners.
The location of the walls are shown to be printed on the deck sheets, but they are blank! So I am using the deck beams, and the deck sheets that go above the wall, to accurately locate all of the walls. ;)
 
Last edited:
Hi Alexander, the picture angle, along with the placement of the wall is causing an illusion to some degree. So let’s look at the issue I discovered when building the wall.
The notches in the side walls are supposed to locate everything from the beam…
View attachment 268487
The deck planks will increase the height of the wall, and I can sand everything flush and level prior to installing the upper deck sheet. Which will look something like this…
View attachment 268494

Here is the problem…
View attachment 268497
Using the provided notches, the wall ends up in the middle of the mizen mast! No good!

View attachment 268498

So I have to move everything forward as show above. But that makes the furthest wall at the edge of the upper deck, too far out with no overhang of the deck!
So now I have to notch the back of the wall in front of the mast, to allow the wall to move back towards the deck beam. And this will require making a spacer block for both sides to locate the wall properly, because the notches can’t be fully seated! Big mess!
This kit keeps you on your toes…because almost all these walls are at angles, and you have to locate them precisely and adjust them…with some compound angle corners.
The location of the walls are shown to be printed on the deck sheets, but they are blank! So I am using the deck beams, and the deck sheets that go above the wall, to accurately locate all of the walls. ;)
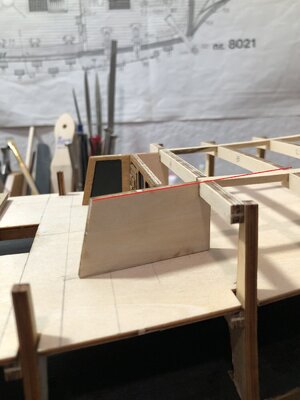
Dean, if I understood correctly, then in the future it will be necessary to grind off as on the red line to get a smooth flooring. So?
DEFA7E98-B548-4A15-BE80-BFB54E95CD65.jpeg
 
Oh boy - the wall across the mast hole is not fun. It makes you sometimes wonder whether some kit manufacturers actually build the ship themselves AFTER they have drawn up the plans and written the instructions.
 
Dean, if I understood correctly, then in the future it will be necessary to grind off as on the red line to get a smooth flooring. So?
View attachment 268515
Yes…once I plank the deck, the wall will sit on the deck. Then I can do the final fairing of the top of the wall with the deck beams. Right now I am trying to properly locate the wall so I can build it. ;)
 
Oh boy - the wall across the mast hole is not fun. It makes you sometimes wonder whether some kit manufacturers actually build the ship themselves AFTER they have drawn up the plans and written the instructions.
The problem is this is an old kit, with old instructions, that has gone through many changes over the years. They changed materials, blocks, figurehead, wood and manufacturing processes to include lazor cuttting. But they have never updated the instructions, which were never good to begin with, and now are even more confusing! They show the wall locations are printed on deck sheets and they are not there. The part location sheets have numbers missing on one page! I can identify most of the pieces by shape.
I have to say I am not impressed at all! The blocks are plastic! I am going to be giving Dry Dock a lot of business! I most likely will be replacing a lot of the wood for the railings and other areas. I will replace the rope…and doubt I will use the provided sail material. So basically I’m using the foundation of frames, keel and deck sheets. After that I am just using the full scale plans! ;)
So In conclusion, only because I like this ship so much, and no one else makes a kit of it, I will endure this poor kit and turn it into something that is presentable! But I fear all kits need some embellishments, some more than others! So it’s a good thing I got this on sale, because I’m not sure what I paid for if I’m not using more than half of the provided materials? :p
I know what you mean! I've overlaid or replaced nearly everything you see on my Billings Vasa with the exception of the plastic carvings. Watching your patients and willingness to experiment are a source of inspiration Dean.
 
I know what you mean! I've overlaid or replaced nearly everything you see on my Billings Vasa with the exception of the plastic carvings. Watching your patients and willingness to experiment are a source of inspiration Dean.
Thank you Daniel! As I said, I really like this ship... and it can be beautiful if someone is willing to go the extra mile! ;)
 
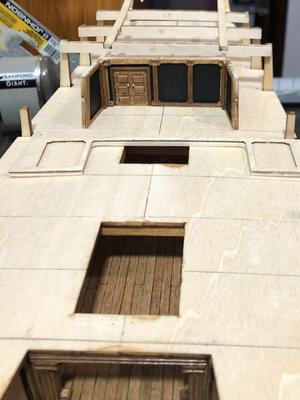
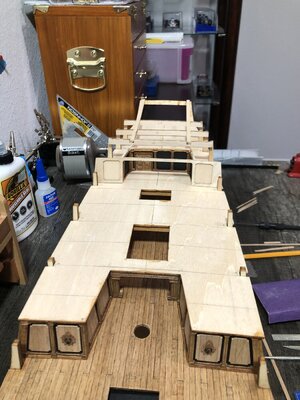
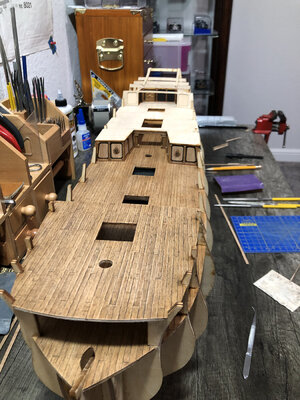
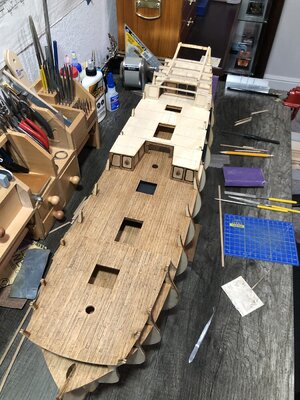
I continue to work on the back wall and have added columns and base trim. Next will be side walls and front wall. My plan is to go ahead and finish these walls like on the lower deck. That way once i plank the deck I can install it as a one piece sub assembly. Then fair the top with the deck beams and add the upper deck, which is the last deck to be installed.
Some pics…
AECAC53A-2F14-4EB9-B52D-00756B5042AD.jpeg4087A51F-DCF1-4079-BE7C-F90DB047900E.jpeg51462CEB-8F16-4321-B222-D18310066B57.jpeg866FDDDD-A53E-4109-8E04-1124E89C83A6.jpeg
 
I continue to work on the back wall and have added columns and base trim. Next will be side walls and front wall. My plan is to go ahead and finish these walls like on the lower deck. That way once i plank the deck I can install it as a one piece sub assembly. Then fair the top with the deck beams and add the upper deck, which is the last deck to be installed.
Some pics…
View attachment 268547View attachment 268548View attachment 268549View attachment 268550
Looking good Dean
 
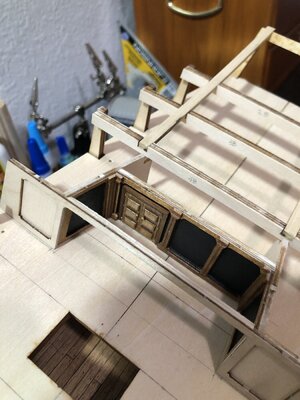
I glued on the front wall. Now to sand and stain and finish with all the trim and panels.
I sanded the panels on the doors in hopes they will match the walls when I get those panels on.
I’m not 100 percent happy with the doors, but they are so tiny I had to hold parts with tweezers and try to bevel the panels once glued on the door. At this point, the only way to improve them, is to carve them …
E29D3864-228C-475C-A75C-E81FB2523509.jpeg
 
I glued on the front wall. Now to sand and stain and finish with all the trim and panels.
I sanded the panels on the doors in hopes they will match the walls when I get those panels on.
I’m not 100 percent happy with the doors, but they are so tiny I had to hold parts with tweezers and try to bevel the panels once glued on the door. At this point, the only way to improve them, is to carve them …
View attachment 268562
Carving those doors would be a real nice challenge and more convincing...
 
I glued on the front wall. Now to sand and stain and finish with all the trim and panels.
I sanded the panels on the doors in hopes they will match the walls when I get those panels on.
I’m not 100 percent happy with the doors, but they are so tiny I had to hold parts with tweezers and try to bevel the panels once glued on the door. At this point, the only way to improve them, is to carve them …
Maybe printed them on a 3D printer?
 
Back
Top