• "Thank you for your Donations and Support"
    As we close this Annual Donations Drive, I want to thank you all for your Generosity in Donating to Ships of Scale. It is Greatly Apreciated !!!
    Ships of Scale continues to explore exciting things to offer to the Ship Building Community.

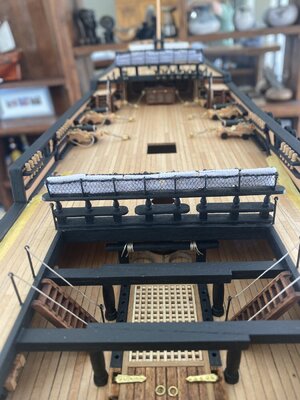
HMS Victory Mantua 1:78 (first build) by Grant Tyler

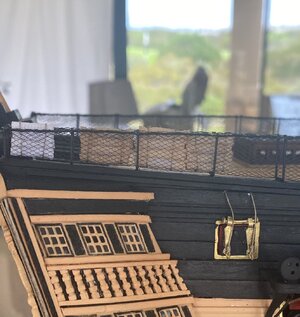
A lot of work to match the varying angles. I LIKE it!

Glenn
Good morning Glen.Thank you. Each “pillar” ,for a better word, is individually measured- takes a while. Using a dremel as a mini lathe is not the best as I don’t get each one the same. I’m happy with the improvement of the stern. Was a challenge from the start to get the stern ok. Cheers
 
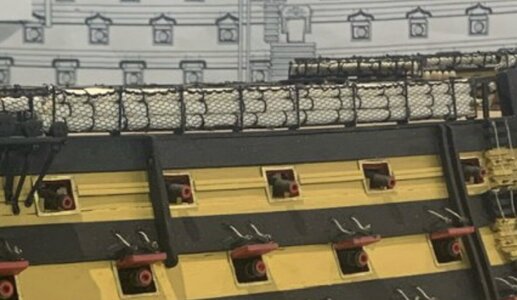
That netting looks SUPERB Grant! Now that very same netting needs to be filled with hammocks ... right?
Goeie More Heinrich. It is my intent to do so however thus far these have failed me.
F2447A61-F45E-4E6F-873E-90DC9D188504.jpeg
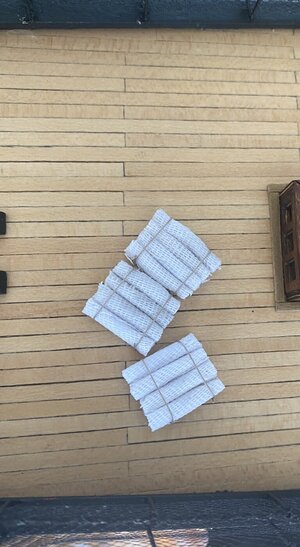
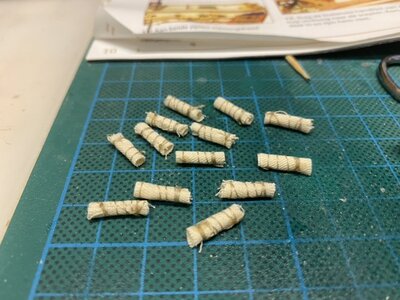
I used some Muslim rolled and painted with PVa and water mix (50/50). My son, in his explicit manner, explained that the Victory looked like it was delivering woman sanitary products. o_O. So I strapped them to make them look a little more like hammocks
B17EF868-1E4C-4BB2-863C-0E242FF81397.jpeg
310E1551-67E3-4A7B-9B55-6AC7566DCC78.jpeg
Stained in tea for 15min as the white was too stark. I did not like them. Muslim is not the right material - the weave is too large and they don’t finish well.

The other question- some modelers roll them, like I have while other fold them up. The folded ones protrude above the netting’s where the Hammock cranes are smaller. I can’t find any authoritative text on which way these actually go. When I do I will post and continue with these.
 
Never in my entire life had I thought that I would halt the build of the WB, to give someone advice on a Victory! ROTF Ye gods ... I must like you! :)

The following comes from Modelbouwforum as executed by Koos in his Victory build. The tip, however, comes from the one and only @pietsan Piet Sanders.

8A0EA790-4E08-455F-8114-A2C9B65F4334.jpeg
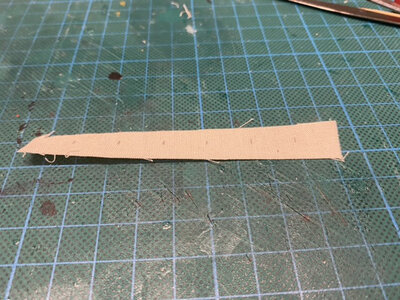
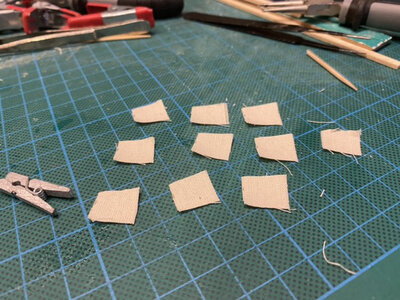
A piece of cloth (I know you are going to ask me what type of cloth - I don't know yet), was first cut to a width of 12mm and then marked 14mm apart.

58BA7313-D129-4238-995C-0EE15711D72F.jpeg
These are then cut on the markings.

42F2E654-8A3C-4BFE-B1F1-4CE877B8F789.jpeg
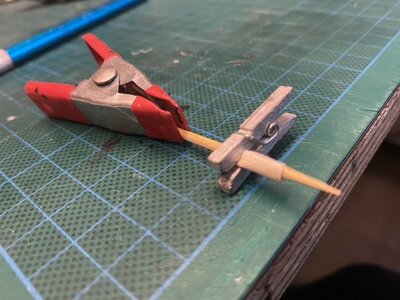
It is then rolled around a toothpick or cocktail stick and clamped into position with a clothes washing clip.

D53F6C4D-6174-4985-A7D1-111CB48ED9F1.jpeg
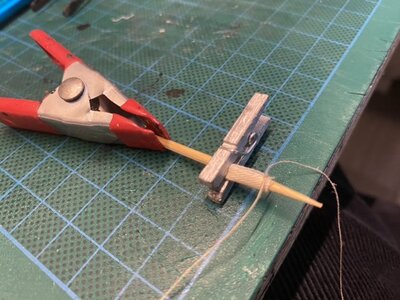
With 0.10mm rope, a knot is made on the one end.

855317DD-DCCD-4EF5-9BAF-7178C090FBDD.jpeg
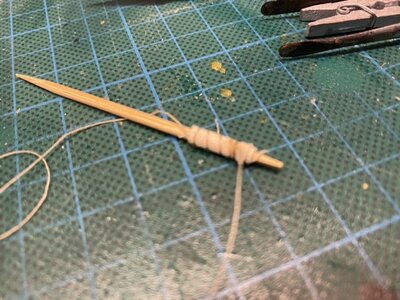
And while holding the rope in one position, the toothpick is rotated so that the rope is wrapped around it as on the picture. Both knots are then secured with a drop of CA glue.

39D12AB7-4413-4F4C-B7F6-2CC2C1EB9A0B.jpeg
This then results in hammocks of 12mm x 3mm.

1BD8DD2E-3347-49E8-A79E-03F7F48A7AF6.jpeg

And after making approximately 350 of those, you should be good to go!
 
Colleagues, good afternoon. Some reflections in hearing on laying beds.
I'm not sure exactly how it was in the British Navy, but in the Russian berths were installed vertically with an inclination to the stern. If the beds are stacked on top of each other, then it is likely that the bottom row of beds will never dry out, but will collect moisture in itself. Another purpose of the beds in battle is protection from bullets and shrapnel. I'm not sure exactly about the British Navy, these are my thoughts.
 
Oh boy! Another reason why I should not be posting anything on British ships! Just ignore the stashing picture then Grant!
 
Never in my entire life had I thought that I would halt the build of the WB, to give someone advice on a Victory! ROTF Ye gods ... I must like you! :)

The following comes from Modelbouwforum as executed by Koos in his Victory build. The tip, however, comes from the one and only @pietsan Piet Sanders.

View attachment 283693
A piece of cloth (I know you are going to ask me what type of cloth - I don't know yet), was first cut to a width of 12mm and then marked 14mm apart.

View attachment 283694
These are then cut on the markings.

View attachment 283695
It is then rolled around a toothpick or cocktail stick and clamped into position with a clothes washing clip.

View attachment 283697
With 0.10mm rope, a knot is made on the one end.

View attachment 283696
And while holding the rope in one position, the toothpick is rotated so that the rope is wrapped around it as on the picture. Both knots are then secured with a drop of CA glue.

View attachment 283698
This then results in hammocks of 12mm x 3mm.

View attachment 283699

And after making approximately 350 of those, you should be good to go!
Ahh Heinrich it must be because I am such a likable guyROTF. Thanks for this.
 
Oh boy! Another reason why I should not be posting anything on British ships! Just ignore the stashing picture then Grant!
Thanks Alexander and Thomas. Yep I thought this may be the historical way of lining the hammocks in. As I mentioned these do not look so good in the small cranes. Heinrich (some guys gonna beat me for this;)) I may still be using your method. It just looks better. On those models where hammocks are in- most don’t. Thanks all.
 
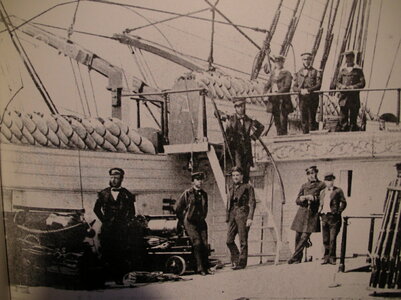
In the daytime, the hammocks were carefully rolled up, with the bedding and perhaps some spare clothes inside them. The boatswain is to pay particular attention that when the hammocks are piped up, they are taut and nearly lashed so that no bedding appears. No clothes are to be shown in them.
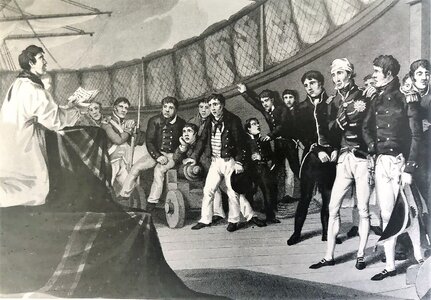
The hammocks were placed in netting arranged along the sides of the ship, for it was believed that they have some value in stopping the enemy fire. In bad weather, the hammocks were lashed uptight and kept below decks.

The hammocks on board Vanguard.

IMG_2256.jpeg
 
Good morning :D. This morning I am looking at the rake of the HMS victory masts.

Here is what I found out (short and sweet). This is all new to me so no guarantee it is 100% correct. Raking helps:
1. Counter act the weight of the sails.
2. Assists with the dropping of the sails when loaded in wind.
3. Based on hull design - if too vertical to then the forces are pulling more down causing the ship to plunge more into the sea effecting the trim path Through the water and it ploughs rather than drives through the water.
4. The rake also ensures the force is directed through the axis of the ship to achieve forward direction.
5.Some smaller vessels also have adjustable rake to assist when sailing on different tacks I.e into the wind or downwind.
(References googleROTF)

My personal thought - it looks way better on certain ship designs when the masts are raked . E.g. imagine The Pride of Baltimore with vertical masts. Those rakes make the little ship.

My plea for help- maybe @Alexander74 or @Thomas Marocke or @Jimsky or @Heinrich (sorry British ships againROTF) or @anyoneelse will be able to assist me here.The rake according to my plan sheets are (degrees from vertical) :foremast 0, Main mast 2, and Mizzen 4.

My research has come up with foremast vertical Main mast 1.5 and Mizzen 3.5.

Would the 0.5 difference matter , is this calculated from the deck line (it is not horizontal on the Victory) or from a horizontal center line and lastly are these figures correct.

Thanks all
 
Here are my findings. They might be not the exact answers but will give you an Idea.

The inclinations of the lower masts depended on the trimming of the particular ship. Experience showed that some ships sailed better with forward-leaning masts while others performed better at their best only with masts that were inclined aft - this being the majority. It was widely believed that for beamier ships the mast standing closer to amidships should have the greatest incline aft, Further, it was believed that longships managed better with masts perpendicular to the waterline, since it was believed that inclined masts, already straining the forward part of the partners, may actually break them under wind pressure.
Chapman recorded data on the inclination of masts. He recommended an inclination aft of the mainmast by one thirteen and the mizzen mast by one-fifteenth of its length (measured at the cup), while the formats stood vertical.
This translates to, Foremast is vertical, Mainmast is inclined about 1.5 to 2 degrees toward the stern, Mizzenmast is inclined about 3.5 to 4 degrees toward the stern.
Jim thank you - much appreciated
 
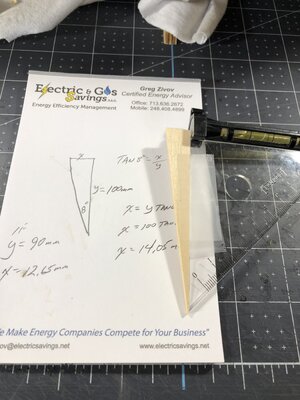
Hi Grant, in determining the rake or inclination of the mast on the Vasa I drew a center line on the mast (directly on the plans) then drew a vertical line that met the center line at the railing (it does not matter where the vertical intersects the mast centerline) the angle remains the same. Then I measured the angle with a protractor to the nearest full degree.

IMG_1518.jpg

You were wondering if 1/2 of a degree makes a difference. Let's see, if y=100mm and the angle is 0.50 deg. x=0.87mm. So, if you had a total mast height of 1 meter, distance x=8.7mm. To me, I would have a very difficult time trying to achieve 0deg 30min accuracy with just a protractor. Therefore, I would just measure to the nearest full degree and not worry about it.

Hope this helps.
 
Hi Grant, in determining the rake or inclination of the mast on the Vasa I drew a center line on the mast (directly on the plans) then drew a vertical line that met the center line at the railing (it does not matter where the vertical intersects the mast centerline) the angle remains the same. Then I measured the angle with a protractor to the nearest full degree.

View attachment 284107

You were wondering if 1/2 of a degree makes a difference. Let's see, if y=100mm and the angle is 0.50 deg. x=0.87mm. So, if you had a total mast height of 1 meter, distance x=8.7mm. To me, I would have a very difficult time trying to achieve 0deg 30min accuracy with just a protractor. Therefore, I would just measure to the nearest full degree and not worry about it.

Hope this helps.
It does Daniel- a lot. X and y’s where a long time ago especially when a tan is thrown in;). The full degree measurement works for me. Thank youThumbsup. I have some adjustment to do (small amounts thankfully) so I should manage this ok. “Touch wood” Cheers.
 
Back
Top