HMS Fly Build (Amati) 1:64 by Nomad

Thanks Grant! I must admit that the Amati material does look like good quality, although I only have Artesania Latina to compare with at this stage, whose rigging thread in particular left a bit to be desired.

This is going to be a long movie, but thanks for climbing aboard. Feel free to use your remote to stop, rewind or change channels at any time. The pause is most welcome, but please, never press the fast-forward button ROTF
I agree with your opinion about Artesania Latina.
Amati is far superior in every way.
Have a good time !
 
Right, so here we go again, workbench swabbed, tools cleaned, blades replaced, cleared for action. There was a definite sense of déjà vu returning to the same starting point as my Bluenose II nearly a year ago, extracting sheet parts with infinite care and filing away all those nasty little tabs :)

The most noticable difference with this Amati kit so far are the plans and instructions. Where Artesania Latina provided many colourful pictures as a guide and no ship plans at all, Amati supplies mainly written instructions only and 1:1 scale plans of all the parts of the ship. It assumes some prior knowledge of ship building for sure, and it feels like I've left the playground and started high school where I actually have to start thinking for myself ROTF

So just a modest start so far, keel and ribs removed in preparation for a dry fit.

View attachment 306943
Love your enthusiasm, clean work site and orderly approach. Something I need to continue to work on. The kit's materials look very nice. I'm sure your pre-cleaning char and other defects on the wood helps with the clean appearance. Time to "Make Sail"!!!

I will enjoy watching your journey. Thank you for sharing your project!

Ken
 
That's what I would call "yumping into the deep"!
As I'm working my way through a BN PoF build, there's no doubt in my mind I will not go from simple to bad with any next model.
Having said that, I'll be following your next building adventure with great interest.
I wish you happy sailing on your journey.
Enjoy!
Johan
 
Love your enthusiasm, clean work site and orderly approach. Something I need to continue to work on. The kit's materials look very nice. I'm sure your pre-cleaning char and other defects on the wood helps with the clean appearance. Time to "Make Sail"!!!

I will enjoy watching your journey. Thank you for sharing your project!

Ken
Thanks Ken, I hope not to disappoint :p
 
That's what I would call "yumping into the deep"!
As I'm working my way through a BN PoF build, there's no doubt in my mind I will not go from simple to bad with any next model.
Having said that, I'll be following your next building adventure with great interest.
I wish you happy sailing on your journey.
Enjoy!
Johan
Thanks Johan. You're right, it is a bit of a jump into the deep but at least not into the unknown. At least I hope not. I find I don't have the same level of timidity as I did at the start of the Bluenose II, and maybe all that plank bending, hull fairing, scupper shaping, sail re-sizing and endless ratline hitching does actually help build confidence for your next model :p
 
Hi Nomad
The laser cut pieces on your photo look qualitativ very impressive.I have also taken my seat to follow your build.
I wish you all the best by finishing your model
Thank you Korsan, and welcome aboard :)
 
Thanks Johan. You're right, it is a bit of a jump into the deep but at least not into the unknown. At least I hope not. I find I don't have the same level of timidity as I did at the start of the Bluenose II, and maybe all that plank bending, hull fairing, scupper shaping, sail re-sizing and endless ratline hitching does actually help build confidence for your next model :p
Well, before even thinking about a next shipsmodel, I first and foremost want to complete my current build...
 
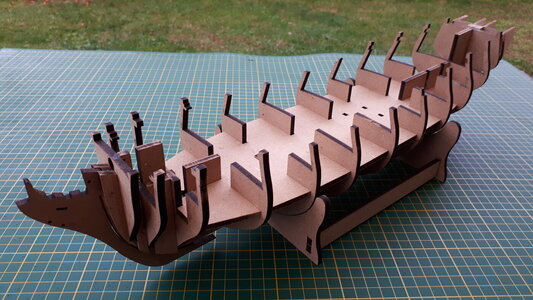
Interestingly, the keel and bulkhead frames of this Amati kit are cut from fibreboard. They are 5mm thick and certainly heavier than plywood, but no signs of warpage. The parts fitted together very well, square, and required no real adjustment at all.

0055_20220512_hms_fly.jpg

The instructions call for a reduction of the stern keel area to half its original width to allow planking to join flush with the sternpost. This prompted me to better understand the science behind bearding and rabbet lines, a process my Bluenose II had not required. I used a length of 2mm tape to mark out the desired width of the stern.

0060_20220512_hms_fly.jpg

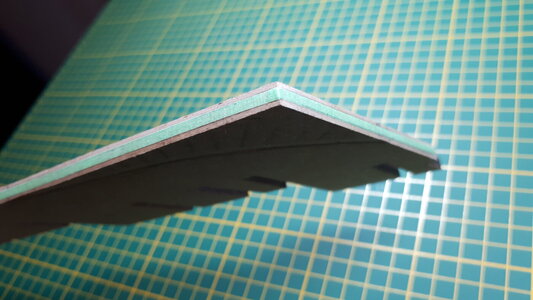
A medium hobby file to taper the keel gradually from the bearding line towards the edge of the keel.

0065_20220512_hms_fly.jpg

The rabbet was more of a forty-five degree bevel than a right-angle recess at the base of the keel. The bevel was applied either side of the keel and should give the garboard strake a reasonably flush purchase.

0070_20220512_hms_fly.jpg

The rabbet was applied all along the keel from stern to bow and up the stem as well. It seemed reasonable to assume that a recess along the stem will provide a secure termination point for the forward planks.

0075_20220512_hms_fly.jpg

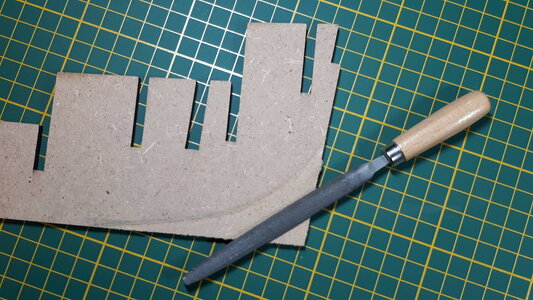
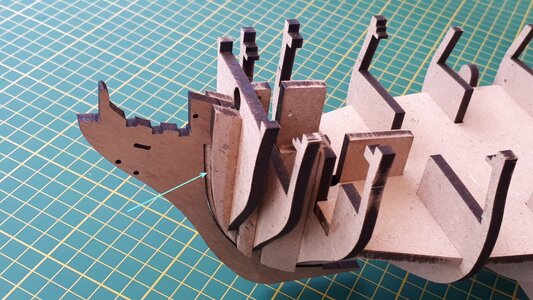
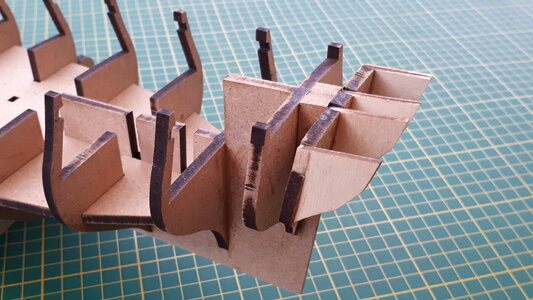
The stern area is extended by counter frames to support the upper deck and transom later on. Notice that I have not removed any of the laser-charring from the edges of the wood. It does not appear to lessen the glue bonding and I'm convinced it will serve as a useful progress indicator when it comes to fairing the hull.

0080_20220512_hms_fly.jpg
 
Last edited:
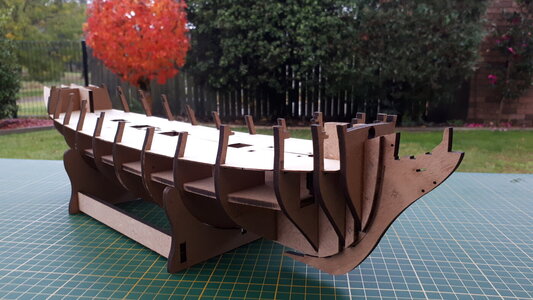
With the bearding line and rabbet work completed I glued the keel and frame assembly in place. The stem key is still dry-fit, as is the thin plywood gun deck that fitted snugly between the frames like a jigsaw piece.

0085_20220512_hms_fly.jpg

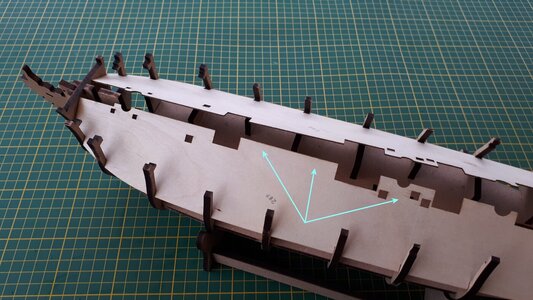
The gun deck is formed by two plywood halves that meet at the centre. The bulkhead frames do not run the full breadth of the hull which leaves the gun deck unsupported at the meeting point. I may need to fashion additional support from the lower deck or possibly join the two gun deck halves underneath using a spare plank. We'll see.

0090_20220512_hms_fly.jpg
 
Last edited:
There are a lot of things I like about your build Mark. The rabbet line does indeed extend all the way to the stem of the keel. You are absolutely correct in not removing the char from the frames. The belief that char affects the adhesion of the glue is an old wives' tale while it will prove to be a valuable guideline in fairing the hull.
 
I may need to fashion some additional support from the lower deck, or possibly join the two gundeck halves underneath using a spare plank.
I'm with you on this one; the support only on those flimsy looking frame ends and that centerline "hinge" joint is just not that well thought out. Wonder what you'll end up with.
 
The gundeck is formed by two plywood halves that meet at the centreline of the hull. They are supported almost solely by the bulkhead frames which do not run the full breadth of the hull, leaving the gundeck a bit vulnerable in the centre where they join. I may need to fashion some additional support from the lower deck, or possibly join the two gundeck halves underneath using a spare plank. We'll see.
NOMAD, I had a similar situation with a kit, I solved it by putting a reinforcement underneath. It worked very well. Good luck
 
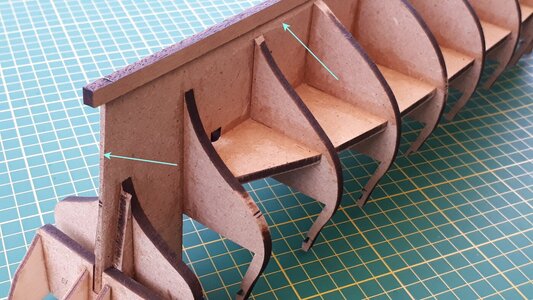
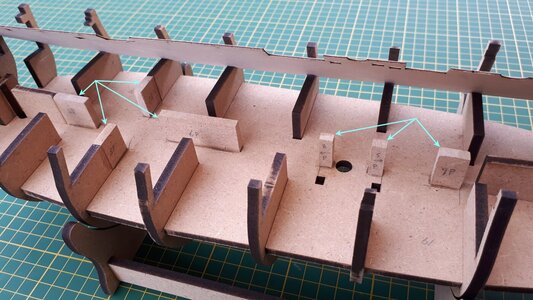
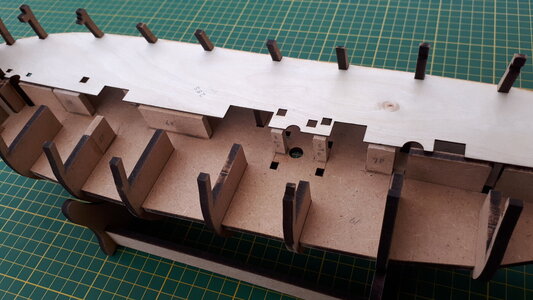
I discovered that other HMS Fly builds also realised the need for additional support for the two gun deck halves. A look-ahead, stitch-in-time kind of thing. So prior to fixing the gun deck in place, which would make the lower deck inaccessible, I fashioned a series of posts from spare fibreboard and glued them strategically to the lower deck.

0095_20220513_hms_fly.jpg

The only trick was to ensure that the support posts will not interfere with any of the deck fittings, and that the height of each post is marginally taller than the surrounding frames to maintain the overall camber of the gun deck.

0100_20220513_hms_fly.jpg
 
Last edited:
Your idea of adding additional support points under the split of the false deck is spot on. Great idea! Something I will remember as I have struggled with uneven edges on models I have done with similar construction details. Well done!
 
Is it me or aren't those frames looking rather frail? Especially when one still has to bevel those frames prior to planking?
 
Back
Top