La Soleil Royal 1:90 Scale (ZHL) A Bandido Build

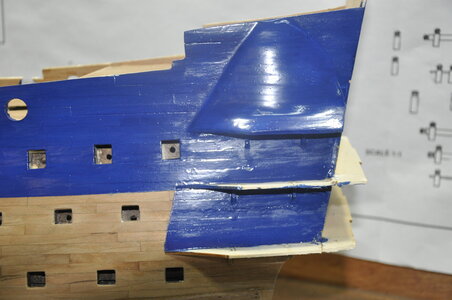
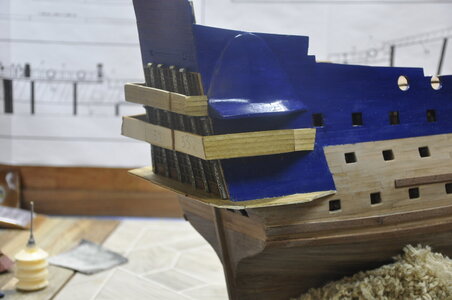
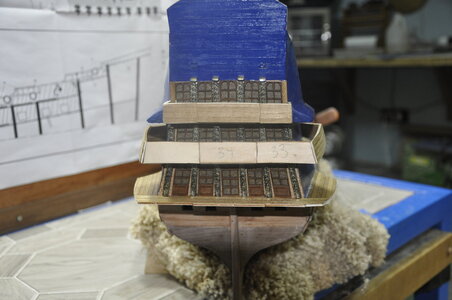
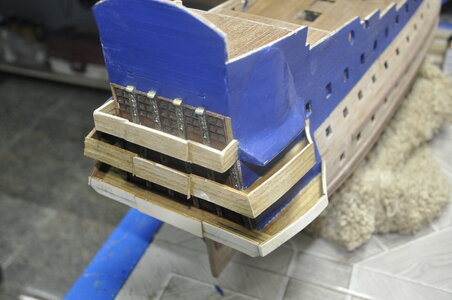
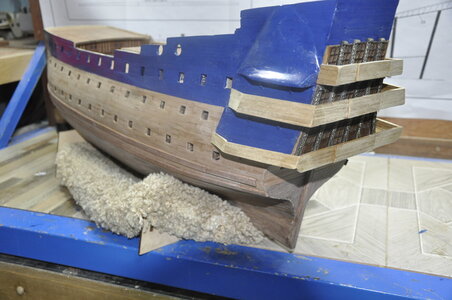
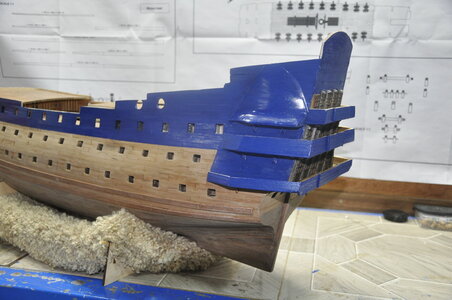
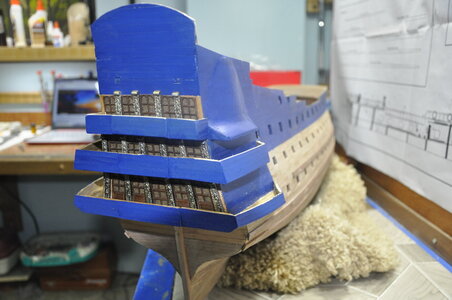
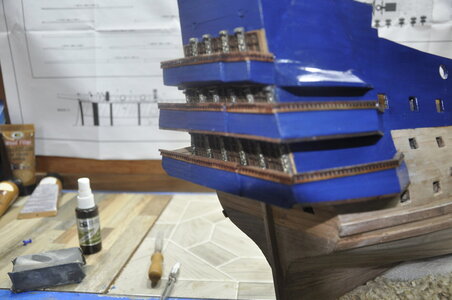
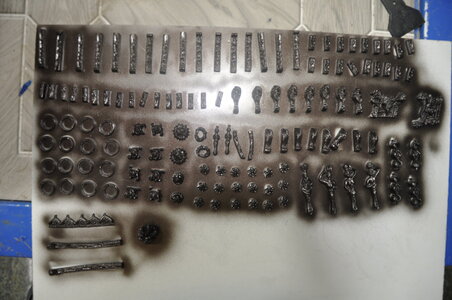
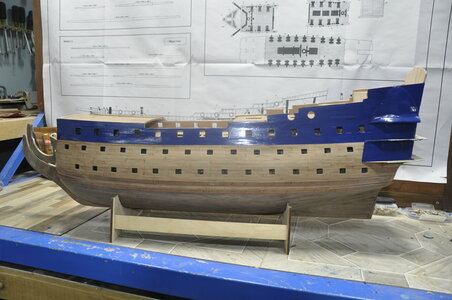
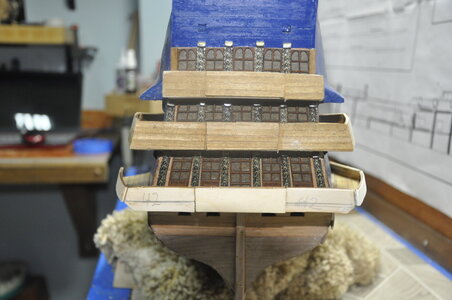
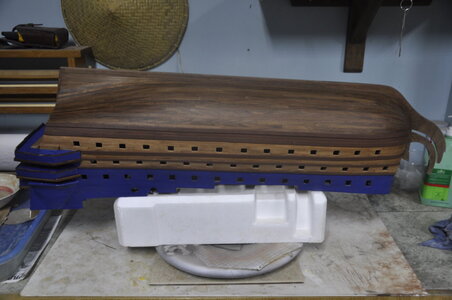
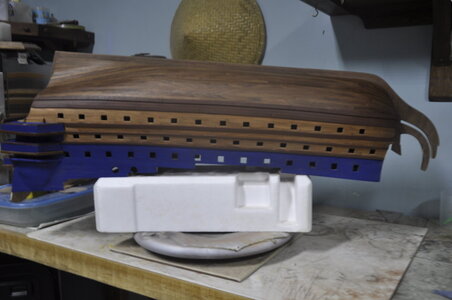
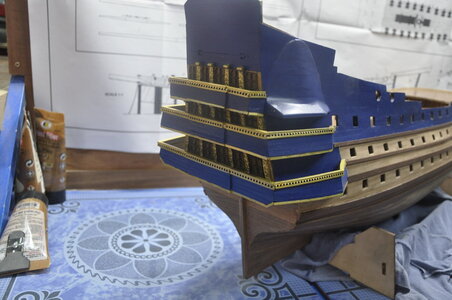
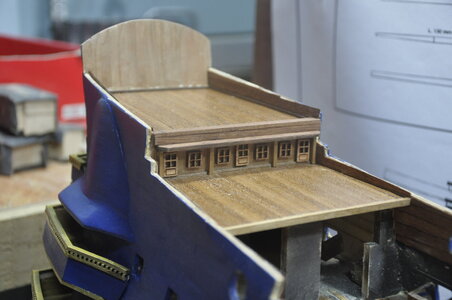
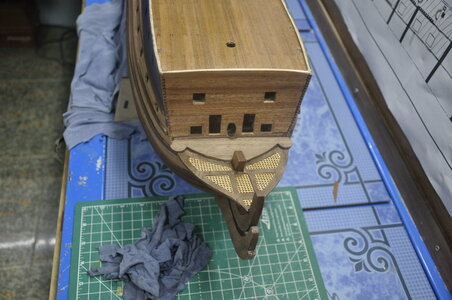
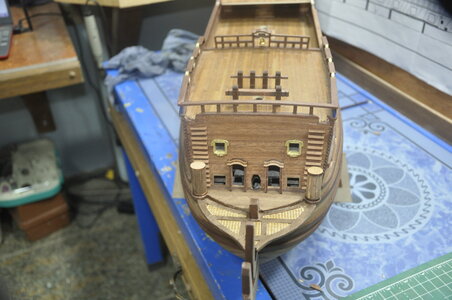
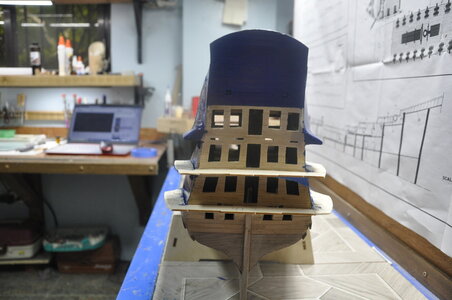
Thought i would post something on my build its been awhile Been working on the poop decks and choose a blue for the upper portions of the hull and poop, been kind of a struggle choosing a color, looked at many models of the le soleil and decide to mix my own color!!! its a little dark but it will do, as Blue is not my favorite color anyway!!! The construction of the poops are not bad once you ignore the almost worthless plans and build them to fit! I also worked on all the metal hardware, Painting then Bronze and will high light with gold using the dry brush method. The metal is going to be a pain to install and the ship will weigh a ton! Wish someone had a upgrade kit for the hardware made from resin or natural wood?? I have looked but know luck! anyway its good to be back on the build the last picture is a little blurry. View attachment 321128View attachment 321129View attachment 321130View attachment 321131View attachment 321132
Spent the last several days working on the Poop decks!!! fairly Tedious work!! Had many alterations to get them to fit the way I wanted? I think I have decided to leave the hand rails and wood rail trim natural?? I know it shows everything gold? My plan is to try and tone down the bling a little!!! We will see as I progress! I found some railing trip from left overs from another ship I built and used on the railings_DSC0095.JPG_DSC0098.JPG_DSC0098.JPG_DSC0099.JPG_DSC0100.JPG_DSC0103.JPG_DSC0107.JPG_DSC0107.JPG_DSC0108.JPG_DSC0110.JPG_DSC0111.JPG

_DSC0096.JPG

_DSC0094.JPG

_DSC0104.JPG
 
Spent the last several days working on the Poop decks!!! fairly Tedious work!! Had many alterations to get them to fit the way I wanted? I think I have decided to leave the hand rails and wood rail trim natural?? I know it shows everything gold? My plan is to try and tone down the bling a little!!! We will see as I progress! I found some railing trip from left overs from another ship I built and used on the railingsView attachment 321953View attachment 321954View attachment 321954View attachment 321955View attachment 321956View attachment 321957View attachment 321959View attachment 321959View attachment 321960View attachment 321961View attachment 321962

View attachment 321951

View attachment 321952

View attachment 321958
good progress
 
Spent the last several days working on the Poop decks!!! fairly Tedious work!! Had many alterations to get them to fit the way I wanted? I think I have decided to leave the hand rails and wood rail trim natural?? I know it shows everything gold? My plan is to try and tone down the bling a little!!! We will see as I progress! I found some railing trip from left overs from another ship I built and used on the railingsView attachment 321953View attachment 321954View attachment 321954View attachment 321955View attachment 321956View attachment 321957View attachment 321959View attachment 321959View attachment 321960View attachment 321961View attachment 321962

View attachment 321951

View attachment 321952

View attachment 321958
That was the most difficult part of the build for me. You’re doing a great job with it, Bandido!
 
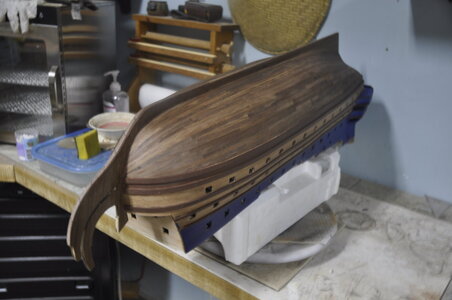
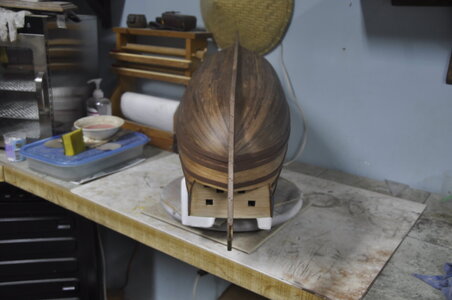
Applied the first 2 coats of Varnish on the hull. I used Vallejo Matt and applied with my #5 needle air brush. will let dry for 24hrs and will apply 2 more coats for a total of 4!! I am pleased with my choice of black walnut and American cherry! _DSC0117.JPG_DSC0119.JPG_DSC0118.JPG

_DSC0120.JPG
 
Applied the first 2 coats of Varnish on the hull. I used Vallejo Matt and applied with my #5 needle air brush. will let dry for 24hrs and will apply 2 more coats for a total of 4!! I am pleased with my choice of black walnut and American cherry! View attachment 322539View attachment 322540View attachment 322541

View attachment 322543
I have been struggling with those heavy Metal zhl calls ornaments especially the 2 hunks of heavy metal ornaments that installs under the lower poop deck on each side of the ship If I can not figure a way of installing them correctly I might not install them at all!!
 
I have been struggling with those heavy Metal zhl calls ornaments especially the 2 hunks of heavy metal ornaments that installs under the lower poop deck on each side of the ship If I can not figure a way of installing them correctly I might not install them at all!!
HI Bandido
Yes, these 2 pieces under the poop deck are a pain
I have installed them using 2 component glue and filled the gap between the hull and those parts.
THen painted in blue and gold.
 
Bandido, I bought a heat gun. They don’t bend well otherwise. In fact, they break. I haven’t put them on yet; I’m using two part epoxy and taping them down one at a time to hold them on.
 
started to work on the decking detail doors windows railings and etc. will start as directions suggest from the Bow back! I also decided to repaint all the hardware brilliant Gold along with that the Poop deck railings. Have also been discussing casting some of the heavy parts with resin I ordered all the stuff to hopefully reproduce the metal parts thanks to Derek Payne's suggestions and instruction

_DSC0124.JPG

_DSC0125.JPG

_DSC0123.JPG
 
started to work on the decking detail doors windows railings and etc. will start as directions suggest from the Bow back! I also decided to repaint all the hardware brilliant Gold along with that the Poop deck railings. Have also been discussing casting some of the heavy parts with resin I ordered all the stuff to hopefully reproduce the metal parts thanks to Derek Payne's suggestions and instruction

View attachment 323537

View attachment 323538

View attachment 323539
Hi Bandido
The railing is very nice. Great job
 
Bandido, you did a great job on adding the rear galleries. MUCH better than mine. Very precise and well measured.
Well far from perfect!! they were a pain but once I decided not to use the support or alignment pieces and just used the parts for the floors and sides it made it achievable for me to get assembled. In my opinion, Model company's over complicate the assembly process in there instructions!!!
 
Hi Bandido
The railing is very nice. Great job
Gilbert thanks for the encouragement as there are areas in this model ship that are frustrating and this was one of them for me! A I mentioned before assembly instructions can over complicate the assembly and I am a firm believer that most of us modelers could create other ways to approach a given assembly and that is why this modeler site is so GREAT!! a lot and experience around here!!!!
 
Gilbert thanks for the encouragement as there are areas in this model ship that are frustrating and this was one of them for me! A I mentioned before assembly instructions can over complicate the assembly and I am a firm believer that most of us modelers could create other ways to approach a given assembly and that is why this modeler site is so GREAT!! a lot and experience around here!!!!
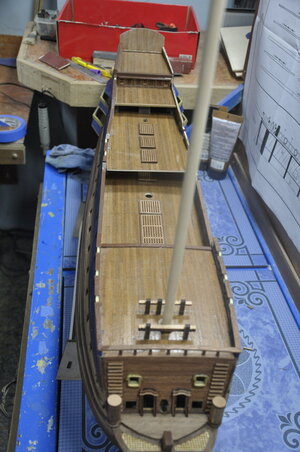
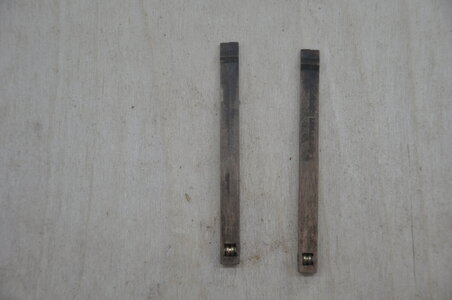
Started on the railings and deck hardware and fittings railing are a little tedious!! working from the bow back worked on the 2 cats and decided to use guitar string ball ends for the pulleys rather than the supplied wood ones worked great! looks good!! The other thing I did on the railings was give up on trying to create those curved hand rail pieces so I used straight pieces at the railing ends?? looks ok? will finish up the railings tomorrow. checked all the mast openings to make sure they fit correctly and adjusted where needed. after the railings and deck stuff I will begin to install all the exterior gold Bling!!
I will be re-casting some of the heavy parts from resin. the 2 stern pieces below the poops for sure! the other thing I decided to do is close the 2 front lower cannon ports as with the stern lower cannon ports!

_DSC0133.JPG

_DSC0134.JPG

_DSC0131.JPG
 
Started on the railings and deck hardware and fittings railing are a little tedious!! working from the bow back worked on the 2 cats and decided to use guitar string ball ends for the pulleys rather than the supplied wood ones worked great! looks good!! The other thing I did on the railings was give up on trying to create those curved hand rail pieces so I used straight pieces at the railing ends?? looks ok? will finish up the railings tomorrow. checked all the mast openings to make sure they fit correctly and adjusted where needed. after the railings and deck stuff I will begin to install all the exterior gold Bling!!
I will be re-casting some of the heavy parts from resin. the 2 stern pieces below the poops for sure! the other thing I decided to do is close the 2 front lower cannon ports as with the stern lower cannon ports!

View attachment 324401

View attachment 324402

View attachment 324403
one of the pictures is blurry here is another_DSC0132.JPG
 
She’s looking good, Bandido! I put a thin sliver of wood over the cat head pulleys to make it two slots to look like two sheaves. I wanted to complete the anchor rigging through them. I had trouble figuring out how to place the cat heads and wound up sticking them out as far as I could to the front and side so the gold man figures could come up and support them without getting in the way of the sheaves. My recommendation would be to wait until adding the swoops on the bow and putting the supports and cats on around the same time.
 
She’s looking good, Bandido! I put a thin sliver of wood over the cat head pulleys to make it two slots to look like two sheaves. I wanted to complete the anchor rigging through them. I had trouble figuring out how to place the cat heads and wound up sticking them out as far as I could to the front and side so the gold man figures could come up and support them without getting in the way of the sheaves. My recommendation would be to wait until adding the swoops on the bow and putting the supports and cats on around the same time.
Vic: yesterday I was looking at your build to see how you installed the Catheads around the Gold trim pieces and swoops decided to wait till later to install as the placement of the cat heads are a little more flexible! and if placed as they show on A1 plan they interfere with the placement of the swoops and Goldman figures. Yes the sheaves!! the parts supplied are to wide to fit side by side in the opening of the cat head ends? So as I said in my post I used Ball ends from my guitar strings not a lot of room there! ( By the way I haven't commented at all on your build but what a fine job!!! and what a great help your posts of your build have been for me very detailed I use it for reference everyday! )
 
Vic: yesterday I was looking at your build to see how you installed the Catheads around the Gold trim pieces and swoops decided to wait till later to install as the placement of the cat heads are a little more flexible! and if placed as they show on A1 plan they interfere with the placement of the swoops and Goldman figures. Yes the sheaves!! the parts supplied are to wide to fit side by side in the opening of the cat head ends? So as I said in my post I used Ball ends from my guitar strings not a lot of room there! ( By the way I haven't commented at all on your build but what a fine job!!! and what a great help your posts of your build have been for me very detailed I use it for reference everyday! )
Thanks for the compliment, Bandido! There are many things I would have done differently if I had it to do over again. But experience certainly is the best teacher. If you have any specific questions, please feel free to ask either on this thread or using the conversation Function at the top of the page. You’ve already fixed some things that I got wrong. I strongly suggest that you get a heat gun if you don’t already have one. They’re indispensable for heating the swoops and heavy aft metal pieces. Loctite Professional Super Glue is the only thing I’ve found to hold them on except for epoxy.
 
Thanks for the compliment, Bandido! There are many things I would have done differently if I had it to do over again. But experience certainly is the best teacher. If you have any specific questions, please feel free to ask either on this thread or using the conversation Function at the top of the page. You’ve already fixed some things that I got wrong. I strongly suggest that you get a heat gun if you don’t already have one. They’re indispensable for heating the swoops and heavy aft metal pieces. Loctite Professional Super Glue is the only thing I’ve found to hold them on except for epoxy.
I am planning on using JB Weld on some of the heaver parts in conjunction with some pinning ideas I have I have some stuff left over from my leather crafting days that might help as fastening supports?? My weak point is going to be the rigging I have rigged a couple ships of much smaller detail I am hoping that the larger size will be a little easier with the blocks and things but understanding the basics ship riggings is not my strong suit!!
 
Started on the railings and deck hardware and fittings railing are a little tedious!! working from the bow back worked on the 2 cats and decided to use guitar string ball ends for the pulleys rather than the supplied wood ones worked great! looks good!! The other thing I did on the railings was give up on trying to create those curved hand rail pieces so I used straight pieces at the railing ends?? looks ok? will finish up the railings tomorrow. checked all the mast openings to make sure they fit correctly and adjusted where needed. after the railings and deck stuff I will begin to install all the exterior gold Bling!!
I will be re-casting some of the heavy parts from resin. the 2 stern pieces below the poops for sure! the other thing I decided to do is close the 2 front lower cannon ports as with the stern lower cannon ports!

View attachment 324401

View attachment 324402

View attachment 324403
Good morning. Very well done. Looking great. Cheers Grant
 
Back
Top