Nor is it mine, Bandido. I learn from doing and reading and looking at other ships and getting help from my friends here. I used JB Weld in a couple of spots too.I am planning on using JB Weld on some of the heaver parts in conjunction with some pinning ideas I have I have some stuff left over from my leather crafting days that might help as fastening supports?? My weak point is going to be the rigging I have rigged a couple ships of much smaller detail I am hoping that the larger size will be a little easier with the blocks and things but understanding the basics ship riggings is not my strong suit!!
-

Win a Free Custom Engraved Brass Coin!!!
As a way to introduce our brass coins to the community, we will raffle off a free coin during the month of August. Follow link ABOVE for instructions for entering.
-

PRE-ORDER SHIPS IN SCALE TODAY!
The beloved Ships in Scale Magazine is back and charting a new course for 2026!
Discover new skills, new techniques, and new inspirations in every issue.
NOTE THAT OUR FIRST ISSUE WILL BE JAN/FEB 2026
You are using an out of date browser. It may not display this or other websites correctly.
You should upgrade or use an alternative browser.
You should upgrade or use an alternative browser.
La Soleil Royal 1:90 Scale (ZHL) A Bandido Build
- Thread starter bandido
- Start date
- Watchers 28
-
- Tags
- le soleil royal
- Joined
- Jan 21, 2022
- Messages
- 471
- Points
- 278

Again Vic a great job on your shipNor is it mine, Bandido. I learn from doing and reading and looking at other ships and getting help from my friends here. I used JB Weld in a couple of s
Nor is it mine, Bandido. I learn from doing and reading and looking at other ships and getting help from my friends here. I used JB Weld in a couple of spots too.
- Joined
- Jan 21, 2022
- Messages
- 471
- Points
- 278

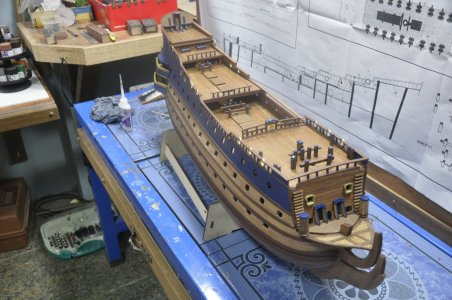
been working on the railings and all the decking equipment decided to highlight all the deck timberheads with blue along with the railing spindles I think it ties in with the blue upper sides of the ship?? I also started casting some of the heavy metal trim first one turned out great what a difference in the weight!! will finish up the railing on the other side of the ship tomorrow and begin installing all the smaller gold Bling on the stern poops and gun wales and continue casting the heavy large pieces
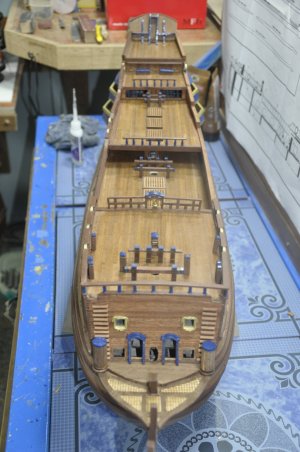
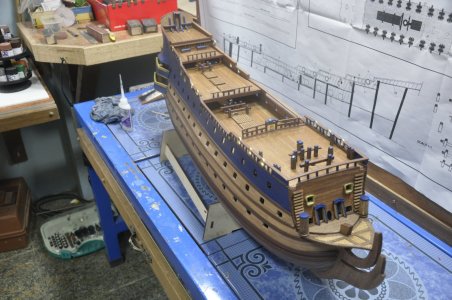
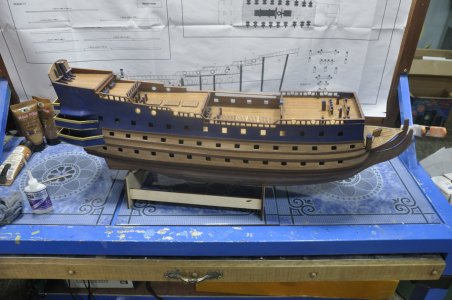


Good progress, Bandido! And you’re adding some creative touches as well.been working on the railings and all the decking equipment decided to highlight all the deck timberheads with blue along with the railing spindles I think it ties in with the blue upper sides of the ship?? I also started casting some of the heavy metal trim first one turned out great what a difference in the weight!! will finish up the railing on the other side of the ship tomorrow and begin installing all the smaller gold Bling on the stern poops and gun wales and continue casting the heavy large pieces
View attachment 325439
View attachment 325440
View attachment 325441
View attachment 325442
View attachment 325443
Excellent job Bandidobeen working on the railings and all the decking equipment decided to highlight all the deck timberheads with blue along with the railing spindles I think it ties in with the blue upper sides of the ship?? I also started casting some of the heavy metal trim first one turned out great what a difference in the weight!! will finish up the railing on the other side of the ship tomorrow and begin installing all the smaller gold Bling on the stern poops and gun wales and continue casting the heavy large pieces
View attachment 325439
View attachment 325440
View attachment 325441
View attachment 325442
View attachment 325443
She's looking really nice
- Joined
- Jan 21, 2022
- Messages
- 471
- Points
- 278

Vic Some times being creative is an easy way out!, and a lot less restrictive! I respect and at times in AW of the passion that is displayed by the model builder who can build and replicate to the finest detail there models! I have found out through my model building history, no matter what I am building Ships, Race Cars, what ever!! that my passion and enjoyment is not achieved through exact replication!Good progress, Bandido! And you’re adding some creative touches as well.
In most cases, we can’t have perfect replication. We often don’t have access to all the correct information. In my case, the ship was made to order for my girl. I did the best job I could of making it look realistic while giving her the color and trim she liked. I’m happy overall with the way it turned out, but I know there are flaws that I shouldn’t make next time.Vic Some times being creative is an easy way out!, and a lot less restrictive! I respect and at times in AW of the passion that is displayed by the model builder who can build and replicate to the finest detail there models! I have found out through my model building history, no matter what I am building Ships, Race Cars, what ever!! that my passion and enjoyment is not achieved through exact replication!
- Joined
- Jan 21, 2022
- Messages
- 471
- Points
- 278

Yes I understand that as information at times is limited to the provided plans and I build by the plans that are provided which at times gets me in trouble!! and do some changes to the color schemes wood types which best fits my liking!! As you said as your girl wanted! realism is the key point and you did do a great job on that! Vic thanks for your thoughts on this
bandido
bandido
- Joined
- Jan 21, 2022
- Messages
- 471
- Points
- 278

Finished the railings and all the cabins and decking equipment and started on all the exterior ornaments! On the ZHL Le royal all the ornaments are metal and carry some weight! I decided to use pins to help support the pieces to the sides of the ship. I used 1mm x 5mm screws drilled a hole in the piece screwed in the screw cut of the head and drilled a hole in the ship and mounted with Ca glue worked great will use this technic on all the pieces if possible!! The purchase of these small screws was one of my best purchases as I have used them everywhere on the ship from attaching planking, side rails, to the ornaments! I also toned down the bright gold ornaments with Dark Copper acrylic! using the dry brush method gave it a deep gold color!
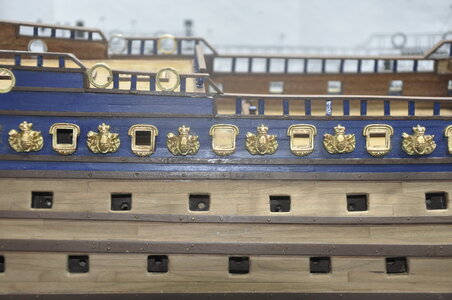
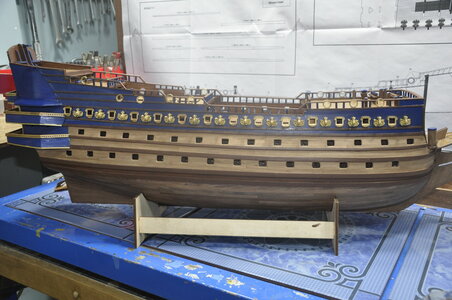
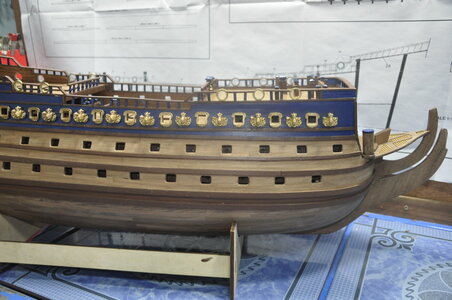
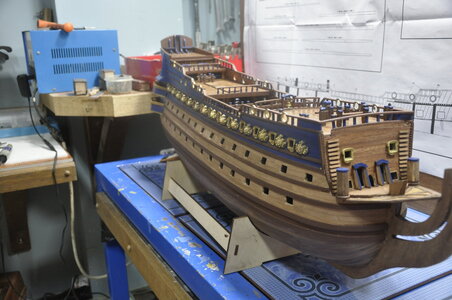


You’re doing a great job, Bandido. Much more accurate than mine.Finished the railings and all the cabins and decking equipment and started on all the exterior ornaments! On the ZHL Le royal all the ornaments are metal and carry some weight! I decided to use pins to help support the pieces to the sides of the ship. I used 1mm x 5mm screws drilled a hole in the piece screwed in the screw cut of the head and drilled a hole in the ship and mounted with Ca glue worked great will use this technic on all the pieces if possible!! The purchase of these small screws was one of my best purchases as I have used them everywhere on the ship from attaching planking, side rails, to the ornaments! I also toned down the bright gold ornaments with Dark Copper acrylic! using the dry brush method gave it a deep gold color!
View attachment 326296
View attachment 326297
View attachment 326298
View attachment 326300
- Joined
- Jan 21, 2022
- Messages
- 471
- Points
- 278

last couple of days been working on the poop deck ornamentation, the stuff is heavy!!!! the stern of the ship will weigh 2 or 3 pounds by the time all the Bling is installed!!! The large male figure I used a 2mm rod drilled and inserted to the side of his leg and inserted the other end of the rod to the poop made it very stable and strong! used pins and CA glue on the rest the ornaments. Also, rather than trying to bend the ornaments around the curved portion of the upper poop side I filed out the center of the pieces to accommodate the curve portion to sit fairly flush, I tried heating and bending the parts initially and broke one and decided the alternate method. looks like I have a couple more days working on the Hull and all the hardware and will begin my second stage of the build the masting. I am planning on using my lathe to rough taper the masts and yards and finish them by hand. than i think I am going to take a break, do some reading and investigation on the rigging requirements for the ship there are many great articles on this site concerning rigging the Le Soleil, and in general step away from the build for a couple weeks!?? I have been at it steady for seems like months!!I Doubt that!! But thanks
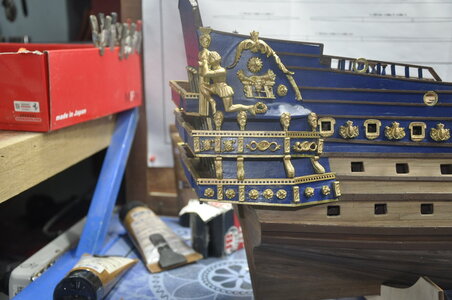
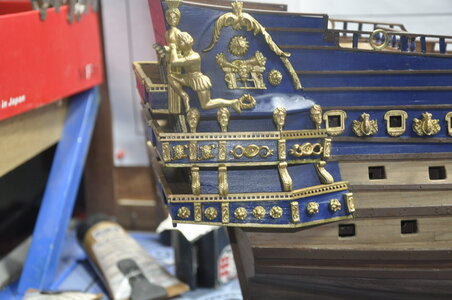
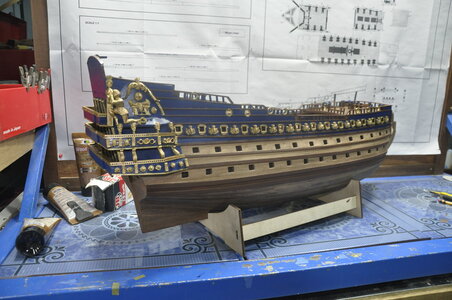
Good morning. Awesome! This ship has loads of bling for sure. Stepping away to do some research and also just to have a break from these ship at times is a good idea. Enjoy. I look forward to your return. Cheers Grant
Did you use a heat gun? I tried other methods and they just didn’t work. Set the heat gun to 600-800 and that should do the trick.last couple of days been working on the poop deck ornamentation, the stuff is heavy!!!! the stern of the ship will weigh 2 or 3 pounds by the time all the Bling is installed!!! The large male figure I used a 2mm rod drilled and inserted to the side of his leg and inserted the other end of the rod to the poop made it very stable and strong! used pins and CA glue on the rest the ornaments. Also, rather than trying to bend the ornaments around the curved portion of the upper poop side I filed out the center of the pieces to accommodate the curve portion to sit fairly flush, I tried heating and bending the parts initially and broke one and decided the alternate method. looks like I have a couple more days working on the Hull and all the hardware and will begin my second stage of the build the masting. I am planning on using my lathe to rough taper the masts and yards and finish them by hand. than i think I am going to take a break, do some reading and investigation on the rigging requirements for the ship there are many great articles on this site concerning rigging the Le Soleil, and in general step away from the build for a couple weeks!?? I have been at it steady for seems like months!!
View attachment 326528
View attachment 326529
View attachment 326530
- Joined
- Jan 21, 2022
- Messages
- 471
- Points
- 278

Yes I have a heat gun! The trick is after it gets hot how to hold it to bend itDid you use a heat gun? I tried other methods and they just didn’t work. Set the heat gun to 600-800 and that should do the trick.
- Joined
- Oct 9, 2020
- Messages
- 2,229
- Points
- 488

I do like what you did with filing the fixtures so they fit the curves of the hull. Did you find it time consuming to do?Yes I have a heat gun! The trick is after it gets hot how to hold it to bend italso I was a little afraid to heat it up too much as I thought it might melt, I know white metal has a very low melting temp?
I do like what you did with filing the fixtures so they fit the curves of the hull. Did you find it time consuming to do?
I heated them up about 20 seconds and used very thick work gloves. Filing took forever for me so I took the quick way out.Yes I have a heat gun! The trick is after it gets hot how to hold it to bend italso I was a little afraid to heat it up too much as I thought it might melt, I know white metal has a very low melting temp?
- Joined
- Jan 21, 2022
- Messages
- 471
- Points
- 278

actually, the metal filed fairly easy, it does take some time, but it works well! After I broke that one piece, I took the safe way out and decided to file!! I used a 1/2" half round fileI heated them up about 20 seconds and used very thick work gloves. Filing took forever for me so I took the quick way out.
- Joined
- Jan 21, 2022
- Messages
- 471
- Points
- 278

I do like what you did with filing the fixtures so they fit the curves of the hull. Did you find it time consuming t


