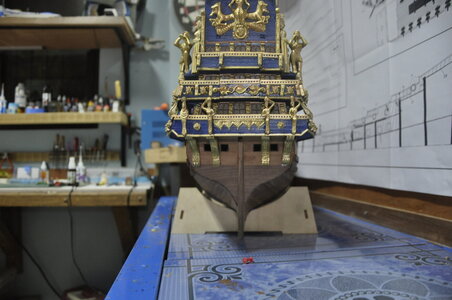
La Soleil Royal 1:90 Scale (ZHL) A Bandido Build

Jack, I feel filing gives me more control over the shape when dealing with concave or convex shapes, and the metal is fairly soft, so it wasn't too time consuming I used a medium course half round file
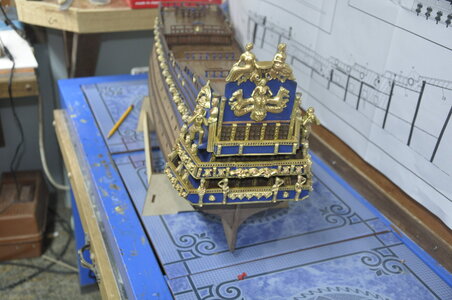
Vic was right the having to use a heat gun to bend the parts especially the 4 supports under the lower poop and the heat gun worked great!! I have just about finished the bling on the stern a lot of work!!!!! and now the ship is very stern heavy need to be careful the ship does not flip out of the work stand! I still have those little wooden railing spindles to glue together and attach to the rear of the upper poop deck. Looking at Vic's build he installed and tied down the bow sprint before attaching the Ornaments on the Bow that will be my next step? Here comes the tapering will use my lathe hope it works?? I think I have the wobble issue resolved on the lathe we will see in the next couple days??

_DSC0150.JPG

_DSC0151.JPG
 
Good work! You learned from my mistakes? It's easier to go ahead and do the gammoning on the bowsprit before adding anything new like ornaments. It was a little tricky trying to find how do put in the slits for the gammoning ropes, but I think it worked out. I had to use a combination Dremel bit and exacto blade to cut them out. The ropes filled the holes so it really didn't have to be a super clean cut, but I think it worked out.
 
Good work! You learned from my mistakes? It's easier to go ahead and do the gammoning on the bowsprit before adding anything new like ornaments. It was a little tricky trying to find how do put in the slits for the gammoning ropes, but I think it worked out. I had to use a combination Dremel bit and exacto blade to cut them out. The ropes filled the holes so it really didn't have to be a super clean cut, but I think it worked out.
Yes, the slits look good on your ship will tackle it the same way.
 
You might want to double check to make sure the gun port covers on the aft chase guns can close. I actually had to move the big heavy ornaments after I tried to put on the covers.
 
I was looking at that yesterday and of course after i installed the braces that the gun port covers will not fit as they are!! I am not going to relocated the braces the gun port covers will have to be modified I had planned to have the covers in the closed position anyway I am going to look at that today to see how bad it is??
 
I was looking at that yesterday and of course after i installed the braces that the gun port covers will not fit as they are!! I am not going to relocated the braces the gun port covers will have to be modified I had planned to have the covers in the closed position anyway I am going to look at that today to see how bad it is??
Sorry I was too late with that bit of info.
 
You might want to double check to make sure the gun port covers on the aft chase guns can close. I actually had to move the big heavy ornaments after I tried to put on the covers.T two things happen to me when i am in building mode, I get too focused and as the saying goes, " I don't see the forest for the trees" the second thing is I depend too much on the quality of the instructions and the design elements that went into creating the kit to begin with and this kit has had its problems!! from the start
 
Well, the covers will not fit as they are, no surprise!! Sometimes I get too focused and don't see the forest for the trees and this kit, builder beware! I do also have a problem with assuming the kit you buy has been thoroughly reviewed before going to market but! am wrong this kit has had its issues from the start, I will learn and with me, it is usually the hard way!!! but thanks to this site and the modelers on it, has made this build tolerable
 
Sorry I was too late with that bit of info.
You were not late with that tip I am learning something every day and trying to be more aware of what I am doing and how it effects steps down the road!! It's all part of Model buildingThumbsup
 
Well, the covers will not fit as they are, no surprise!! Sometimes I get too focused and don't see the forest for the trees and this kit, builder beware! I do also have a problem with assuming the kit you buy has been thoroughly reviewed before going to market but! am wrong this kit has had its issues from the start, I will learn and with me, it is usually the hard way!!! but thanks to this site and the modelers on it, has made this build tolerable
Good morning. Those multitude of ornaments came out beautifully. Yep Kits! I agree with you it’s baffling why they don’t get them right- I think it’s so we can do a little bit of unintended kit bashing. If we spot the kit errors up front it is fun. Lovely work so far. Cheers Grant
 
Good morning. Those multitude of ornaments came out beautifully. Yep Kits! I agree with you it’s baffling why they don’t get them right- I think it’s so we can do a little bit of unintended kit bashing. If we spot the kit errors up front it is fun. Lovely work so far. Cheers Grant
thanks Grant. If I couldn't complain about the kit I'm building some of the fun would be gone :D
 
I spent the day figuring out how to approach the rigging of the cannons. it's going to be a repetitious task!! looks like over 30 of them. the rigging that will be attached to the inside of the gun wale opening I am using a 2mm long 2 x 3 mm piece of trim to install the required eye bolts and blocks and rigging line, than will attach the 2 pieces one to each side of the gun port, install the rigged cannon carriage with a pin in the rear to hold the cannon in place, run the pre attached rigging through the blocks on the cannon attach the end of the rope to the deck and attach the rope coil over the end of the rigging line looks good and is much easier to rig that way at least for me.
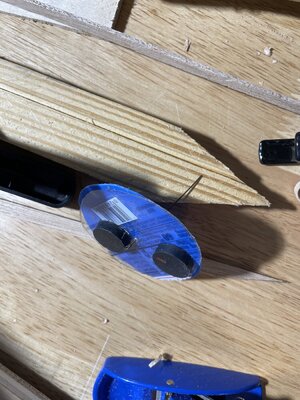
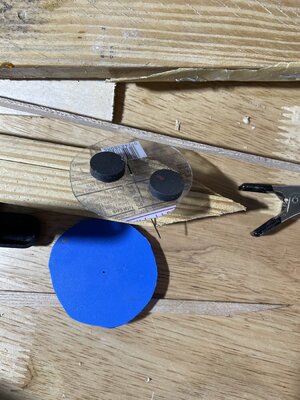
went online and found the answer on how to make the rope coils use 2 small square pieces of plastic drill a hole in the center of both pieces put the end of your twine through one hole place the other piece of plastic over the other put a tack through the holes in the center apply watered down white glue on the twine as you wrap the twine around the center of the tack keep pressure on the 2 pieces of clear plastic to assure the twine stays aligned and let dry
Bandido
For rope coil, I use double sided tape and simply turn the rope from the center
Quite easy and fast to make
 
Bandido
For rope coil, I use double sided tape and simply turn the rope from the center
Quite easy and fast to make
Gilbert the article had both methods! The method I choose is probably a little more time consuming but as they say 6 of half dozen of another!!
 
Back
Top