-

Win a Free Custom Engraved Brass Coin!!!
As a way to introduce our brass coins to the community, we will raffle off a free coin during the month of August. Follow link ABOVE for instructions for entering.
-

PRE-ORDER SHIPS IN SCALE TODAY!
The beloved Ships in Scale Magazine is back and charting a new course for 2026!
Discover new skills, new techniques, and new inspirations in every issue.
NOTE THAT OUR FIRST ISSUE WILL BE JAN/FEB 2026
You are using an out of date browser. It may not display this or other websites correctly.
You should upgrade or use an alternative browser.
You should upgrade or use an alternative browser.
La Soleil Royal 1:90 Scale (ZHL) A Bandido Build
- Thread starter bandido
- Start date
- Watchers 28
-
- Tags
- le soleil royal
- Joined
- Jan 21, 2022
- Messages
- 471
- Points
- 278

Attached the bow ornaments had to use small screws to attach parts are very heavy and fit strangely, would like to know how they attached the 2 side ornaments? The 2 anchor blocks or arms originally, I cut the openings so the parts could protrude and sit flush with the deck, but after further investigation those parts do not sit flush?? a little Fab work!! Tomorrow will install the Rudder and the stern guns and doors!Gilbert: Yes, it is the large one from Hobby zone The company name is Minyarts.eu, and I purchased it thru Ebay for 79 euro's, the Item is out of Germany
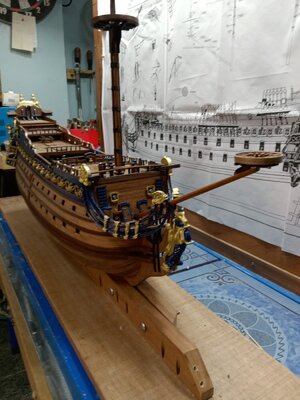
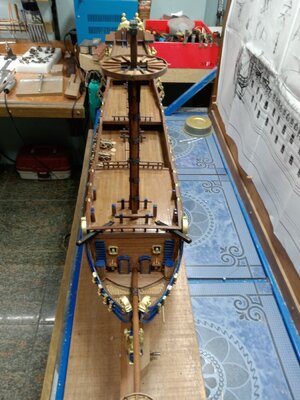
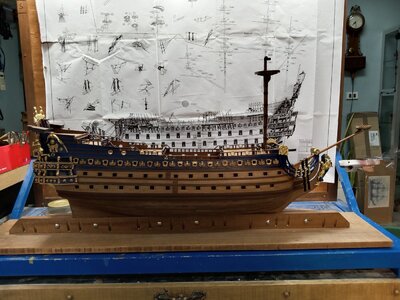
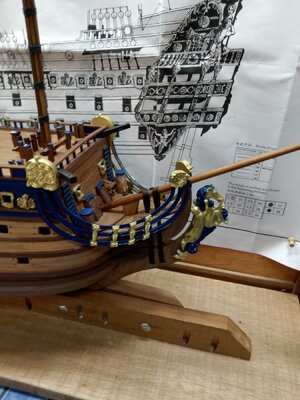
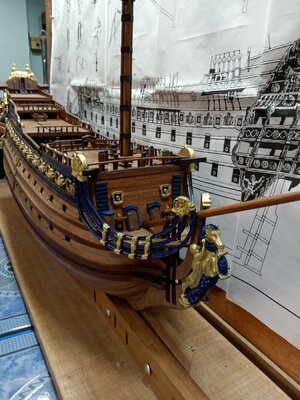
Quite majestic looking Bandido!
You did a great job on your wales, Bandido!Applied the first 2 coats of Varnish on the hull. I used Vallejo Matt and applied with my #5 needle air brush. will let dry for 24hrs and will apply 2 more coats for a total of 4!! I am pleased with my choice of black walnut and American cherry! View attachment 322539View attachment 322540View attachment 322541
View attachment 322543
I stopped getting notifications on your build, so I missed a month's worth of progress! She's looking good!finished most of the Bowsprit, gammoned it down, installed the bow cannons and doors, thought it would be easier to do the bowsprit prior to doing the front bling, bling!! now to finish the rest of the bow ornamentation. received my building slip today from Germany, I think i will take a break from the ship and assemble the slip! I won't use it on this model but on the Druid when i start it next year
View attachment 332280
View attachment 332281
View attachment 332282
View attachment 332283
View attachment 332284
- Joined
- Jan 21, 2022
- Messages
- 471
- Points
- 278

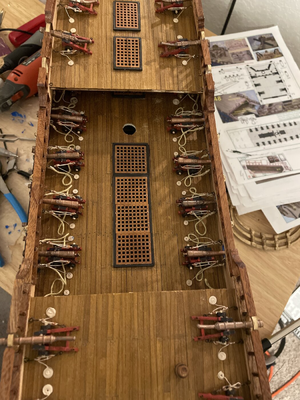
I have finished the lower deck cannon install and rigging; I am not real happy with the way the ropes assemblies are laying on the deck. I am going to think some more on that before i start the other cannons!! I learned a lot though and will be warmed up and ready to install and rig the remaining upper deck cannons where the quality of the rigging is very visible!! I have also finished the install on the Rudder, for me that was a challenge!! trying to figure out how to make the rudder hinge pin assemblies, took me awhile but they are done and look pretty good!! some times I feel like the kit manufactures could make parts easier to assemble like the hinge pins assemblies for the rudder!! but I guess that is modelling??I stopped getting notifications on your build, so I missed a month's worth of progress! She's looking good!
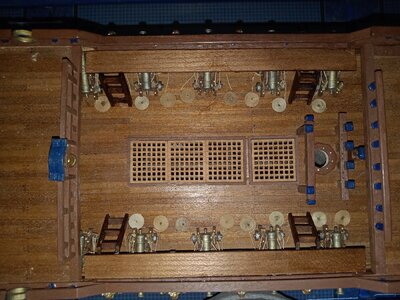
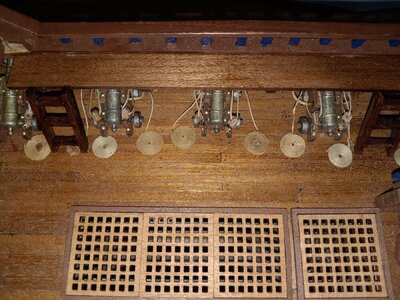
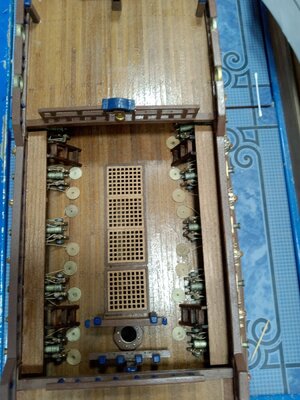
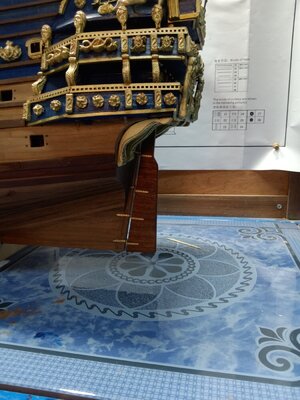
excellent. Looks really nice
As far as I am concerned, I bought new hinges fir the rudder.
As far as I am concerned, I bought new hinges fir the rudder.
- Joined
- Jan 21, 2022
- Messages
- 471
- Points
- 278

Gilbert, I thought about it, !!!excellent. Looks really nice
As far as I am concerned, I bought new hinges fir the rudder.
Hi Bandido,I have finished the lower deck cannon install and rigging; I am not real happy with the way the ropes assemblies are laying on the deck. I am going to think some more on that before i start the other cannons!! I learned a lot though and will be warmed up and ready to install and rig the remaining upper deck cannons where the quality of the rigging is very visible!! I have also finished the install on the Rudder, for me that was a challenge!! trying to figure out how to make the rudder hinge pin assemblies, took me awhile but they are done and look pretty good!! some times I feel like the kit manufactures could make parts easier to assemble like the hinge pins assemblies for the rudder!! but I guess that is modelling??
View attachment 336223
View attachment 336224
View attachment 336225
View attachment 336226
I was reluctant to make this post but I'll also feel bad if I don't. The rudder hinges need to be inverted. The way you have it the rudder will slip right off the ship...
trueHi Bandido,
I was reluctant to make this post but I'll also feel bad if I don't. The rudder hinges need to be inverted. The way you have it the rudder will slip right off the ship...
The rigging looks good on the cannons. My blocks were a bit smaller, Bandido, and they were a bit hard to work with. I think the coils are a bit oversized, though. You don't need that much rope for the guns. Cut the tail off the end of the coil and lead the rigging line right into the coil where it will look seamless. Although your rudder hinges are under instead of over, they are much neater than mine. Or you could lay the coil over the line and make it look like the coil was rolled from the center. I had trouble with this too:I have finished the lower deck cannon install and rigging; I am not real happy with the way the ropes assemblies are laying on the deck. I am going to think some more on that before i start the other cannons!! I learned a lot though and will be warmed up and ready to install and rig the remaining upper deck cannons where the quality of the rigging is very visible!! I have also finished the install on the Rudder, for me that was a challenge!! trying to figure out how to make the rudder hinge pin assemblies, took me awhile but they are done and look pretty good!! some times I feel like the kit manufactures could make parts easier to assemble like the hinge pins assemblies for the rudder!! but I guess that is modelling??
View attachment 336223
View attachment 336224
View attachment 336225
View attachment 336226
Hi PaulHi Bandido,
I was reluctant to make this post but I'll also feel bad if I don't. The rudder hinges need to be inverted. The way you have it the rudder will slip right off the ship...
You are correct, the upper part should be on the rudder itself
- Joined
- Jan 21, 2022
- Messages
- 471
- Points
- 278

Yes, you are correct about the coils not too good and too big I changed the rigging block size and style for the upper deck cannons they look much better but might still be a little big!! and the rope coils will be much smaller if I use coils, that brings up a question what they tied those ropes off to! I see in a build where they had eyes mounted to the deck with rings behind the cannons? I am going to look into that a little more before I decide what to do with the rope cableThe rigging looks good on the cannons. My blocks were a bit smaller, Bandido, and they were a bit hard to work with. I think the coils are a bit oversized, though. You don't need that much rope for the guns. Cut the tail off the end of the coil and lead the rigging line right into the coil where it will look seamless. Although your rudder hinges are under instead of over, they are much neater than mine. Or you could lay the coil over the line and make it look like the coil was rolled from the center. I had trouble with this too:View attachment 336282
- Joined
- Jan 21, 2022
- Messages
- 471
- Points
- 278

Your right! I am not sure I can fix that the way I had to install the hinges!! but I will look at it I have made a few mistakes, and this is one of them, thanks for heads up on that oneHi Bandido,
I was reluctant to make this post but I'll also feel bad if I don't. The rudder hinges need to be inverted. The way you have it the rudder will slip right off the ship...
- Joined
- Jan 21, 2022
- Messages
- 471
- Points
- 278

again, thanks for your keen eye and I did get them inverted correctlyHi Bandido,
I was reluctant to make this post but I'll also feel bad if I don't. The rudder hinges need to be inverted. The way you have it the rudder will slip right off the ship...
The coiled part of the ropes don’t tie off to anything. The rings on the deck are for the hooks on the ends of the ropes so you can pull the guns back and reload. Some guns apparently used the same rigging to bring the gun to hull and to pull it back for reloading. There are differences between the French way and the British way. Paul @dockattner shows examples of being pulled forward and back on his Vasa build.Yes, you are correct about the coils not too good and too big I changed the rigging block size and style for the upper deck cannons they look much better but might still be a little big!! and the rope coils will be much smaller if I use coils, that brings up a question what they tied those ropes off to! I see in a build where they had eyes mounted to the deck with rings behind the cannons? I am going to look into that a little more before I decide what to do with the rope cable
- Joined
- Jan 21, 2022
- Messages
- 471
- Points
- 278

so if I am understanding what you have said the rope lengths reached to the rings and had a hook attached to them? that will help me measure the length of each to be coiled! and to install rings at the correct distance from the rear of each cannon to the deck for each rope. I will do some reading as it is interesting to me. I have seen builds with them and without them?? What you're explaining to me makes sense.The coiled part of the ropes don’t tie off to anything. The rings on the deck are for the hooks on the ends of the ropes so you can pull the guns back and reload. Some guns apparently used the same rigging to bring the gun to hull and to pull it back for reloading. There are differences between the French way and the British way. Paul @dockattner shows examples of being pulled forward and back on his Vasa build.
The hooks can be fastened to eyebolts on the inner side of the hull near the recoil rope eyebolts. They could be removed from those eyebolts and hooked onto the rings behind the guns to haul the guns back. The coils don’t have to be that big. In fact, there is some question as to whether they used coils at all during the heat of battle. If they had them, it was probably for show. They look cool, though, don’t they? Also, I’ve seen pictures of the Continental ships where there were two sets of rigging: one in front, and one behind. I tried that on two guns and later tore them out. Enough was enough!so if I am understanding what you have said the rope lengths reached to the rings and had a hook attached to them? that will help me measure the length of each to be coiled! and to install rings at the correct distance from the rear of each cannon to the deck for each rope. I will do some reading as it is interesting to me. I have seen builds with them and without them?? What you're explaining to me makes sense.
Yes, when the gun tackles have drawn the carriages forward to firing position, the tackles were unhooked from the eyebolts, probably those on the carriage, and they lay on the deck where they fall. After firing, the carriage recoils rearward from the gun port, and the tackles are payed out and hooked back to the carriage as the gun is being reloaded. No one has time to coil rope neatly when you're being shot at.The hooks can be fastened to eyebolts on the inner side of the hull near the recoil rope eyebolts. They could be removed from those eyebolts and hooked onto the rings behind the guns to haul the guns back. The coils don’t have to be that big. In fact, there is some question as to whether they used coils at all during the heat of battle. If they had them, it was probably for show. They look cool, though, don’t they? Also, I’ve seen pictures of the Continental ships where there were two sets of rigging: one in front, and one behind. I tried that on two guns and later tore them out. Enough was enough!
The train tackles, or optionally one of the gun tackles, is only hooked between the rear of the carriage and an eyebolt far behind the gun when you need to withdraw the gun barrel from the gun port in order to close it. It is not used in battle. Many models show the train tackles, but they are optional.
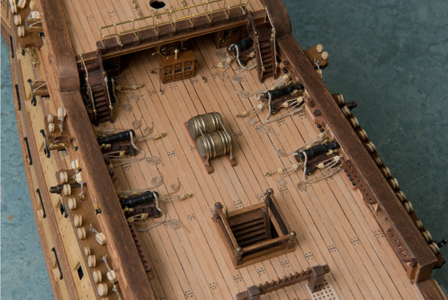
Here is an example from HMS Victory. The two gun tackles are rigged to the gun carriages, and the single train tackle is also rigged to the rear of each carriage on this model. The fall from each tackle is neatly coiled on the deck as if in presentation for inspection.
Last edited:
- Joined
- Jan 21, 2022
- Messages
- 471
- Points
- 278

You have been a great help and I understand now, the coils I installed on the main deck are too big too much rope! I might just replace them with a correct size coil to reflect the correct length of rope as for the upper deck cannons your info will help make them look truer to life! as for the hooks and the rings I will see how i feel after rigging 16 more cannonsThe hooks can be fastened to eyebolts on the inner side of the hull near the recoil rope eyebolts. They could be removed from those eyebolts and hooked onto the rings behind the guns to haul the guns back. The coils don’t have to be that big. In fact, there is some question as to whether they used coils at all during the heat of battle. If they had them, it was probably for show. They look cool, though, don’t they? Also, I’ve seen pictures of the Continental ships where there were two sets of rigging: one in front, and one behind. I tried that on two guns and later tore them out. Enough was enough!


