Beautiful work on the hull and copper plates!
Thanks Dean it’s very kind of you. The plates are glaringly shiny at the moment but given time I hope a patina develops for a more subdued effect.
 |
As a way to introduce our brass coins to the community, we will raffle off a free coin during the month of August. Follow link ABOVE for instructions for entering. |
 |
 |
The beloved Ships in Scale Magazine is back and charting a new course for 2026! Discover new skills, new techniques, and new inspirations in every issue. NOTE THAT OUR FIRST ISSUE WILL BE JAN/FEB 2026 |
 |
Beautiful work on the hull and copper plates!
Stunning work, Roger! The cooper plating, natural woodgrain and red inner bulwarks make your Syren and @Dean62 Dean's NL not unlike each other.I have always said that this going to be a stunning build and I stand by what I have said - a deep bow!

Good looking sheet plating - very well done
And we can see the notch for the false keel - this will look at the end very good -> BRAVO
 .
.Excellent workmanship, Roger.
Dear Roger
the coppering of the hull looks beautiful

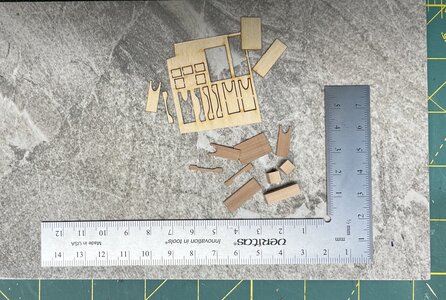
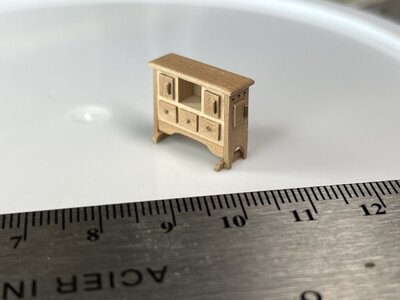
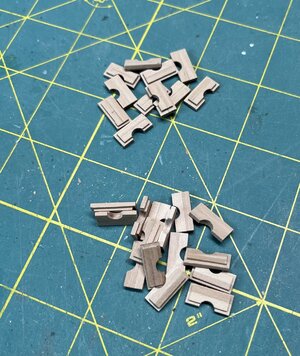
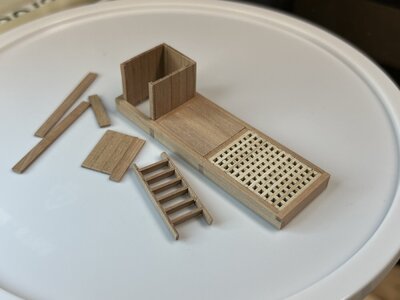
Good evening Roger. Mighty fine work. Cheers GrantJust a small update as work progresses on some of the smaller parts of construction.
The supplied compass binnacle kit parts are laser cut from a basswood sheet. I decided I did not want to use stained basswood so challenged myself to copy and cut new tiny pieces from pear. I am trying to keep the deck fittings consistent using pear where possible. As expected there’s some colour variation in the pear I cut.
View attachment 364996
View attachment 364997
A few other small items on the bench. I cut the gunport lids from pear stock too and they are now ready for painting. The companionway and ladder (also pear) is underway too.
View attachment 364998
View attachment 364999
That’s it for now, thanks for checking in on me.
Thanks Paul! A nice compliment coming from one of SOS’s most accomplished builders.This is very fine work Roger! You've got skills!
Hi Grant, thanks for your always supportive comments.Good evening Roger. Mighty fine work. Cheers Grant
Thank you Heinrich! After long months and sometimes little time I am happy to progress from the general hull construction to the smaller details of the build. As we all know it’s a continuous learning process and as I have said many times before, it’s a satisfying and enjoyable hobby.This is stunning work Roger! That binnacle, in particular, looks amazing. I wouldn't be phased at all by the color variation in the pear wood. That just adds to the authenticity of working with real wood.
Great work Roger!
 ?
?I agree with you Paul. I often wish I could emulate the work of the experienced modellers but I’ve settled into Frank Sinatra mode “I did it my way” - good grief I am starting to sound like Grant!No criticism from me - a noble effort that looks very promising. Don't you just hate it when others can do what we can't quite manage?
Pintled off - have to remember that one!


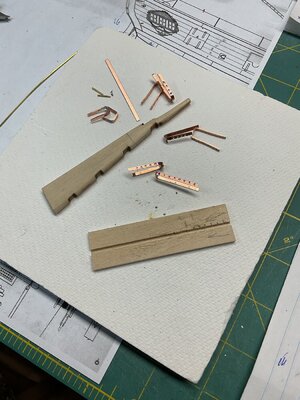
Ok so I got pintled off with my build of this ship and i purchased already made gudgeons and pintles. I am a wimp. This was before the great crash of 2019(ie. my wife dropped the ship).Another small update but a protracted battle making the rudder pintles and gudgeons. I need to get the rudder on before turning the hull upright for the deck fixtures and fittings, which I have been working away at.
I started off with the kit supplied 12” length of brass, drilled erratic bolt holes, struggled with soldering tiny pins for the pintles, ran out of the sized brass strip then decided the use of copper strips might be easier and more realistic. I had also tried various methods making the soldered gudgeons similar to Dirk’s @Dubz Modelling World. However, I couldn’t get a small enough spacing between the rudder and hull so changed tack again.
I purchased a small sheet of 0.5mm (1/64”) copper and cut scaled strips on the Byrnes table saw with lots of repeat small scale measuring. Many efforts later I decided to stop trying to line up and drill the multiple bolt holes and simply simulated them with a Dremel engraving cutter. For drilling I held the copper in place using a “Jimsky jig” @Jimsky.Then it was back to tiny soldering for the pintle pins and some careful bending. I think I now have a possible solution.
I have been at this on and off for some time and was getting “pintled off” at my lack of progress. So here’s my latest iteration - helpful criticism is always welcome. My thanks to you for following along.
View attachment 372920
